


先来一张大菠萝 🍍 Pinia 美照😄镇楼。
Pinia 是什么?
按照官方的介绍:
Pinia最初是在 2019 年 11 月左右重新设计适用于Vue3组合式API的状态管理库。
目前 Vuex 最新版本是 v4.0.2,Pinia 可以说是 Vuex 的升级版(个人理解为 vuex 5.x 版本),尤雨溪强势推荐。
Pinia相对Vuex 优化了什么
- Vue2 和 Vue3 都能支持
- 相比较Vuex放弃 Mutation ,只保留 state, getter 和 action ,简化状态管理库
- 支持 Vue3 的 Composition api
- 为 JS 用户提供适当的 TypeScript 支持
- 可以自己写一些插件对Pinia进行扩展
- 支持服务器端渲染
安装
pinia使用您最喜欢的包管理器安装:
yarn add pinia
# or with npm
npm install pinia
创建第一个store仓库
1、在src目录下创建store目录
2、创建一个 PiniaTest.ts 的文件(文件名可以根据自己需求来)
import {defineStore} from 'pinia'

// 使用 defineStore 定义一个仓库,
// 组件中需要引入仓库,并使用useStorePinia 进行实例化
// main 是仓库唯一的ID,可以根据自己的需求定义
export const useStorePinia = defineStore('main', {
     // 闭包
    state () {
        return {
        	// 所有这些属性都将自动推断其类型
            msg: 'hello word',
            count: 10,
            content: '这是通过getters获取Pinia管理的仓库数据'
        }
    },
    // 推荐用于完整类型推断的箭头函数
    // state: () => {
	//   return {
	//         // 所有这些属性都将自动推断其类型
	//           msg: 'hello word',
	//           count: 10,
	//           content: '这是通过getters获取Pinia管理的仓库数据'
	//   }
	// },
    // 简写方式
    // state: () => ({
    //    msg: 'hello word',
    //    count: 10
    // }),
    getters:{
        getMsgFn(){
            return this.content
        }
    },
    actions:{
    	// actions 里面可以执行同步和异步任务
    	// 也可以接收外部传递进来的参数
    	// 可以直接修改仓库的值,此处不能使用箭头函数,否则找不到this,打印显示 undefined
        changeMsg (val) {
            console.log('传入进来的值:', val)
            this.msg = '1111'
            this.count == val;
        }
    }
})
引入并使用步骤
- 在 main.js 里面引入pinia
- 使用 createPinia 进行实例化
- 挂载到Vue身上(实际上是将插件进行注册,给放到已经注册的插件数组列表中)
import { createApp } from 'vue'
// 引入inia
import {createPinia} from 'pinia'
import App from './App.vue'

console.log('createPinia:', createPinia);

// 创建实例
const pinia = createPinia();

console.log('pinia:', pinia);

// 使用插件
createApp(App).use(pinia).mount('#app')
Pinia在组价中的使用
<template>
<div style="background: pink;padding: 10px;margin: 10px 0;">
<div>组件11111111111</div>
<div>仓库数据:{{count}}---{{getMsgFn}}</div>
<button @click="changeStoreCountFn">点击</button>
</div>
</template>
<script setup>
import {defineProps} from 'vue';
import { storeToRefs } from "pinia";
// 引入仓库
import {useStorePinia} from '../Store/PiniaTest'
// 此处 defineStore 与仓库名一样
const store = useStorePinia();
// 此处不能直接使用解构,这样会破坏数据的响应式,这里与使用 props 是一个道理,但是定义的函数是可以解构的
// 如果需要保留响应式,需要使用 storeToRefs() ,将为每个属性创建引用
const {changeMsg, getMsgFn} = store; // getMsgFn // 始终会是 '这是通过getters获取Pinia管理的仓库数据'
// 只有强转ref后数据才是响应式的
const {msg, count} = storeToRefs(store);
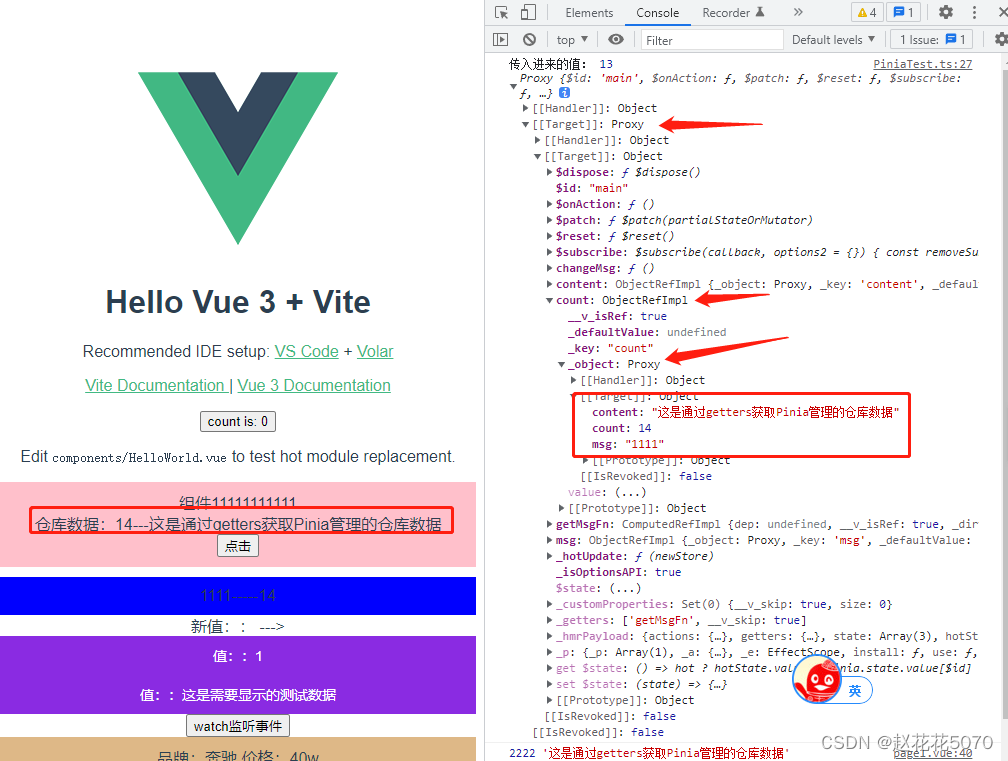
console.log(11111, store,storeToRefs(store), msg, count)
// 修改仓库count值
const changeStoreCountFn = () => {
// 方式 1、通过触发仓库 actions 中定义的函数执行
changeMsg(++count.value)
console.log(2222,getMsgFn)
// 方式 2、读取仓库数据进行修改
// count.value++
// msg.value = 'aaaaaa'
// 方式 3、对象形式修改仓库数据
// store.$patch({
// msg: 'change word',
// count: ++count.value
// })
// 方式 4、函数形式修改仓库数据
// store.$patch((state) =>{
// state.msg = 'change word';
// state.count++
// })
}
</script>
效果展示
拓展
Setup Function 定义仓库
除了上面 Options 方式创建仓库的方式以外,我们还可以用另外一种语法来定义仓库,类似于Vue composition API 的 setup functin,可以定一个响应式属性和方法的函数,并返回一个带有属性和我们要公开的函数方法。
具体的创建方式如下示例。
import {computed, ref, reactive} from 'vue';
import { defineStore } from 'pinia';

// 你可以为`defineStore()`的返回值命名任何你想要的名字,
// 但最好使用商店的名称并用`use`和`Store`包围它, 当然也可以不采用,不过这是一个习惯问题,不作强求
//(例如`useUserStore`、`useCartStore`、`useProductStore` )
// 第一个参数是创建的仓库中唯一的ID

export const useUserStore = defineStore('user', () => {
	const count = ref(0);
	const userInfosObj = reactive({
		name: '张三',
		age: 18,
	});

	const COUNT = computed(() => count.value * 2);

	const resetCountFn = () => {
		count.value = 0;
	};

	return { count,COUNT , userInfosObj, resetCountFn }

})
在 Setup Stores 中:
ref(),reactive()成为state的仓库属性computed()变成gettersfunction()变成actions
这种设置方式相比较Options Stores的方式更加的灵活,可以在仓库中创建观察者并自由的使用。但是,如果在 SSR 中使用时,组合式创建仓库会变得很复杂不好维护。
如果在使用的时候对两种方式有些摇摆不定,那么建议使用 Options 方式创建仓库。
重置状态
-
在
Options Stores中,可以通过$reseat()方法将状态重置为初始值。const store = useStore() store.$reset() -
在
SetupStores中,需要自己定义$reseat()方法。export const useCounterStore = defineStore('counter', () => { const count = ref(0) function $reset() { count.value = 0 } return { count, $reset } })
改变状态
-
使用
store.count++const store = useStore() store.count++ -
使用
store.$patch({})const store = useStore() // 使用这种方式,例如集合修改会有些困难或者代价高昂 store.$patch({ name: '张三', age: 18, subject: [] }) -
使用
store.$patch(() => {})const store = useStore() store.$patch((state) => { state.subject.push({ name: '语文', quantity: 1 }) state.age= 19 })
这里的主要区别是 $patch() 允许您将多个更改分组到开发工具中的一个条目中。 注意两者,state 和 $patch() 的直接更改都出现在 devtools 中,并且可以进行时间旅行(在 Vue 3 中还没有)。


 688
688

 被折叠的 条评论
为什么被折叠?
被折叠的 条评论
为什么被折叠?
 到【灌水乐园】发言


