1. 基于netty学习(3):SpringBoot整合netty实现多个客户端与服务器通信的学习,要想通过http在netty客户端之间发送消息,需要实现spring-boot-starter-web,封装消息格式,自动调用netty客户端
2. 封装一个简单的message,作为http发送的消息格式
在父工程创建message包
package message;

import com.alibaba.fastjson.JSONObject;
import lombok.Data;

import java.nio.charset.StandardCharsets;

@Data
public class Message extends JSONObject {
    enum MessageType {
        RegisterRequest,
        RegisterResponse,

        QueryRegisterRequest,
        QueryRegisterResponse,

        Request,
        Response
    }

    private String messageType;

    private String msg;

    public Message(String messageType, String msg) {
        this.messageType = messageType;
        this.msg = msg;
    }

//    //序列化
//    public byte[] toByte(JSONObject message) {
//        return message.toString().getBytes(StandardCharsets.UTF_8);
//    }
//
//    //反序列化
//    public Message toMessage(String str) {
//        return (Message) JSONObject.parseObject(str);
//    }

    @Override
    public String toString() {
        return "Message{" +
                "messageType='" + messageType + '\'' +
                ", msg='" + msg + '\'' +
                '}';
    }

    public String getMessageType() {
        return messageType;
    }

    public void setMessageType(String messageType) {
        this.messageType = messageType;
    }

    public String getMsg() {
        return msg;
    }

    public void setMsg(String msg) {
        this.msg = msg;
    }
}
3. 子工程使用父工程的代码
<?xml version="1.0" encoding="UTF-8"?>
<project xmlns="http://maven.apache.org/POM/4.0.0"
         xmlns:xsi="http://www.w3.org/2001/XMLSchema-instance"
         xsi:schemaLocation="http://maven.apache.org/POM/4.0.0 http://maven.apache.org/xsd/maven-4.0.0.xsd">
    <parent>
        <artifactId>nettyTest</artifactId>
        <groupId>org.example</groupId>
        <version>1.0-SNAPSHOT</version>
    </parent>
    <modelVersion>4.0.0</modelVersion>

    <artifactId>client1</artifactId>
<!--    父工程-->
    <dependencies>
        <dependency>
            <groupId>org.example</groupId>
            <artifactId>nettyTest</artifactId>
            <version>1.0-SNAPSHOT</version>
        </dependency>
    </dependencies>

</project>
4. 对client模块里面的NettyClient类改造,支持发送消息的函数sendMessage()
package client.netty;

import io.netty.bootstrap.Bootstrap;
import io.netty.channel.Channel;
import io.netty.channel.ChannelFuture;
import io.netty.channel.EventLoopGroup;
import io.netty.channel.nio.NioEventLoopGroup;
import io.netty.channel.socket.nio.NioSocketChannel;
import lombok.Getter;
import lombok.extern.slf4j.Slf4j;
import org.slf4j.Logger;
import org.slf4j.LoggerFactory;
import org.springframework.beans.factory.annotation.Value;
import org.springframework.stereotype.Component;
import javax.annotation.Resource;
import java.io.BufferedReader;
import java.io.IOException;
import java.io.InputStreamReader;
import java.nio.charset.StandardCharsets;

@Component
@Slf4j
public class NettyClient {
    private final static Logger logger = LoggerFactory.getLogger(NettyClient.class);

    @Resource
    private SocketInitializer socketInitializer;

    @Getter
    private Bootstrap bootstrap;

    @Getter
    private Channel channel;
    /**
     * netty服务监听端口
     */
    @Value("${netty.port:6666}")
    private int port;

    @Value("${netty.host:127.0.0.1}")
    private String host;

    /**
     * 启动netty
     */
    public void start() {
        this.init();
        this.channel = this.bootstrap.connect(host, port).channel();
        logger.info("Netty connect on port: {}, the host {}, the channel {}", this.port, this.host, this.channel);
//        try {
//            InputStreamReader is = new InputStreamReader(System.in, StandardCharsets.UTF_8);
//            BufferedReader br = new BufferedReader(is);
//            while (true) {
//                System.out.println("输入:");
//                this.channel.writeAndFlush(br.readLine() + "\r\n");
//            }
//        } catch (IOException e) {
//            e.printStackTrace();
//        }
    }

    /**
     * 初始化netty配置
     */
    private void init() {
        EventLoopGroup group = new NioEventLoopGroup();
        this.bootstrap = new Bootstrap();
        //设置线程组
        bootstrap.group(group)
                .channel(NioSocketChannel.class) //设置客户端的通道实现类型
                .handler(this.socketInitializer);
    }

//发送消息
    public void sendMessage(String message) {
        this.channel.writeAndFlush(message + "\r\n");
    }
}
5. 创建control层,调用netty客户端发送消息
package client.control;

import client.netty.NettyClient;
import message.Message;
import org.springframework.web.bind.annotation.*;
import javax.annotation.Resource;

@RestController
@RequestMapping("/test")
public class NettyControl {
    @Resource
    private NettyClient nettyClient;

    @PostMapping("/msg")
    public String sendMsg(@RequestBody Message message) {
        this.nettyClient.sendMessage(message.getMsg());
        return message.getMsg();
    }
}
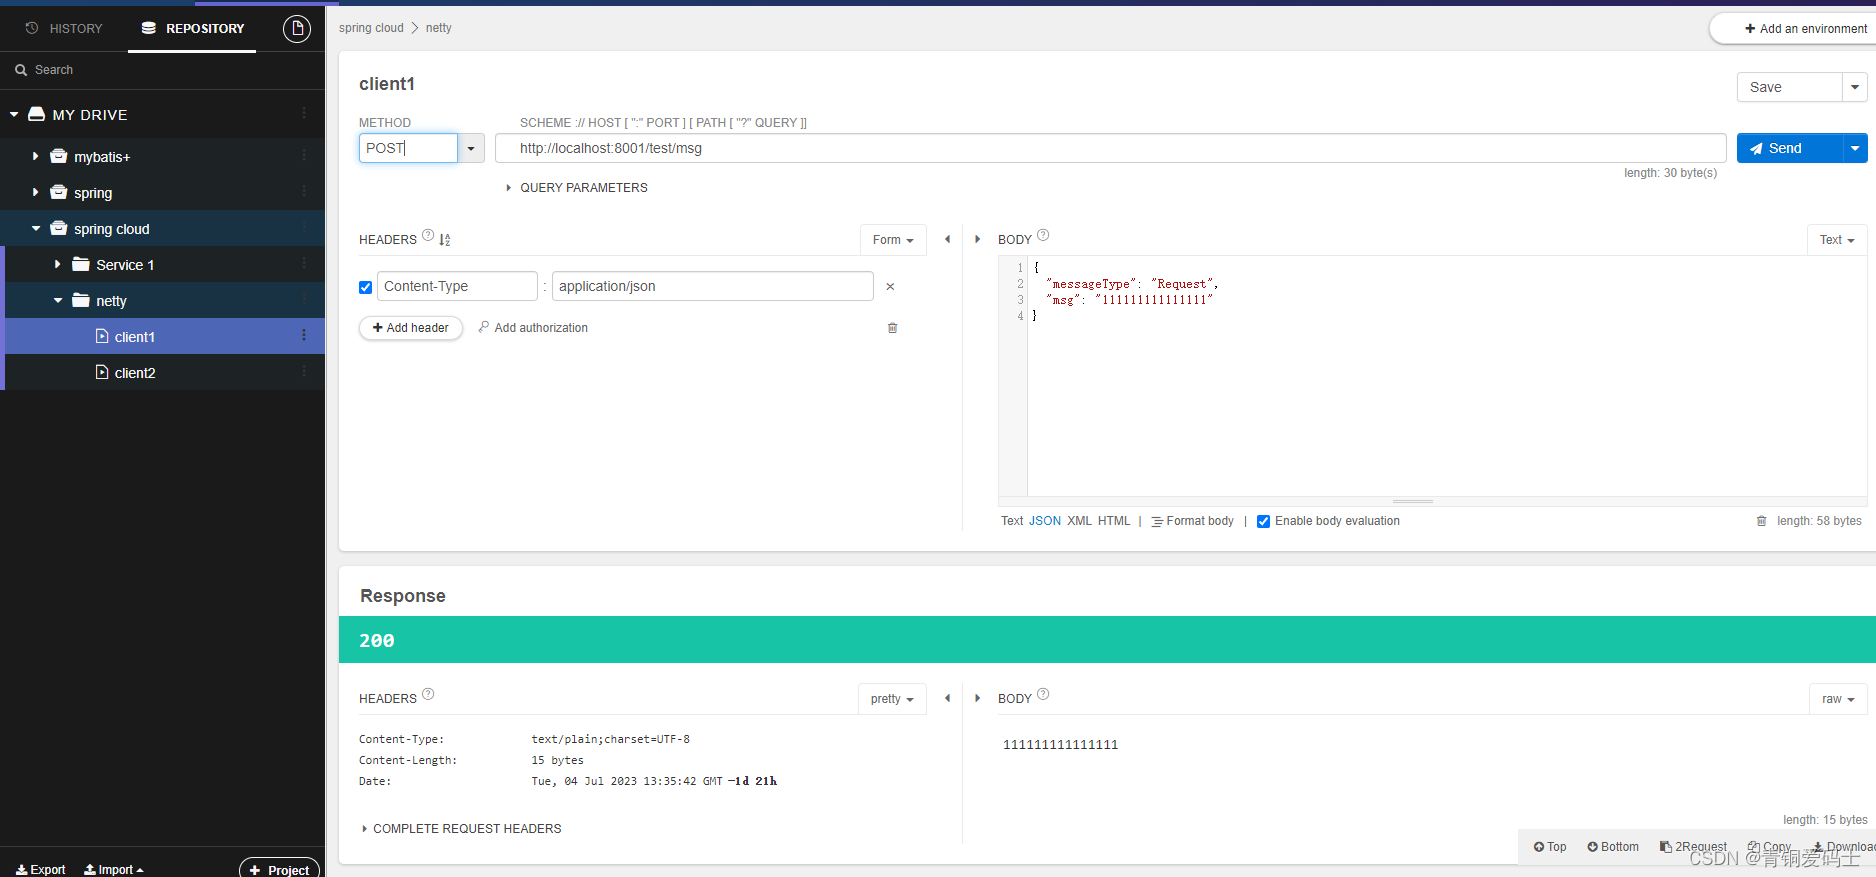
6. 测试,(还不支持发送给指定的客户端,接下来要改造为指定客户端)
给client1发送消息


client2收到消息:

服务器:


 435
435


 被折叠的 条评论
为什么被折叠?


