


一、Vite创建Vue3 项目
npm init vite@latest vue3-ts-vite -- --template vue
创建成功后用npm install命令安装依赖运行项目

vue3+vite初始化项目的基础结构

启动成功的页面

二、Vue3基本语法
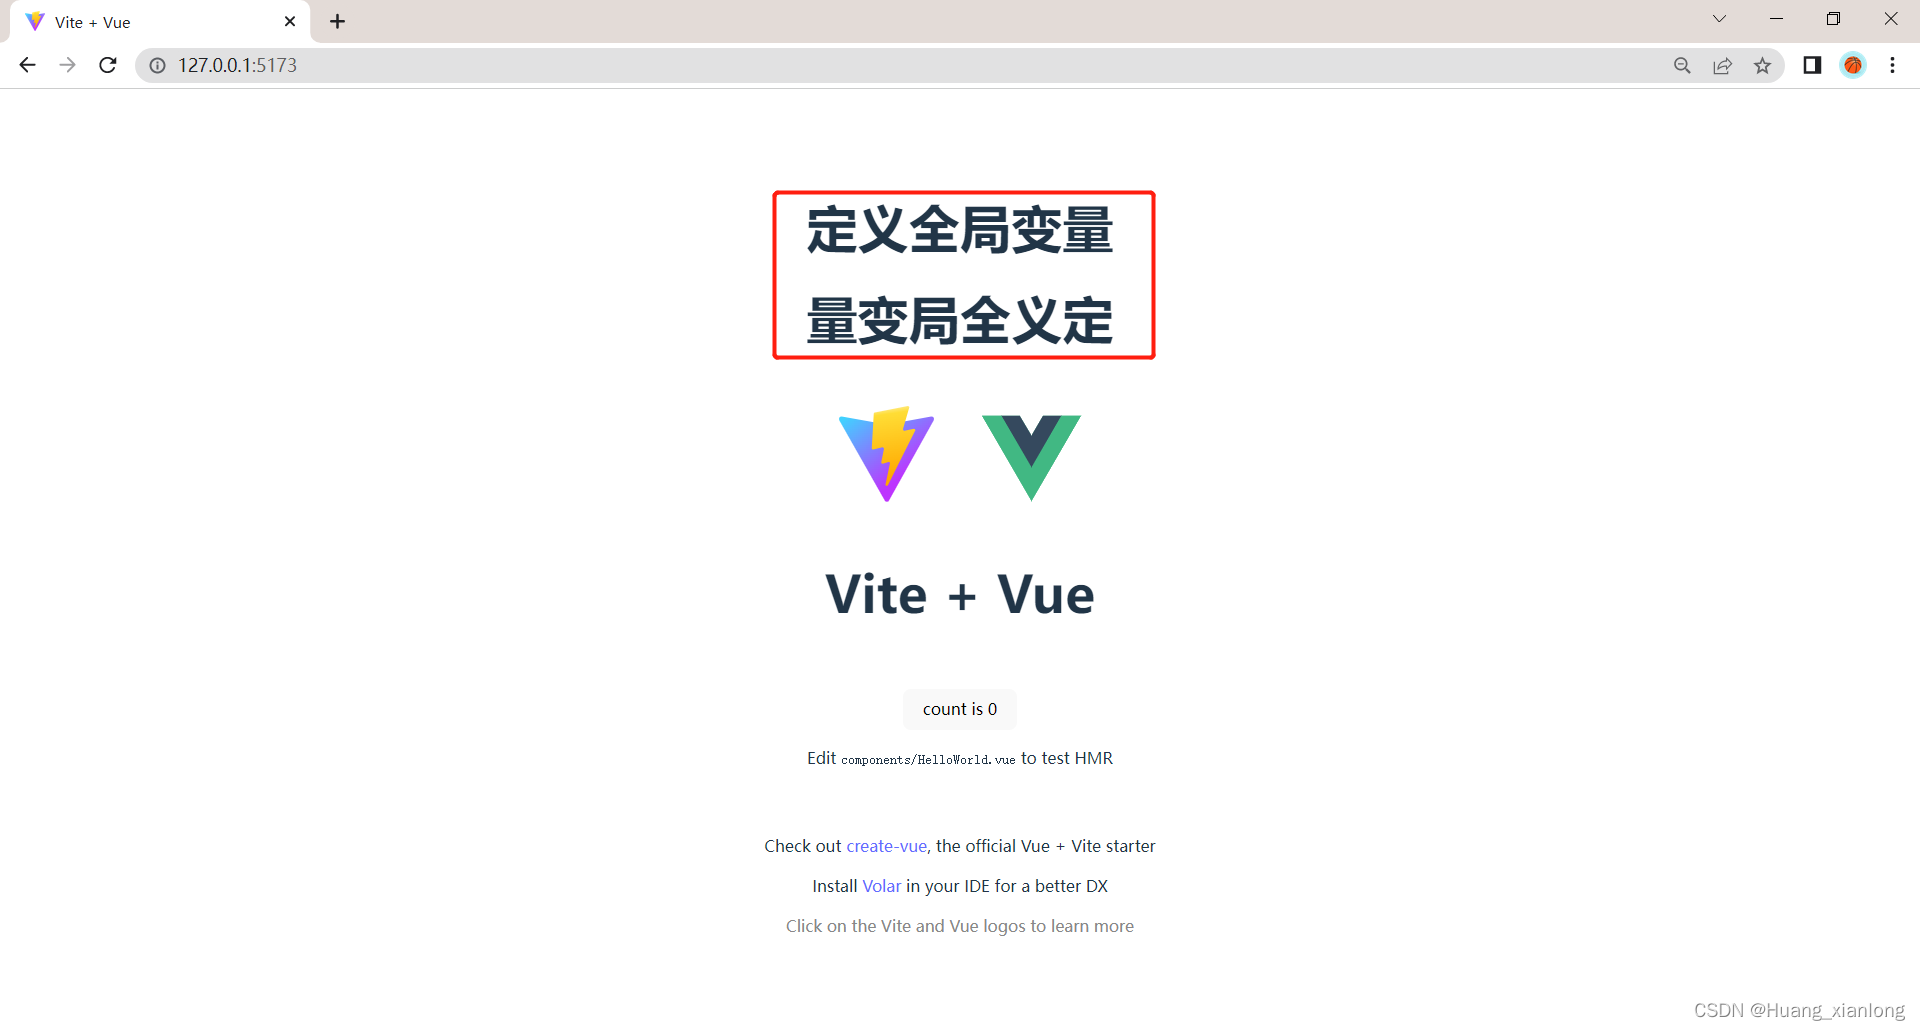
1、定义全局变量
<template>
  <h1>{{msg}}</h1>
  <div>
    <a href="https://vitejs.dev" target="_blank">
      <img src="/vite.svg" class="logo" alt="Vite logo" />
    </a>
    <a href="https://vuejs.org/" target="_blank">
      <img src="./assets/vue.svg" class="logo vue" alt="Vue logo" />
    </a>
  </div>
  <HelloWorld msg="Vite + Vue" />
</template>
<script setup>
// This starter template is using Vue 3 <script setup> SFCs
// Check out https://vuejs.org/api/sfc-script-setup.html#script-setup
import HelloWorld from './components/HelloWorld.vue'
let msg  = "定义全局变量"

</script>
<style scoped>
.logo {
  height: 6em;
  padding: 1.5em;
  will-change: filter;
}
.logo:hover {
  filter: drop-shadow(0 0 2em #646cffaa);
}
.logo.vue:hover {
  filter: drop-shadow(0 0 2em #42b883aa);
}
</style>
在<script setup>中定义的变量为全局变量,可以全局使用。
2、定义函数
翻转字符串函数
<template>
  <h1>{{msg}}</h1>
  <h1>{{reMsg(msg)}}</h1>
  <div>
    <a href="https://vitejs.dev" target="_blank">
      <img src="/vite.svg" class="logo" alt="Vite logo" />
    </a>
    <a href="https://vuejs.org/" target="_blank">
      <img src="./assets/vue.svg" class="logo vue" alt="Vue logo" />
    </a>
  </div>
  <HelloWorld msg="Vite + Vue" />
</template>
<script setup>
// This starter template is using Vue 3 <script setup> SFCs
// Check out https://vuejs.org/api/sfc-script-setup.html#script-setup
import HelloWorld from './components/HelloWorld.vue'
let msg  = "定义全局变量"
function reMsg(val){
  return val.split('').reverse().join('')
}
</script>
<style scoped>
.logo {
  height: 6em;
  padding: 1.5em;
  will-change: filter;
}
.logo:hover {
  filter: drop-shadow(0 0 2em #646cffaa);
}
.logo.vue:hover {
  filter: drop-shadow(0 0 2em #42b883aa);
}
</style>
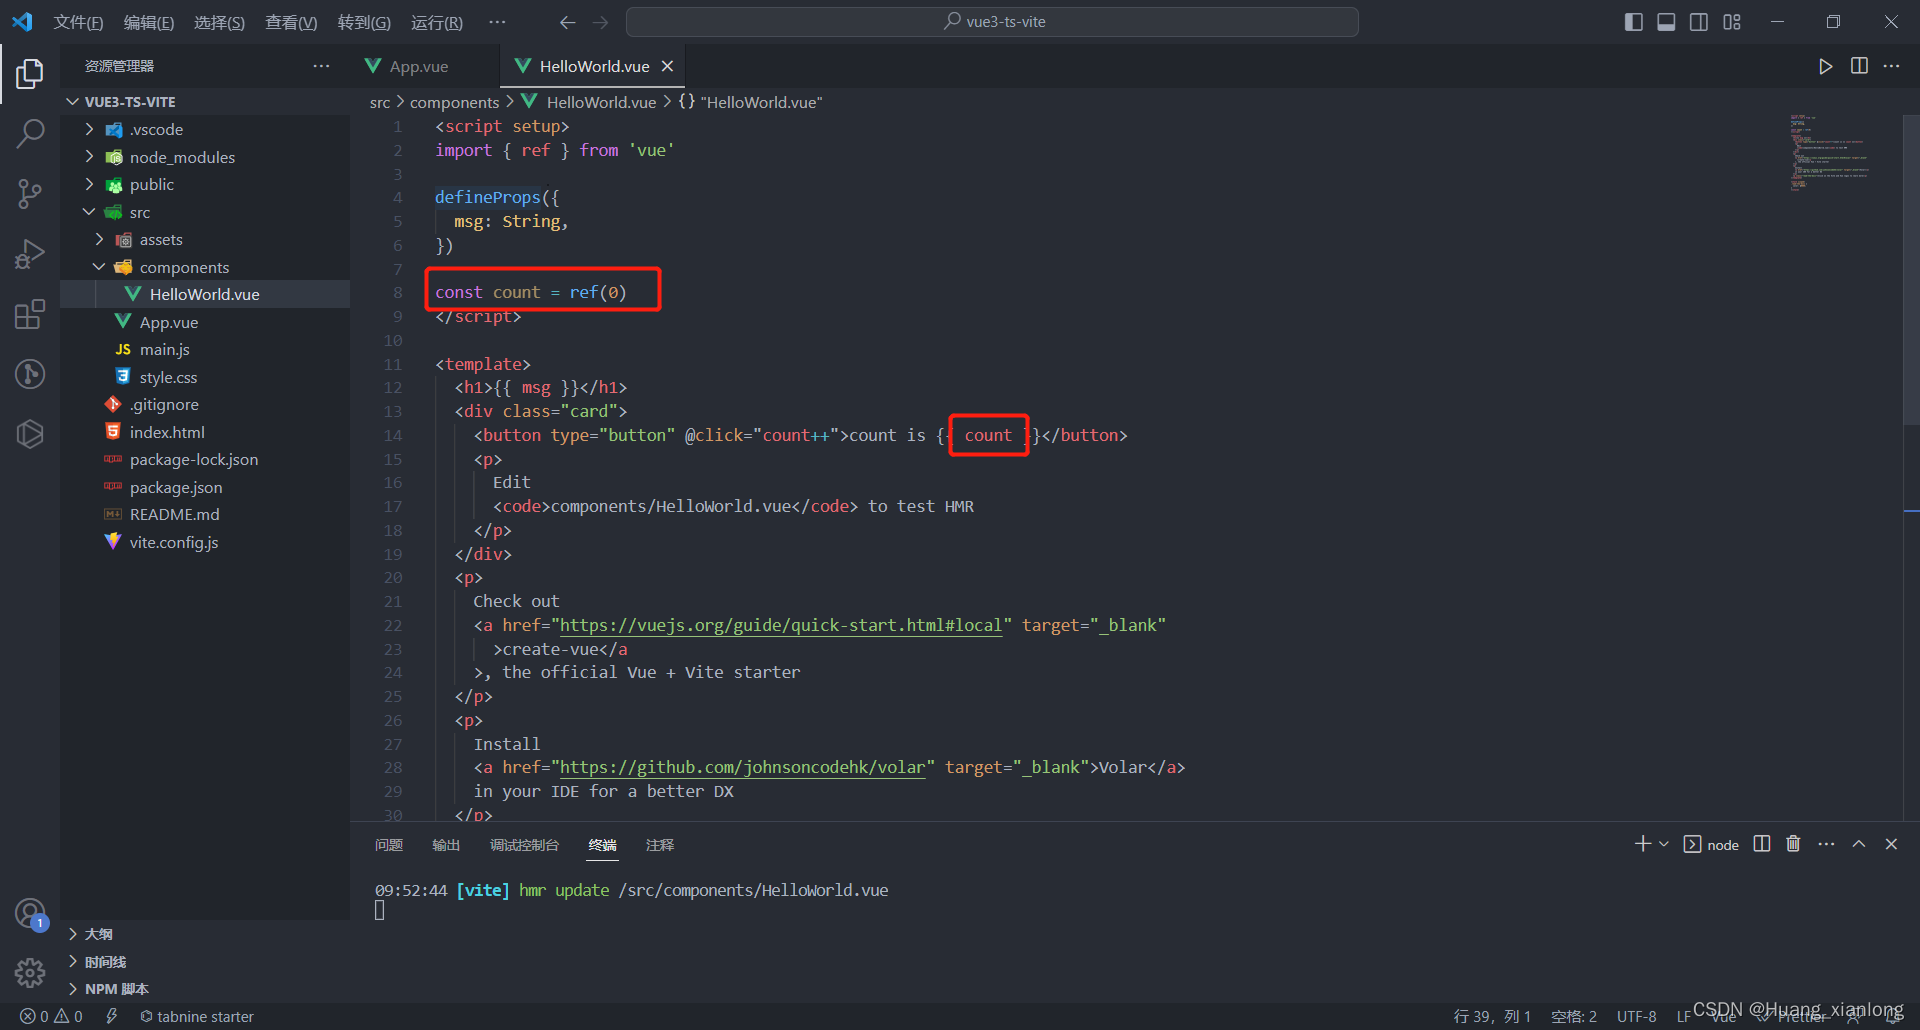
3、定义响应式ref
在vue3中想要数据具有响应性,就需要用ref来创建响应式对象。
<template>
<h1>{{msg}}</h1>
<h1>{{reMsg(msg)}}</h1>
<button @click="setMsg">点击修改</button>
<div>
<a href="https://vitejs.dev" target="_blank">
<img src="/vite.svg" class="logo" alt="Vite logo" />
</a>
<a href="https://vuejs.org/" target="_blank">
<img src="./assets/vue.svg" class="logo vue" alt="Vue logo" />
</a>
</div>
<HelloWorld msg="Vite + Vue" />
</template>
<script setup>
// This starter template is using Vue 3 <script setup> SFCs
// Check out https://vuejs.org/api/sfc-script-setup.html#script-setup
import HelloWorld from './components/HelloWorld.vue'
import {ref} from 'vue'
//通过 ref 创建响应式对象
let msg = ref("定义全局变量")
function reMsg(val){
return val.split('').reverse().join('')
}
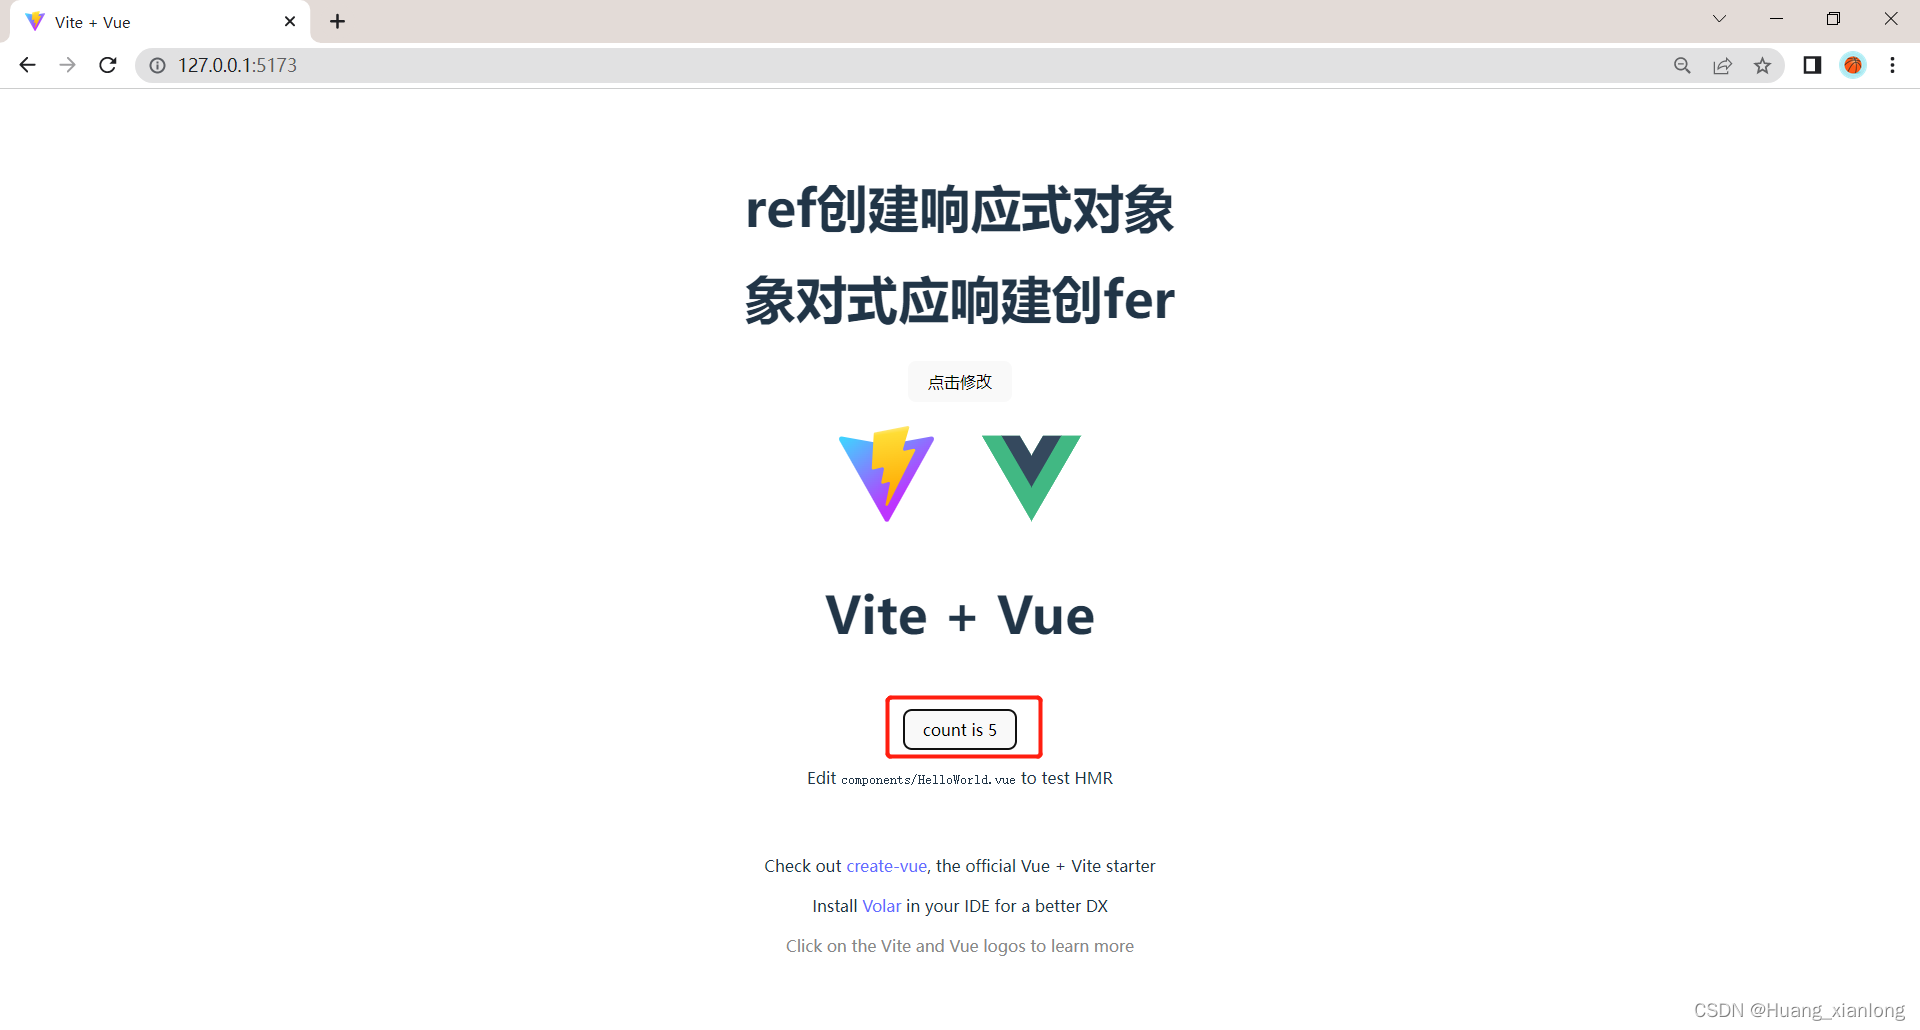
function setMsg(){
msg.value = "ref创建响应式对象"
}
</script>
<style scoped>
.logo {
height: 6em;
padding: 1.5em;
will-change: filter;
}
.logo:hover {
filter: drop-shadow(0 0 2em #646cffaa);
}
.logo.vue:hover {
filter: drop-shadow(0 0 2em #42b883aa);
}
</style>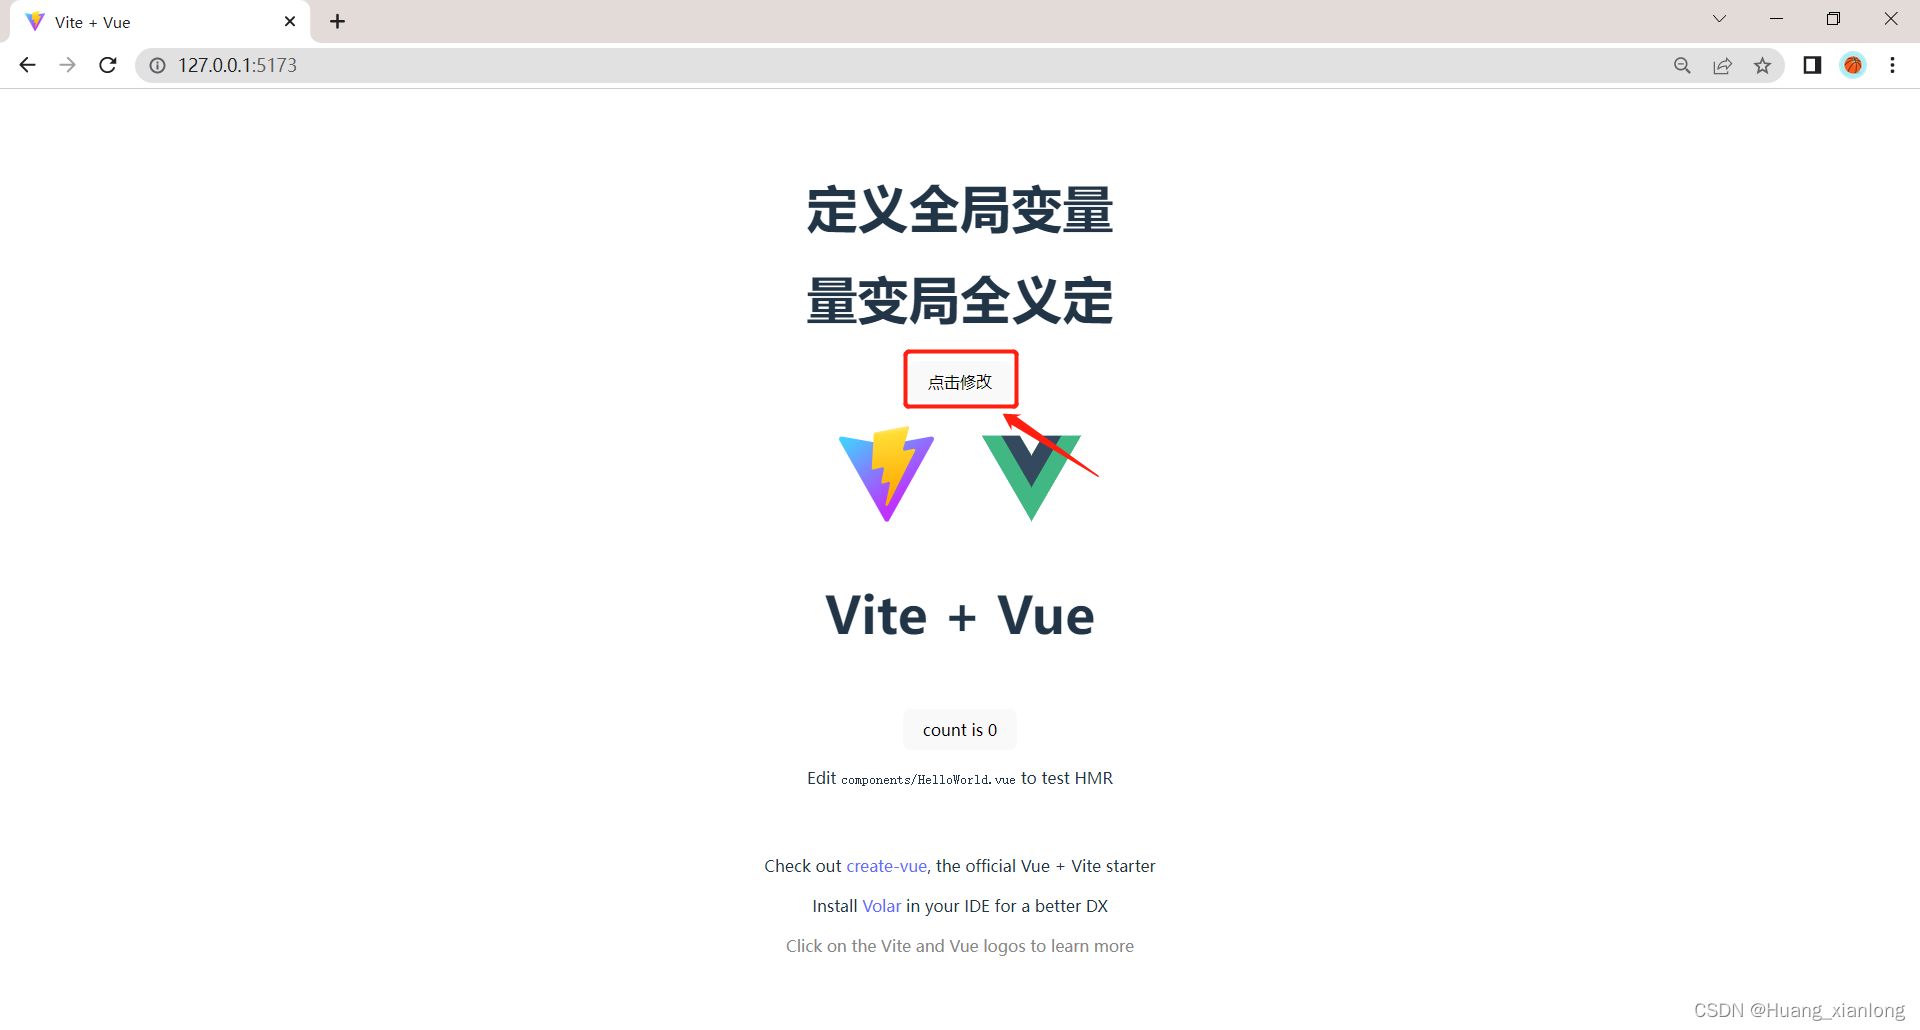

vue3项目初始化的HelloWorld.vue的count数值变化的原理也是因为用了ref来创建响应式对象。
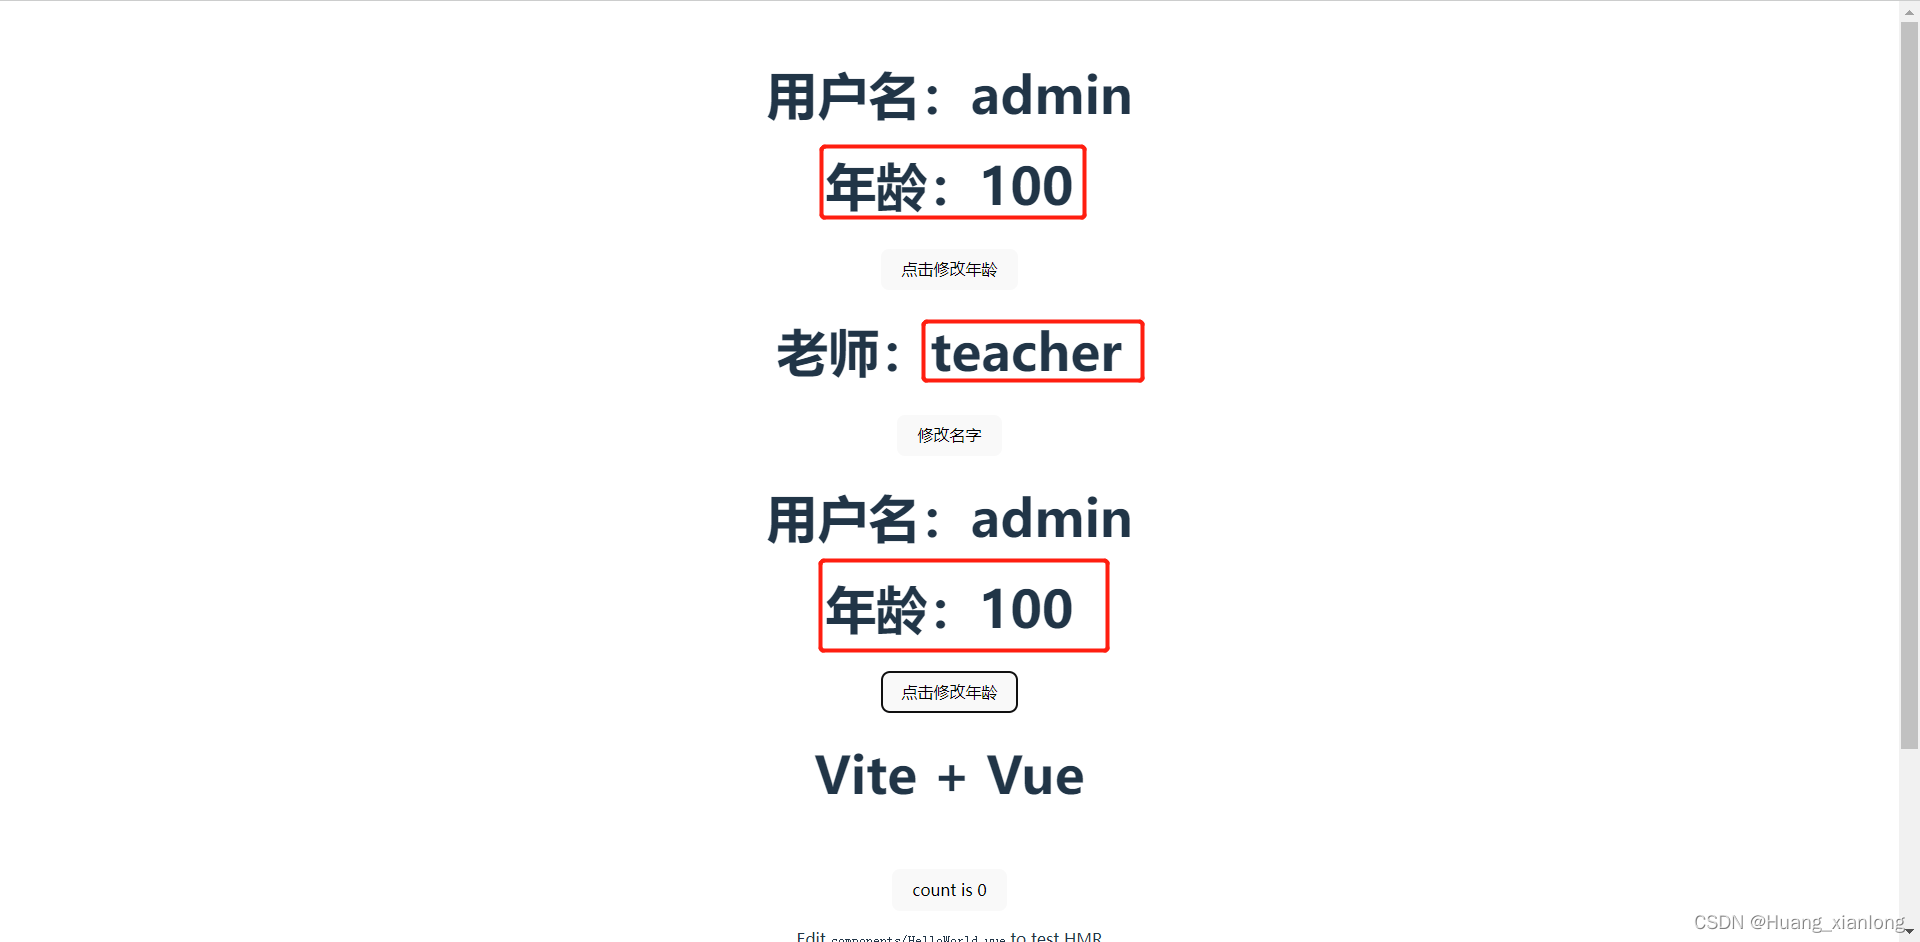
4、响应式reactive
ref允许我们创建一个任意类型的响应式的ref对象,在使用时需要带上.value。在模板中使用ref对象时,假如ref位于顶层,就不需要使用value,它会自动解包,但如果ref对象是作为一个属性声明于对象之中,在模板中进行运算时仍然要使用.value。
通常使用reactive()来创建一个响应式的对象或数组,这样的对象或数组状态都是默认深层响应式的,无论嵌套多深,都能跟踪到。但他也有局限性,就是只对对象类型有效,对基本数据类型无效,并且假如用一个新对象替换了原来的旧对象,那么原来的旧对象会失去响应性。
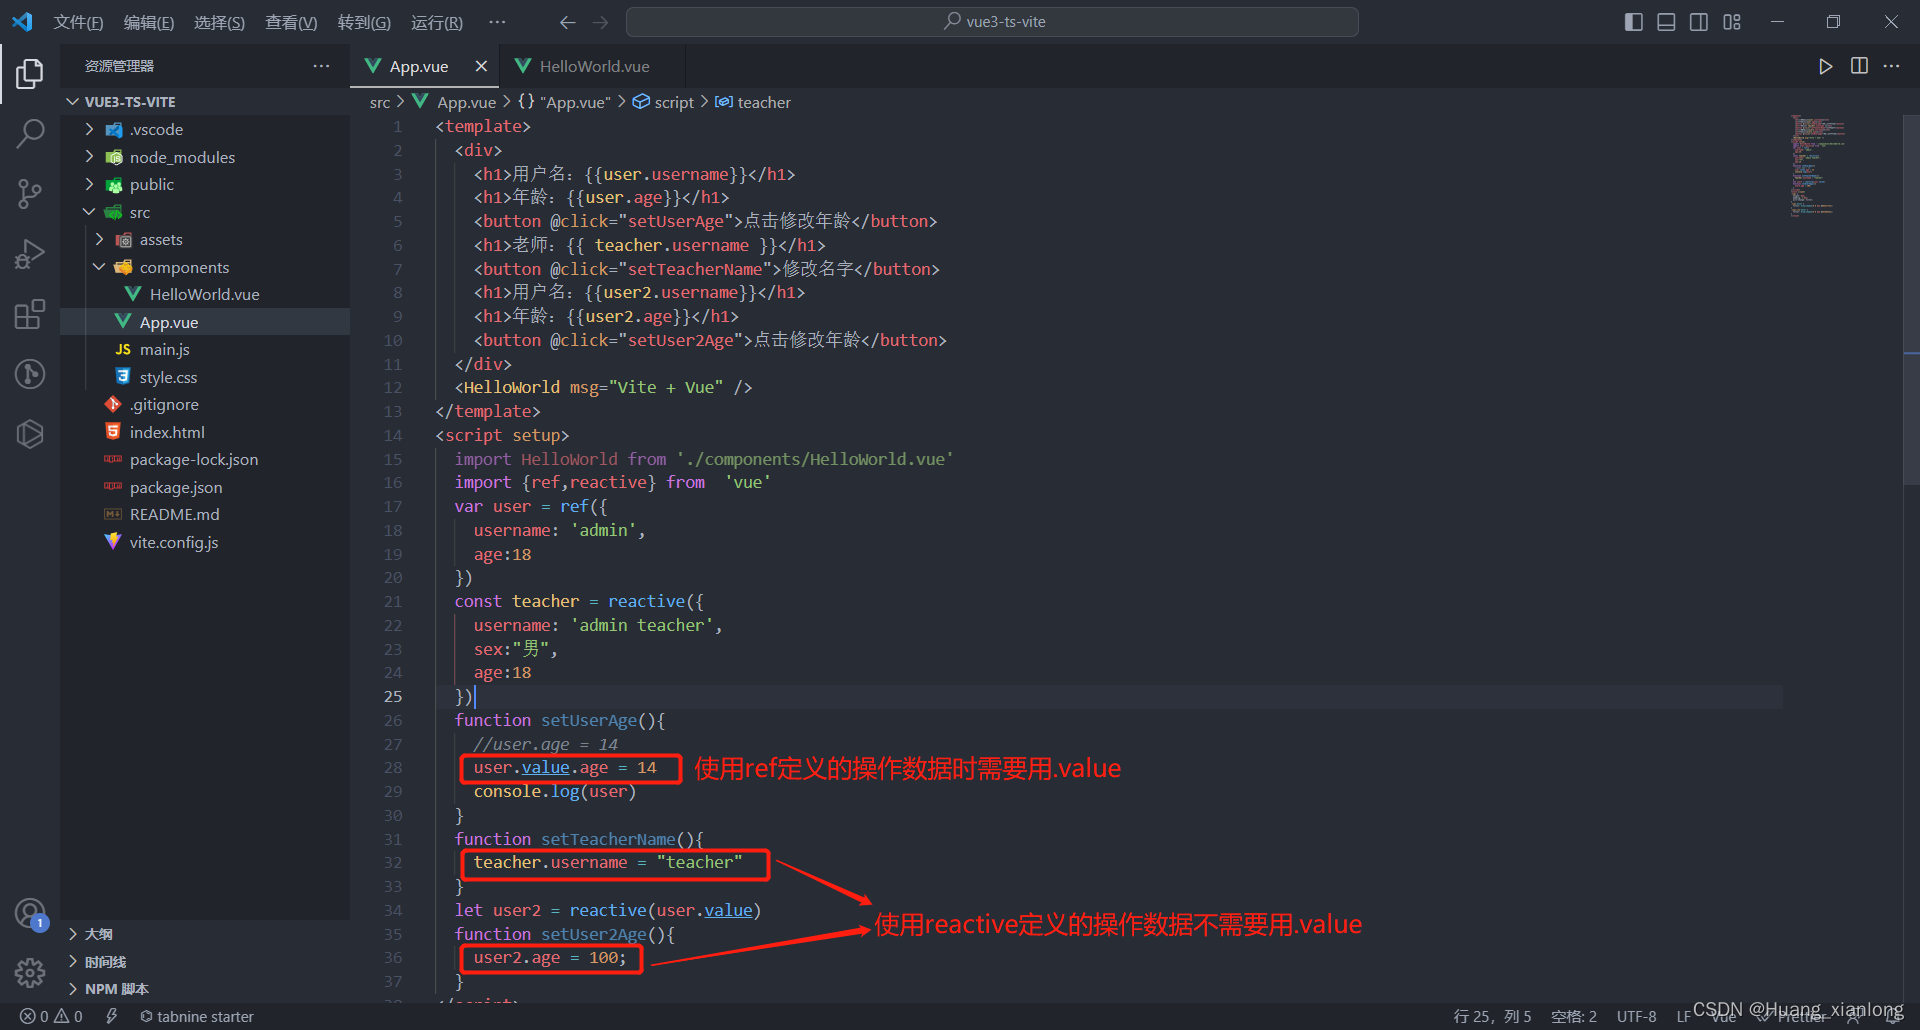
 点击相应的按钮都能改变数据并显示
两者区别:
1、ref多用来定义基本数据类型(也可以定义对象,内部会自动通过reactive转为代理对象),而 reactive只能用来定义对象数组类型;
2、ref操作数据需要.value,reactive操作数据不需要.value;
3、ref通过Object.defineProperty()的get和set来实现响应式, reactive通过Proxy来实现响应式,并通过Reflect操作源对象内部的数据。
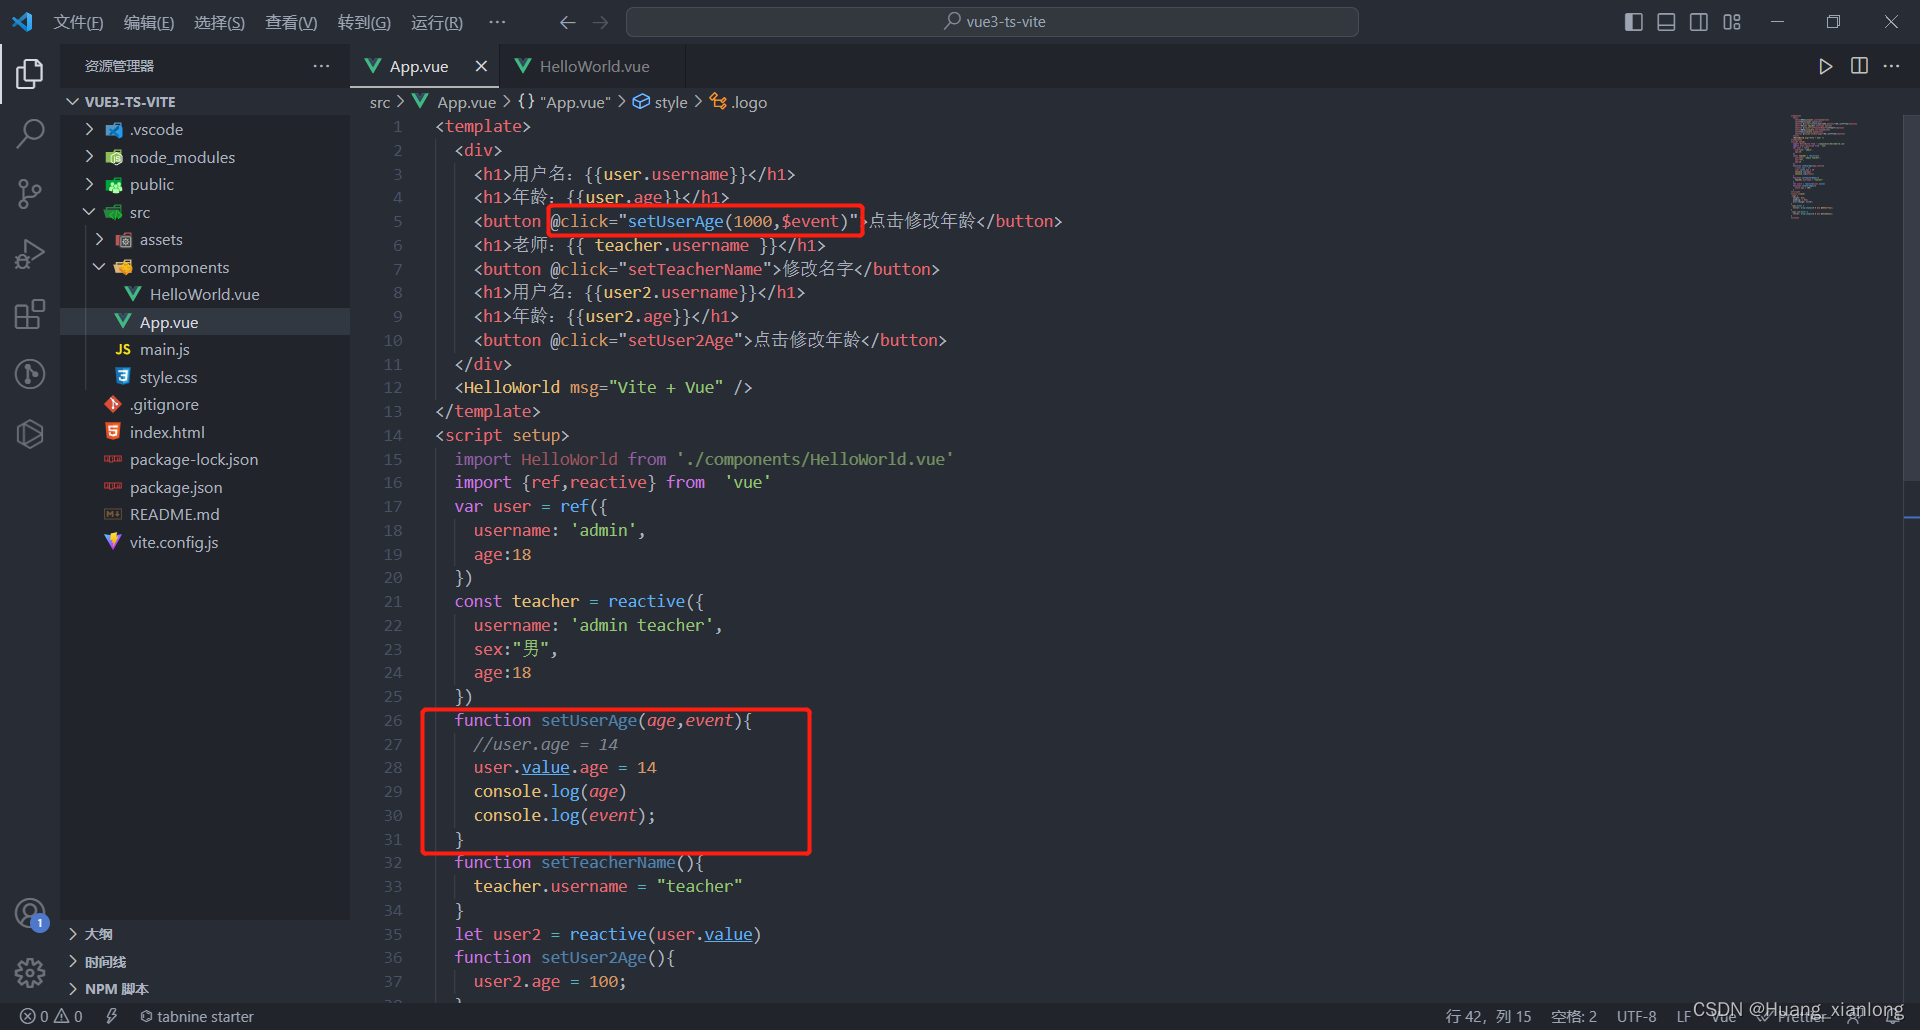
5、Vue3事件对象与传递参数
Vue3事件对象与传递参数与普通函数的定义和使用一致。

6、Vue3计算属性
6.1引入computed将计算的结果进行缓存,防止多次调用损失性能
<template>
  <div>
    <h1>{{msg}}</h1>
    <h1>{{ reMsg  }}</h1>
    <h1>{{ reMsg  }}</h1>
    <h1>{{ reMsg }}</h1>
    <button @click="setMsg('itred',$event)"></button>
  </div>
  <HelloWorld msg="Vite + Vue" />
</template>
<script setup>
  import HelloWorld from './components/HelloWorld.vue'
  import {ref,computed,reactive} from  'vue'

  let msg = reactive("计算属性computed")

  function setMsg(value,event){
    msg.value = value
    console.log(value)
    console.log(event)
  }
  const reMsg = computed( function (){
        console.log(123)
        return msg.split("").reverse().join("")
      }
  )
</script>
<style scoped>
.logo {
  height: 6em;
  padding: 1.5em;
  will-change: filter;
}
.logo:hover {
  filter: drop-shadow(0 0 2em #646cffaa);
}
.logo.vue:hover {
  filter: drop-shadow(0 0 2em #42b883aa);
}
</style>
我们可以发现虽然调用了三遍,但是函数只执行了一次。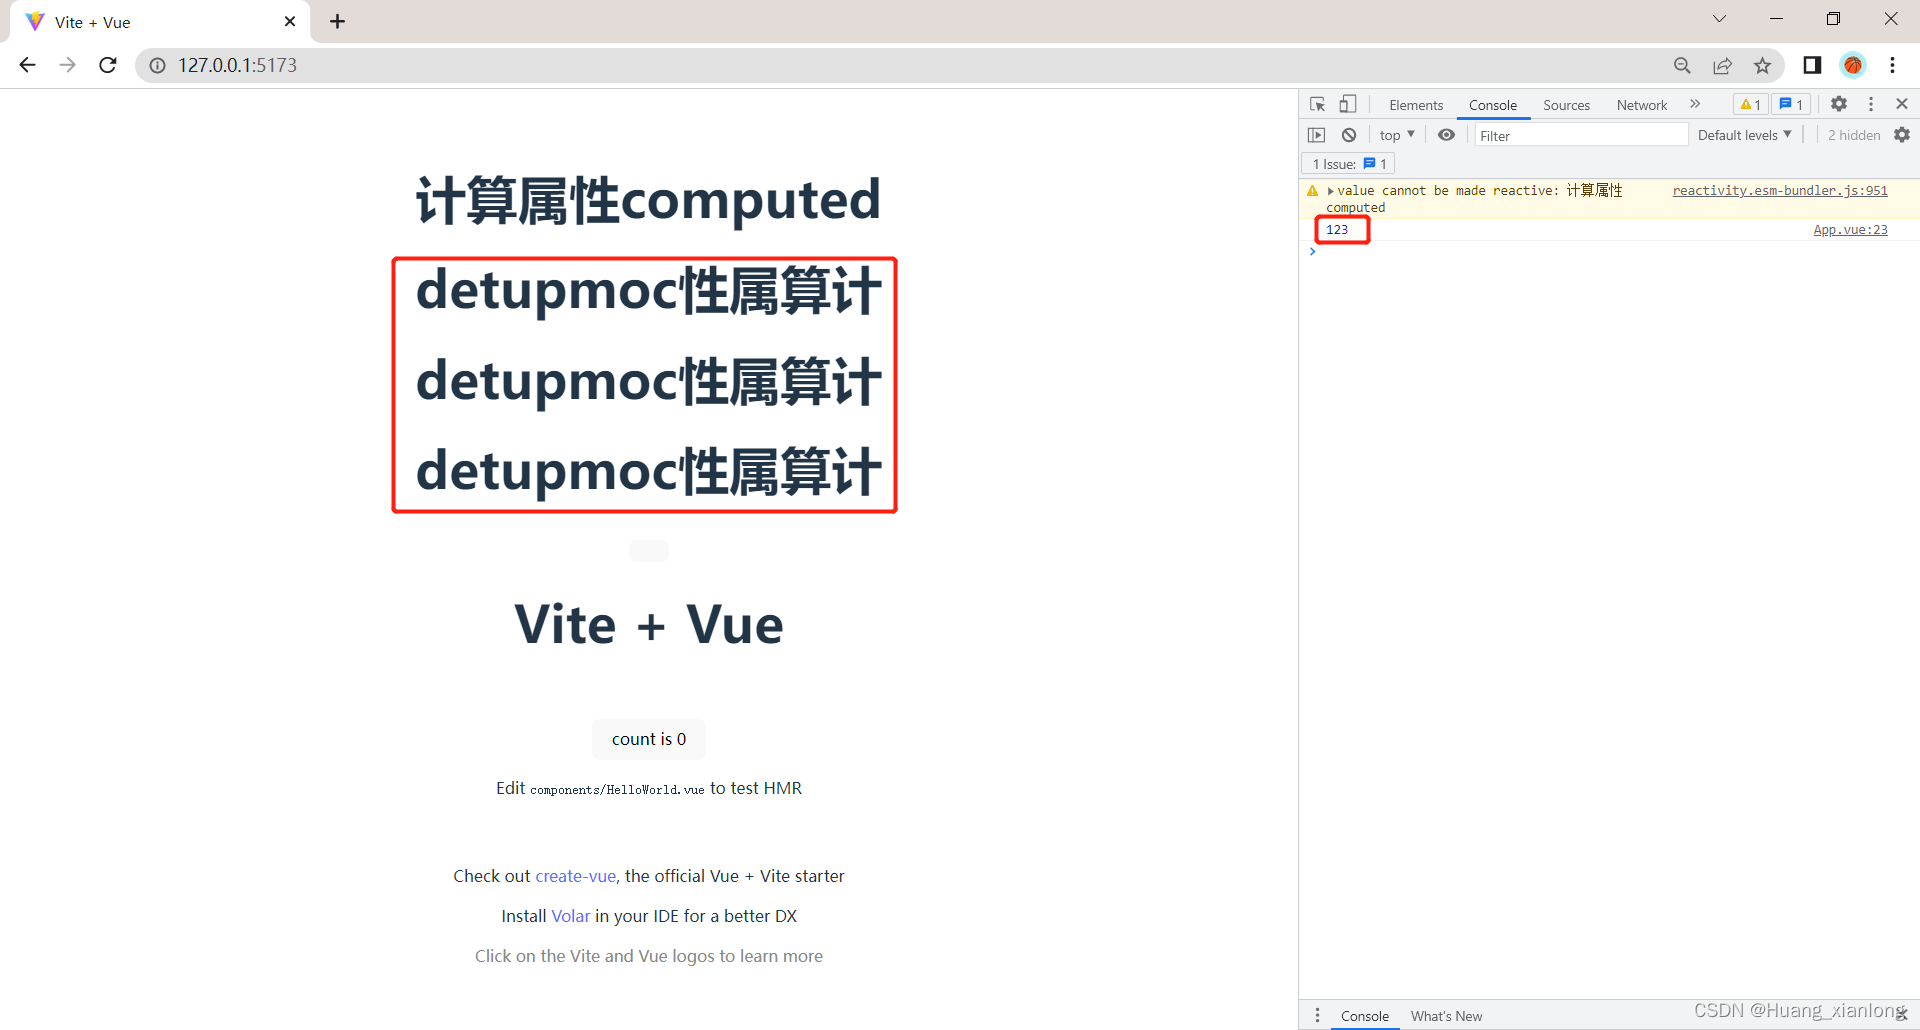
6.2 设置值和修改值
<template>
  <div>
    <h1>{{ msg }}</h1>
    <h1>{{ reMsg }}</h1>
    <h1>{{ reMsg }}</h1>
    <h1>{{ reMsg }}</h1>
    <button @click="setMsg('methods', $event)">修改内容</button>
    <button @click="setReMsg">修改计算属性reMsg</button>
  </div>
  <HelloWorld msg="Vite + Vue" />
</template>
<script setup>
import HelloWorld from "./components/HelloWorld.vue";
import { ref, computed } from "vue";

let msg = ref("计算属性computed");

function setMsg(value, event) {
  msg.value = value;
  console.log("methods");
}
const reMsg = computed({
  get: () => {
    console.log("get");
    return msg.value.split("").reverse().join("");
  },
  set: (value) => {
    console.log("set");
    msg.value = value.split("").reverse().join("");
  },
});
function setReMsg() {
  reMsg.value = "computed";
}
</script>
<style scoped>
.logo {
  height: 6em;
  padding: 1.5em;
  will-change: filter;
}
.logo:hover {
  filter: drop-shadow(0 0 2em #646cffaa);
}
.logo.vue:hover {
  filter: drop-shadow(0 0 2em #42b883aa);
}
</style>
reMsg默认加载的时候调用了get方法
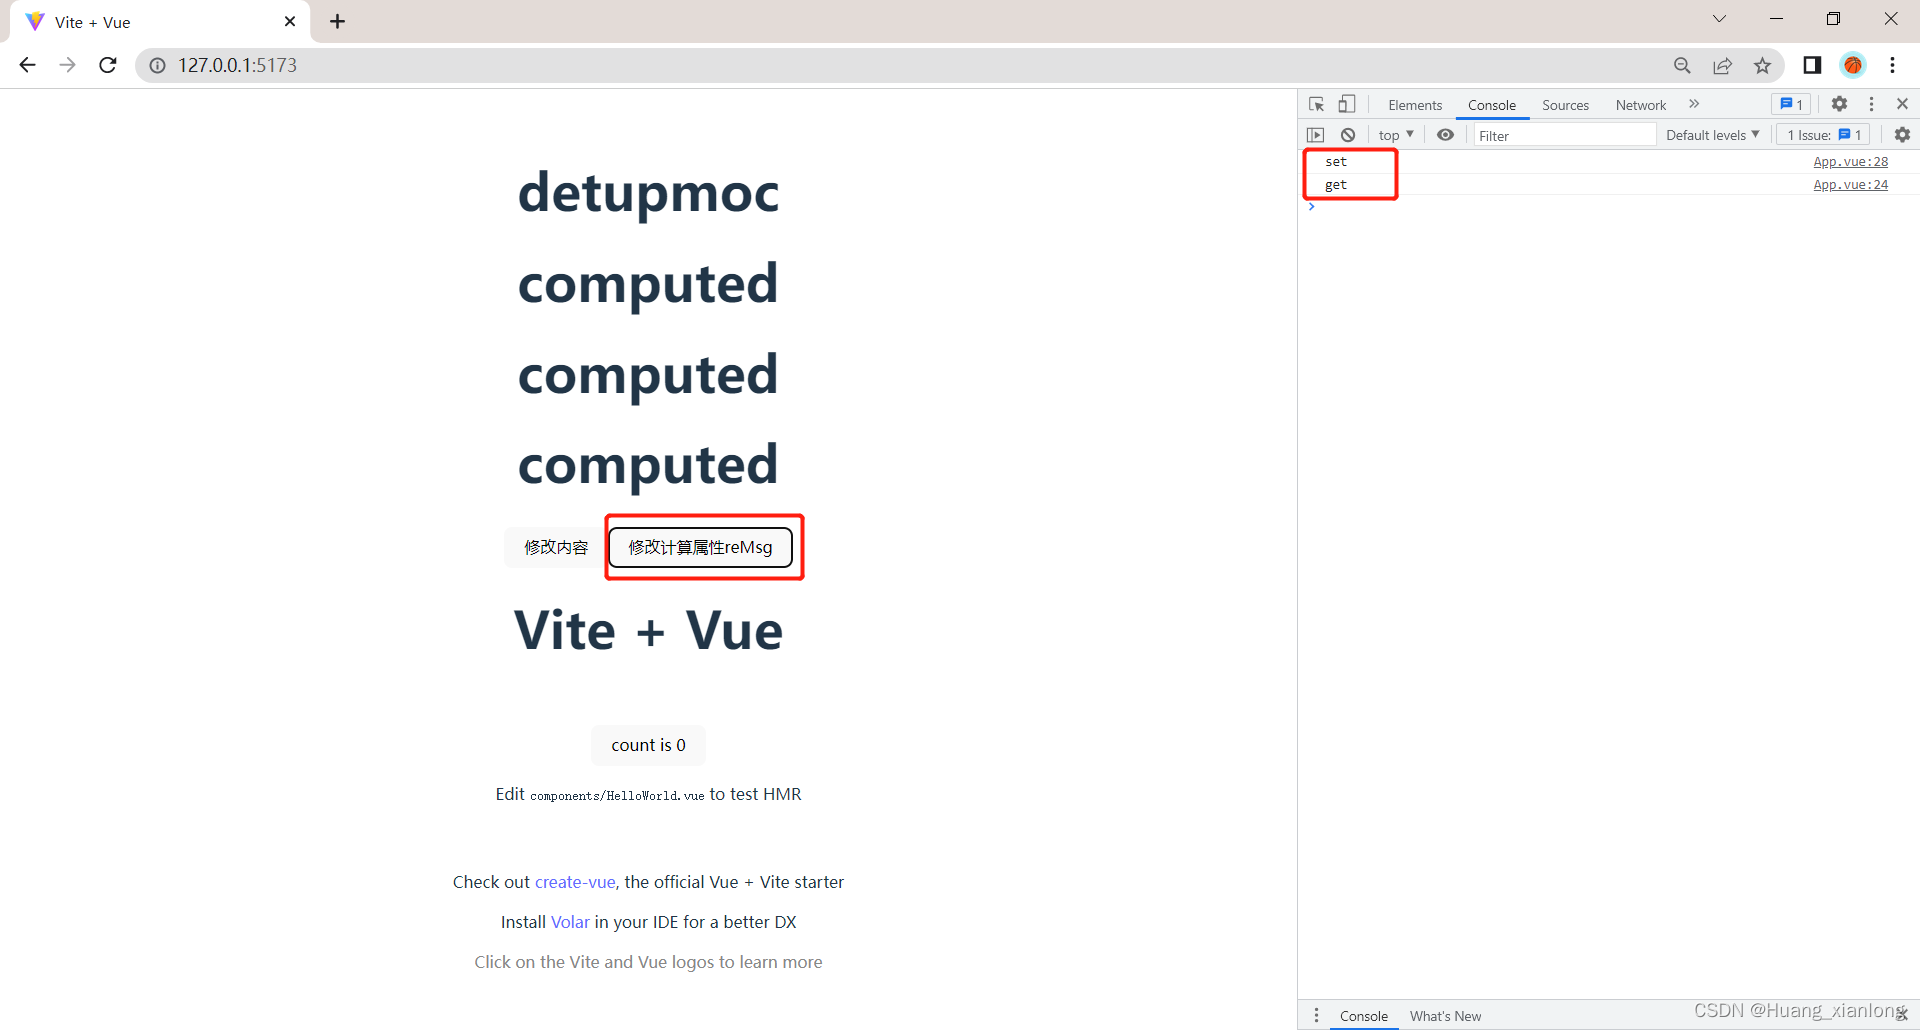
点击修改计算属性reMsg的时候调用set方法后又调用get方法。
7、Vue3监听数据变化


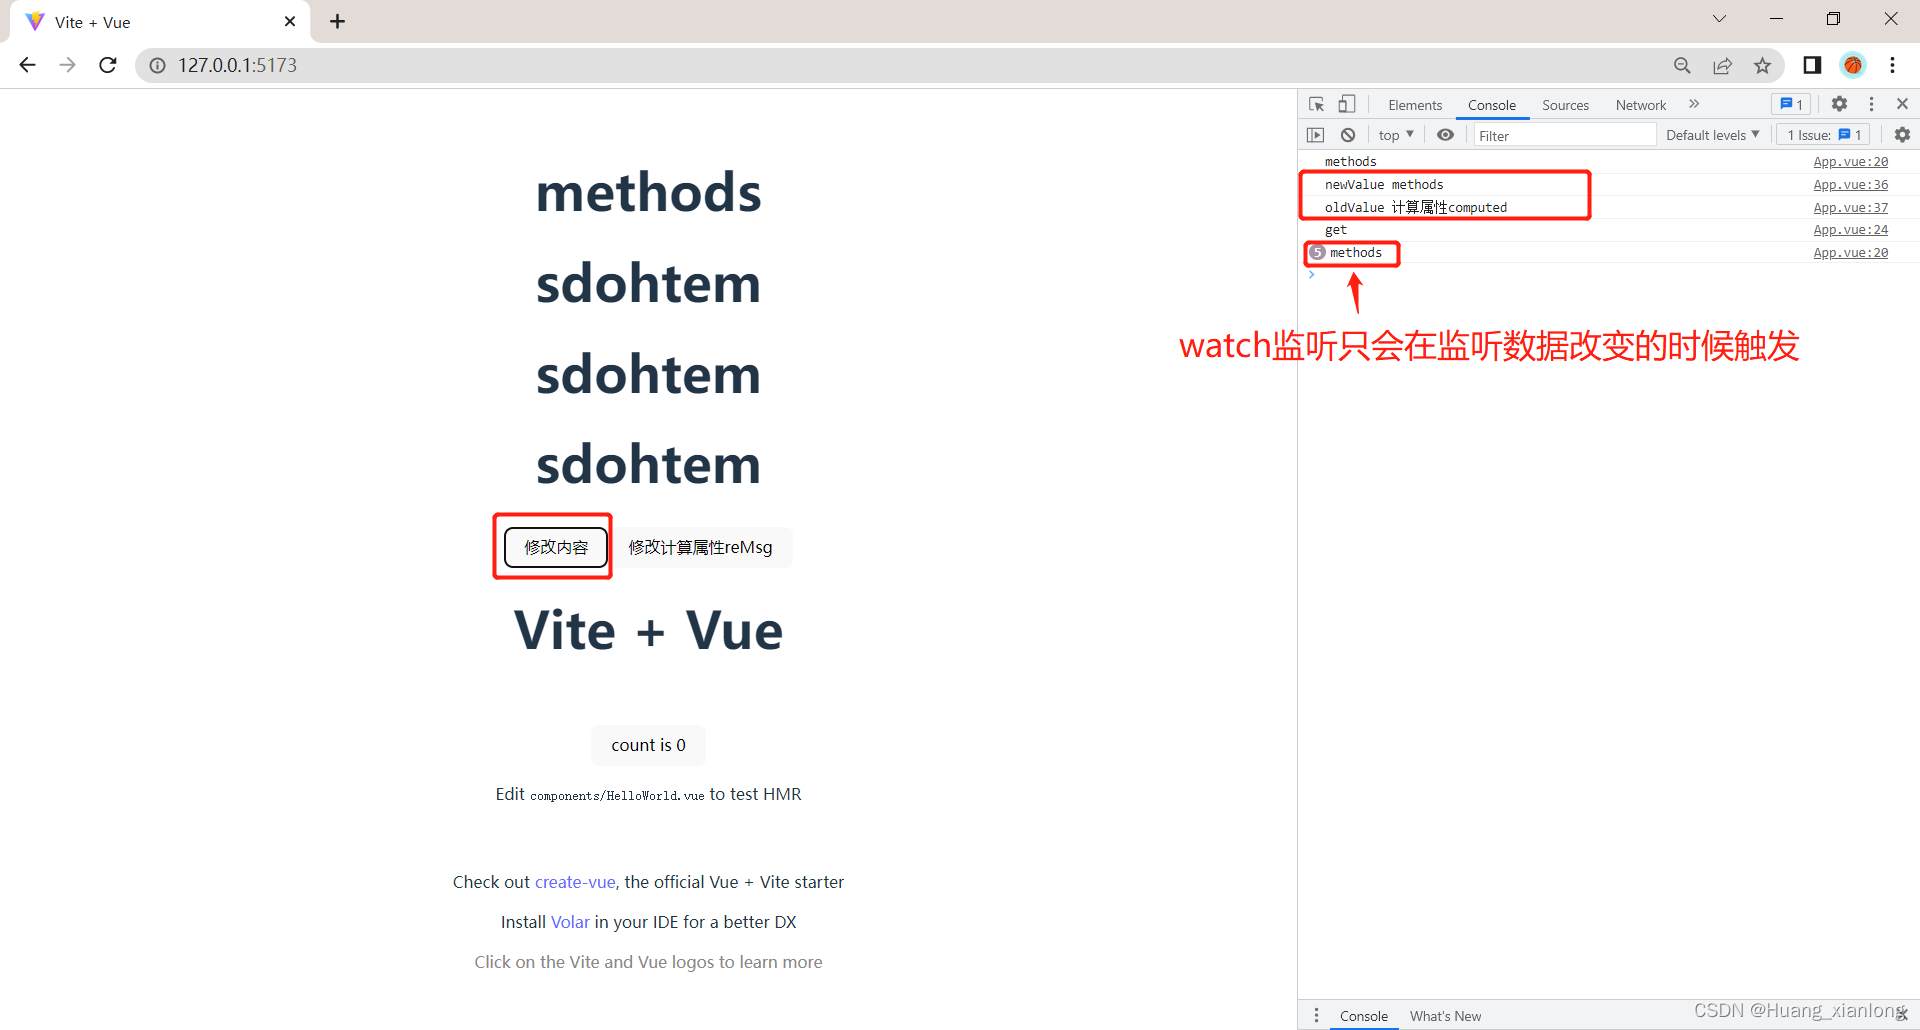
监听对象


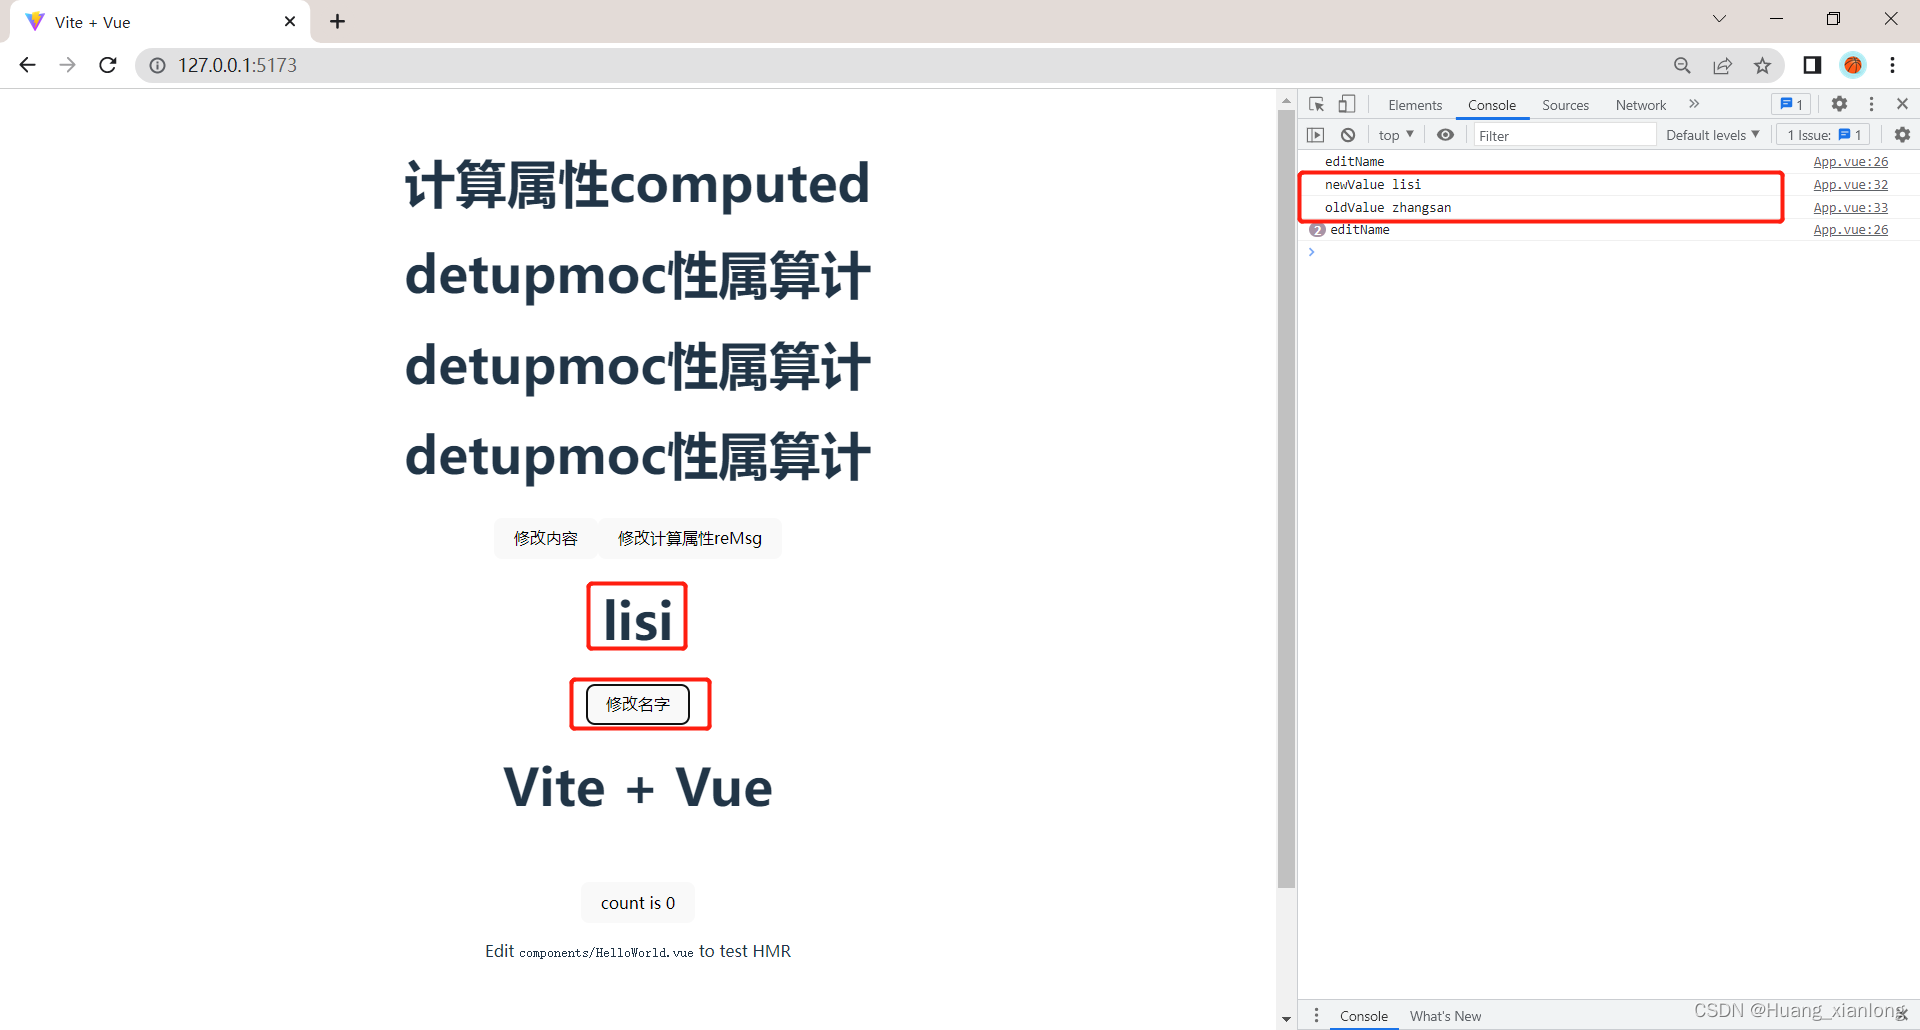
7.2、多个数据监听
同时监听多个数据
// 同时监听mes和user.name
watch([msg, () => user.name], (newValue, oldValue) => {
  console.log("newValue", newValue);
  console.log("oldValue", oldValue);
});

8、Vue3常见指令与样式
<template>
  <div>
    <h1>{{msg}}</h1>
    <h1 v-bind:class="classname"></h1>
    <h1 :class="classname"></h1>
  </div>
  <HelloWorld msg="Vite + Vue" />
</template>
<script setup>
  import HelloWorld from './components/HelloWorld.vue'
  import {ref, computed, watch, reactive} from 'vue'
  let msg = ref("Vue3")
  let classname = ref('box bgRed')

</script>
<style scoped>
.box{
  width: 200px;
  height: 200px;
  background-color: pink;
}
.bgRed{
  background-color: red;
}
</style>
8.2、id
<template>
  <div>
    <h1>{{msg}}</h1>
    <h1 v-bind:class="classname"></h1>
    <h1 :class="classname"></h1>
    <h1 :id="box"></h1>
  </div>
  <HelloWorld msg="Vite + Vue" />
</template>
<script setup>
  import HelloWorld from './components/HelloWorld.vue'
  import {ref, computed, watch, reactive} from 'vue'
  let msg = ref("Vue3")
  let classname = ref('box bgRed')
  let box = ref('box')

</script>
<style scoped>
.box{
  width: 200px;
  height: 200px;
  background-color: pink;
}
.bgRed{
  background-color: red;
}
#box{
  width: 200px;
  height: 200px;
  background-color: pink;
}
</style>
8.3、title
<template>
  <div>
    <h1>{{msg}}</h1>
    <h1 v-bind:class="classname"></h1>
    <h1 :title="desc" :class="classname"></h1>
    <h1 :id="box"></h1>
  </div>
  <HelloWorld msg="Vite + Vue" />
</template>
<script setup>
  import HelloWorld from './components/HelloWorld.vue'
  import {ref, computed, watch, reactive} from 'vue'
  let msg = ref("Vue3")
  let classname = ref('box bgRed')
  let box = ref('box')
  let desc = ref("这是一个box")

</script>
<style scoped>
.box{
  width: 200px;
  height: 200px;
  background-color: pink;
}
.bgRed{
  background-color: red;
}
#box{
  width: 200px;
  height: 200px;
  background-color: pink;
}
</style>
title设置后鼠标放到该元素上会显示设置的内容

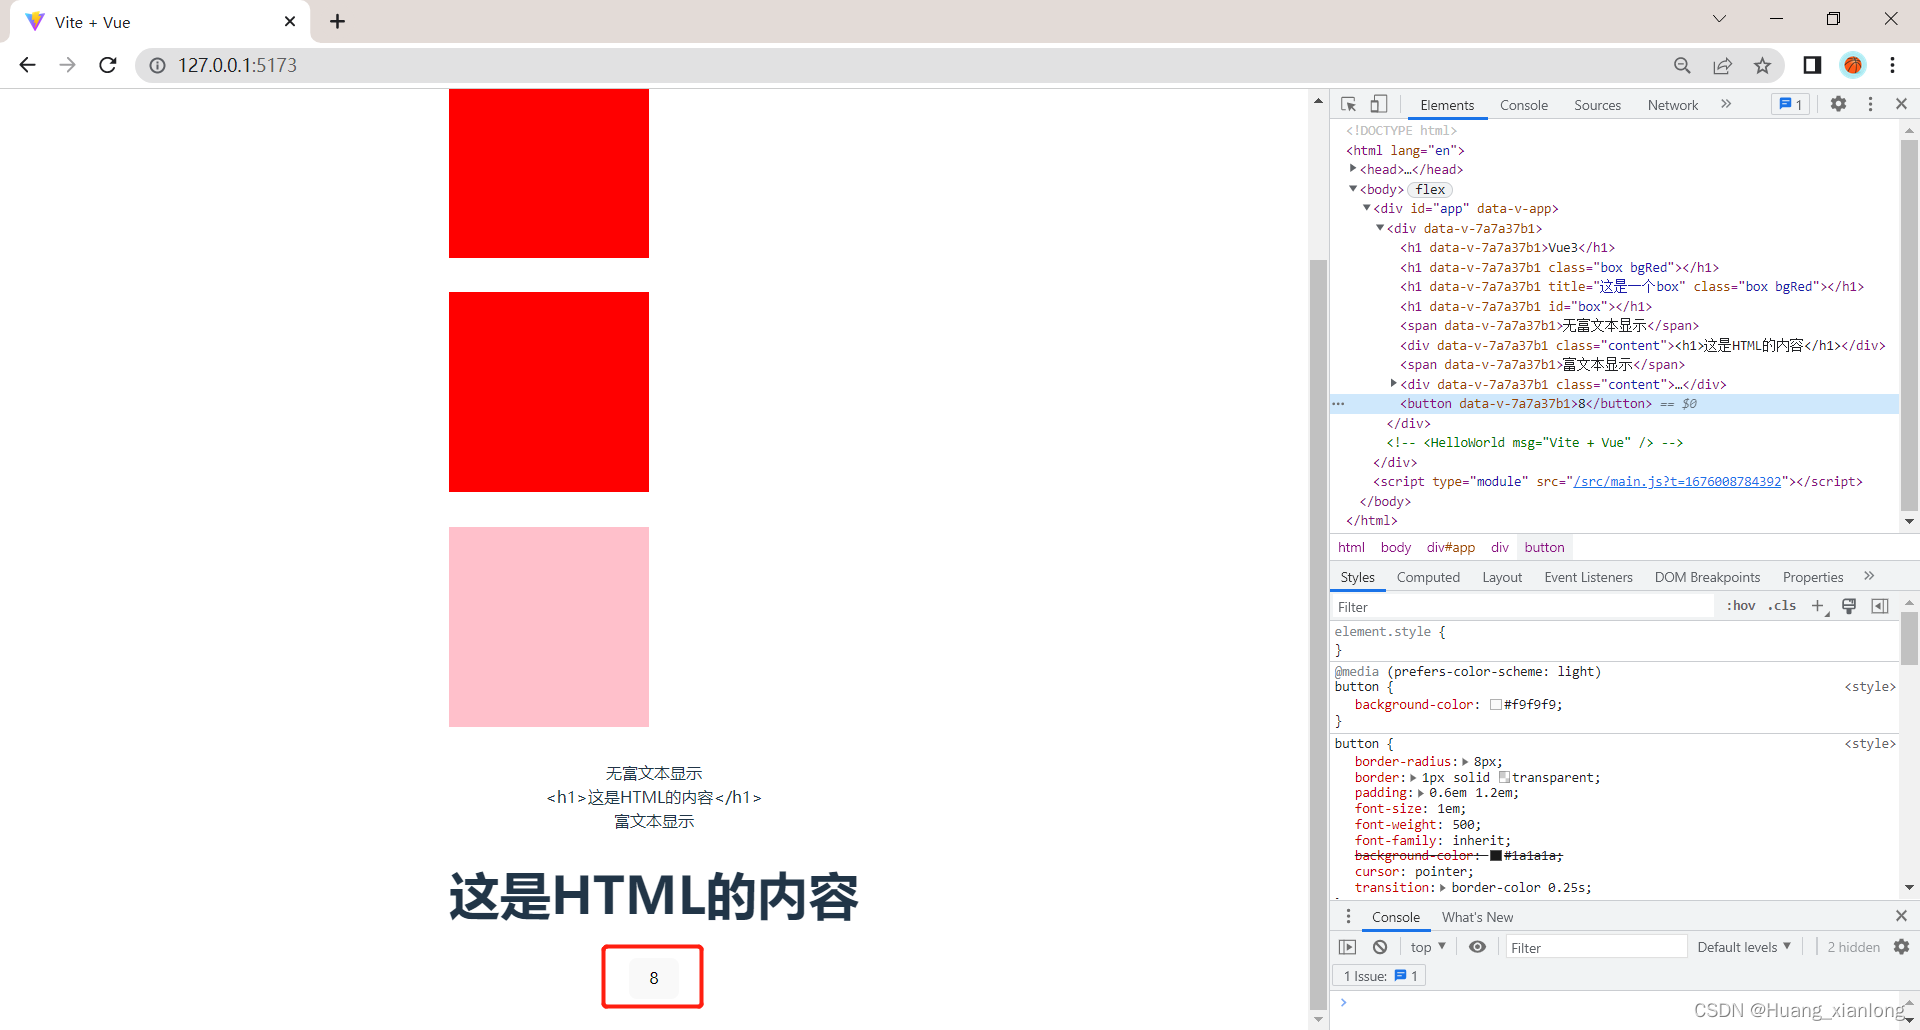
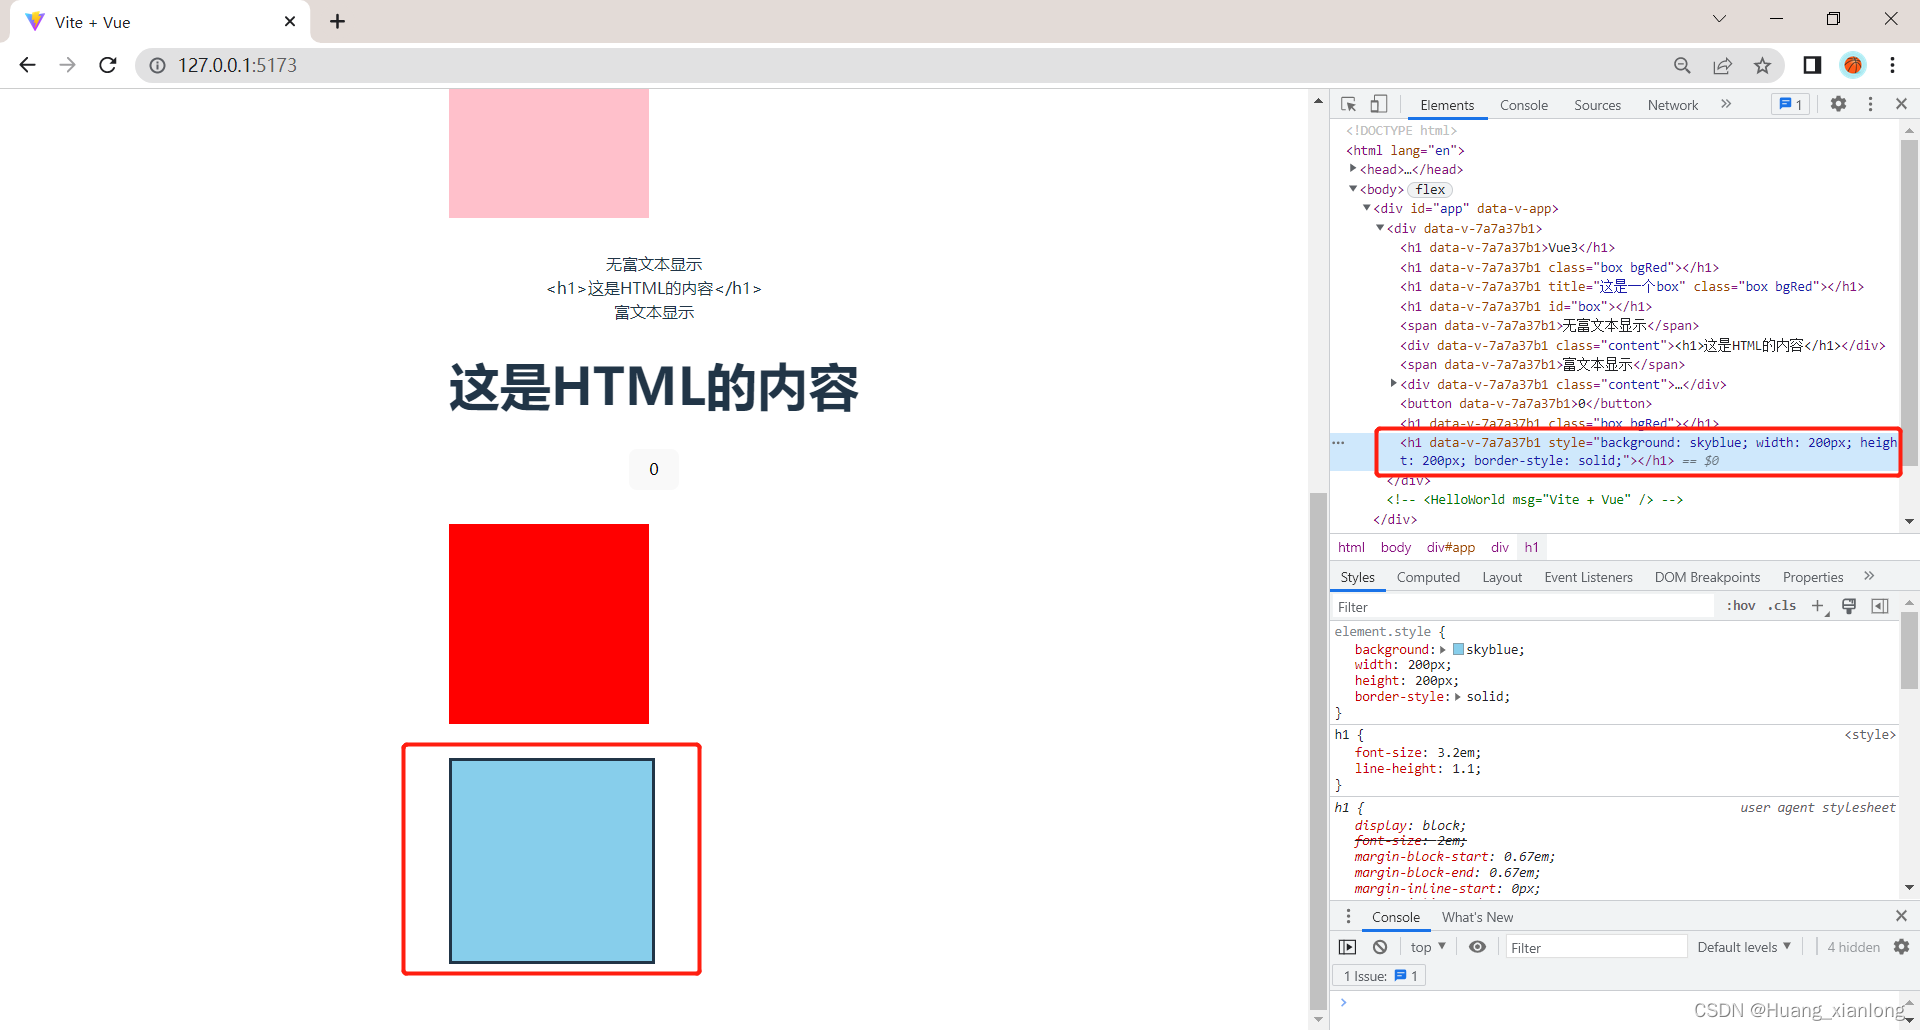
8.4、富文本显示
<template>
  <div>
    <h1>{{msg}}</h1>
    <h1 v-bind:class="classname"></h1>
    <h1 :title="desc" :class="classname"></h1>
    <h1 :id="box"></h1>
    <span>无富文本显示</span>
    <div class="content">{{html}}</div>
    <span>富文本显示</span>
    <div class="content" v-html="html"></div>
  </div>
  <HelloWorld msg="Vite + Vue" />
</template>
<script setup>
  import HelloWorld from './components/HelloWorld.vue'
  import {ref, computed, watch, reactive} from 'vue'
  let msg = ref("Vue3")
  let classname = ref('box bgRed')
  let box = ref('box')
  let desc = ref("这是一个box")
  let html = ref("<h1>这是HTML的内容</h1>")

</script>
<style scoped>
.box{
  width: 200px;
  height: 200px;
  background-color: pink;
}
.bgRed{
  background-color: red;
}
#box{
  width: 200px;
  height: 200px;
  background-color: pink;
}
</style>
8.5、点击事件
监听点击事件

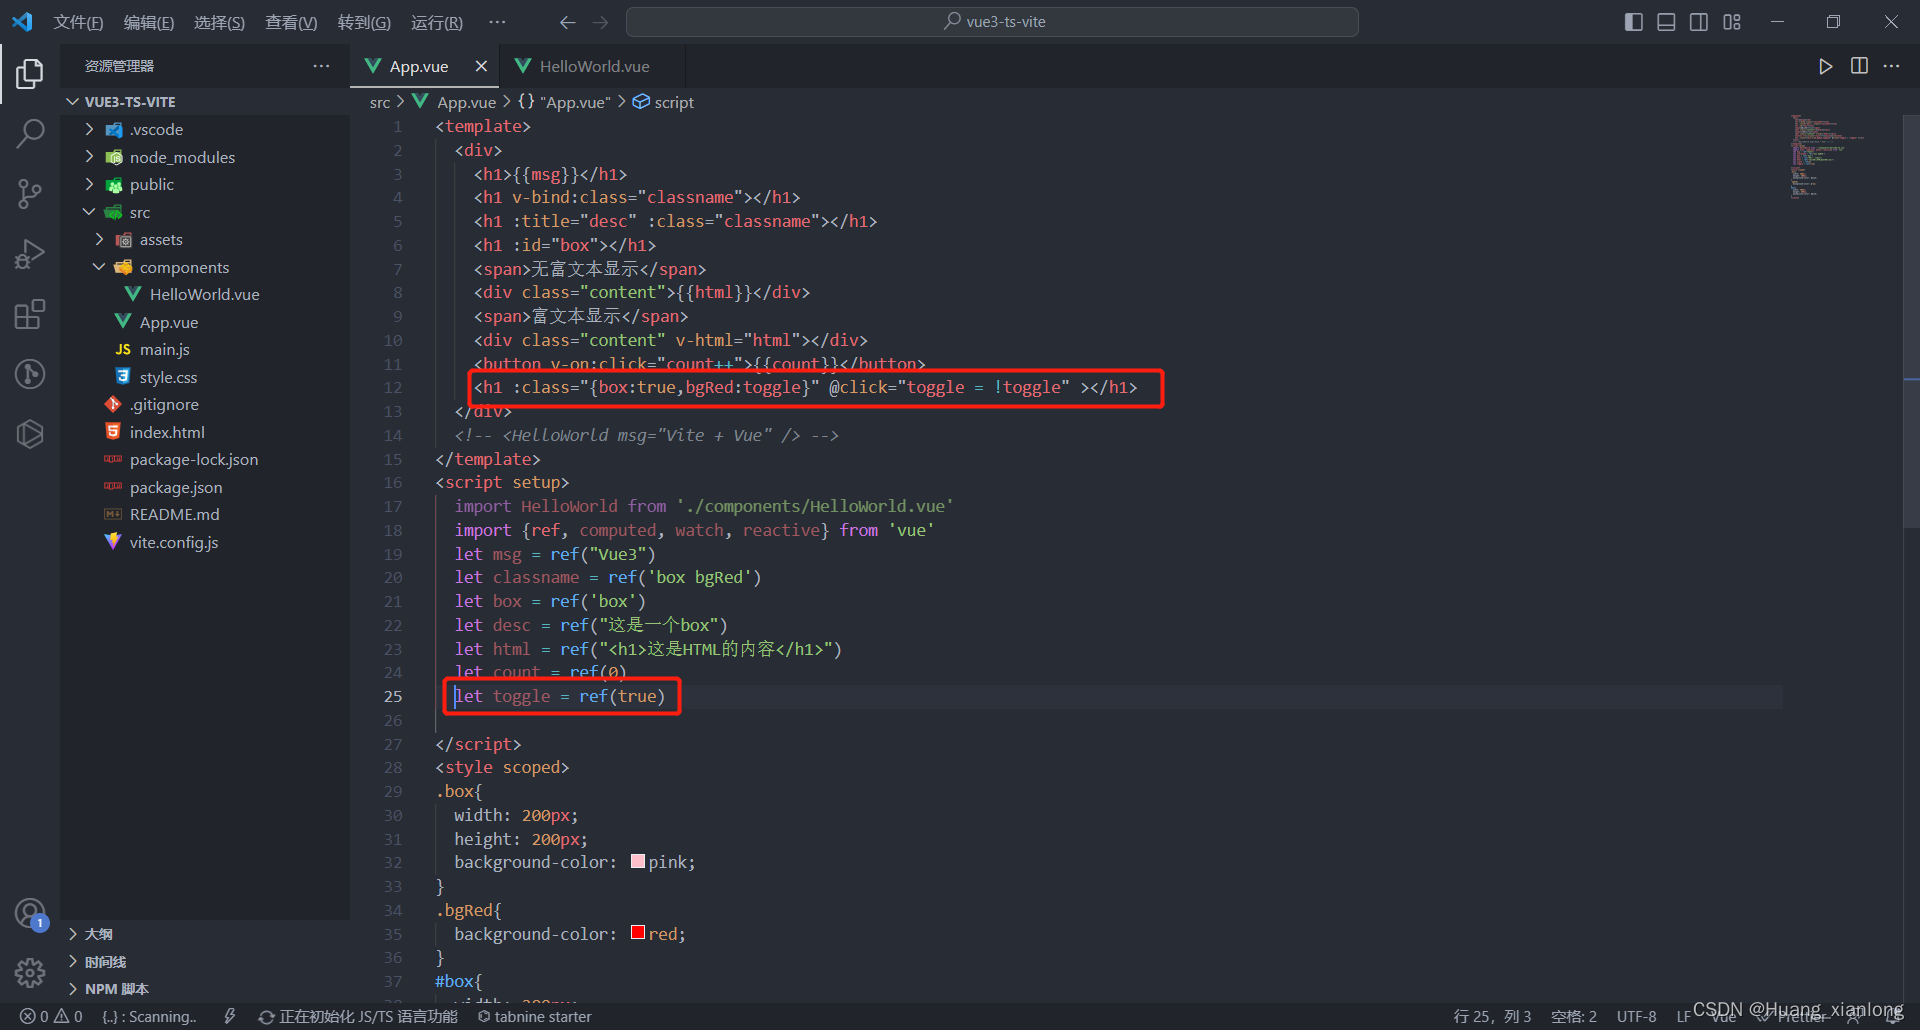
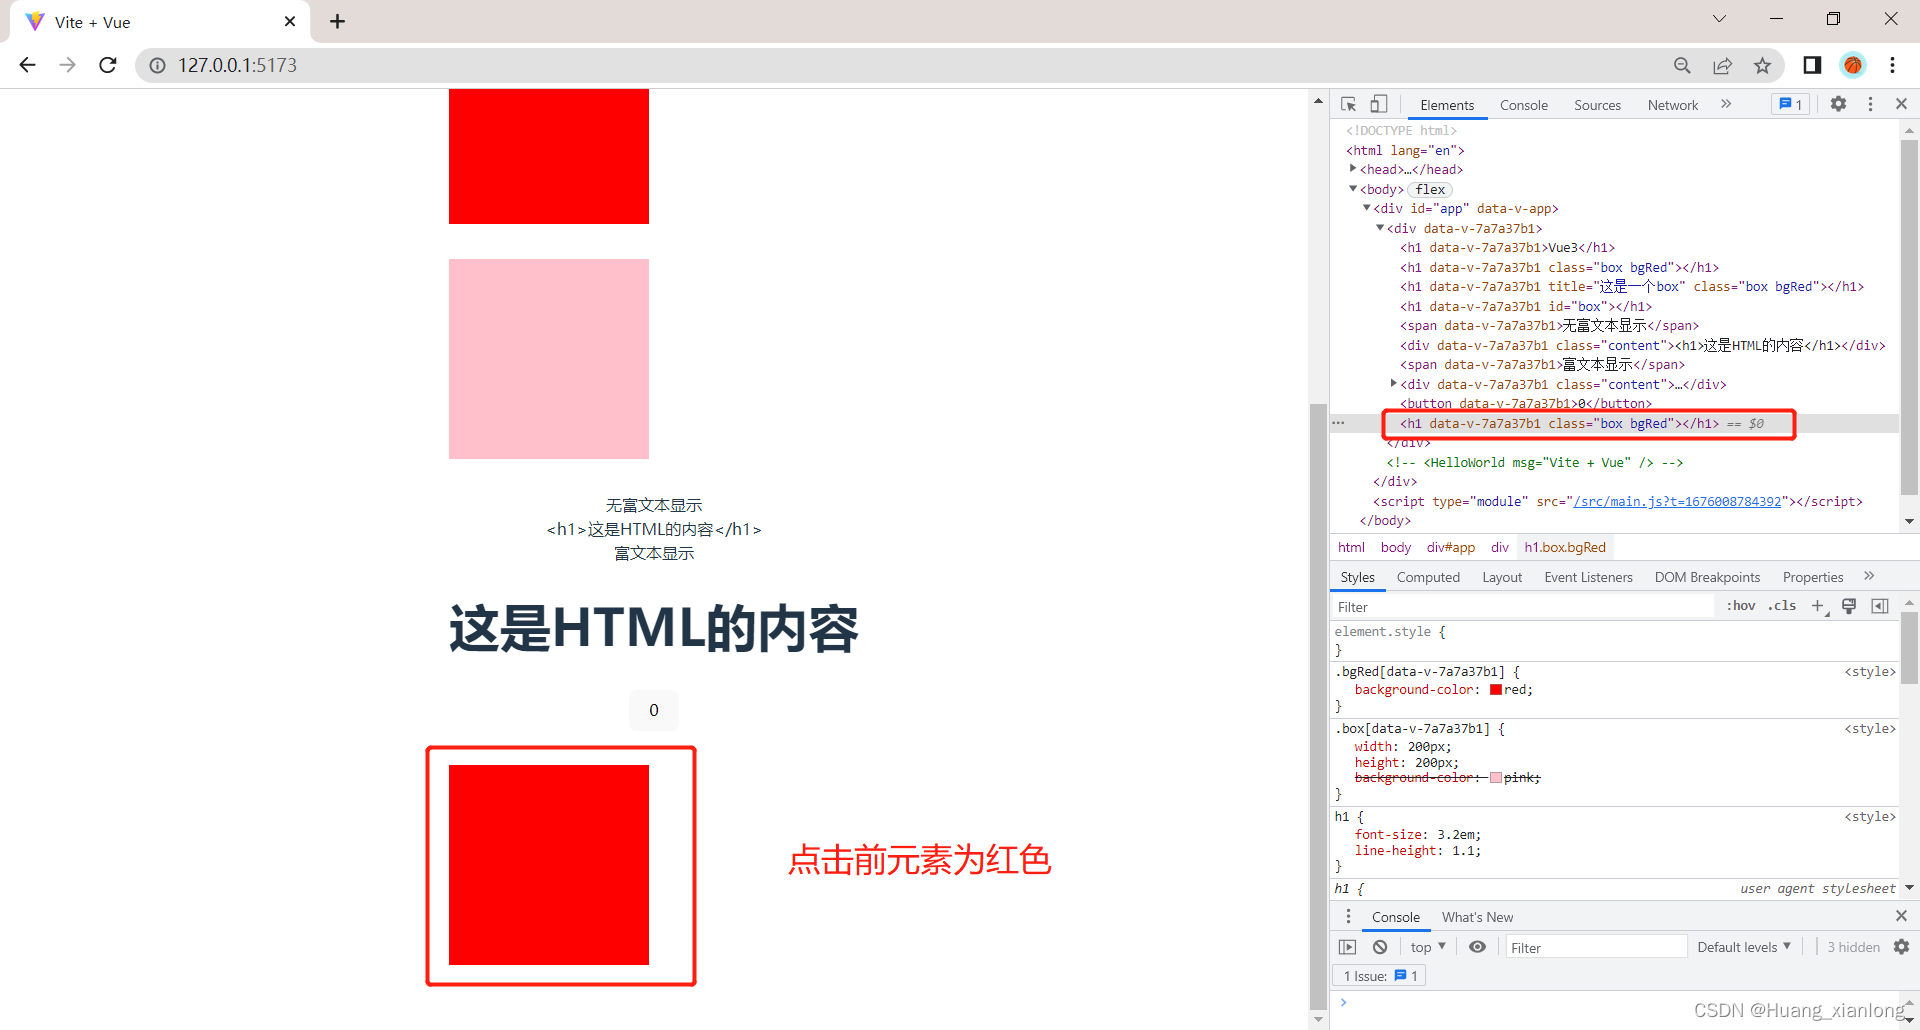
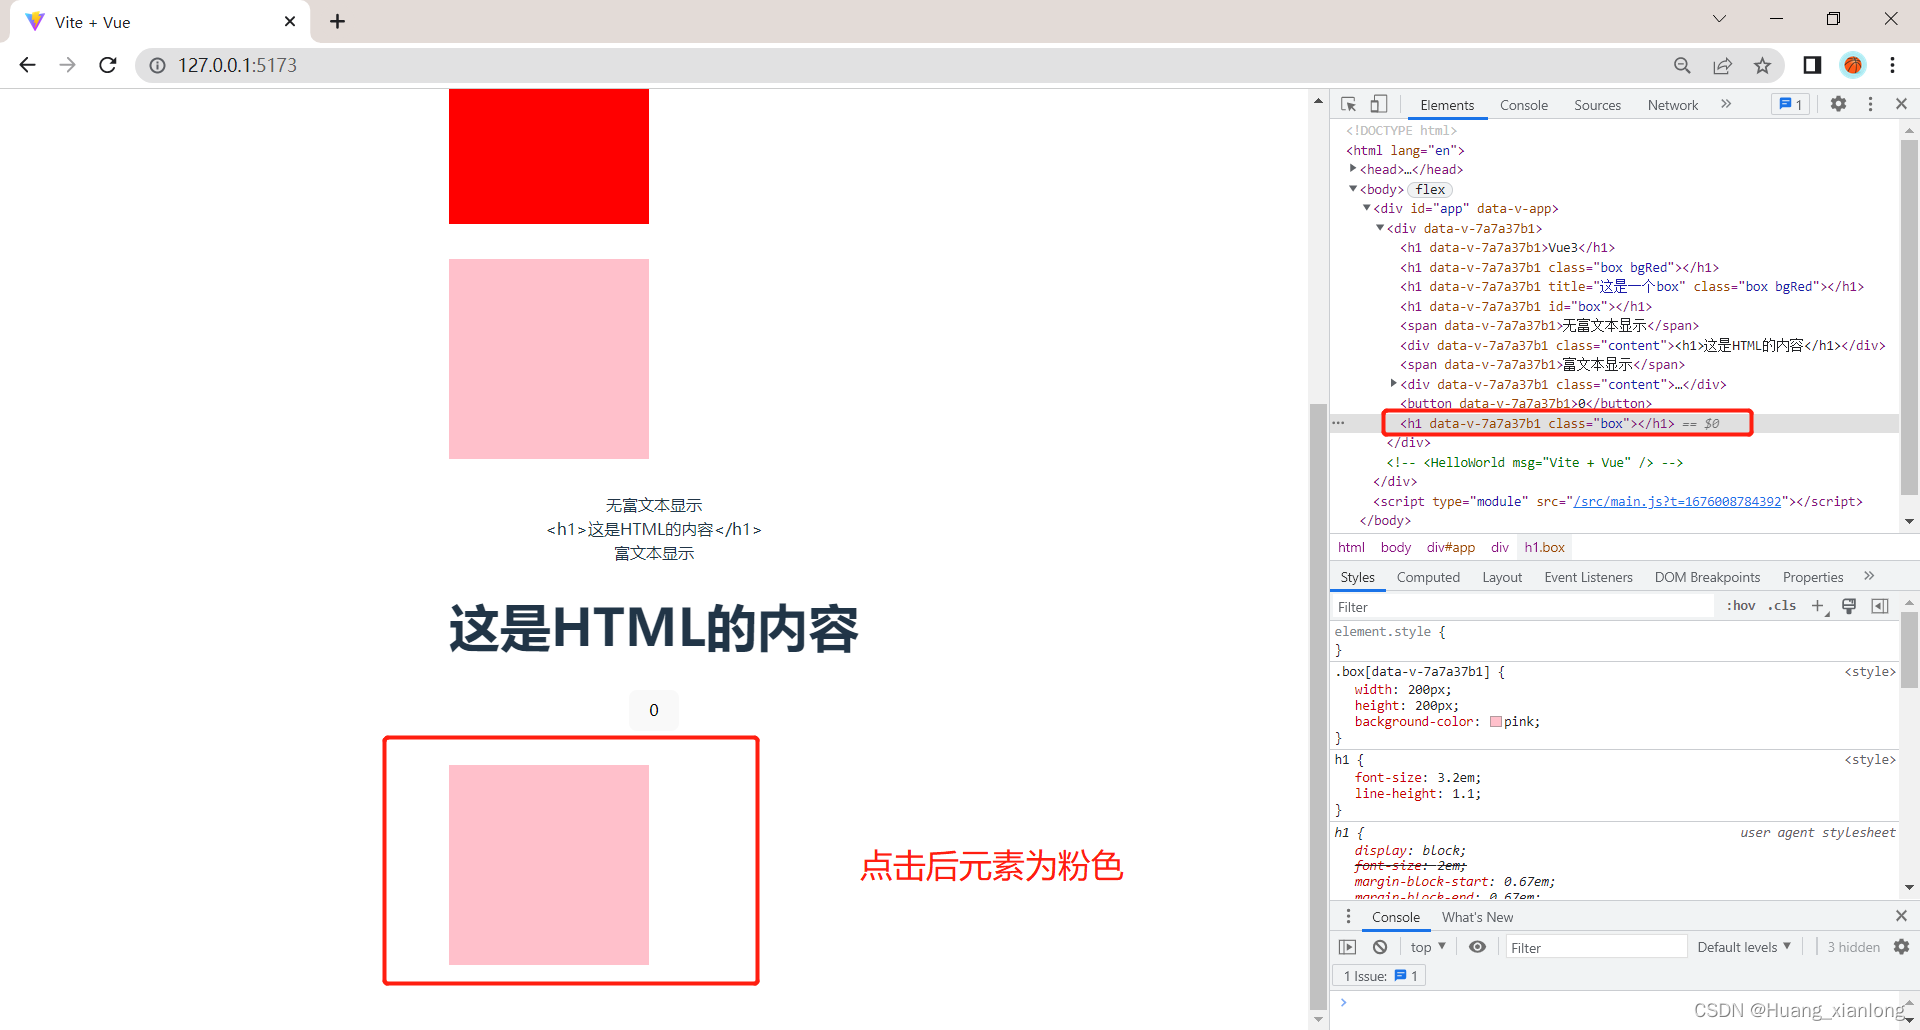
 8.6、点击切换样式
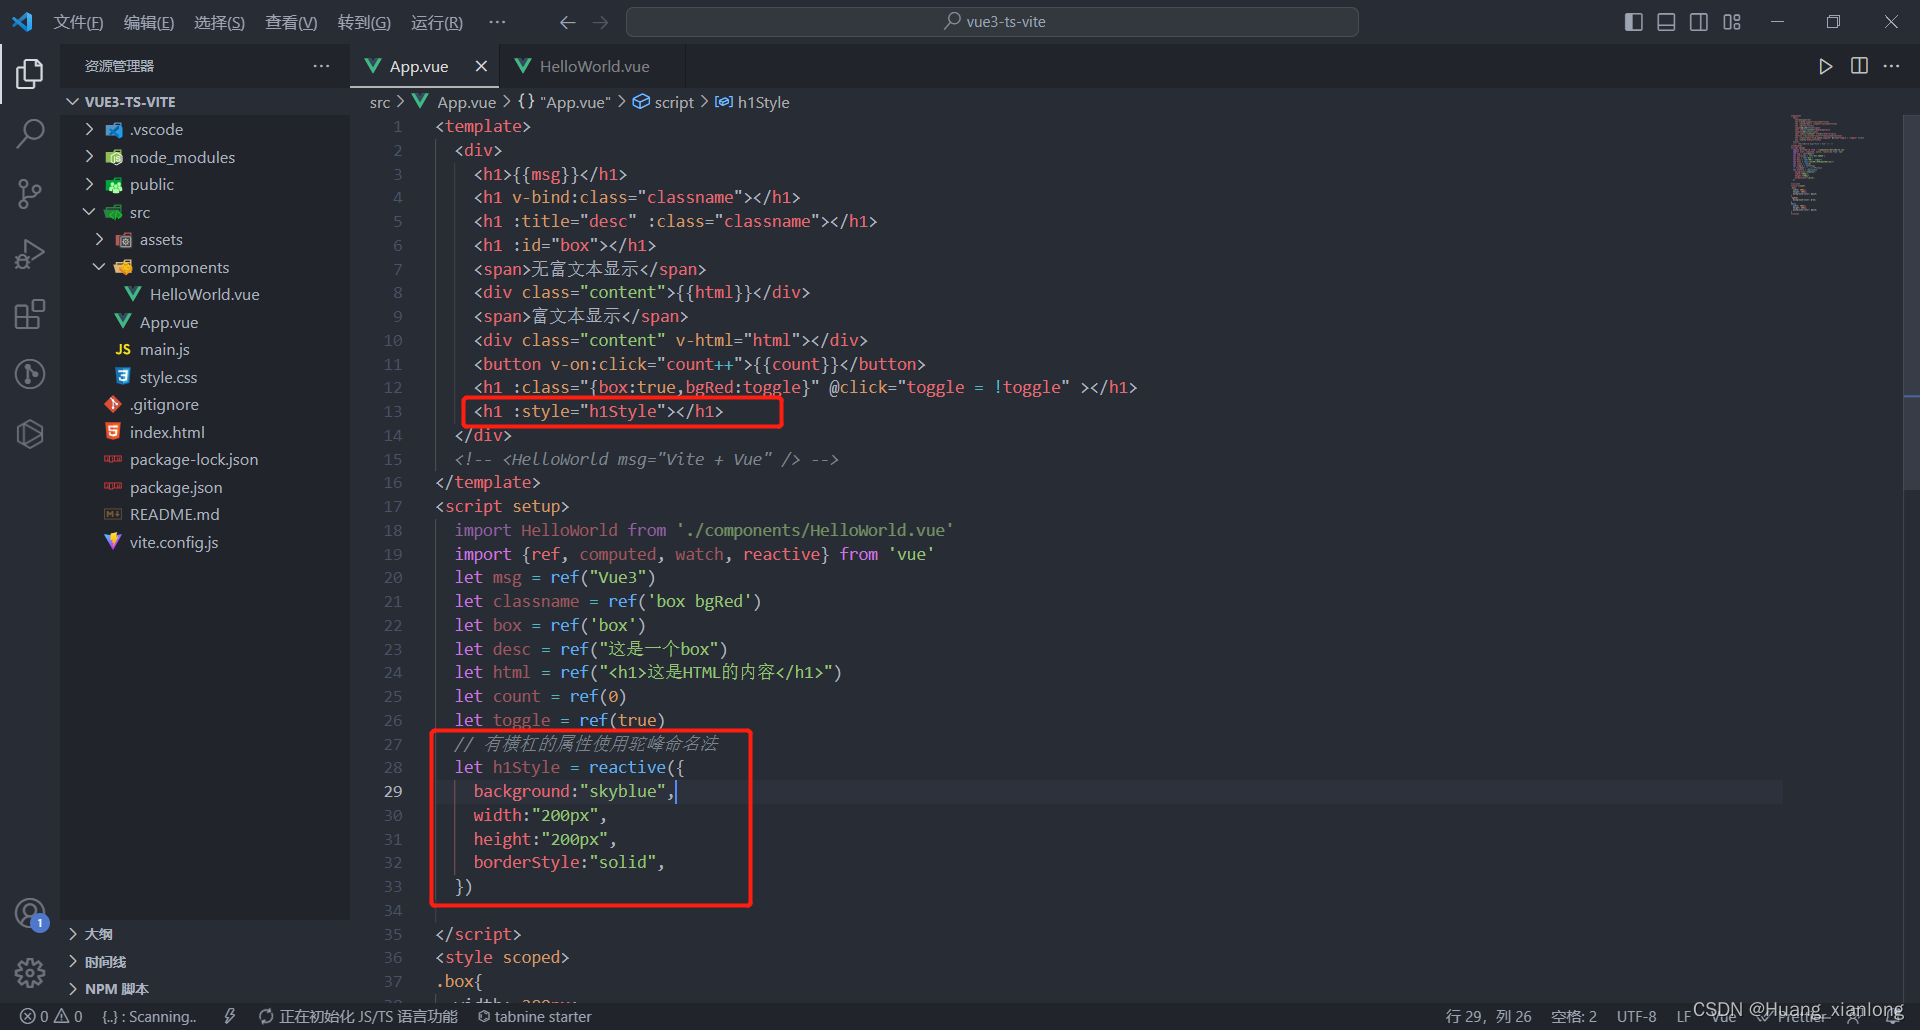
8.7、:style
使用:style写的样式为行内样式
9、Vue父子组件数据传递Props
9.2 设置父组件给子组件传递数据


10、Vue3自定义事件
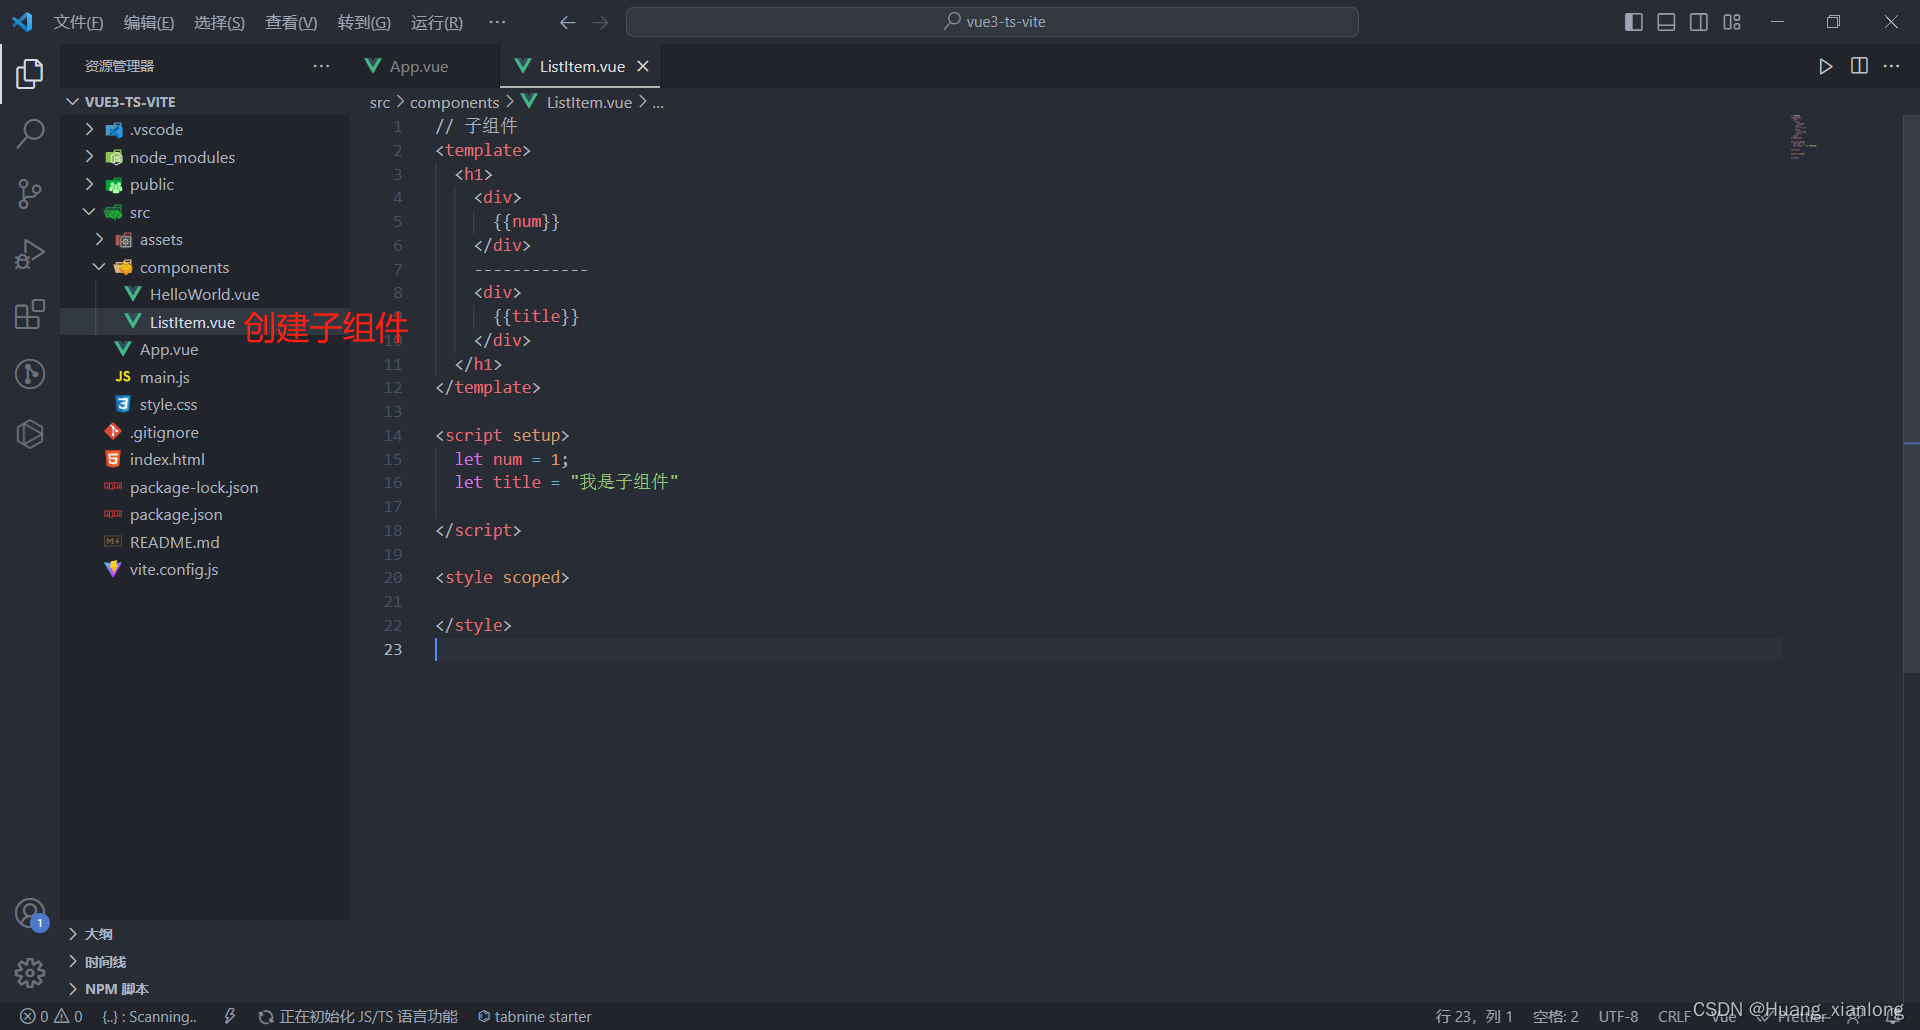
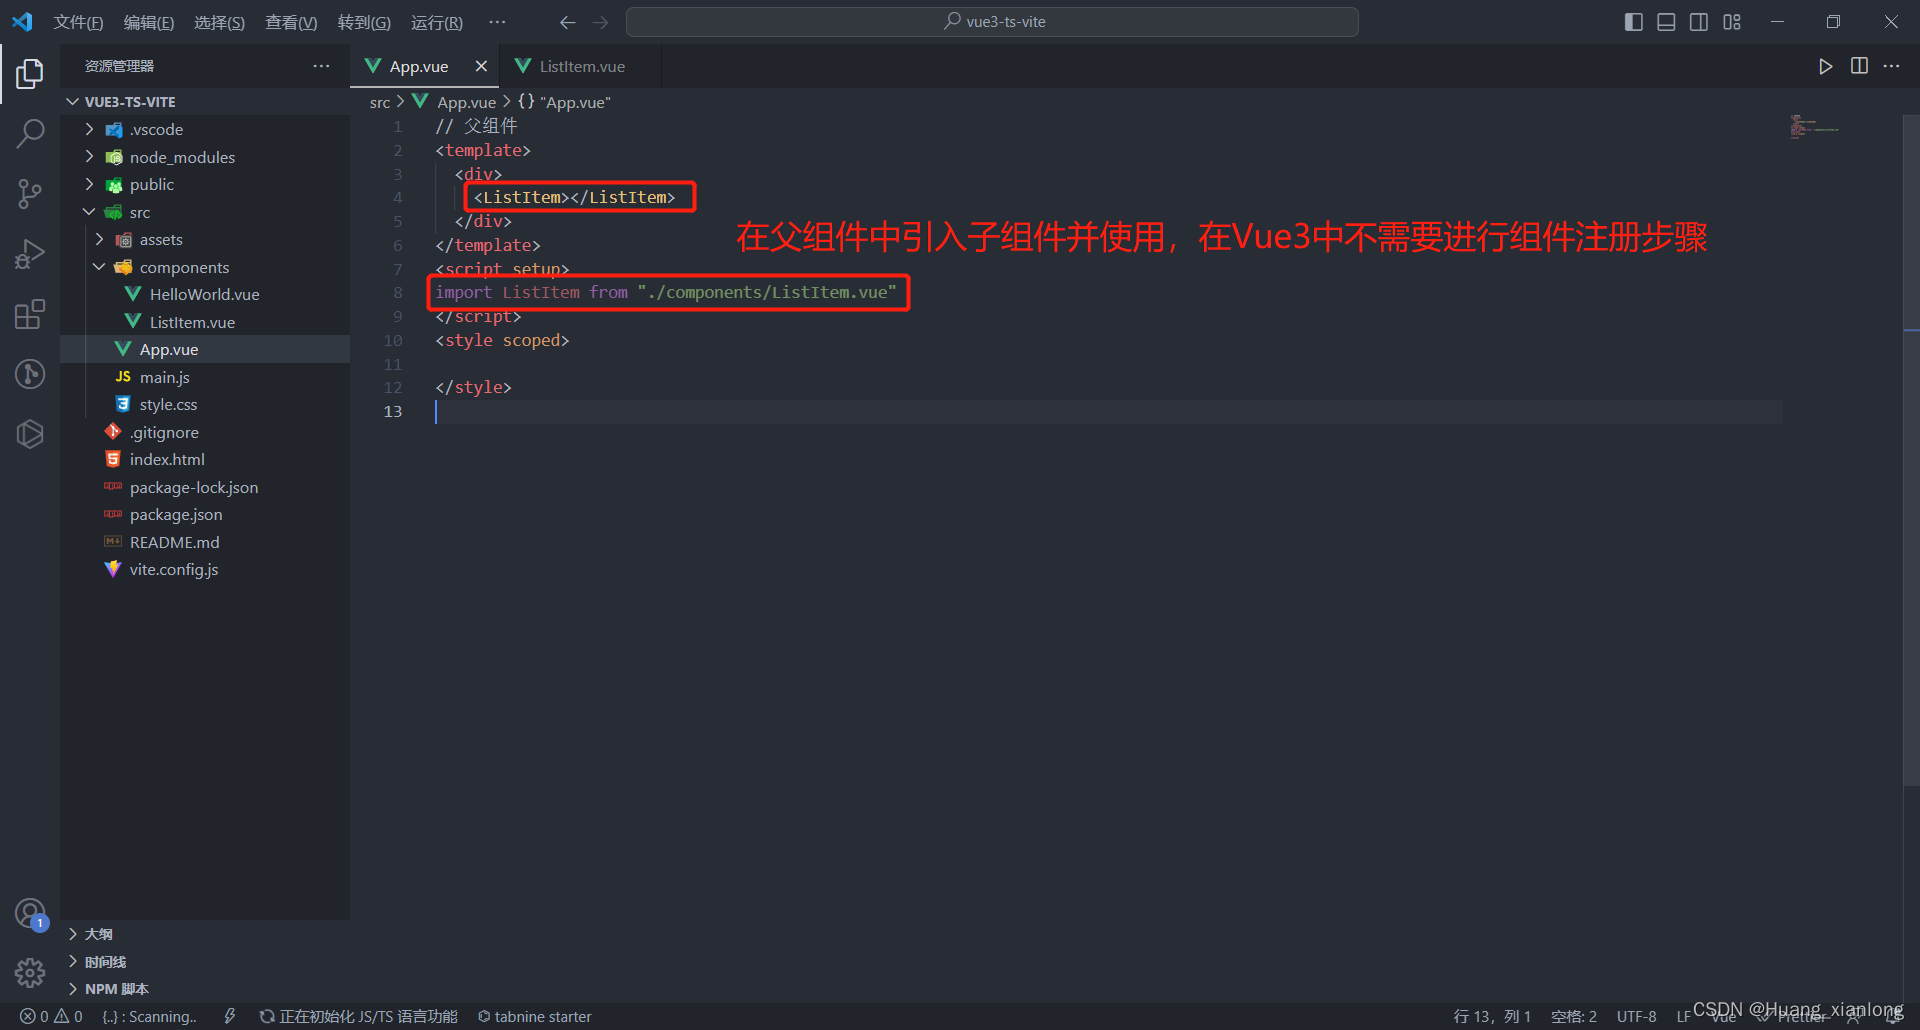
10.1 定义子组件在父组件当中引用(父组件的数据传递给子组件)
子组件当中定义事件
// 子组件
<template>
  <h1 @click="sendRead">
    <span>
      {{ props.num }}
    </span>
    ---------
    <span>
      {{ props.title }}
    </span>
    <br />
    article
    <span>
      {{ props.article.num }}
    </span>
    ---------
    <span>
      {{ props.article.title }}
    </span>
  </h1>
</template>

<script setup>
import { defineProps, defineEmits } from "vue";
const props = defineProps({
  num: Number,
  title: String,
  article: Object,
});

const emit = defineEmits(["finishRead", "reading"]);

function sendRead() {
  emit("finishRead");
}
</script>

<style scoped>
</style>
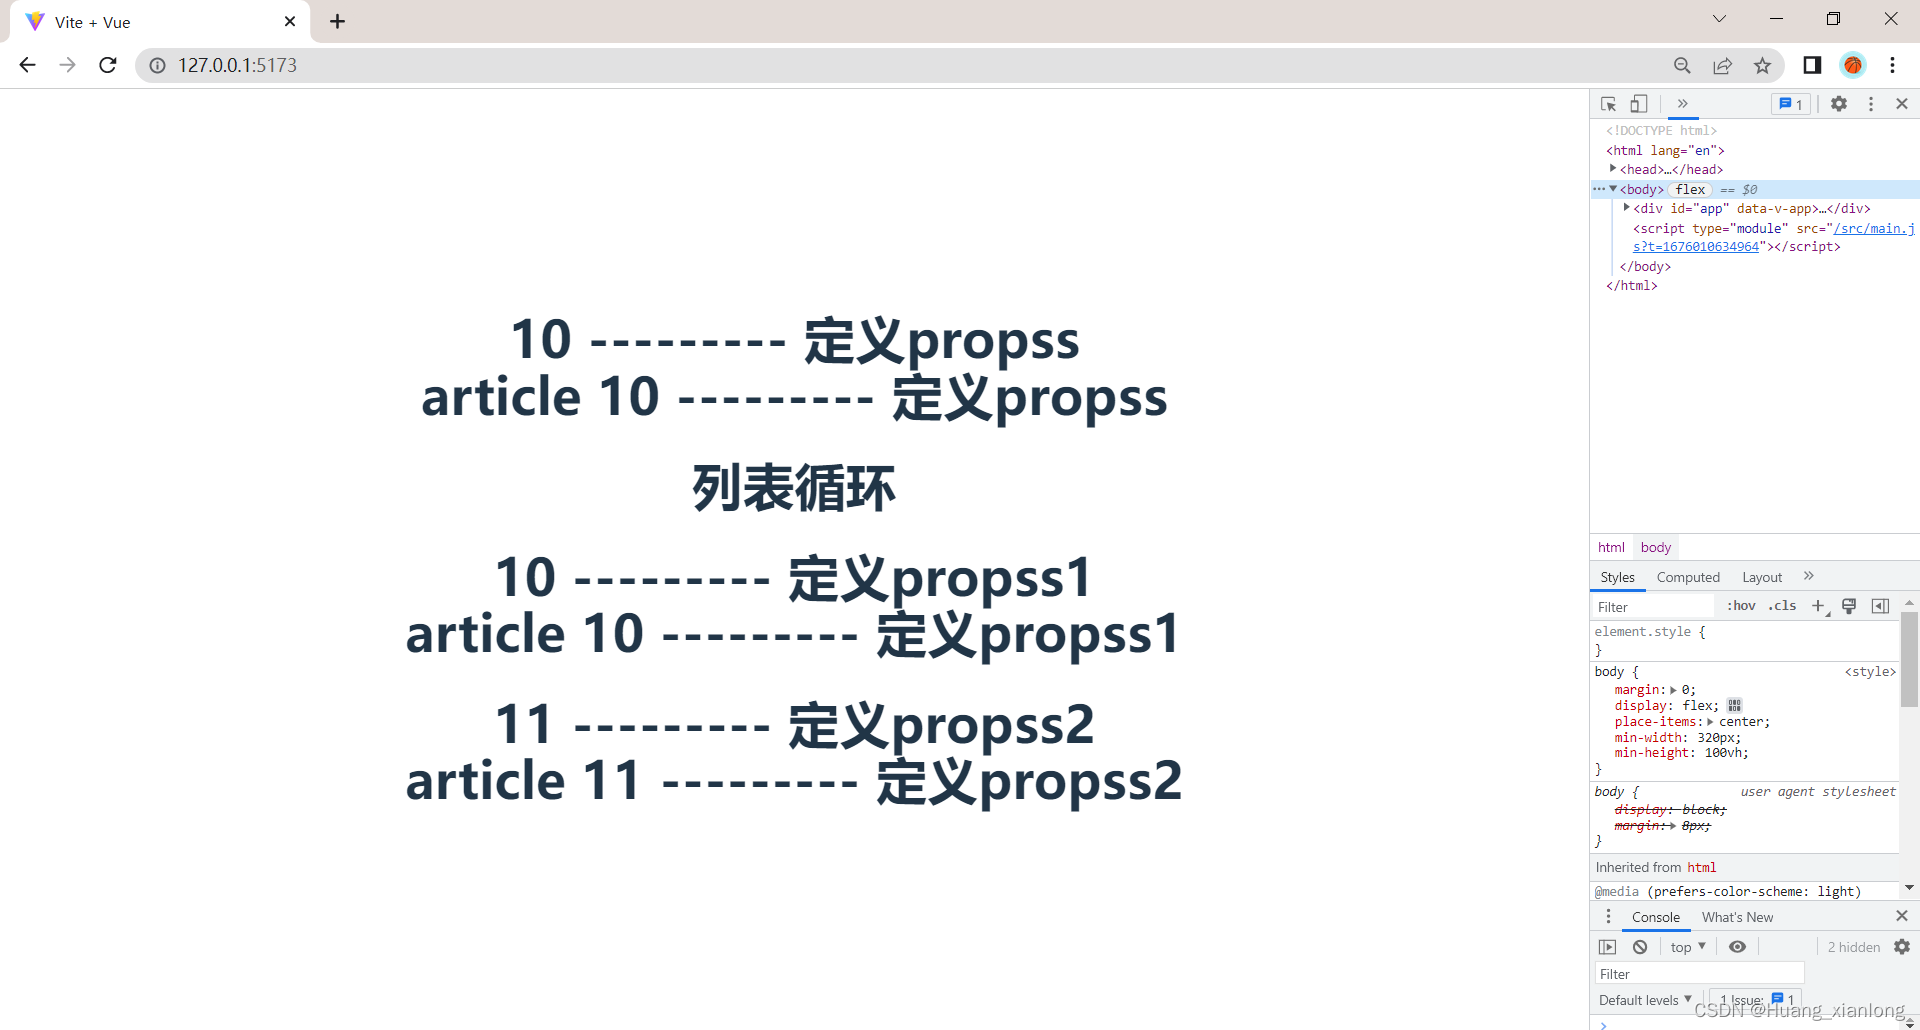
父组件接受事件
// 父组件
<template>
  <div>
    <ListItem
      :num="article.num"
      :title="article.title"
      :article="article"
    ></ListItem>
    <h1>列表循环</h1>
    <ListItem
      :num="item.num"
      :title="item.title"
      :article="item"
      v-for="item in articleList"
      :key="item.num"
      @finishRead="changeTitle(item)"
    >
    </ListItem>
  </div>
</template>
<script setup>
import ListItem from "./components/ListItem.vue";
import { reactive } from "vue";
let article = reactive({
  num: 10,
  title: "定义propss",
});
let articleList = reactive([
  {
    num: 10,
    title: "定义propss1",
  },
  {
    num: 11,
    title: "定义propss2",
  },
]);

function changeTitle(item) {
  console.log(item);
  item.title += "【已读】";
}
</script>
<style scoped>
</style>
点击前

点击后

10.2 定义子组件在父组件当中引用(子组件的数据传递给父组件)

11、Vue3路由
vue的vue-router是基于路由和组件的,路由用于设定访问路径, 将路径和组件映射起来,在vue-router的单页面应用中, 页面的路径的改变就是组件的切换。
11.1 安装路由
npm install vue-router@411.2 路由的使用步骤和基本使用流程
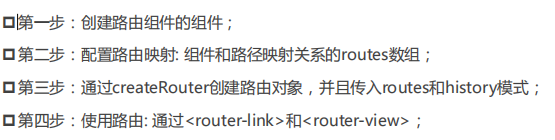
路由的基本使用流程
router.js
// history模式
import {
    createRouter,
    createWebHashHistory,
} from 'vue-router'

import Home from '../pages/Home.vue'
import About from '../pages/About.vue'

const routes = [
// 路由的默认路径
    {
        path:'/',
        redirect:"/home"
    },
    {
        path: '/home',
        component: Home
    },
    {
        path: '/about',
        component: About
    },
]

// 创建路由对象
const router = createRouter({
    history: createWebHashHistory(),
    routes
})
export default router;
main.js
import {
    createApp
} from 'vue'
import App from './App.vue'
import router from './router'
createApp(App).use(router).mount('#app')
App.js
<template>
  <div>
    <router-link to="/home">home</router-link>
    <router-link to="/about">about</router-link>
    <keep-alive>
      <router-view></router-view>
    </keep-alive>
  </div>
</template>

<script>
export default {
  name: "App",
  components: {},
};
</script>

<style>
</style>
11.3 路由懒加载
如果我们能把不同路由对应的组件分割成不同的代码块,然后当路由被访问的时候才加载对应组件,这样就会更加高效;
这里可以使用webpack的分包知识,而Vue Router默认就支持动态来导入组件;
这是因为component可以传入一个组件,也可以接收一个函数,该函数 需要放回一个Promise;
而import函数就是返回一个Promise;
const routes = [{
    path: '/',
    redirect: "/home"
  },
  {
    path: '/home',
    component: () => import('../pages/Home.vue')
  },
  {
    path: '/about',
    component: () => import('../pages/About.vue')
  },
]
我们会发现分包是没有一个很明确的名称的,其实webpack从3.x开始支持对分包进行命名(chunk name):
const routes = [{
    path: '/',
    redirect: "/home"
  },
  {
    path: '/home',
    component: () => import(/* webpackChunkName:"home-chunk"*/'../pages/Home.vue')
  },
  {
    path: '/about',
    component: () => import(/* webpackChunkName:"about-chunk"*/'../pages/About.vue')
  },
]
11.4 动态路由基本匹配
很多时候我们需要将给定匹配模式的路由映射到同一个组件:
在Vue Router中,我们可以在路径中使用一个动态字段来实现,我们称之为 路径参数
{
        path: “/user/:id”,
        component: () => import(’…/pages/user.vue’)
}
在router-link中进行如下跳转:
<router-link to="/user/123">user</router-link>
获取路由的值
在setup中,我们要使用 vue-router库给我们提供的一个hook useRoute;
<template>
  <div>{{ route.params }}</div>
</template>

<script>
import { useRoute } from "vue-router";
export default {
  setup() {
    const route = useRoute();

    return { route };
  },
};
</script>

<style lang="scss" scoped>
</style>
NotFound
对于哪些没有匹配到的路由,我们通常会匹配到固定的某个页面
- 比如NotFound的错误页面中,这个时候我们可编写一个动态路由用于匹配所有的页面;
{
    path: '/:pathMatch(.*)',
    component: () => import('../pages/NotFound.vue')
}
我们可以通过 $route.params.pathMatch获取到传入的参数:
{{ $route.params.pathMatch }}
匹配规则加*
*我在/:pathMatch(.*)后面又加了一个 ;
{
    path: '/:pathMatch(.*)*',
    component: () => import('../pages/NotFound.vue')
}
路由的嵌套
顾名思义是子路由,界面里面还有界面
{
    path: '/home',
    component: () => import( /* webpackChunkName:"home-chunk"*/ '../pages/Home.vue'),
    children: [{
        path:'',
        redirect:'/home/product'
    },{
        path:'product',
        component:()=>import('../pages/HomeProduct.vue')
    }]
},
代码的页面跳转
有时候我们希望通过代码来完成页面的跳转,比如点击的是一个按钮
junpToProfile(){
    this.$router.push('/profile')
}
当然,我们也可以传入一个对象
junpToProfile(){
    this.$router.push({
        path:'/profile'
    })
}
如果是在setup中编写 的代码,那么我们需要通过useRouter来获取
const router = useRouter()
const junpToProfile = () => {
    router.replace('/profile')
}
query方式的参数
setup() {
    const router = useRouter();
    const jumpTo = () => {
      router.push({
        path: "/about",
        query: {
          name: "fuck",
        },
      });
    };
    return {jumpTo};
  },
在界面中通过 $route.query 来获取参数:
{{$route.query}}
替换当前的位置
使用push的特点是压入一个新的页面,那么在用户点击返回时,上一个页面还可以回退,但是如果我们希望当前
页面是一个替换操作,那么可以使用replace:
<router-link to="/home/product" replace="">子界面</router-link>
页面的前进后退

router-link的v-slot
在vue-router3.x的时候,router-link有一个tag属性,可以决定router-link到底渲染成什么元素:
但是在vue-router4.x开始,该属性被移除了;
而给我们提供了更加具有灵活性的v-slot的方式来定制渲染的内容;
我们使用v-slot来作用域插槽来获取内部传给我们的值:
href:解析后的 URL;
route:解析后的规范化的route对象;
navigate:触发导航的函数;
isActive:是否匹配的状态;
isExactActive:是否是精准匹配的状态;
<!-- props: href 跳转的链接 -->
<!-- props: route对象 -->
<!-- props: navigate导航函数 -->
<!-- props: isActive 是否当前处于活跃的状态 -->
<!-- props: isExactActive 是否当前处于精确的活跃状态 -->
<router-link to="/home" v-slot="props">
  <p @click="props.navigate">{{ props.href }}</p>
  <span :class="{ active: props.isActive }">{{ props.isActive }}</span>
  <span :class="{ active: props.isActive }">{{ props.isExactActive }}</span>
</router-link>
router-view的v-slot
router-view也提供给我们一个插槽,可以用于 和 组件来包裹你的路由组件:
Component:要渲染的组件;
route:解析出的标准化路由对象;
动态添加路由
某些情况下我们可能需要动态的来添加路由:
如果我们是为route添加一个children路由,那么可以传入对应的name:
// 创建路由对象
const router = createRouter({
    history: createWebHashHistory(),
    routes
})
const categoryA = { //接口返回路由信息
    path: '/category',
    name: 'category',
    component: () => category
};
router.addRoute("category", {
    path: '/child',
    name: 'child',
    component: () => import('../newpage/child.vue')
})
11.5 动态删除路由
删除路由有以下三种方式:
方式一:添加一个name相同的路由;
方式二:通过removeRoute方法,传入路由的名称;
方式三:通过addRoute方法的返回值回调;
路由导航守卫
vue-router 提供的导航守卫主要用来通过跳转或取消的方式守卫导航。
全局的前置守卫beforeEach是在导航触发时会被回调的:
它有两个参数:to:即将进入的路由Route对象;from:即将离开的路由Route对象;
它有返回值:false:取消当前导航;不返回或者undefined:进行默认导航;
返回一个路由地址:可以是一个string类型的路径;可以是一个对象,对象中包含path、query、params等信息;
可选的第三个参数:next
在Vue2中我们是通过next函数来决定如何进行跳转的;
但是在Vue3中我们是通过返回值来控制的,不再推荐使用next函数,这是因为开发中很容易调用多次next;
router.beforeEach((to, from) => {
    console.log('to', to)
    console.log('from', from)
    if (to.path !== '/about') {
        const token = localStorage.setItem('token', 'qwer')
        if (!token) {
            return '/about'
        }
    }
})
12、 Vue3中vuex的基本使用
12.1 基本结构
src/store/index.js中,代码如下
// vue3中创建store实例对象的方法createStore()按需引入
import { createStore } from 'vuex'

export default createStore({
  state: {
  },
  mutations: {
  },
  actions: {
  },
  getters: {
  },
  modules: {
  }
})
12.2 基本使用
src/store/index.js
import { createStore } from 'vuex'

export default createStore({
  state: {
    info: 'hello'
  },
  mutations: {
    // 定义mutations,用于修改状态(同步)
    updateInfo (state, payload) {
      state.info = payload
    }
  },
  actions: {
    // 定义actions,用于修改状态(异步)
    // 2秒后更新状态
    updateInfo (context, payload) {
      setTimeout(() => {
        context.commit('updateInfo', payload)
      }, 2000)
    }
  },
  getters: {
    // 定义一个getters
    formatInfo (state) {
      return state.info + ' Tom'
    }
  },
  modules: {
  }
})
src/views/Test.vue测试组件中对store中数据的操作与使用
<template>
  <div>测试组件</div>
  <hr>
  <!-- 页面中直接使用渲染时与vue2中的使用方法相同 -->
  <div>获取Store中的state、getters: {{$store.getters.formatInfo}}</div>
  <button @click='handleClick'>点击</button>
</template>

<script>
// 按需引入useStore()方法
import { useStore } from 'vuex'

export default {
  name: 'Test',
  setup () {
    // this.$store.state.info
    // Vue3中store类似于Vue2中this.$store
    // useStore()方法创建store对象,相当于src/store/index.js中的store实例对象
    const store = useStore()
    console.log(store.state.info) // hello
    // 修改info的值
    const handleClick = () => {
      // 触发mutations,用于同步修改state的信息
      // store.commit('updateInfo', 'nihao')
      // 触发actions,用于异步修改state的信息
      store.dispatch('updateInfo', 'hi')
    }
    return { handleClick }
  }
}
</script>
12.3 将store中的数据模块化后的使用
1. 模块化
基于原index.js代码进行改造拆分,假设有两个模块global和user,新建src/store/modules/global.js 、src/store/modules/user.js文件
拆分后代码如下(src/store/modules/global.js)
// 全局store,存放全局使用共享的数据
export default { // 注意:全局模块中不需要开启命名空间
  state: {
  },
  mutations: {
  },
  actions: {
  },
  getters: {
  }
}
拆分后代码如下(src/store/modules/user.js)
// 用户信息模块(局部模块)
export default {
  namespaced: true, // 开启命名空间
  state () {
    return {
      // 用户信息对象
      profile: {
        id: '',
        avatar: '',
        nickname: 'yee',
        account: '',
        mobile: '',
        token: ''
      }
    }
  },
  mutations: {
    // 定义mutations,用于同步修改状态
    updateNickname (state, payload) {
      state.profile.nickname = payload
    }
  },
  actions: {
    // 定义actions,用于异步修改状态
    // 2秒后更新状态
    updateNickname (context, payload) {
      setTimeout(() => {
        context.commit('updateNickname', payload)
      }, 2000)
    }
  },
  getters: {
    // 定义一个getters
    formatNickname (state) {
      return 'Hi ' + state.profile.nickname
    }
  }
}
拆分后代码如下(src/store/index.js)
import { createStore } from 'vuex'
// 全局模块
import global from './modules/global'
// 局部模块
import user from './modules/user'

export default createStore({
  // 全局模块
  ...global,
  // 局部模块
  modules: {
    user
  }
})
2.使用
src/views/Test.vue测试组件中对模块化后的store中数据的操作与使用
<template>
  <div>测试组件</div>
  <hr>
  <div>获取Store中user模块的getters: {{$store.getters['user/formatNickname']}}</div>
  <button @click='handleClick'>点击</button>
</template>

<script>
import { useStore } from 'vuex'

export default {
  name: 'Test',
  setup () {
    // this.$store.state.info
    // Vue3中store类似于Vue2中this.$store
    const store = useStore()
    console.log(store.state.user.profile.nickname)
    // 修改nickname的值
    const handleClick = () => {
      // 触发mutations,用于同步修改user模块state的信息
      // store.commit('updateNickname', 'Jackson')
      store.dispatch('user/updateNickname', 'Yee')
    }
    return { handleClick }
  }
}
</script>


 850
850


 被折叠的 条评论
为什么被折叠?
被折叠的 条评论
为什么被折叠?
 到【灌水乐园】发言


