


一、创建项目
- 创建项目
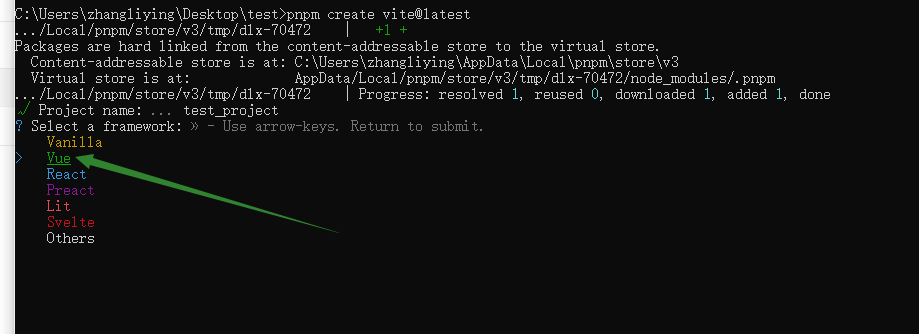
pnpm create vite@latest2.输入项目名称
Project name: » test_project3.选择vue
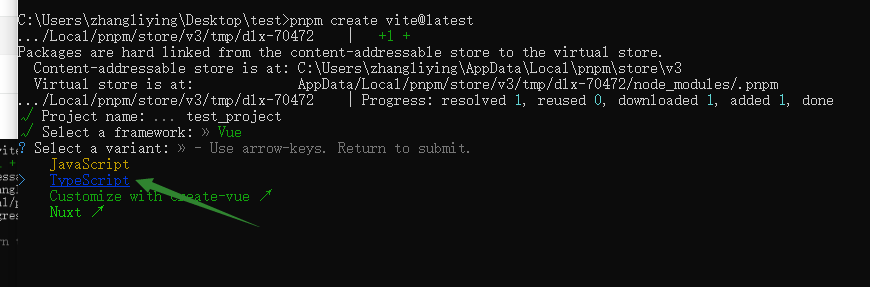
4.选择ts
- cd test_project进入这个项目
- pnpm install 安装依赖包
二、安装axios
1.安装axios命令
pnpm install axios --save2.在src下 创建utils => request.ts
import axios from "axios";

const request = axios.create({
  baseURL:`http://rap2api.taobao.org/app/mock/274612/`
});

// 请求拦截 interceptors 拦截器
request.interceptors.request.use((config) => {
  console.log(`请求拦截`, config);
  return config;
});

// 响应拦截
request.interceptors.response.use((res: any) => {
  console.log(`响应拦截`, res);
  return res;
});

export default request;
3.在src下创建 => api =>index.ts
import request from "../utils/request";

export const getList = (params: any) => {
  return request({
    url: "/getlist",
    method: "get",
    params,
  });
};
APP.vue
<script setup lang="ts">
import { getList } from "../src/api/index";
const getData = () => {
const params = {};
getList(params).then((res) => {
console.log(res);
});
};
</script>
<template>
<button @click="getData()">提交</button>
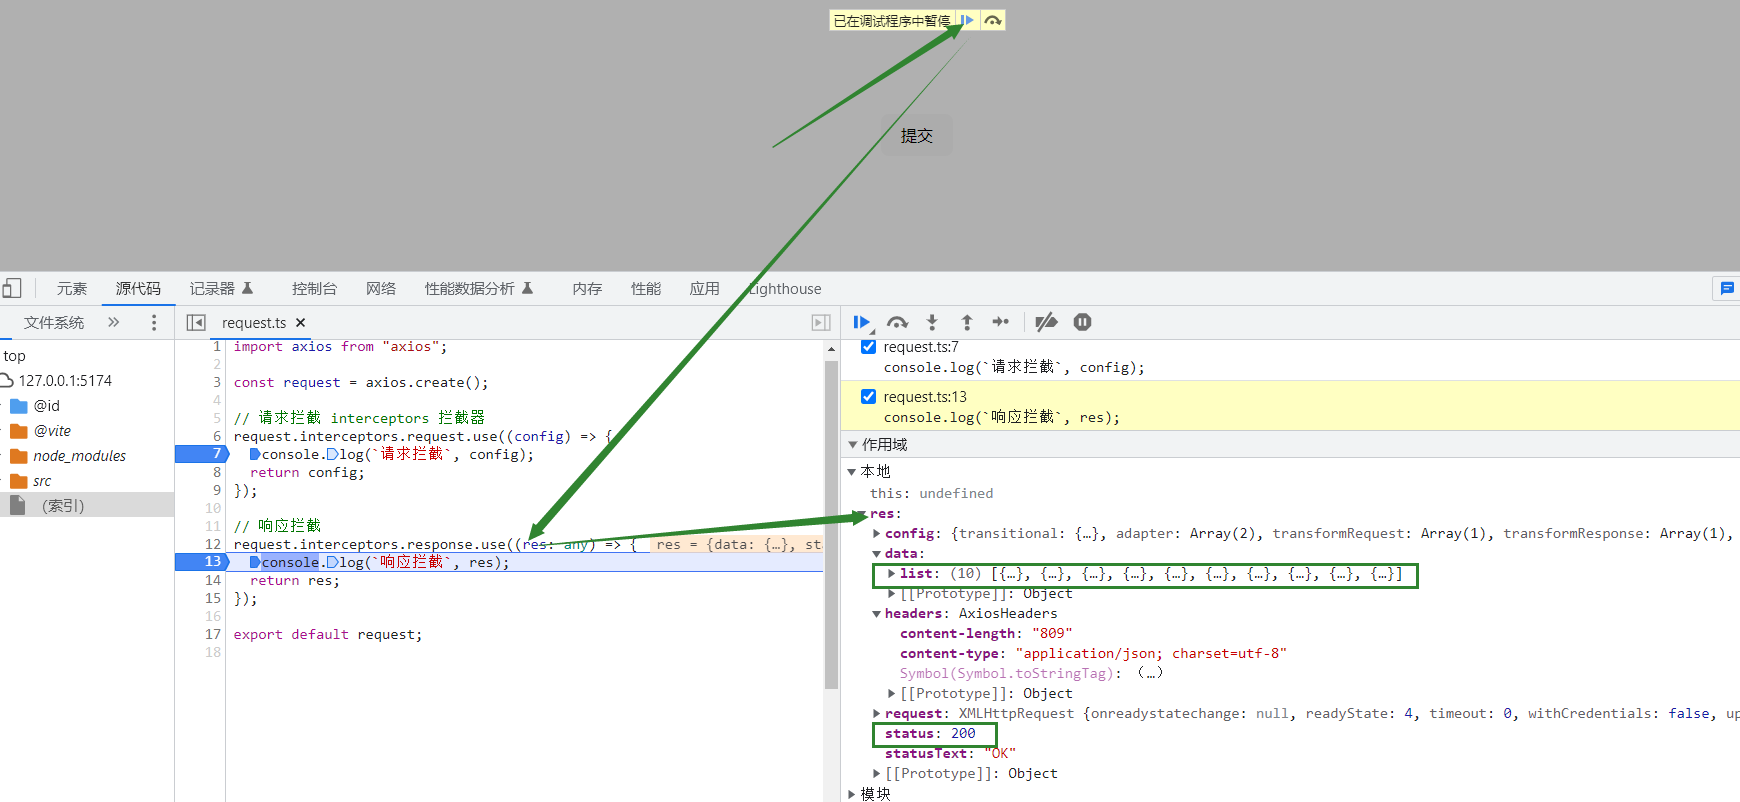
</template>调试:
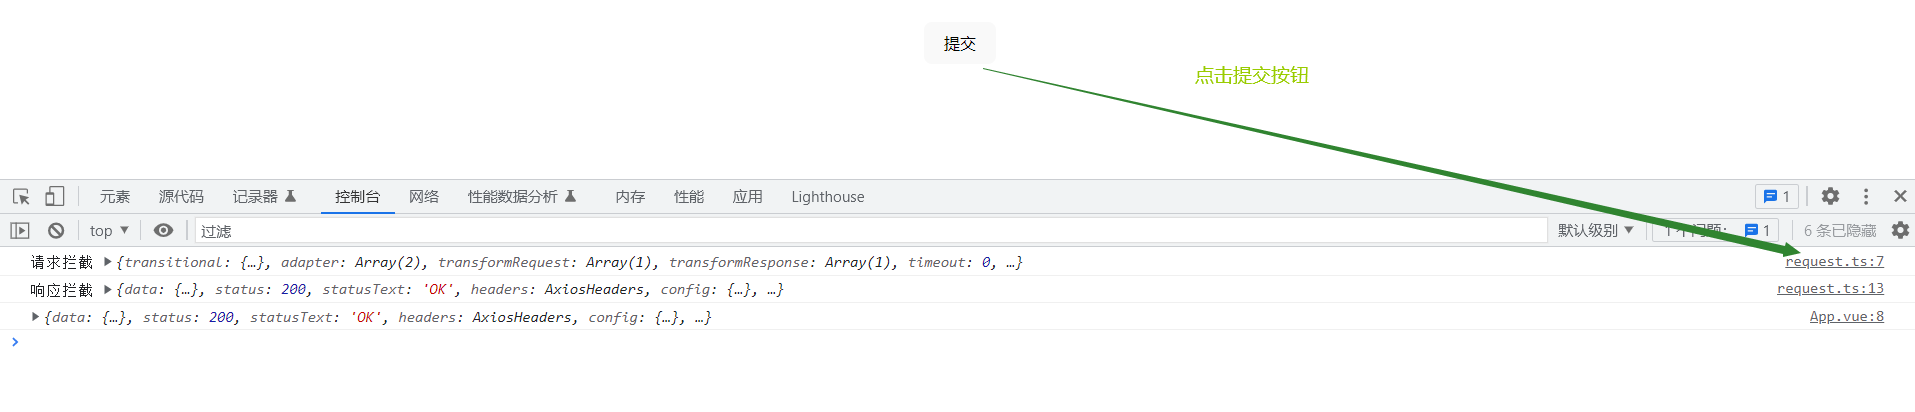
测试请求
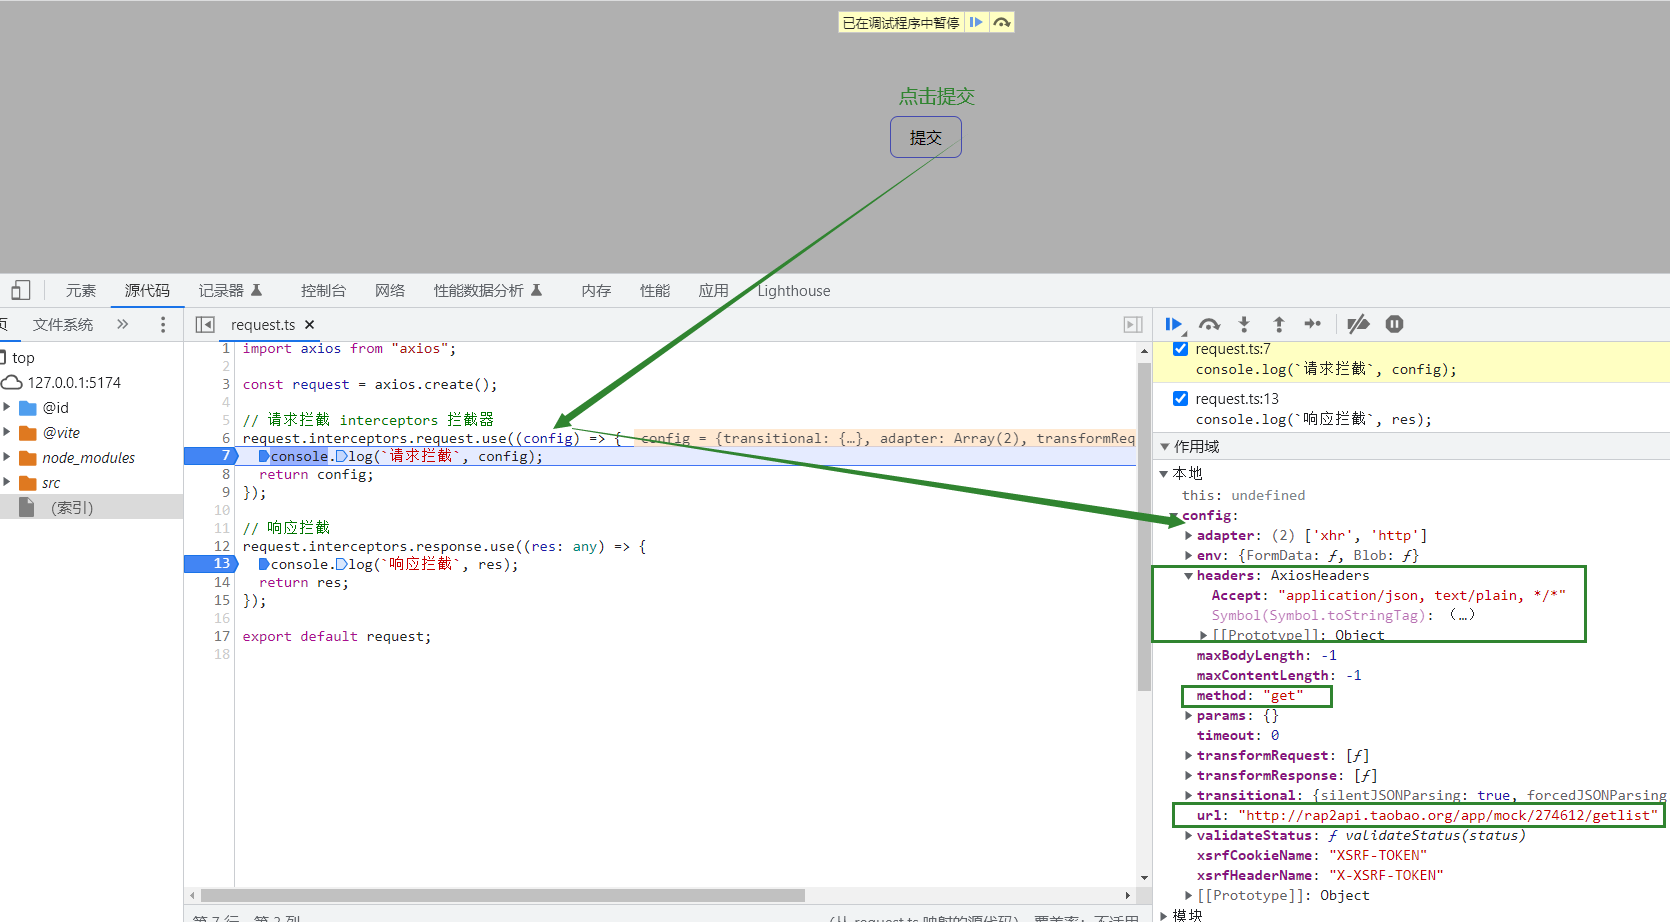
测试响应
三、安装路由
1.安装路由命令
pnpm install vue-router@42.在src下创建文件夹 router=>index.ts
import {createRouter,createMemoryHistory} from "vue-router"
const routes=[
{
  path:"/",
  redirect:"/down"
},{
  path:'/down',
  name:"down",
  component:()=>import('../views/Done/index.vue')
}
]
export const router=createRouter({
  history:createMemoryHistory(),
  routes,
})
3.在src下创建views => Down=>index.vue
<template>
 <div @click="add()">我是已办</div>
</template>

<script setup lang='ts'>
const add=()=>{
  console.log(`11`,111);

}
</script>
4.在main.ts中引入
import { createApp } from 'vue'
// 引入router
import { router } from "./router/index";

import './style.css'
import App from './App.vue'

//使用router
createApp(App).use(router).mount('#app')
5.在App.vue中提供出口
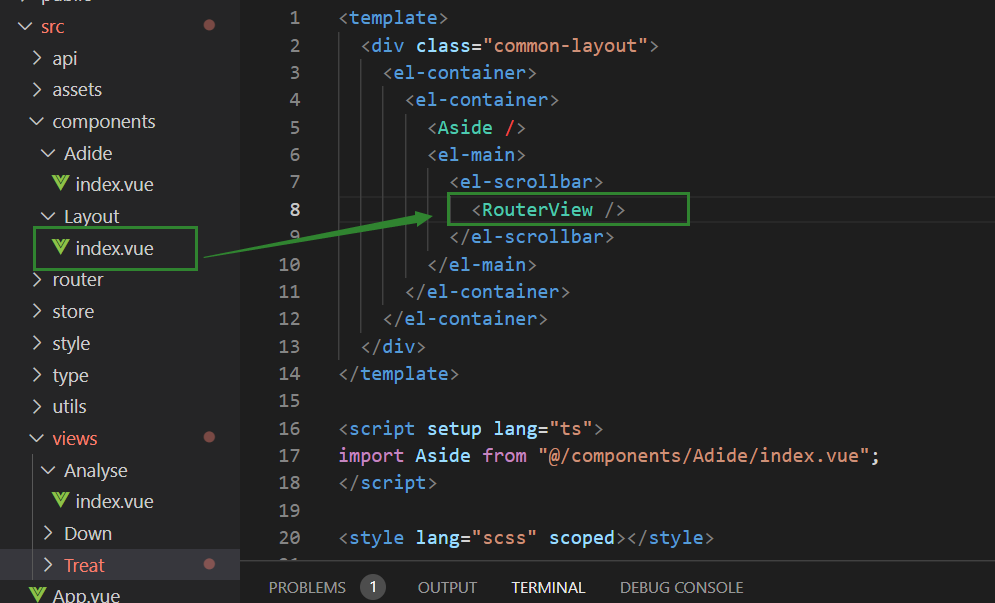
<template>
  <router-view></router-view>
</template>
四、安装element-plus
1.安装element-plus
pnpm install element-plus2.在main.ts中引入
import { createApp } from 'vue'

import { router } from "./router/index";

//引入element-plus
import ElementPlus from "element-plus";
import "element-plus/dist/index.css";

import './style.css'
import App from './App.vue'

//使用element-plus
createApp(App).use(router).use(ElementPlus).mount('#app')
3.任意文件测试
<button>提交</button>五、安装sass
pnpm add -D sass
pnpm add -D sass-loader
六、安装stroe
1.安装store
pnpm install pinia2.在stc下创建store文件=>index.ts
import { defineStore } from "pinia";

interface MainState {
  count: number;
}

export const useMain = defineStore("mainStore", {
  state: (): MainState => {
    return {
      count: 1,
    };
  },
  getters: {
    getCount: (state: any) => {
      return state.count;
    },
  },
  actions: {
    addCount() {
      this.count++;
    },
  },
});
3.在main.ts中引入
//pinia
import { createPinia } from "pinia";
const pinia = createPinia();

const app = createApp(App)
  .use(pinia)
  .mount("#app");
4.页面测试
import { useMain } from "../../store/index";
import { storeToRefs } from "pinia";

const main = useMain();
const { getCount } = storeToRefs(main);

// 获取数据
const getData = () => {
  main.addCount();
  const params = {};
  getList(params).then((res) => {
    console.log(res);
  });
};
七、安装vue-router
1.安装vue-router命令
pnpm install vue-router@42.在src下创建router=>index.ts
import { createRouter, createWebHashHistory } from "vue-router";

const routes = [
  {
    path: "/",
    redirect: "/analyse",
  },
  {
    path: "/",
    name: "Layout",
    component: () => import("@/components/Layout/index.vue"),
    children: [
      {
        path: "/analyse",
        component: () => import("@/views/Analyse/index.vue"),
      },
      {
        path: "/details:id",
        component: () => import("@/views/Treat/Details/index.vue"),
      },
    ],
  },
];

export const router = createRouter({
  history: createWebHashHistory(),
  routes,
});
3.在main.ts中引入
import { router } from "./router/index";

const app = createApp(App)
  .use(router)
  .mount("#app");
4.在App.vue中写入RouterView
<script setup lang="ts">
import { RouterView } from "vue-router";
</script>

<template>
  <RouterView />
</template>
5.在布局页面中输出视图


 264
264


 被折叠的 条评论
为什么被折叠?
被折叠的 条评论
为什么被折叠?
 到【灌水乐园】发言


