


相关链接:
Mysql官网:https://www.mysql.com/downloads/
下载地址:https://dev.mysql.com/downloads/
:https://dev.mysql.com/get/Downloads/MySQL-5.6/mysql-5.6.36.tar.gz。

编译错误下载版本错误导致:
CMake Error: The source directory "/usr/local/mysql/mysql-5.6.41-linux-glibc2.12-x86_64" does not appear to contain CMakeLists.txt.
Specify --help for usage, or press the help button on the CMake GUI.
CentOS 6.5环境源码编译安装MySQL 5.6.34 过程详解。
源码下载地址http://dev.mysql.com/downloads/mysql/5.6.html#downloads
选择Generic Linux (Architecture Independent), Compressed TAR Archive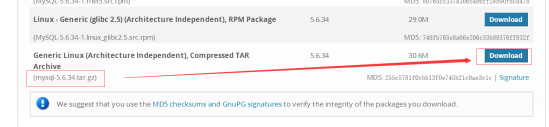
选择 No thanks, just start my download. 开始下载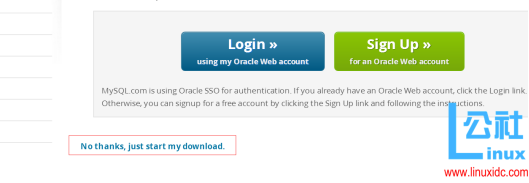
操作系统:
centos6.5 x86_64
安装前准备
通过rpm命令检查centos上是否已经安装mysql,然后卸载已经存在的mysql版本
[root@localhost src]# rpm -qa|grep mysql
mysql-libs-5.1.66-2.el6_3.i686
[root@localhost src]# rpm -e --nodeps mysql-libs-5.1.66-2.el6_3.i686
一、yum安装相关依赖
# yum -y install gcc gcc-c++ gcc-g77 autoconf automake zlib* fiex* libxml* ncurses-devel libmcrypt* libtool-ltdl-devel* make cmake bison git openssl openssl-devel
二、编译安装
1.添加用户
groupadd mysql
useradd -r -g mysql mysql
2.编译安装
tar xf mysql-5.6.34.tar.gz
cd mysql-5.6.34
#默认情况下是安装在/usr/local/mysql
# cmake编译参数可以自己调整
cmake . -DCMAKE_INSTALL_PREFIX=/usr/local/mysql -DMYSQL_DATADIR=/data/mydata -DSYSCONFDIR=/etc -DWITH_INNOBASE_STORAGE_ENGINE=1 -DWITH_MYISAM_STORAGE_ENGINE=1 -DWITH_ARCHIVE_STORAGE_ENGINE=1 -DWITH_PARTITION_STORAGE_ENGINE=1 -DWITH_BLACKHOLE_STORAGE_ENGINE=1 -DWITH_READLINE=1 -DWITH_SSL=system -DWITH_ZLIB=system -DMYSQL_UNIX_ADDR=/tmp/mysql.sock -DMYSQL_TCP_PORT=3306 -DENABLED_LOCAL_INFILE=1 -DEXTRA_CHARSETS=all -DDEFAULT_CHARSET=utf8 -DWITH_LIBWRAP=0 -DDEFAULT_COLLATION=utf8_general_ci**************************************************************
-- Looking for asprintf
-- Looking for asprintf - found
-- Check size of pthread_t
-- Check size of pthread_t - done
-- Using cmake version 2.8.12.2
-- Not building NDB
-- Performing Test HAVE_PEERCRED
-- Performing Test HAVE_PEERCRED - Success
-- Library mysqlclient depends on OSLIBS -lpthread;/usr/lib64/libz.so;m;rt;/usr/lib64/libssl.so;/usr/lib64/libcrypto.so;dl
-- Googlemock was not found. gtest-based unit tests will be disabled. You can run cmake . -DENABLE_DOWNLOADS=1 to automatically download and build required components from source.
-- If you are inside a firewall, you may need to use an http proxy: export http_proxy=http://example.com:80
-- Library mysqlserver depends on OSLIBS -lpthread;/usr/lib64/libz.so;m;rt;/usr/lib64/libssl.so;/usr/lib64/libcrypto.so;dl;crypt
-- CMAKE_BUILD_TYPE: RelWithDebInfo
-- COMPILE_DEFINITIONS: HAVE_CONFIG_H
-- CMAKE_C_FLAGS: -Wall -Wextra -Wformat-security -Wvla -Wwrite-strings -Wdeclaration-after-statement
-- CMAKE_CXX_FLAGS: -Wall -Wextra -Wformat-security -Wvla -Woverloaded-virtual -Wno-unused-parameter
-- CMAKE_C_FLAGS_RELWITHDEBINFO: -O3 -g -fabi-version=2 -fno-omit-frame-pointer -fno-strict-aliasing -DDBUG_OFF
-- CMAKE_CXX_FLAGS_RELWITHDEBINFO: -O3 -g -fabi-version=2 -fno-omit-frame-pointer -fno-strict-aliasing -DDBUG_OFF
-- Configuring done
-- Generating done
CMake Warning:
Manually-specified variables were not used by the project:
WITH_READLINE
-- Build files have been written to: /root/mysql-5.6.34
**************************************************************
cmake编译报错需要删除编译缓存,修复错误后再次重新编译
rm -f CMakeCache.txt
3.make && make install
注意事项:
重新编译时,需要清除旧的对象文件和缓存信息。
# make clean
# rm -f CMakeCache.txt
# rm -rf /etc/my.cnf
4.改变数据存储目录所有者为mysql
chown -R mysql.mysql /usr/local/mysql
chown -R mysql.mysql /data/mydata
5.启动脚本初始化数据库
cd /usr/local/mysql
scripts/mysql_install_db --user=mysql --basedir=/usr/local/mysql --datadir=/data/mydata
6.注册服务
cp support-files/mysql.server /etc/rc.d/init.d/mysqld
#使用默认配置文件
cp support-files/my-default.cnf /etc/my.cnf
#让chkconfig管理mysql服务
chkconfig --add mysqld
#开机启动
chkconfig mysqld on
编辑/etc/my.cnf配置,加入以下内容
innodb_file_per_table = 1
datadir = /data/mydata
log-bin=/data/binlogs/mysql-bin
注意:
经过实际测试innodb_file_per_table = ON这条参数需要innodb_file_per_table = 1 才能生效,具体可以通过
mysql> show variables like '%per_table%';来查询
mkdir /data/binlogs
chown -R mysql.mysql /data/binlogs
8.将mysql命令加入环境变量中
vim /etc/profile.d/mysql.sh
加入
export PATH=/usr/local/mysql/bin:$PATH
默认密码为空
//先不用管第九条
9修改/etc/security/limits.conf,然后加入以下内容,退出再重新登陆即可(不需要重启,退出当前的连接shell即可)
# ulimit -n 查看参数是否生效
* hard nofile 655350
* soft nofile 655350
否则报错如下:
错误#23: Out of resources when opening file './XX/USER.MYD' (Errcode: 24)
同时
vim /etc/security/limits.d/90-nproc.conf
删除如下这行接触centos对文件操作句柄的限制:
* soft nproc 1024
10、使用密码登录mysql账号:mysql -uroot -p
11、修改root密码:SET PASSWORD = PASSWORD('123456');
2.3. 系统启动时自动启动mysql服务
加入到系统服务:
chkconfig --add mysqld
自动启动:
chkconfig mysqld on
查询列表:
chkconfig
说明:都没关闭(off)时是没有自动启动
2.4. 开启远程访问
登录:
mysql -uroot –p123456
设置远程访问(使用root密码):
grant all privileges on *.* to 'root' @'%' identified by '123456';
flush privileges;
防火墙打开3306端口
/sbin/iptables -I INPUT -p tcp --dport 3306 -j ACCEPT
/etc/rc.d/init.d/iptables save
/etc/init.d/iptables status
安装数据文件
mysql安装完成之后需要安装文件,在mysql的安装目录下的scripts文件夹里可以看到mysql_install_db,用来安装mysql数据文件,指定mysql用户
[root@localhost mysql]# ls /usr/local/mysql/scripts/
mysql_install_db
[root@localhost mysql]# ./mysql_install_db --user=mysql --basedir=/usr/local/mysql --datadir=/usr/local/mysql/data
启动mysql
[root@localhost mysql]# /usr/local/mysql/support-files/mysql.server start
Starting MySQL.. SUCCESS!
登录mysql
[root@localhost mysql]# /usr/local/mysql/bin/mysql -uroot
第一次登陆不需要密码,需要通过mysqladmin设置root登录密码、
[root@localhost mysql]# /usr/local/mysql/bin/mysqladmin -uroot password '111111'
查看mysql配置文件
[root@localhost mysql]# /usr/local/mysql/bin/mysql --verbose --help |grep -A 1 'Default options'
Default options are read from the following files in the given order:/etc/my.cnf /etc/mysql/my.cnf /usr/local/mysql/etc/my.cnf ~/.my.cnf
可以看到mysql的配置文件是存放在多个位置的,读取的顺序依次是
/etc/my.cnf 、/etc/mysql/my.cnf 、/usr/local/mysql/etc/my.cnf 、~/.my.cnf
那么我们复制mysql安装目录下的support-files文件夹中的my-default.cnf配置文件到/etc/my.cnf即可
[root@localhost support-files]# cp my-default.cnf /etc/my.cnf
如果存在直接覆盖就好了,这里最好把/etc/my.cnf改变下所有者
环境变量的配置,便于使用
将mysql服务启动放在/etc/init.d/下
[root@localhost support-files]# cp mysql.server /etc/init.d/mysqld
将/usr/local/mysql/bin/目录添加到环境变量中,vim编辑vim /etc/profile永久添加环境变量,重启生效
export PATH=$PATH:/usr/local/mysql/bin
使环境变量生效:
source /etc/profile


 被折叠的 条评论
为什么被折叠?
被折叠的 条评论
为什么被折叠?
 到【灌水乐园】发言


