


居家办公用 Cisco IPsec 方式连公司VPN,由于VPN连接后会流量都会先从VPN经过,导致访问非公司网络极慢,搜索一番都得知可通过添加路由表让公司内网地址走VPN,非公司内网地址正常连接网络.
解决方案出自: https://superuser.com/questions/91191/how-to-force-split-tunnel-routing-on-mac-to-a-cisco-vpn/473766#comment471825_313961
-
Mac IPsec 连接 VPN详见 https://github.com/hwdsl2/setup-ipsec-vpn/blob/master/docs/clients-xauth-zh.md#os-x
-
找到你的默认路由网关
netstat -rn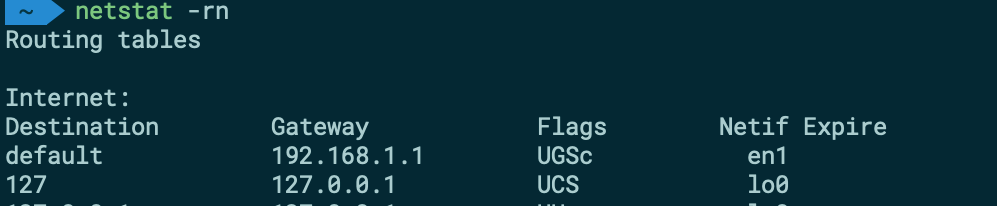
即图中default 一行对应的 Gateway ,我的是 192.168.1.1
-
通过以下脚本可以实现路由表添加从而实现VPN分流
#!/bin/bash

if [[ $EUID -ne 0 ]]; then
    echo "Run this as root"
    exit 1
fi

route -nv add -net 192.168.0.0/16 -interface utun2
route change default 192.168.1.1
其中
192.168.0.0/16代表公司内网的网络段(每个公司也许不同,可询问你的上级),utun2表示 Cisco IPsec 的接口route -nv add -net 192.168.0.0/16 -interface utun2表示 所有
192.168.0.0/16网络段内的IP 都走utun2口 也即VPNroute change default 192.168.1.1表示将默认路由恢复原来的(不连接VPN时)默认路由.
-
至此VPN的分流就配置结束了,如何让他自动运行呢?总不能每次用这两条命令吧,在上面提到的解决方案中已经给出了自动运行的答案.详见 https://gist.github.com/prehensile/675916
- 在
/Library/LaunchDaemons目录下创建prehensile.networkwatcher.plist - 写入以下内容
<?xml version="1.0" encoding="UTF-8"?>
<!DOCTYPE plist PUBLIC "-//Apple Computer//DTD PLIST 1.0//EN"
	"http://www.apple.com/DTDs/PropertyList-1.0.dtd">
<plist version="1.0">
<dict>
	<key>Label</key>
	<string>prehensile.networkwatcher</string>
	<key>ProgramArguments</key>
	<array>
		<string>/bin/bash</string>
		<string>your_shell_path</string>
	</array>
	<key>WatchPaths</key>
	<array>
		<string>/Library/Preferences/SystemConfiguration</string>
	</array>
</dict>
</plist>
其中
your_vpnshell_path请替换为你存放脚本的位置,以用户名为henry 脚本命名为auto-vpn.sh 为例/Users/henry/Scripts/auto-vpn.sh-
添加执行权限
sudo chown root:staff /Library/LaunchDaemons/prehensile.networkwatcher.plist -
添加到后台运行
sudo launchctl load -w /Library/LaunchDaemons/prehensile.networkwatcher.plist - 在
至此大功告成.


 1万+
1万+

 被折叠的 条评论
为什么被折叠?
被折叠的 条评论
为什么被折叠?
 到【灌水乐园】发言


