


nginx 日志文件详解
nginx 日志文件分为 log_format 和 access_log 两部分
log_format 定义记录的格式,其语法格式为
log_format 样式名称 样式详情
配置文件中默认有
log_format  main  'remote_addr - remote_user [time_local] "request" '
                  'status body_bytes_sent "$http_referer" '
                  '"http_user_agent" "http_x_forwarded_for"';
[root@localhost ~]# vim /etc/nginx/nginx.conf
log_format  main  '$remote_addr - $remote_user [$time_local] "$request" '
                      '$status $body_bytes_sent "$http_referer" '
                      '"$http_user_agent" "$http_x_forwarded_for"';

    access_log  logs/access.log  main;
#ng配置文件里面有一段是可以自定义日志输出的内容.
| 点击这里 | 点击这里 |
|---|---|
| 变量 | 说明 |
| $remote_addr和$http_x_forwarded_for | 客户端的ip |
| $remote_user | 客户端的名称 |
| $time_local | 访问时的本地时间 |
| $request | 请求的URL和http协议 |
| $status | 访问的状态码 |
| $body_bytes_sent | 发送给客户端的主体内容大小 |
| $http_referer | 记录客户端是从哪个页面链接访问过来的,若没有链接,则访问‘-’ |
| $http_user_agent | 记录客户端使用的浏览器的相关信息 |
[root@localhost ~]# tailf /var/log/nginx/access.log
#打开ng的访问日志文件.
192.168.10.1 - TNT [19/May/2020:16:05:57 +0800] "GET / HTTP/1.1" 304 0 "-" "Mozilla/5.0 (Windows NT 10.0; Win64; x64) AppleWebKit/537.36 (KHTML, like Gecko) Chrome/81.0.4044.138 Safari/537.36"
#这里面的日志内容输出的格式就是上面配置文件里面定义的.
#意思是日志输出显示的内容可以自定义.
6、nginx 高级应用 访问控制
1、使用 alias 实现虚拟目录
location /tiger {

    	alias /var/www/tiger;
    	index index.html;    #访问http://x.x.x.x/tiger时实际上访问是/var/www/tiger/index.html
[root@localhost ~]# vim /etc/nginx/nginx.conf
location /tiger {
alias /var/www/tiger;
index index.html index.htm;
}
#打开配置文件.
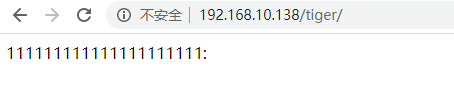
#里面新增一段访问路径,然后浏览器访问的时候访问http://x.x.x.x/tiger时实际上访问是/var/www/tiger/index.html
[root@localhost ~]# cat /var/www/tiger/index.html
111111111111111111111:
2、通过 stub_status 模块监控 nginx 的工作状态
1、通过 nginx -V 命令查看是否已安装 stub_status 模块
2、编辑 /etc/nginx/nginx.conf 配置文件
#添加以下内容~~
location /nginx-status {

      stub_status on;
      access_log    /var/log/nginx/nginxstatus.log;    #设置日志文件的位置
      auth_basic    "nginx-status";    #指定认证机制(与location后面的内容相同即可)
      auth_basic_user_file    /etc/nginx/htpasswd;     #指定认证的密码文件
      }
3、创建认证口令文件并添加用户 lzs 和 zsgg,密码用md5加密
安装htpasswd: yum -y install httpd-tools
htpasswd -c -m /etc/nginx/htpasswd tiger # -c 创建解密文件,-m MD5加密
htpasswd -m /etc/nginx/htpasswd zsgg
htpasswd 是开源 http 服务器 apache httpd 的一个命令工具,用于生成 http 基本认证的密码文件。
4、重启服务
5、客户端访问 http://x.x.x.x/nginx-status 即可
[root@localhost ~]# vim /etc/nginx/nginx.conf
 location /nginx-status {

                stub_status on;
                access_log    /var/log/nginx/nginxstatus.log;    #设置日志文件的位置
                auth_basic    "nginx-status";    #指定认证机制(与location后面的内容相同即可)
                auth_basic_user_file    /etc/nginx/htpasswd;
最低0.47元/天 解锁文章


 639
639


 被折叠的 条评论
为什么被折叠?
被折叠的 条评论
为什么被折叠?
 到【灌水乐园】发言


