


“学弟,JUC你还没有讲完呢,我还等着去和面试官对线呢”
“别急学姐,我们今天继续讲”我说道。

四大函数式接口
作为00后程序员,我们必须要学会lambda表达式、链式编程、函数式接口、Stream流式计算
函数式接口: 只有一个方法的接口
@FunctionalInterface
public interface Runnable {
    public abstract void run();
}
// 泛型、枚举、反射
// lambda表达式、链式编程、函数式接口、Stream流式计算
// 超级多FunctionalInterface
// 简化编程模型,在新版本的框架底层大量应用!
// foreach(消费者类的函数式接口)
Function 函数式接口

package com.znb.function;

import java.util.function.Function;

public class Test01 {
    public static void main(String[] args) {


       /*Function<String,String> function = new
        								Function<String,String>() {
            @Override
            public String apply(String str) {
                return str;
            }
        };*/

        // lambda 表达式简化:
        Function<String,String> function = str->{return str;};

        System.out.println(function.apply("asd"));
    }
}
Predicate 断定型接口
有一个输入参数,返回值只能是 布尔值!

package com.znb.function;

import java.util.function.Predicate;

public class Test02 {
    public static void main(String[] args) {
        // 判断字符串是否为空
        /*Predicate<String> predicate = new Predicate<String>(){
            @Override
            public boolean test(String str) {
                return str.isEmpty();//true或false
            }
        };*/

        Predicate<String> predicate =
                (str)->{return str.isEmpty(); };

        System.out.println(predicate.test(""));//true
    }

}
Consumer 消费型接口
只有输入,没有返回值

package com.znb.function;

import java.util.function.Consumer;

public class Test03 {
    public static void main(String[] args) {
        /*Consumer<String> consumer = new Consumer<String>() {
            @Override
            public void accept(String str) {
                System.out.println(str);
            }
        };*/
        Consumer<String> consumer =
                (str)->{System.out.println(str);};

        consumer.accept("sdadasd");
    }

}
Supplier 供给型接口
没有参数,只有返回值
package com.znb.function;

import java.util.function.Supplier;

public class Test04 {
    public static void main(String[] args) {
        /*Supplier supplier = new Supplier<Integer>() {
            @Override
            public Integer get() {
                System.out.println("get()");
                return 1024;
            }
        };*/

        Supplier supplier = ()->{ return 1024; };
        System.out.println(supplier.get());
    }

}
Stream 流式计算
什么是Stream流式计算
- 大数据:存储 + 计算
- 集合、MySQL 本质就是存储东西的;
- 计算都应该交给流来操作!
这个可以看一下我之前写的博客
Lambda表达式
ForkJoin
什么是 ForkJoin
- ForkJoin 在 JDK 1.7 , 并行执行任务!提高效率。大数据量!
- 大数据:Map Reduce (把大任务拆分为小任务)

ForkJoin 特点:工作窃取
打个比方,小红和小明同时去搬一百个箱子,一段时间后小红搬了50个,小明搬完了,然后小明就去帮小红搬,这样就最大限度的利用了线程
package com.znb.forkjoin;

import java.util.concurrent.RecursiveTask;

public class ForkJoinDemo extends RecursiveTask<Long> {

    private Long start;  // 1
    private Long end;    // 1990900000

    // 临界值
    private Long temp = 10000L;

    public ForkJoinDemo(Long start, Long end) {
        this.start = start;
        this.end = end;
    }

    // 计算方法
    @Override
    protected Long compute() {
        if ((end-start)<temp){
            Long sum = 0L;
            for (Long i = start; i <= end; i++) {
                sum += i;
            }
            return sum;
        }else { // forkjoin 递归
            long middle = (start + end) / 2; // 中间值
            ForkJoinDemo task1 = new ForkJoinDemo(start, middle);
            task1.fork(); // 拆分任务,把任务压入线程队列
            ForkJoinDemo task2 = new ForkJoinDemo(middle+1, end);
            task2.fork(); // 拆分任务,把任务压入线程队列

            return task1.join() + task2.join();
        }
    }
}
测试代码
package com.znb.forkjoin;

import java.util.concurrent.ExecutionException;
import java.util.concurrent.ForkJoinPool;
import java.util.concurrent.ForkJoinTask;
import java.util.stream.LongStream;

/**
 * 同一个任务,别人效率高你几十倍!
 */
public class Test {
    public static void main(String[] args) throws ExecutionException, InterruptedException {
//         test1(); // 12224
         test2(); // 10038
//         test3(); // 153
    }

    // 普通程序员
    public static void test1(){
        Long sum = 0L;
        long start = System.currentTimeMillis();
        for (Long i = 1L; i <= 10_0000_0000; i++) {
            sum += i;
        }
        long end = System.currentTimeMillis();
        System.out.println("sum="+sum+" 时间:"+(end-start));
    }

    // 会使用ForkJoin
    public static void test2() throws ExecutionException, InterruptedException {
        long start = System.currentTimeMillis();

        ForkJoinPool forkJoinPool = new ForkJoinPool();
        ForkJoinTask<Long> task = new ForkJoinDemo(0L, 10_0000_0000L);
        // 提交任务
        ForkJoinTask<Long> submit = forkJoinPool.submit(task);

        Long sum = submit.get();// 获得结果

        long end = System.currentTimeMillis();

        System.out.println("sum="+sum+" 时间:"+(end-start));
    }

    public static void test3(){
        long start = System.currentTimeMillis();
        // Stream并行流 ()  (]
        long sum = LongStream
                .rangeClosed(0L, 10_0000_0000L) // 计算范围(,]
                .parallel() // 并行计算
                .reduce(0, Long::sum); // 输出结果

        long end = System.currentTimeMillis();
        System.out.println("sum="+"时间:"+(end-start));
    }
}
异步回调
Future 设计的初衷: 对将来的某个事件的结果进行建模
package com.znb.future;

import java.util.concurrent.CompletableFuture;
import java.util.concurrent.ExecutionException;

public class Test01 {
    public static void main(String[] args) throws ExecutionException, InterruptedException {
        // 没有返回值的 runAsync 异步回调
//        CompletableFuture<Void> completableFuture =
//        							CompletableFuture.runAsync(()->{
//            try {
//                TimeUnit.SECONDS.sleep(2);
//            } catch (InterruptedException e) {
//                e.printStackTrace();
//            }
//            System.out.println(
//        		Thread.currentThread().getName()+"runAsync=>Void");
//        });
//
//        System.out.println("1111");
//
//        completableFuture.get(); // 获取阻塞执行结果

        // 有返回值的 supplyAsync 异步回调
        // ajax,成功和失败的回调
        // 返回的是错误信息;
        CompletableFuture<Integer> completableFuture =
                CompletableFuture.supplyAsync(()->{
                    System.out.println(Thread.currentThread().getName()
                            +"supplyAsync=>Integer");
                    int i = 10/0;
                    return 1024;
                });

        System.out.println(completableFuture.whenComplete((t, u) -> {
            System.out.println("t=>" + t); // 正常的返回结果
            System.out.println("u=>" + u);
            // 错误信息:
            // java.util.concurrent.CompletionException:
            // java.lang.ArithmeticException: / by zero

        }).exceptionally((e) -> {
            System.out.println(e.getMessage());
            return 233; // 可以获取到错误的返回结果
        }).get());

        /**
         * succee Code 200
         * error Code 404 500
         */
    }

}
JMM
请你谈谈你对 Volatile 的理解
Volatile 是 Java 虚拟机提供轻量级的同步机制,类似于synchronized 但是没有其强大。
- 保证可见性
- 不保证原子性
- 防止指令重排
什么是JMM
JMM : Java内存模型,不存在的东西,概念!约定!
关于JMM的一些同步的约定:
- 线程解锁前,必须把共享变量立刻刷回主存。
- 线程加锁前,必须读取主存中的最新值到工作内存中!
- 加锁和解锁是同一把锁。
8 种操作


内存交互操作有8种,虚拟机实现必须保证每一个操作都是原子的,不可在分的(对于double和long类型的变量来说,load、store、read和writ操作在某些平台上允许例外)
- lock (锁定):作用于主内存的变量,把一个变量标识为线程独占状态
- unlock (解锁):作用于主内存的变量,它把一个处于锁定状态的变量释放出来,释放后的变量才可以被其他线程锁定
- read (读取):作用于主内存变量,它把一个变量的值从主内存传输到线程的工作内存中,以便随后的load动作使用
- load (载入):作用于工作内存的变量,它把read操作从主存中变量放入工作内存中
- use (使用):作用于工作内存中的变量,它把工作内存中的变量传输给执行引擎,每当虚拟机遇到一个需要使用到变量的值,就会使用到这个指令
- assign (赋值):作用于工作内存中的变量,它把一个从执行引擎中接受到的值放入工作内存的变量副本中
- store (存储):作用于主内存中的变量,它把一个从工作内存中一个变量的值传送到主内存中,以便后续的write使用
- write (写入):作用于主内存中的变量,它把store操作从工作内存中得到的变量的值放入主内存的变量中
JMM 对这八种指令的使用,制定了如下规则:
- 不允许read和load、store和write操作之一单独出现。即使用了read必须load,使用了store必须write
- 不允许线程丢弃他最近的assign操作,即工作变量的数据改变了之后,必须告知主存
- 不允许一个线程将没有assign的数据从工作内存同步回主内存
- 一个新的变量必须在主内存中诞生,不允许工作内存直接使用一个未被初始化的变量。就是怼变量实施use、store操作之前,必须经过assign和load操作
- 一个变量同一时间只有一个线程能对其进行lock。多次lock后,必须执行相同次数的unlock才能解锁
- 如果对一个变量进行lock操作,会清空所有工作内存中此变量的值,在执行引擎使用这个变量前,必须重新load或assign操作初始化变量的值
- 如果一个变量没有被lock,就不能对其进行unlock操作。也不能unlock一个被其他线程锁住的变量
- 对一个变量进行unlock操作之前,必须把此变量同步回主内存
问题: 程序不知道主内存的值已经被修改过了

Volatile
保证可见性
我们设一个num,开启main线程和另外一个新的线程,新线程无限循环,直到num!=0
package com.znb.volatiles;

import java.util.concurrent.TimeUnit;

public class Test01 {
    private  static int num = 0;

    public static void main(String[] args) { // main

        new Thread(()->{ // 线程 1 对主内存的变化不知道的
            while (num==0){

            }
        }).start();

        try {
            TimeUnit.SECONDS.sleep(1);
        } catch (InterruptedException e) {
            e.printStackTrace();
        }

        num = 1;
        System.out.println(num);

    }

}

在这里并没有成功,因为我们没有使用volatile
package com.znb.volatiles;

import java.util.concurrent.TimeUnit;

public class Test01 {
    private volatile static int num = 0;

    public static void main(String[] args) { // main

        new Thread(()->{ // 线程 1 对主内存的变化不知道的
            while (num==0){

            }
        }).start();

        try {
            TimeUnit.SECONDS.sleep(1);
        } catch (InterruptedException e) {
            e.printStackTrace();
        }

        num = 1;
        System.out.println(num);

    }

}
成功

不保证原子性
原子性 : 不可分割
线程A在执行任务的时候,不能被打扰的,也不能被分割。要么同时成功,要么同时失败。
volatile没有原子性,也就是说,当有好多好多个线程同时操作某一个数据的时候,就有可能会要很多线程的操作没有成功
package com.znb.volatiles;

import java.util.concurrent.atomic.AtomicInteger;

public class Test02 {
    // volatile 不保证原子性
    // 原子类的 Integer
    private volatile static int num = 0;

    public static void add(){
        // num++; // 不是一个原子性操作
        num++; // AtomicInteger + 1 方法, CAS
    }

    public static void main(String[] args) {

        //理论上num结果应该为 2 万
        for (int i = 1; i <= 20; i++) {
            new Thread(()->{
                for (int j = 0; j < 1000 ; j++) {
                    add();
                }
            }).start();
        }

        // 判断只要剩下的线程不大于2个,就说明20个创建的线程已经执行结束
        while (Thread.activeCount()>2){ // Java 默认有 main gc 2个线程
            Thread.yield();
        }

        System.out.println(Thread.currentThread().getName()
                + " " + num);
    }

}

在这里我们运行了2万次,按理来说最后累计应该是20000,但是并没有,而且每一次的运行结果都是不一样的,那我我们要怎么办呢?在这里我们要使用AtomicInteger,这个类有原子性,不会有多个现场同时对一个数据进行修改的情况。
package com.znb.volatiles;

import java.util.concurrent.atomic.AtomicInteger;

public class Test02 {
    // volatile 不保证原子性
    // 原子类的 Integer
    private volatile static AtomicInteger num = new AtomicInteger();

    public static void add(){
        // num++; // 不是一个原子性操作
        num.getAndIncrement(); // AtomicInteger + 1 方法, CAS
    }

    public static void main(String[] args) {

        //理论上num结果应该为 2 万
        for (int i = 1; i <= 20; i++) {
            new Thread(()->{
                for (int j = 0; j < 1000 ; j++) {
                    add();
                }
            }).start();
        }

        // 判断只要剩下的线程不大于2个,就说明20个创建的线程已经执行结束
        while (Thread.activeCount()>2){ // Java 默认有 main gc 2个线程
            Thread.yield();
        }

        System.out.println(Thread.currentThread().getName()
                + " " + num);
    }

}

指令重排
什么是指令重排?:我们写的程序,计算机并不是按照你写的那样去执行的。
源代码 —> 编译器优化的重排 —> 指令并行也可能会重排 —> 内存系统也会重排 ----> 执行
处理器在执行指令重排的时候,会考虑:数据之间的依赖性
int x = 1; // 1
int y = 2; // 2
x = x + 5; // 3
y = x * x; // 4
我们所期望的:1234 但是可能执行的时候会变成 2134 或者 1324
但是不可能是 4123!
前提:a b x y 这四个值默认都是 0:
可能造成影响得到不同的结果:
| 线程A | 线程B |
|---|---|
| x=a | y=b |
| b=1 | a=2 |
正常的结果:x = 0; y = 0; 但是可能由于指令重排出现以下结果:
| 线程A | 线程B |
|---|---|
| b=1 | a=2 |
| x=a | y=b |
指令重排导致的诡异结果: x = 2; y = 1;
volatile 可以避免指令重排:内存屏障。CPU指令。作用:
- 保证特定操作的执行顺序!
- 可以保证某些变量的内存可见性 (利用这些特性volatile 实现了可见性)

volatile 是可以保证可见性。不能保证原子性,由于内存屏障,可以保证避免指令重排的现象产生!
volatile 内存屏障在单例模式中使用的最多!
单例模式
饿汉式
饿汉式需要私有化构造器,这样别人就不能new这个对象了
package com.znb.single;

public class Hungry {
    // 可能会浪费空间
    private byte[] data1 = new byte[1024*1024];
    private byte[] data2 = new byte[1024*1024];
    private byte[] data3 = new byte[1024*1024];
    private byte[] data4 = new byte[1024*1024];

    private Hungry(){

    }

    private final static Hungry HUNGRY = new Hungry();

    public static Hungry getInstance(){
        return HUNGRY;
    }

}
DCL 懒汉式
在多线程的情况下,懒汉单例模式会被破坏
package com.znb.single;

public class LazyMan1 {
    private static LazyMan1 lazyMan1;
    private  LazyMan1(){
        System.out.println(Thread.currentThread().getName()+"ok");

    }
    private static LazyMan1 getInstance(){
        if (lazyMan1==null){
            lazyMan1=new LazyMan1();
        }
        return lazyMan1;
    }
    public static void main(String[] args) {
        for (int i=0;i<10;i++){
            new Thread(()->{
                LazyMan1.getInstance();
            }).start();
        }
    }
}

所以这个时候,我们需要加上锁
package com.znb.single;

public class LazyMan1 {
    private static LazyMan1 lazyMan1;
    private  LazyMan1(){
        System.out.println(Thread.currentThread().getName()+"ok");

    }
    private static LazyMan1 getInstance(){
        if (lazyMan1==null){
            synchronized (LazyMan.class){
                if (lazyMan1==null){
                    lazyMan1=new LazyMan1();
                }
            }

        }
        return lazyMan1;
    }
    public static void main(String[] args) {
        for (int i=0;i<10;i++){
            new Thread(()->{
                LazyMan1.getInstance();
            }).start();
        }
    }
}

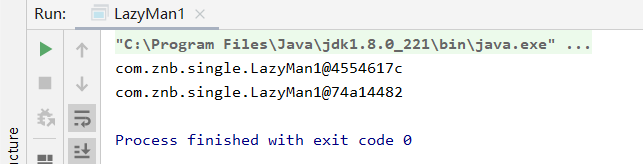
但是,我们还可以通过反射破坏单例模式
package com.znb.single;

import java.lang.reflect.Constructor;

public class LazyMan1 {
    private static LazyMan1 lazyMan1;
    private  LazyMan1(){


    }
    private static LazyMan1 getInstance(){
        if (lazyMan1==null){
            synchronized (LazyMan.class){
                if (lazyMan1==null){
                    lazyMan1=new LazyMan1();
                }
            }
        }
        return lazyMan1;
    }
    public static void main(String[] args) throws Exception {
        LazyMan1 lazyMan1=LazyMan1.getInstance();
        Constructor<LazyMan1> declaredConstructor = LazyMan1.class.getDeclaredConstructor(null);
        LazyMan1 lazyMan2 = declaredConstructor.newInstance();
        System.out.println(lazyMan1);
        System.out.println(lazyMan2);
    }
}

但是我们可以通过设置一个标识符来防止
package com.znb.single;

import java.lang.reflect.Constructor;

public class LazyMan1 {
    private static LazyMan1 lazyMan1;
    private static boolean znb=true;
    private  LazyMan1(){
        if (znb){
            znb=false;
        }else {
            throw new RuntimeException("别玩花样");
        }
    }
    private static LazyMan1 getInstance(){
        if (lazyMan1==null){
            synchronized (LazyMan.class){
                if (lazyMan1==null){
                    lazyMan1=new LazyMan1();
                }
            }
        }
        return lazyMan1;
    }
    public static void main(String[] args) throws Exception {
        LazyMan1 lazyMan1=LazyMan1.getInstance();
        Constructor<LazyMan1> declaredConstructor = LazyMan1.class.getDeclaredConstructor(null);
        LazyMan1 lazyMan2 = declaredConstructor.newInstance();
        System.out.println(lazyMan1);
        System.out.println(lazyMan2);
    }
}

但是道高一尺,魔高一丈,我们还有其他的手段破解
package com.znb.single;
import java.lang.reflect.Constructor;
import java.lang.reflect.Field;
public class LazyMan1 {
private static LazyMan1 lazyMan1;
private static boolean znb=true;
private LazyMan1(){
if (znb){
znb=false;
}else {
throw new RuntimeException("别玩花样");
}
}
private static LazyMan1 getInstance(){
if (lazyMan1==null){
synchronized (LazyMan.class){
if (lazyMan1==null){
lazyMan1=new LazyMan1();
}
}
}
return lazyMan1;
}
public static void main(String[] args) throws Exception {
Field znb=LazyMan1.class.getDeclaredField("znb");
znb.setAccessible(true);
Constructor<LazyMan1> declaredConstructor = LazyMan1.class.getDeclaredConstructor(null);
declaredConstructor.setAccessible(true);
LazyMan1 lm1 = declaredConstructor.newInstance();
znb.set(lm1,true);
LazyMan1 lm2=declaredConstructor.newInstance();
System.out.println(lm1);
System.out.println(lm2);
}
}
虽然这样也被破解了,但是我们还有一种方法通过枚举来防止
package com.znb.single;

import java.lang.reflect.Constructor;

public enum EnumSingle {

    INSTANCE;

    public EnumSingle getInstance(){
        return INSTANCE;
    }

}

class Test{

    public static void main(String[] args) throws Exception, InstantiationException {
        EnumSingle instance1 = EnumSingle.INSTANCE;
        Constructor<EnumSingle> declaredConstructor = EnumSingle.class.getDeclaredConstructor(String.class,int.class);
        declaredConstructor.setAccessible(true);
        EnumSingle instance2 = declaredConstructor.newInstance();

        // NoSuchMethodException: com.kuang.single.EnumSingle.<init>()
        System.out.println(instance1);
        System.out.println(instance2);

    }
}

CAS
package com.znb.cas;

import java.util.concurrent.atomic.AtomicInteger;

public class CASDemo {
    // CAS compareAndSet : 比较并交换!
    public static void main(String[] args) {
        AtomicInteger atomicInteger = new AtomicInteger(2020);

        // 期望、更新
        // public final boolean compareAndSet
        //									(int expect, int update)
        // 如果我期望的值达到了,那么就更新,否则,
        // 就不更新, CAS 是CPU的并发原语!
        System.out.println(atomicInteger.compareAndSet(2020, 2021));
        System.out.println(atomicInteger.get());

//        atomicInteger.getAndIncrement(); // 看底层如何实现 ++
        System.out.println(atomicInteger.compareAndSet(2021, 200));
        System.out.println(atomicInteger.get());
    }

}
结果

原子引用
解决ABA 问题,引入原子引用! 对应的思想:乐观锁!
package com.znb.cas;

import java.util.concurrent.TimeUnit;
import java.util.concurrent.atomic.AtomicStampedReference;

public class Test01 {
    /*
     * AtomicStampedReference 注意,
     * 如果泛型是一个包装类,注意对象的引用问题
     * 正常在业务操作,这里面比较的都是一个个对象
     */

    // 可以有一个初始对应的版本号 1
    static AtomicStampedReference<Integer>
            atomicStampedReference =
            new AtomicStampedReference<>(2020,1);

    // CAS compareAndSet : 比较并交换!
    public static void main(String[] args) {
        new Thread(()->{
            // 获得版本号
            int stamp = atomicStampedReference.getStamp();

            System.out.println("a1=>"+stamp);

            try {
                TimeUnit.SECONDS.sleep(2);
            } catch (InterruptedException e) {
                e.printStackTrace();
            }

            atomicStampedReference.compareAndSet(
                    2020,
                    2022,
                    atomicStampedReference.getStamp(), // 最新版本号
                    // 更新版本号
                    atomicStampedReference.getStamp() + 1);

            System.out.println("a2=>"
                    +atomicStampedReference.getStamp());

            System.out.println(
                    atomicStampedReference.compareAndSet(
                            2022,
                            2020,
                            atomicStampedReference.getStamp(),
                            atomicStampedReference.getStamp() + 1));

            System.out.println("a3=>"
                    +atomicStampedReference.getStamp());
        },"a").start();

        // 乐观锁的原理相同!
        new Thread(()->{
            // 获得版本号
            int stamp = atomicStampedReference.getStamp();

            System.out.println("b1=>"+stamp);
            try {
                TimeUnit.SECONDS.sleep(2);
            } catch (InterruptedException e) {
                e.printStackTrace();
            }

            System.out.println(
                    atomicStampedReference.compareAndSet(
                            2020, 6666, stamp, stamp + 1));

            System.out.println("b2=>"
                    +atomicStampedReference.getStamp());

        },"b").start();
    }

}

注意:
Integer 使用了对象缓存机制,默认范围是 -128 ~ 127 ,推荐使用静态工厂方法 valueOf 获取对象实例,而不是 new,因为 valueOf 使用缓存,而 new 一定会创建新的对象分配新的内存空间;
下面是阿里巴巴开发手册的规范点:

各种锁的理解
公平锁、非公平锁
公平锁: 非常公平, 不能够插队,必须先来后到!
非公平锁:非常不公平,可以插队 (默认都是非公平)
public ReentrantLock() {
    sync = new NonfairSync();
}

public ReentrantLock(boolean fair) {
    sync = fair ? new FairSync() : new NonfairSync();
}
可重入锁
可重入锁(递归锁)

Synchronized 版
package com.znb.lock;

public class Test01 {
    public static void main(String[] args) {
        Phone phone = new Phone();

        new Thread(()->{
            phone.sms();
        },"A").start();


        new Thread(()->{
            phone.sms();
        },"B").start();
    }
}

class Phone{

    public synchronized void sms(){
        System.out.println(Thread.currentThread().getName()
                + "sms");
        call(); // 这里也有锁(sms锁 里面的call锁)
    }

    public synchronized void call(){
        System.out.println(Thread.currentThread().getName()
                + "call");
    }

}

Lock 版
package com.znb.lock;

import java.util.concurrent.locks.Lock;
import java.util.concurrent.locks.ReentrantLock;

public class Test02 {
    public static void main(String[] args) {
        Phone2 phone = new Phone2();

        new Thread(()->{
            phone.sms();
        },"A").start();


        new Thread(()->{
            phone.sms();
        },"B").start();
    }
}

class Phone2{
    Lock lock = new ReentrantLock();

    public void sms(){
        lock.lock();
        // 细节问题:lock.lock(); lock.unlock();
        // lock 锁必须配对,否则就会死在里面
        // 两个lock() 就需要两次解锁
        lock.lock();
        try {
            System.out.println(Thread.currentThread().getName()
                    + "sms");
            call(); // 这里也有锁
        } catch (Exception e) {
            e.printStackTrace();
        } finally {
            lock.unlock();
            lock.unlock();
        }

    }

    public void call(){

        lock.lock();
        try {
            System.out.println(Thread.currentThread().getName()
                    + "call");
        } catch (Exception e) {
            e.printStackTrace();
        } finally {
            lock.unlock();
        }
    }

}

自旋锁
我们来自定义一个锁测试:
package com.znb.lock;

import java.util.concurrent.atomic.AtomicReference;

public class SpinlockDemo {
    // int   0
    // Thread  null
    // 原子引用
    AtomicReference<Thread> atomicReference =
            new AtomicReference<>();

    // 加锁
    public void myLock(){
        Thread thread = Thread.currentThread();
        System.out.println(Thread.currentThread().getName()
                + "==> mylock");

        // 自旋锁
        while (!atomicReference.compareAndSet(null,thread)){

        }
    }


    // 解锁
    // 加锁
    public void myUnLock(){
        Thread thread = Thread.currentThread();
        System.out.println(Thread.currentThread().getName()
                + "==> myUnlock");
        atomicReference.compareAndSet(thread,null);// 解锁
    }

}
package com.znb.lock;

import java.util.concurrent.TimeUnit;

public class TestSpinLock {
    public static void main(String[] args) throws
            InterruptedException {
//        ReentrantLock reentrantLock = new ReentrantLock();
//        reentrantLock.lock();
//        reentrantLock.unlock();

        // 底层使用的自旋锁CAS
        SpinlockDemo lock = new SpinlockDemo();// 定义锁

        new Thread(()-> {
            lock.myLock();// 加锁

            try {
                TimeUnit.SECONDS.sleep(5);
            } catch (Exception e) {
                e.printStackTrace();
            } finally {
                lock.myUnLock();// 解锁
            }

        },"T1").start();

        TimeUnit.SECONDS.sleep(1);

        new Thread(()-> {
            lock.myLock();

            try {
                TimeUnit.SECONDS.sleep(1);
            } catch (Exception e) {
                e.printStackTrace();
            } finally {
                lock.myUnLock();
            }

        },"T2").start();

    }

}

死锁
死锁是什么?


“好了学姐,JUC已经讲完了,剩下的难得我也不会,这下你去对线面试官应该没问题了”
学姐含情脉脉的看着我说道:“其实我不想当程序员,我只是想和你多说说话学弟”
“对不起学姐,我只喜欢敲代码,请你自重,你再过来我要喊人了”

注意:
上述故事纯属扯淡


 512
512

 被折叠的 条评论
为什么被折叠?
被折叠的 条评论
为什么被折叠?
 到【灌水乐园】发言


