


上一次我们看到SpringApplication run方法中的第二行代码,这次从第三行代码开始月度
DefaultBootstrapContext bootstrapContext = createBootstrapContext();
这行代码很明显是创建一个Context,可以理解是一个容器,或者说是一个map吧
private DefaultBootstrapContext createBootstrapContext() {
		DefaultBootstrapContext bootstrapContext = new DefaultBootstrapContext();
		this.bootstrapRegistryInitializers.forEach((initializer) -> initializer.initialize(bootstrapContext));
		return bootstrapContext;
	}
这个createBootstrapContext就是创建一个bootstrapContext ,并将注册器都注册到bootstrapContext 中
这里有一个bootstrapRegistryInitializers这个是我们在new SpringApplication()的时候初始化的
public SpringApplication(ResourceLoader resourceLoader, Class<?>... primarySources) {
	this.resourceLoader = resourceLoader;
	Assert.notNull(primarySources, "PrimarySources must not be null");
	this.primarySources = new LinkedHashSet<>(Arrays.asList(primarySources));
	this.webApplicationType = WebApplicationType.deduceFromClasspath();
	this.bootstrapRegistryInitializers = getBootstrapRegistryInitializersFromSpringFactories();
	setInitializers((Collection) getSpringFactoriesInstances(ApplicationContextInitializer.class));
	setListeners((Collection) getSpringFactoriesInstances(ApplicationListener.class));
	this.mainApplicationClass = deduceMainApplicationClass();
}
1-4行不做太多解读,接下看看第5行
this.bootstrapRegistryInitializers = getBootstrapRegistryInitializersFromSpringFactories();
进一步涨到方法查看里面的内容
private List<BootstrapRegistryInitializer> getBootstrapRegistryInitializersFromSpringFactories() {
	ArrayList<BootstrapRegistryInitializer> initializers = new ArrayList<>();
	getSpringFactoriesInstances(Bootstrapper.class).stream()
			.map((bootstrapper) -> ((BootstrapRegistryInitializer) bootstrapper::initialize))
			.forEach(initializers::add);
	initializers.addAll(getSpringFactoriesInstances(BootstrapRegistryInitializer.class));
	return initializers;
}
这里面的想法比诡异,虽然不知道为什么这么写,但是这段代码的意思很明确,初始化ArrayList<BootstrapRegistryInitializer> initializers
2个地方都用到了getSpringFactoriesInstances方法,接下来我们重点的关注getSpringFactoriesInstances
private <T> Collection<T> getSpringFactoriesInstances(Class<T> type) {
	return getSpringFactoriesInstances(type, new Class<?>[] {});
}
这里还不能看出来什么名堂,继续看他下一个重载
private <T> Collection<T> getSpringFactoriesInstances(Class<T> type, Class<?>[] parameterTypes, Object... args) {
	ClassLoader classLoader = getClassLoader();
	// Use names and ensure unique to protect against duplicates
	Set<String> names = new LinkedHashSet<>(SpringFactoriesLoader.loadFactoryNames(type, classLoader));
	List<T> instances = createSpringFactoriesInstances(type, parameterTypes, classLoader, args, names);
	AnnotationAwareOrderComparator.sort(instances);
	return instances;
}
这个方法得看了许多,就是用来初始化SpringFactoriesInstances,我们要看初始化了多少SpringFactoriesInstances,首先需要看这个方法SpringFactoriesLoader.loadFactoryNames(type, classLoader)
public static List<String> loadFactoryNames(Class<?> factoryType, @Nullable ClassLoader classLoader) {
	ClassLoader classLoaderToUse = classLoader;
	if (classLoaderToUse == null) {
		classLoaderToUse = SpringFactoriesLoader.class.getClassLoader();
	}
	String factoryTypeName = factoryType.getName();
	return loadSpringFactories(classLoaderToUse).getOrDefault(factoryTypeName, Collections.emptyList());
}
这里首先是看看classloader是不是为空,为空则默认一个classloader,可能是与多版本加载有关,先不管
接下来主要的方法还是loadSpringFactories(classLoaderToUse)其他基本可以忽略不看
private static Map<String, List<String>> loadSpringFactories(ClassLoader classLoader) {
	Map<String, List<String>> result = cache.get(classLoader);
	if (result != null) {
		return result;
	}

	result = new HashMap<>();
	try {
		Enumeration<URL> urls = classLoader.getResources(FACTORIES_RESOURCE_LOCATION);
		while (urls.hasMoreElements()) {
			URL url = urls.nextElement();
			UrlResource resource = new UrlResource(url);
			Properties properties = PropertiesLoaderUtils.loadProperties(resource);
			for (Map.Entry<?, ?> entry : properties.entrySet()) {
				String factoryTypeName = ((String) entry.getKey()).trim();
				String[] factoryImplementationNames =
						StringUtils.commaDelimitedListToStringArray((String) entry.getValue());
				for (String factoryImplementationName : factoryImplementationNames) {
					result.computeIfAbsent(factoryTypeName, key -> new ArrayList<>())
							.add(factoryImplementationName.trim());
				}
			}
		}

		// Replace all lists with unmodifiable lists containing unique elements
		result.replaceAll((factoryType, implementations) -> implementations.stream().distinct()
				.collect(Collectors.collectingAndThen(Collectors.toList(), Collections::unmodifiableList)));
		cache.put(classLoader, result);
	}
	catch (IOException ex) {
		throw new IllegalArgumentException("Unable to load factories from location [" +
				FACTORIES_RESOURCE_LOCATION + "]", ex);
	}
	return result;
}
读到了这里我才恍然大悟,原来,选择classloade是多么的重要,classloder会检查类加载目录下的路径
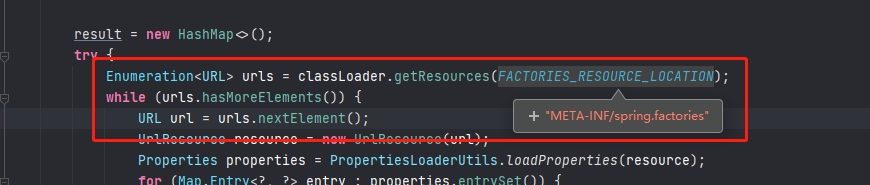
public static final String FACTORIES_RESOURCE_LOCATION = "META-INF/spring.factories";
也就是jar包的META-INF/spring.factories路径,我们看到一个简单的类初始化居然扫描并加载了2个jar的配置文件

到了这里我才恍然发现,网上很多大牛的文章一上来就说加载路径的事情,搞得我一脸懵逼,现在总算是明白是怎么回事了
最后一步找到这么工厂信息之后也只是初始化这些工厂信息了
private <T> List<T> createSpringFactoriesInstances(Class<T> type, Class<?>[] parameterTypes,
		ClassLoader classLoader, Object[] args, Set<String> names) {
	List<T> instances = new ArrayList<>(names.size());
	for (String name : names) {
		try {
			Class<?> instanceClass = ClassUtils.forName(name, classLoader);
			Assert.isAssignable(type, instanceClass);
			Constructor<?> constructor = instanceClass.getDeclaredConstructor(parameterTypes);
			T instance = (T) BeanUtils.instantiateClass(constructor, args);
			instances.add(instance);
		}
		catch (Throwable ex) {
			throw new IllegalArgumentException("Cannot instantiate " + type + " : " + name, ex);
		}
	}
	return instances;
}
这里也只能算是完成了SpringApplication的初始化工作,更多的功能仍旧在
SpringApplication的run方法


 455
455


 被折叠的 条评论
为什么被折叠?
被折叠的 条评论
为什么被折叠?
 到【灌水乐园】发言


