


项目名称:个人博客系统
1.项目需求分析
实现了基本的登录,注册以及增删改查的操作
以及对于文章的新增和评论功能(二级评论)
可以对文章进行归纳,标签和最热文章小小功能实现
2.功能展示(用户的展示模块和后台管理模块)
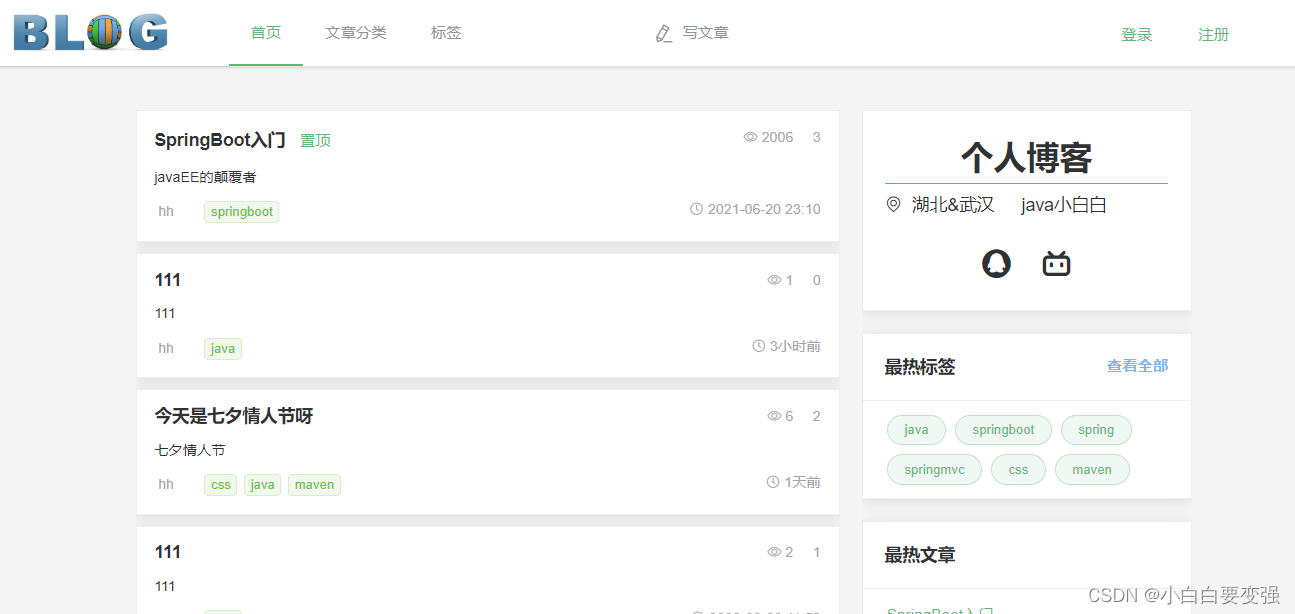
1.1.博客展示界面
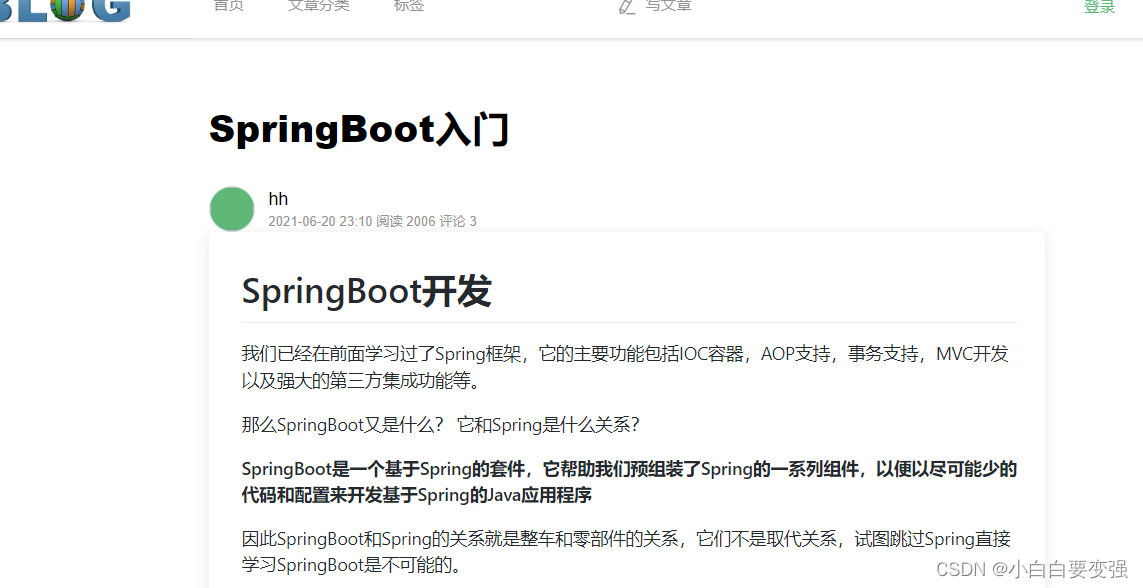
1.2.查看文章信息
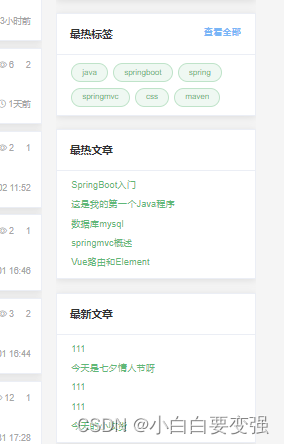
1.3.实现最热标签,最热文章,最新文章
1.4.评论功能

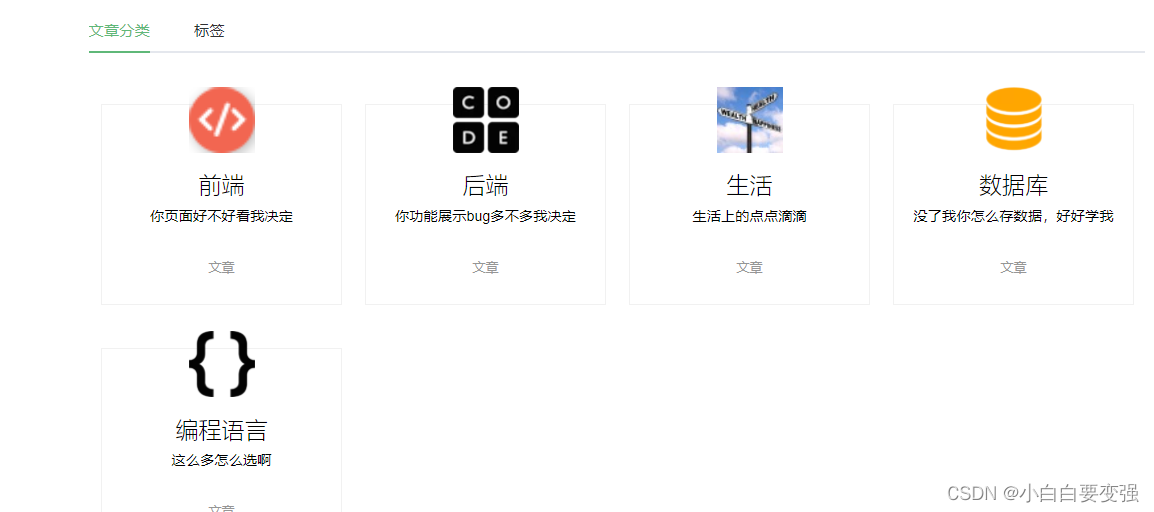
1.5实现文章标签和文章分类管理
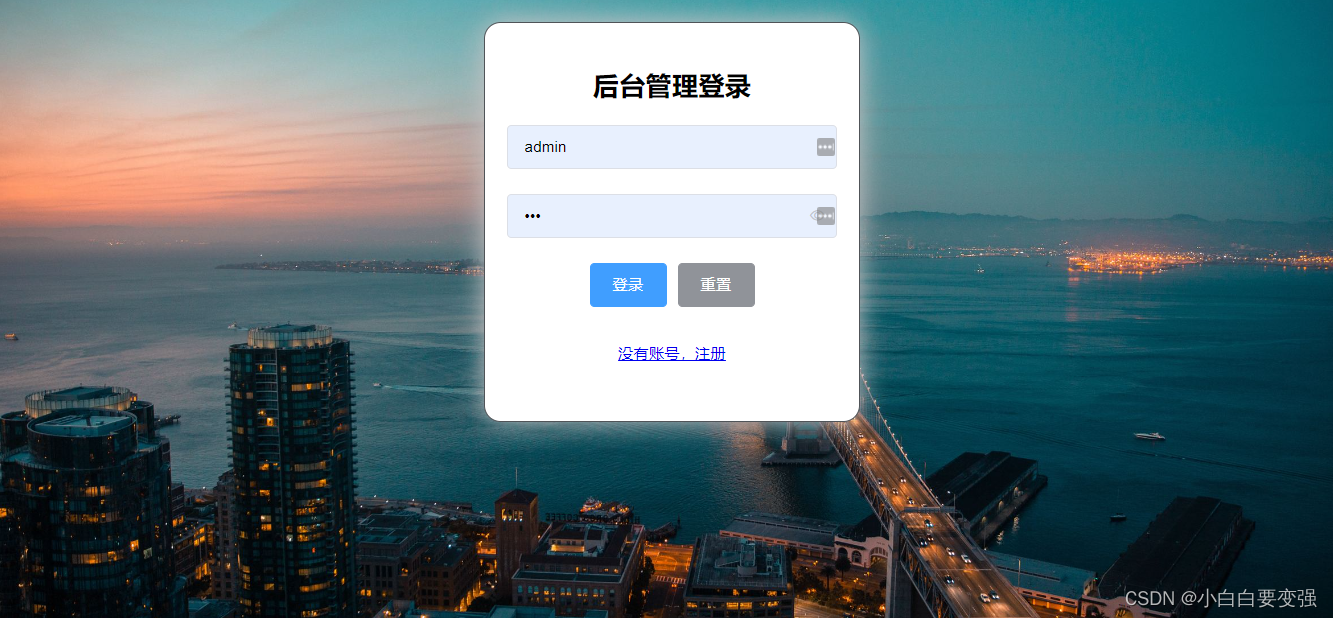
2.1管理员登录界面
2.2管理员首页和动态路由实现

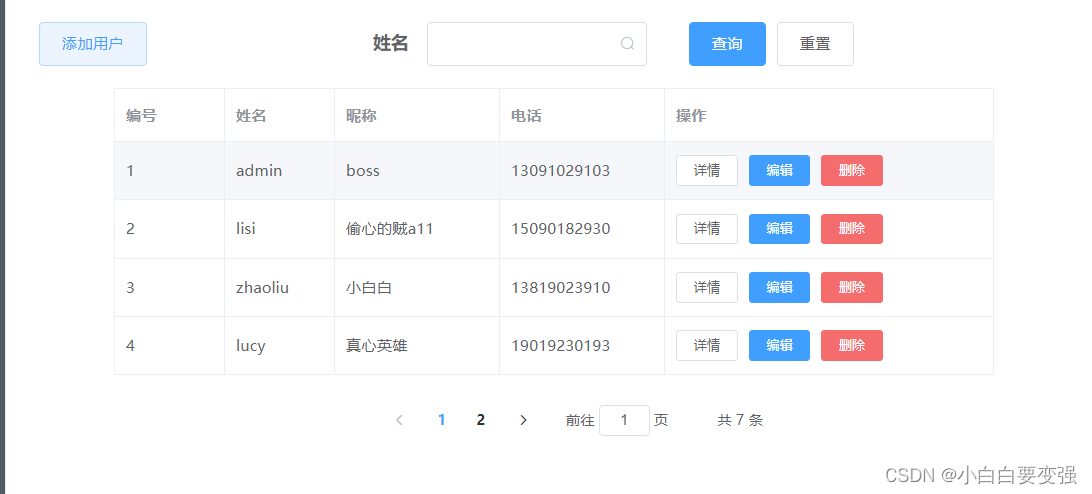
2.3实现基本的增删改查
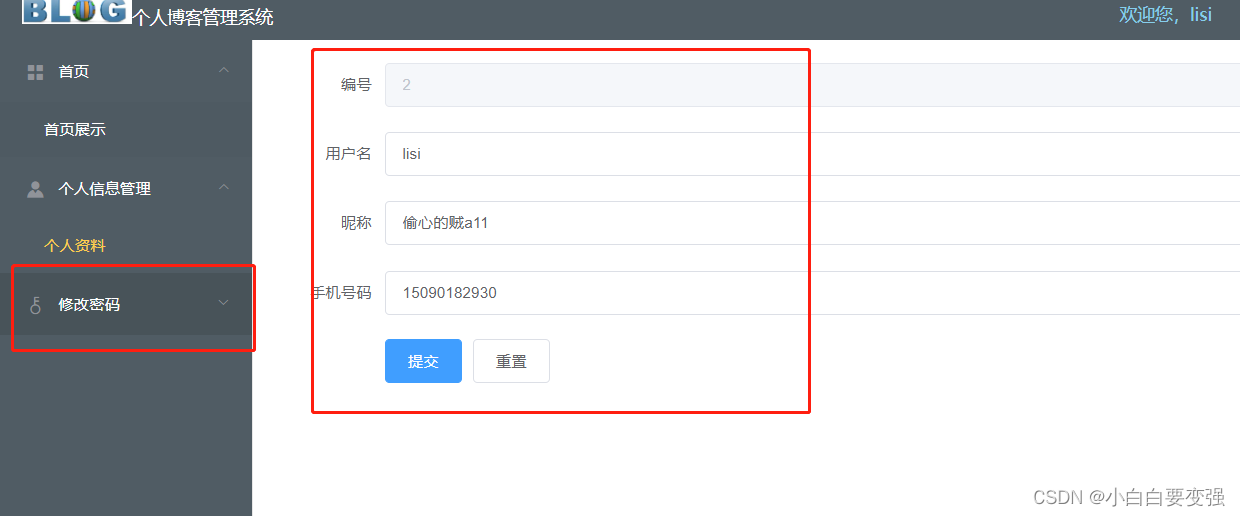
2.4用户界面信息
有一些小功能的实现代码
1.日志功能
@Slf4j
public class IpUtils {

    /**
     * 获取IP地址
     * <p>
     * 使用Nginx等反向代理软件, 则不能通过request.getRemoteAddr()获取IP地址
     * 如果使用了多级反向代理的话,X-Forwarded-For的值并不止一个,而是一串IP地址,X-Forwarded-For中第一个非unknown的有效IP字符串,则为真实IP地址
     */
    public static String getIpAddr(HttpServletRequest request) {
        String ip = null, unknown = "unknown", seperator = ",";
        int maxLength = 15;
        try {
            ip = request.getHeader("x-forwarded-for");
            if (StringUtils.isEmpty(ip) || unknown.equalsIgnoreCase(ip)) {
                ip = request.getHeader("Proxy-Client-IP");
            }
            if (StringUtils.isEmpty(ip) || ip.length() == 0 || unknown.equalsIgnoreCase(ip)) {
                ip = request.getHeader("WL-Proxy-Client-IP");
            }
            if (StringUtils.isEmpty(ip) || unknown.equalsIgnoreCase(ip)) {
                ip = request.getHeader("HTTP_CLIENT_IP");
            }
            if (StringUtils.isEmpty(ip) || unknown.equalsIgnoreCase(ip)) {
                ip = request.getHeader("HTTP_X_FORWARDED_FOR");
            }
            if (StringUtils.isEmpty(ip) || unknown.equalsIgnoreCase(ip)) {
                ip = request.getRemoteAddr();
            }
        } catch (Exception e) {
            log.error("IpUtils ERROR ", e);
        }

        // 使用代理,则获取第一个IP地址
        if (StringUtils.isEmpty(ip) && ip.length() > maxLength) {
            int idx = ip.indexOf(seperator);
            if (idx > 0) {
                ip = ip.substring(0, idx);
            }
        }

        return ip;
    }

    /**
     * 获取ip地址
     *
     * @return
     */
    public static String getIpAddr() {
        HttpServletRequest request = HttpContextUtils.getHttpServletRequest();
        return getIpAddr(request);
    }
}
2.图片上传下载
@Component
public class QiniuUtils {
    public static  final String url = "http://rftefaxx1.hb-bkt.clouddn.com/";

    public  boolean upload(MultipartFile file, String fileName){

        //构造一个带指定 Region 对象的配置类
        Configuration cfg = new Configuration(Region.huabei());
        //...其他参数参考类注释
        UploadManager uploadManager = new UploadManager(cfg);
        //...生成上传凭证,然后准备上传
        String bucket = "hhblog1";
        //默认不指定key的情况下,以文件内容的hash值作为文件名
        try {
            byte[] uploadBytes = file.getBytes();
            Auth auth = Auth.create("j5ohN8-ab9Q4pd5pZzUQ424JJryvp-52LSGqxi-S", "wvDdI31t2rXuFWYcIaBaHKQ8aunv6-7YpHT16bGr");
            String upToken = auth.uploadToken(bucket);
            Response response = uploadManager.put(uploadBytes, fileName, upToken);
            //解析上传成功的结果
            DefaultPutRet putRet = JSON.parseObject(response.bodyString(), DefaultPutRet.class);
            return true;
        } catch (Exception ex) {
            ex.printStackTrace();
        }
        return false;
    }


}
3.JWT工具类
public class JWTUtils {
    private static final String jwtToken = "123456hh!@#$$";

    public static String createToken(Long userId){
        Map<String,Object> claims = new HashMap<>();
        claims.put("userId",userId);
        JwtBuilder jwtBuilder = Jwts.builder()
                .signWith(SignatureAlgorithm.HS256, jwtToken) // 签发算法,秘钥为jwtToken
                .setClaims(claims) // body数据,要唯一,自行设置
                .setIssuedAt(new Date()) // 设置签发时间
                .setExpiration(new Date(System.currentTimeMillis() + 24 * 60 * 60 * 60 * 1000));// 一天的有效时间
        String token = jwtBuilder.compact();
        return token;
    }

    public static Map<String, Object> checkToken(String token){
        try {
            Jwt parse = Jwts.parser().setSigningKey(jwtToken).parse(token);
            return (Map<String, Object>) parse.getBody();
        }catch (Exception e){
            e.printStackTrace();
        }
        return null;

    }

    public static void main(String[] args) {
        String token = JWTUtils.createToken(100L);
        System.out.println(token);
        Map<String,Object> map = JWTUtils.checkToken(token);
        System.out.println("userId = " + map.get("userId"));
    }

}
4.Aop实现日志记录
@Component
@Aspect  //切面  定义了通知和切点的关系
@Slf4j
public class LogAspect {

    @Pointcut("@annotation(com.hh.aopLogger.LogAnnotation)")
    public void pt(){

    }

    //环绕通知
    @Around("pt()")
    public Object log(ProceedingJoinPoint point) throws Throwable {
        long beginTime = System.currentTimeMillis();
        //执行方法
        Object result = point.proceed();
        //执行时长(毫秒)
        long time = System.currentTimeMillis() - beginTime;
        //保存日志
        recordLog(point, time);
        return result;
    }

    private void recordLog(ProceedingJoinPoint joinPoint, long time) {
        MethodSignature signature = (MethodSignature) joinPoint.getSignature();
        Method method = signature.getMethod();
        LogAnnotation logAnnotation = method.getAnnotation(LogAnnotation.class);
        log.info("=====================log start================================");
        log.info("module:{}",logAnnotation.module());
        log.info("operation:{}",logAnnotation.operator());

        //请求的方法名
        String className = joinPoint.getTarget().getClass().getName();
        String methodName = signature.getName();
        log.info("request method:{}",className + "." + methodName + "()");

//        //请求的参数
        Object[] args = joinPoint.getArgs();
        String params = JSON.toJSONString(args[0]);
        log.info("params:{}",params);

        //获取request 设置IP地址
        HttpServletRequest request = HttpContextUtils.getHttpServletRequest();
        log.info("ip:{}", IpUtils.getIpAddr(request));


        log.info("excute time : {} ms",time);
        log.info("=====================log end================================");
    }


}
5.使用redis进行缓存处理和过期时间的安全限制
 //注意设置过期时间
        redisTemplate.opsForValue().set("TOKEN_"+token, JSON.toJSONString(sysUser),1, TimeUnit.DAYS);
        return Result.success(token);
#整合redis
  redis:
    host: localhost
    port: 6379
    password: 123456


 1万+
1万+


 被折叠的 条评论
为什么被折叠?
被折叠的 条评论
为什么被折叠?
 到【灌水乐园】发言


