


下载下来的证书包含两个文件:
Tomcat 配置
1.上传证书文件 上传证书到服务器上,这里目录根据自己可自由设置,我上传的路径为 tomcat/cert。 2.修改 conf/server.xml a.修改 tomcat 访问端口,将 8080 改为 80,在浏览器访问时不需要添加端口。将 redirectPort="8443"的端口改为 443,因为 https 的端口为 443。最终修改内容如下
<!-- A "Connector" represents an endpoint by which requests are received
         and responses are returned. Documentation at :
         Java HTTP Connector: /docs/config/http.html
         Java AJP  Connector: /docs/config/ajp.html
         APR (HTTP/AJP) Connector: /docs/apr.html
         Define a non-SSL/TLS HTTP/1.1 Connector on port 8080
    -->
    <Connector port="80" protocol="HTTP/1.1"
               connectionTimeout="20000"
               redirectPort="443" />
2.添加 ssl证书和密码,将 port 值改为 443,keystoreFile 属性指向服务器的 *.pfx文件,keystorePass的值为 pfx-password.txt 的内容,最终修改内容如下:
<!-- Define an SSL/TLS HTTP/1.1 Connector on port 8443
         This connector uses the NIO implementation. The default
         SSLImplementation will depend on the presence of the APR/native
         library and the useOpenSSL attribute of the
         AprLifecycleListener.
         Either JSSE or OpenSSL style configuration may be used regardless of
         the SSLImplementation selected. JSSE style configuration is used below.
-->
<Connector port="443"
    protocol="org.apache.coyote.http11.Http11Protocol"
    SSLEnabled="true"
    scheme="https"
    secure="true"
    keystoreFile="/xxx/tomcat/cert/restlessman.cn.pfx"
    keystoreType="PKCS12"
    keystorePass="xxxxx"
    clientAuth="false"
    SSLProtocol="TLSv1+TLSv1.1+TLSv1.2"
    ciphers="TLS_RSA_WITH_AES_128_CBC_SHA,TLS_RSA_WITH_AES_256_CBC_SHA,TLS_ECDHE_RSA_WITH_AES_128_CBC_SHA,TLS_ECDHE_RSA_WITH_AES_128_CBC_SHA256,TLS_RSA_WITH_AES_128_CBC_SHA256,TLS_RSA_WITH_AES_256_CBC_SHA256"/>
3.修改 conf/web.xml 在 conf/web.xml 添加如下内容,可从 http 跳转到 https
<login-config>
<!-- Authorization setting for SSL -->
<auth-method>CLIENT-CERT</auth-method>
<realm-name>Client Cert Users-only Area</realm-name>
</login-config>
<security-constraint>
<!-- Authorization setting for SSL -->
<web-resource-collection >
<web-resource-name >SSL</web-resource-name>
<url-pattern>/*</url-pattern>
</web-resource-collection>
<user-data-constraint>
<transport-guarantee>CONFIDENTIAL</transport-guarantee>
</user-data-constraint>
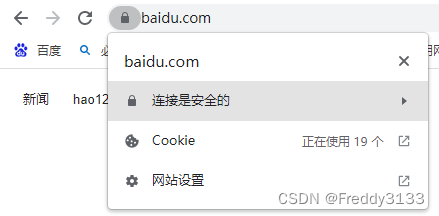
</security-constraint>4.重启 Tomcat 重启 Tomcat 后,访问 https://xxx.xxx.xxx 即可。如下图:


 886
886


 被折叠的 条评论
为什么被折叠?
被折叠的 条评论
为什么被折叠?
 到【灌水乐园】发言


