


如果用户在微信客户端中访问第三方网页,公众号可以通过微信网页授权机制,来获取用户基本信息,进而实现业务逻辑。
简要说明:
本文使用java web实现微信网页授权,整个授权过程是基于Oauth2.0授权码模式,这里不再赘述Oauth2.0。授权过程分为4步:
页面重定向至授权页面,获取code
-
用户授权后,页面带着code重定向至client指定地址,使用code换取accessToken
-
刷新accessToken(过期需要)
-
使用accessToken获取用户信息(通常openId,nickname,headimgurl)
开发前准备工作:
-
测试公众号,相当于你的开发主体在微信授权中心登记。需要appid,appsecret等信息
-
内网穿透工具,需要和微信进行交互,本文使用的是NATAPP
-
web应用,本文使用springboot2+thymeleaf+joddhttp
代码片段:
1.开发跳转微信授权接口,直接将页面重定向,注意参数REDIRECTP_URI需要URLEncode。
String AUTHORIZE_URL = "https://open.weixin.qq.com/connect/oauth2/authorize?appid=%s&redirect_uri=%s&response_type=%s&scope=%s&state=%s#wechat_redirect";
@GetMapping(value = "login")
public void wx(HttpServletRequest request, HttpServletResponse response) throws IOException {
    //1:重定向到授权页面: 引导用户进入授权页面同意授权,获取code
    String codeUrl = String.format(AUTHORIZE_URL, APPID, URLEncoder.encode(REDIRECT_URI, "utf-8"), RESPONSE_TYPE, SCOPE, STATE);
    response.sendRedirect(codeUrl);
}
2.用户授权后,微信会在上一步的REDIRECTP_URI拼接参数code。
String ACCESS_TOKEN_URL = "https://api.weixin.qq.com/sns/oauth2/access_token?appid=%s&secret=%s&code=%s&grant_type=authorization_code";
String GET_UERINFO_URL = "https://api.weixin.qq.com/sns/userinfo?access_token=%s&openid=%s&lang=zh_CN";
@GetMapping(value = "callback")
public ModelAndView wxcallback(@RequestParam("code") String code) throws IOException {
    //2:使用code换取access_token
    String accessTokenUrl = String.format(ACCESS_TOKEN_URL, APPID, APPSECRET, code);
    HttpResponse accessTokenResp = HttpRequest.get(accessTokenUrl).send();
    JSONObject jsonObject = JSON.parseObject(accessTokenResp.bodyText());
    String token = jsonObject.getString("access_token");
    String openid = jsonObject.getString("openid");
    //3:刷新access_token (if need)
    //4:获取用户信息
    String getUerinfoUrl = String.format(GET_UERINFO_URL, token, openid);
    HttpResponse userinfoResp = HttpRequest.get(getUerinfoUrl).send();
    WxUser wxUser = JSON.parseObject(userinfoResp.charset("utf-8").bodyText(), WxUser.class);
    ModelAndView modelAndView = new ModelAndView();
    modelAndView.addObject("userinfo", wxUser);
    modelAndView.setViewName("wx/wx_succ");
    return modelAndView;
}
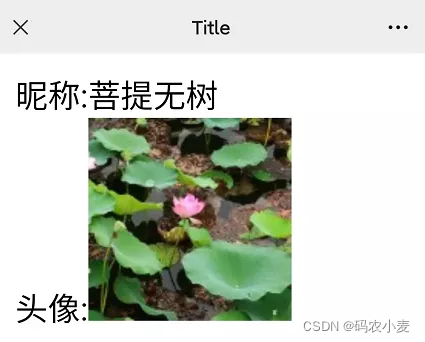
3.简单的测试页面,展示下用户数据。
<!DOCTYPE html>
<html lang="en" xmlns="http://www.w3.org/1999/xhtml"
      xmlns:th="http://www.thymeleaf.org">
<head>
    <meta charset="UTF-8">
    <title>Title</title>
</head>
<body>
    <div>昵称:<p th:text="${userinfo.nickname}"></p></div>
    <div>头像:<img width="100" th:src="${userinfo.headimgurl }"></div>
</body>
</html>
4.验证结果。
整体实现还是比较简单的,但这也是Oauth2.0授权码模式的整个流程,其他网站类似(如github,微博等)。


 1485
1485

 被折叠的 条评论
为什么被折叠?
被折叠的 条评论
为什么被折叠?
 到【灌水乐园】发言


