


 超级会员免费看
大致思路
所谓 tagsView 可以分成两部分来去看:
- tags
- view
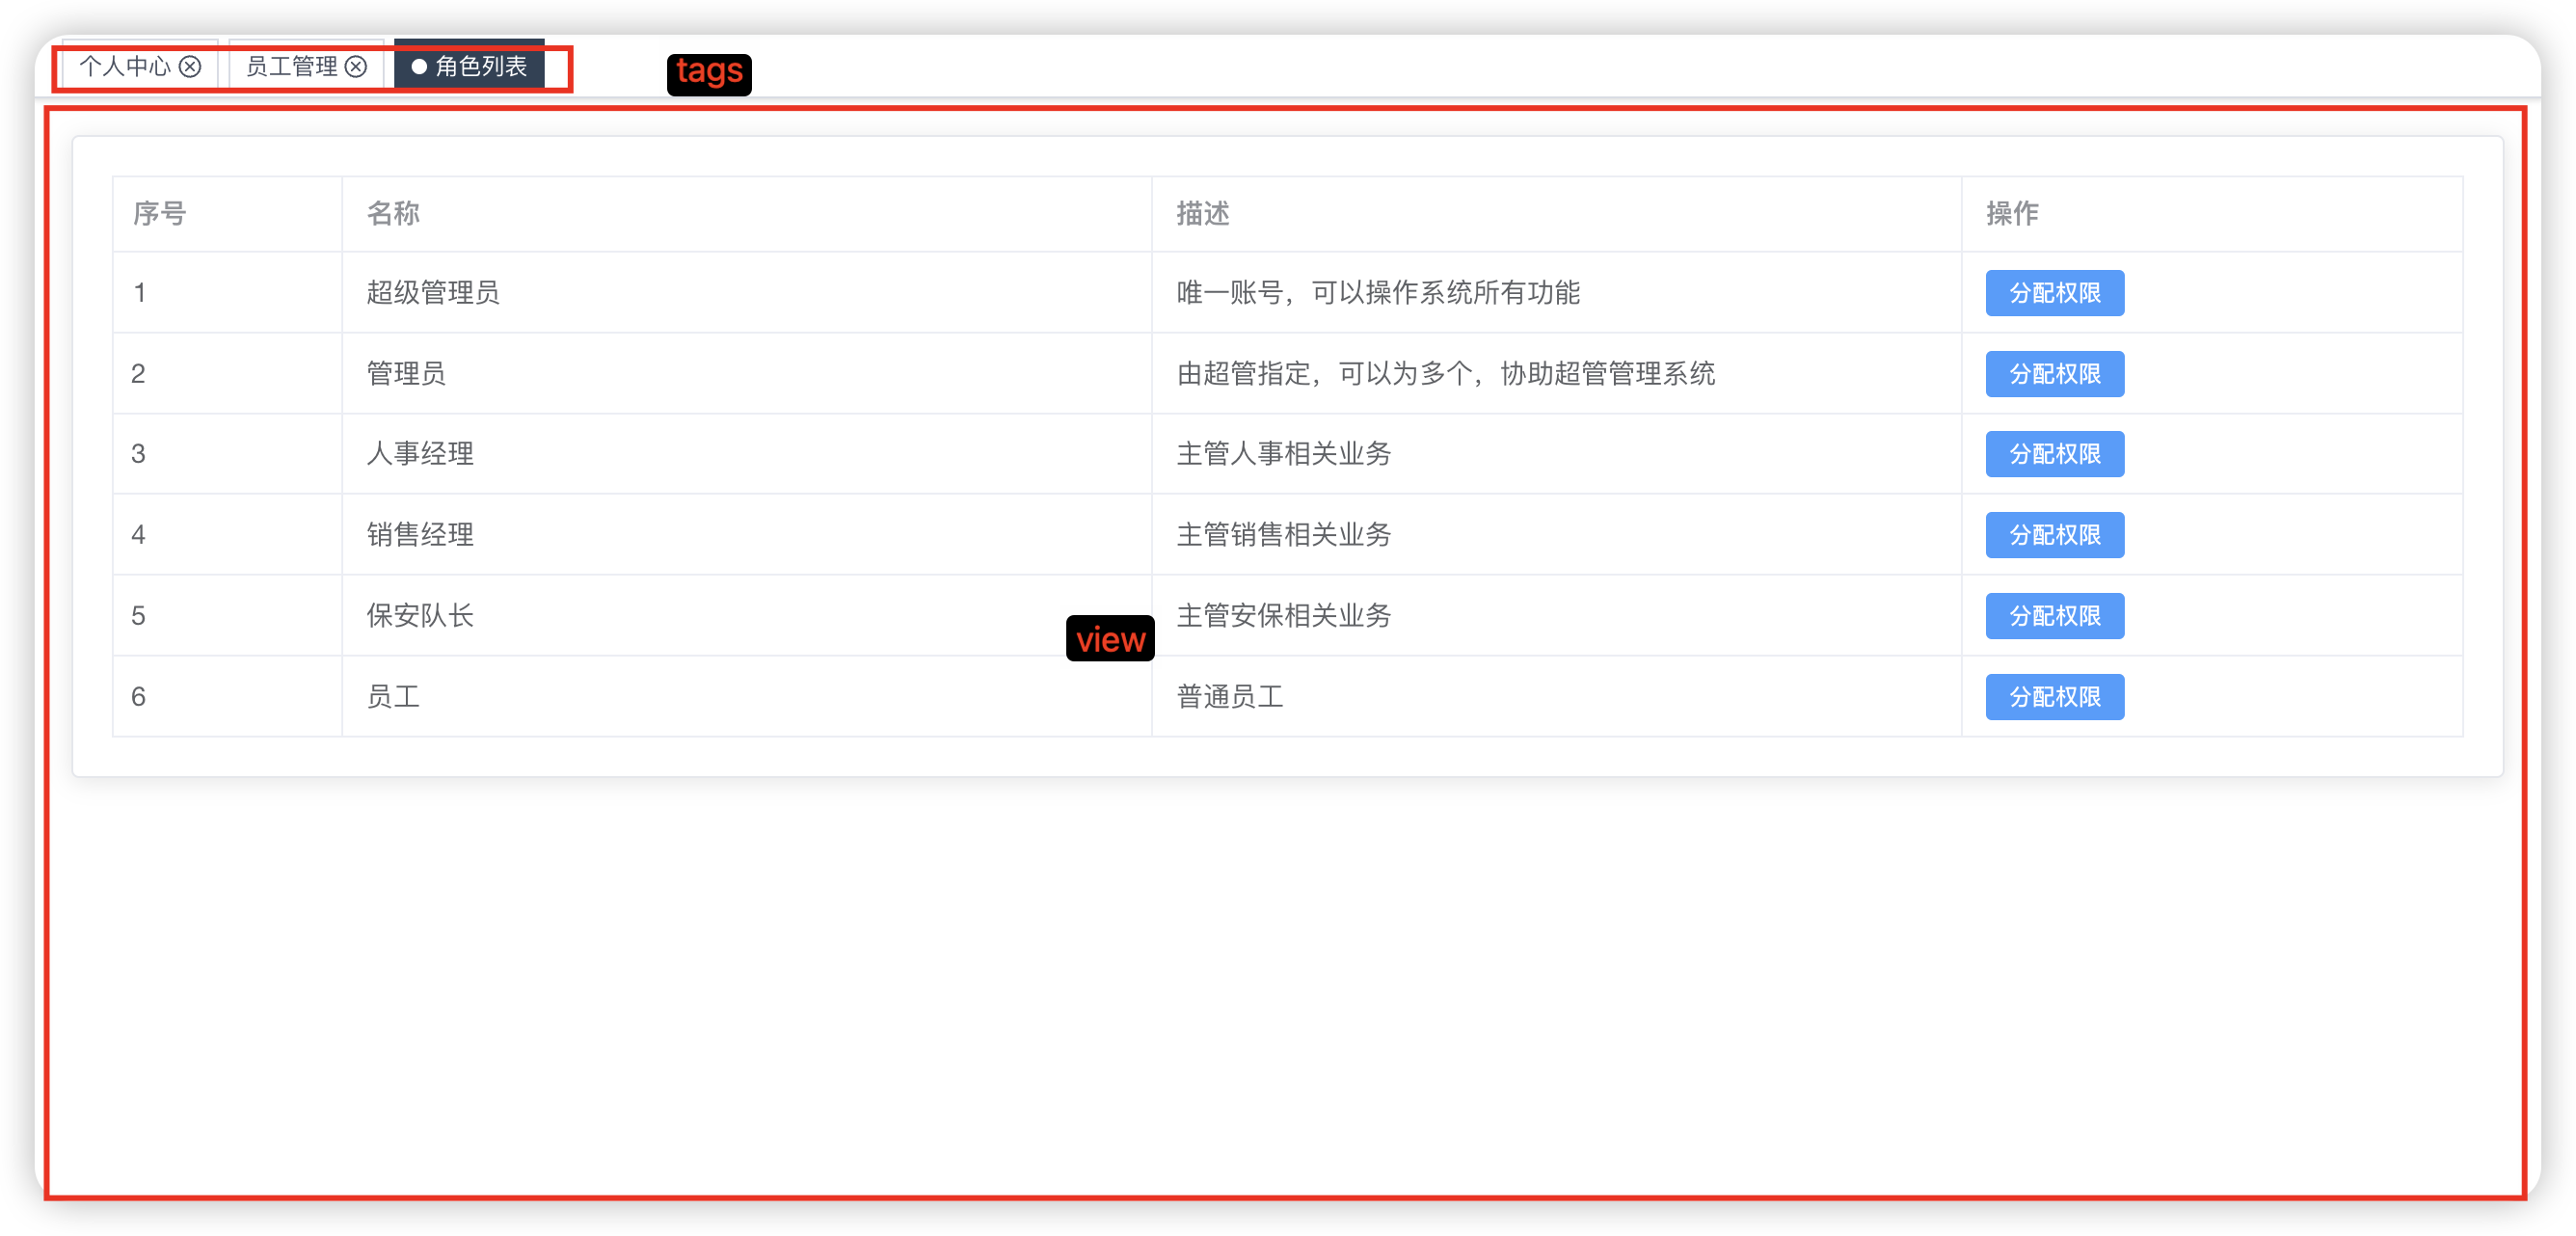
那怎么分开看呢?
首先我们先来看 tags:
所谓 tgas 指的是:位于 appmain 之上的标签
那么现在我们忽略掉 view,现在只有一个要求:
在 view 之上渲染这个 tag
仅看这一个要求,很简单吧。
views:
明确好了 tags 之后,我们来看 views。
脱离了 tags 只看 views 就更简单了,所谓 views :指的就是一个用来渲染组件的位置,就像我们之前的 Appmain 一样,只不过这里的 views 可能稍微复杂一点,因为它需要在渲染的基础上增加:
- 动画
- 缓存(数据的缓存)
这两个额外的功能。
加上这两个功能之后可能会略显复杂,但是 官网已经帮助我们处理了这个问题
所以 单看 views 也是一个很简单的功能。
那么接下来我们需要做的就是把 tags 和 view 合并起来而已。
那么明确好了原理之后,我们就来看 实现方案:
- 创建
tagsView组件:用来处理tags的展示 - 处理基于路由的动态过渡,在
AppMain中进行:用于处理view的部分
整个的方案就是这么两大部,但是其中我们还需要处理一些细节相关的,完整的方案为:
- 监听路由变化,组成用于渲染
tags的数据源 - 创建
tags组件,根据数据源渲染tag,渲染出来的tags需要同时具备
-
- 国际化
title (这里不考虑) - 路由跳转
- 国际化
- 处理鼠标右键效果,根据右键处理对应数据源
- 处理基于路由的动态过渡
那么明确好了方案之后,接下来我们根据方案进行处理即可。
基本布局
这里我们会基于element-plus的Tabs 标签页组件以及dropdown联合进行封装开发
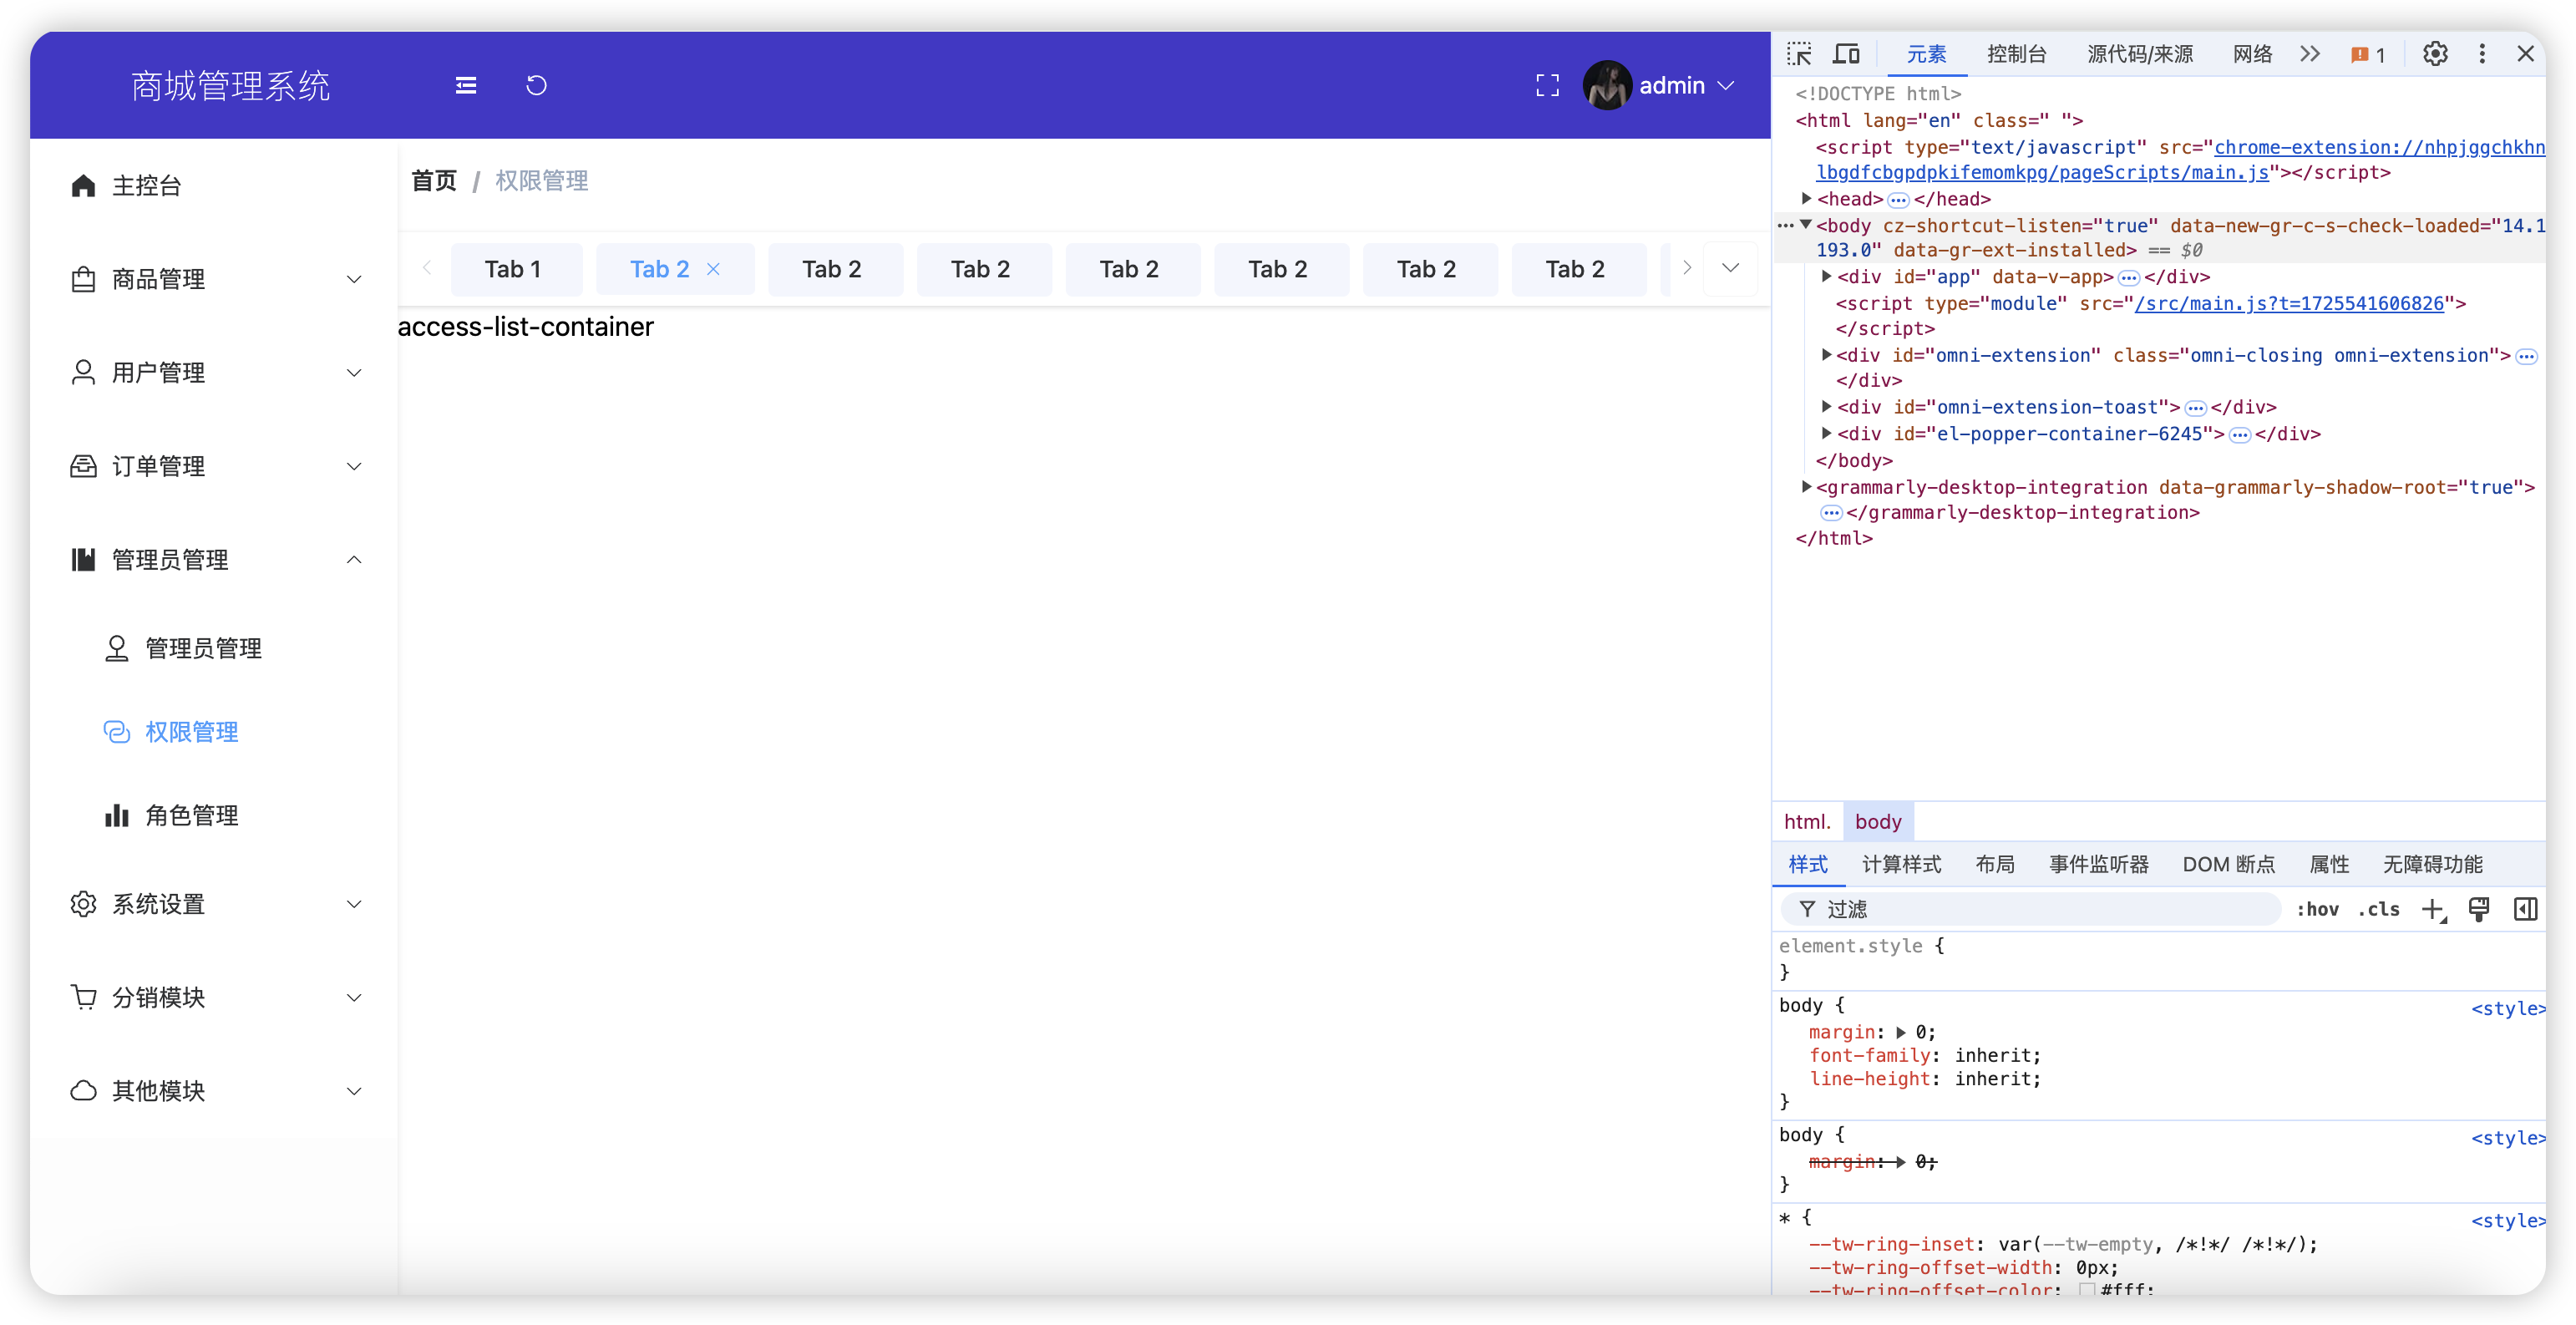
layout/components/tagsView/idnex.vue
<template>
  <div
    class="f-tag-list"
    :style="{ left: appStore.sidebar.opened == '1' ? '220px' : '64px' }"
  >
    <el-tabs
      v-model="editableTabsValue"
      type="card"
      closable
      @edit="handleTabsEdit"
      class="flex-1"
      style="min-width: 100px;"
    >
      <el-tab-pane
        v-for="item in editableTabs"
        :key="item.name"
        :label="item.title"
        :name="item.name"
      >
      </el-tab-pane>
    </el-tabs>

    <span class="tag-btn">
      <el-dropdown>
        <span class="el-dropdown-link">
          <el-icon>
            <arrow-down />
          </el-icon>
        </span>
        <template #dropdown>
          <el-dropdown-menu>
            <el-dropdown-item>Action 1</el-dropdown-item>
            <el-dropdown-item>Action 2</el-dropdown-item>
            <el-dropdown-item>Action 3</el-dropdown-item>
            <el-dropdown-item disabled>Action 4</el-dropdown-item>
            <el-dropdown-item divided>Action 5</el-dropdown-item>
          </el-dropdown-menu>
        </template>
      </el-dropdown>
    </span>
  </div>
</template>

<script setup>
import useAppStore from "@/store/modules/app";

const appStore = useAppStore();

let tabIndex = 2;
const editableTabsValue = ref("2");
const editableTabs = ref([
  {
    title: "Tab 1",
    name: "1",
    content: "Tab 1 content",
  },
  {
    title: "Tab 2",
    name: "2",
    content: "Tab 2 content",
  },
  {
    title: "Tab 2",
    name: "3",
    content: "Tab 2 content",
  },
  {
    title: "Tab 2",
    name: "4",
    content: "Tab 2 content",
  },
  {
    title: "Tab 2",
    name: "5",
    content: "Tab 2 content",
  },
  {
    title: "Tab 2",
    name: "6",
    content: "Tab 2 content",
  },
  {
    title: "Tab 2",
    name: "7",
    content: "Tab 2 content",
  },
  {
    title: "Tab 2",
    name: "8",
    content: "Tab 2 content",
  },
  {
    title: "Tab 2",
    name: "9",
    content: "Tab 2 content",
  },
  {
    title: "Tab 2",
    name: "10",
    content: "Tab 2 content",
  },
]);
const handleTabsEdit = (targetName, action) => {
  if (action === "add") {
    const newTabName = `${++tabIndex}`;
    editableTabs.value.push({
      title: "New Tab",
      name: newTabName,
      content: "New Tab content",
    });
    editableTabsValue.value = newTabName;
  } else if (action === "remove") {
    const tabs = editableTabs.value;
    let activeName = editableTabsValue.value;
    if (activeName === targetName) {
      tabs.forEach((tab, index) => {
        if (tab.name === targetName) {
          const nextTab = tabs[index + 1] || tabs[index - 1];
          if (nextTab) {
            activeName = nextTab.name;
          }
        }
      });
    }

    editableTabsValue.value = activeName;
    editableTabs.value = tabs.filter((tab) => tab.name !== targetName);
  }
};
</script>

<style scoped lang="scss">
:deep(.el-tooltip__trigger:focus-visible) {
  outline: unset !important;
}

:deep(.el-tabs__header) {
  margin-bottom: 0 !important;
}

:deep(.el-tabs--card > .el-tabs__header) {
  border-bottom: none !important;
}

:deep(.el-tabs__nav) {
  border: 0 !important;
}

:deep(.el-tabs--card > .el-tabs__header .el-tabs__item) {
  border-left: 0 !important;
  height: 32px !important;
  line-height: 32px !important;
  background-color: rgba(216,226,249, .3);
  @apply mx-1 rounded;
}

:deep(.el-tabs__nav-next), :deep( .el-tabs__nav-prev) {
    line-height: 32px;
    height: 32px;
}

:deep(.is-disabled) {
    cursor: not-allowed;
    @apply text-gray-300;
}

.f-tag-list {
  height: 44px;
  z-index: 100;
  width: 100%;
  background: #fff;
  -webkit-box-shadow: 0 1px 3px 0 rgba(0, 0, 0, 0.12),
    0 0 3px 0 rgba(0, 0, 0, 0.04);
  box-shadow: 0 1px 3px 0 rgba(0, 0, 0, 0.12), 0 0 3px 0 rgba(0, 0, 0, 0.04);
  @apply bg-white flex items-center px-2;
}

.tag-btn {
  @apply bg-white rounded ml-auto flex items-center justify-center;
  height: 32px;
  width: 32px;
  -webkit-box-shadow: 0 0px 1px 0 rgba(0, 0, 0, 0.12),
    0 0 0px 0 rgba(0, 0, 0, 0.04);
  box-shadow: 0 px 1px 0 rgba(0, 0, 0, 0.12), 0 0 1px 0 rgba(0, 0, 0, 0.04);
}
</style>
同步路由和存储
layout/components/tagsView/index.vue
<template>
  <div
    class="f-tag-list"
    :style="{ left: appStore.sidebar.opened == '1' ? '220px' : '64px' }"
  >
    <el-tabs
      v-model="activeTags"
      type="card"
      @edit="handleTagsEdit"
      @tab-change="tabChangeEvent"
      class="flex-1"
      style="min-width: 100px"
    >
      <el-tab-pane
        v-for="item in tagsList"
        :key="item.path"
        :label="item.title"
        :name="item.path"
        :closable="item.path != '/dashboard'"
      >
      </el-tab-pane>
    </el-tabs>

    <span class="tag-btn">
      <el-dropdown>
        <span class="el-dropdown-link">
          <el-icon>
            <arrow-down />
          </el-icon>
        </span>
        <template #dropdown>
          <el-dropdown-menu>
            <el-dropdown-item>Action 1</el-dropdown-item>
            <el-dropdown-item>Action 2</el-dropdown-item>
            <el-dropdown-item>Action 3</el-dropdown-item>
            <el-dropdown-item disabled>Action 4</el-dropdown-item>
            <el-dropdown-item divided>Action 5</el-dropdown-item>
          </el-dropdown-menu>
        </template>
      </el-dropdown>
    </span>
  </div>
</template>

<script setup>
import useAppStore from "@/store/modules/app";
import Cookies from "js-cookie";

const route = useRoute();
const router = useRouter();
const appStore = useAppStore();

const activeTags = ref(route.path);
const tagsList = ref([
  {
    title: "首页",
    path: "/dashboard",
  },
]);

// 初始化tags标签
function initTagsList() {
  let tagsInitList = Cookies.get('tagsList');
  if(tagsInitList) {
    tagsList.value = JSON.parse(tagsInitList);
  }
}
initTagsList()

// 添加标签导航
function addtags(tag) {
  // 判断是否已经存在tag
  let noTag = tagsList.value.findIndex((t) => t.path == tag.path) == -1;
  if (noTag) {
    tagsList.value.push(tag);
  }
  // 缓存
  Cookies.set("tagsList", JSON.stringify(tagsList.value));
}

// 监听路由变化
onBeforeRouteUpdate((to, from) => {
  activeTags.value = to.path;
  addtags({
    title: to.meta.title,
    path: to.path,
  });
});

// 标签栏点击事件
const handleTagsEdit = (targetName, action) => {
  console.log(action, targetName);
  if (action === "add") {
  } else if (action === "remove") {
  }
};

// 监听 tag 的切换
const tabChangeEvent = (name) => {
  activeTags.value = name;
  router.push(name)
};
</script>

<style scoped lang="scss">
  ...
</style>
关闭标签导航实现

当我们点击关闭标签导航的时候会自动切换到下一个;关闭下一个标签导航会自动切换到上一个
layout/components/tagsView/index.vue
<el-tabs
  v-model="activeTags"
  type="card"
++  @tab-remove="handleTagsRemoveEvent"
  @tab-change="tabChangeEvent"
  class="flex-1"
  style="min-width: 100px"
>

// 标签栏点击事件
const handleTagsRemoveEvent = (t) => {
  let tags = tagsList.value;
  let currentActiveTag = activeTags.value;

  // 如果关闭的是当前激活的标签
  if (currentActiveTag === t) {
    // 尝试找到下一个或上一个可激活的标签
    let nextTag;
    for (let i = 0; i < tags.length; i++) {
      if (tags[i].path === t) {
        nextTag = tags[i + 1] || tags[i - 1]; // 尝试找下一个或上一个标签
        break;
      }
    }

    // 如果没有找到可激活的标签(例如,只剩下一个标签且被关闭),可以选择默认路由
    if (!nextTag) {
      nextTag = tags[0]; // 或者其他默认逻辑
    }

    // 更新激活标签
    activeTags.value = nextTag.path;

    // 如果新激活的标签不是当前路由,则跳转
    if (nextTag.path !== route.path) {
      router.push(nextTag.path);
    }
  }

  // 过滤标签列表并缓存
  tagsList.value = tags.filter((tag) => tag.path !== t);
  Cookies.set("tagsList", JSON.stringify(tagsList.value));
};
关闭其他和关闭全部功能实现
layout/components/tagsView/index.vue
<span class="tag-btn">
  <el-dropdown @command="commandEvent">
    <span class="el-dropdown-link">
      <el-icon>
        <arrow-down />
      </el-icon>
    </span>
    <template #dropdown>
      <el-dropdown-menu>
        <el-dropdown-item command="clearOther">关闭其他</el-dropdown-item>
        <el-dropdown-item command="clearAll">全部关闭</el-dropdown-item>
      </el-dropdown-menu>
    </template>
  </el-dropdown>
</span>

// 关闭其他/关闭全部功能
const commandEvent = (val) => {
  if (val == "clearAll") {
    // 标签激活状态切换为 首页
    activeTags.value = "/dashboard";
    // 直接跳转到首页路由
    router.push("/dashboard");
    // 过滤 tags 数组,只剩下首页
    tagsList.value = [
      {
        title: "首页",
        path: "/dashboard",
      },
    ];
  } else if (val == "clearOther") {
    // 过滤只剩下首页和当前激活的tag
    tagsList.value = tagsList.value.filter(
      (tab) => tab.path == "/dashboard" || tab.path == activeTags.value
    );
  }
  Cookies.set("tagsList", JSON.stringify(tagsList.value));
};
优化逻辑
对于上面写的逻辑我们这里对其进行一个抽离封装成hooks
hooks/useTags.js
import Cookies from "js-cookie";

export function useTags() {
  const route = useRoute();
  const router = useRouter();

  const activeTags = ref(route.path);
  const tagsList = ref([
    {
      title: "首页",
      path: "/dashboard",
    },
  ]);

  // 初始化tags标签
  function initTagsList() {
    let tagsInitList = Cookies.get("tagsList");
    if (tagsInitList) {
      tagsList.value = JSON.parse(tagsInitList);
    }
  }
  initTagsList();

  // 添加标签导航
  function addtags(tag) {
    // 判断是否已经存在tag
    let noTag = tagsList.value.findIndex((t) => t.path == tag.path) == -1;
    if (noTag) {
      tagsList.value.push(tag);
    }
    // 缓存
    Cookies.set("tagsList", JSON.stringify(tagsList.value));
  }

  // 监听路由变化
  onBeforeRouteUpdate((to, from) => {
    activeTags.value = to.path;
    addtags({
      title: to.meta.title,
      path: to.path,
    });
  });

  // 监听 tag 的切换
  const tabChangeEvent = (name) => {
    activeTags.value = name;
    router.push(name);
  };

  // 标签栏点击事件
  const handleTagsRemoveEvent = (t) => {
    let tags = tagsList.value;
    let currentActiveTag = activeTags.value;

    // 如果关闭的是当前激活的标签
    if (currentActiveTag === t) {
      // 尝试找到下一个或上一个可激活的标签
      let nextTag;
      for (let i = 0; i < tags.length; i++) {
        if (tags[i].path === t) {
          nextTag = tags[i + 1] || tags[i - 1]; // 尝试找下一个或上一个标签
          break;
        }
      }

      // 如果没有找到可激活的标签(例如,只剩下一个标签且被关闭),可以选择默认路由
      if (!nextTag) {
        nextTag = tags[0]; // 或者其他默认逻辑
      }

      // 更新激活标签
      activeTags.value = nextTag.path;

      // 如果新激活的标签不是当前路由,则跳转
      if (nextTag.path !== route.path) {
        router.push(nextTag.path);
      }
    }

    // 过滤标签列表并缓存
    tagsList.value = tags.filter((tag) => tag.path !== t);
    Cookies.set("tagsList", JSON.stringify(tagsList.value));
  };

  // 关闭其他/关闭全部功能
  const commandEvent = (val) => {
    if (val == "clearAll") {
      // 标签激活状态切换为 首页
      activeTags.value = "/dashboard";
      // 直接跳转到首页路由
      router.push("/dashboard");
      // 过滤 tags 数组,只剩下首页
      tagsList.value = [
        {
          title: "首页",
          path: "/dashboard",
        },
      ];
    } else if (val == "clearOther") {
      // 过滤只剩下首页和当前激活的tag
      tagsList.value = tagsList.value.filter(
        (tab) => tab.path == "/dashboard" || tab.path == activeTags.value
      );
    }
    Cookies.set("tagsList", JSON.stringify(tagsList.value));
  };

  return {
    activeTags,
    tagsList,
    tabChangeEvent,
    handleTagsRemoveEvent,
    commandEvent,
  }
}
layout/components/tagsView/index.vue
<template>
  <div
    class="f-tag-list"
    :style="{ left: appStore.sidebar.opened == '1' ? '220px' : '64px' }"
  >
    <el-tabs
      v-model="activeTags"
      type="card"
      @tab-remove="handleTagsRemoveEvent"
      @tab-change="tabChangeEvent"
      class="flex-1"
      style="min-width: 100px"
    >
      <el-tab-pane
        v-for="item in tagsList"
        :key="item.path"
        :label="item.title"
        :name="item.path"
        :closable="item.path != '/dashboard'"
      >
      </el-tab-pane>
    </el-tabs>

    <span class="tag-btn">
      <el-dropdown @command="commandEvent">
        <span class="el-dropdown-link">
          <el-icon>
            <arrow-down />
          </el-icon>
        </span>
        <template #dropdown>
          <el-dropdown-menu>
            <el-dropdown-item command="clearOther">关闭其他</el-dropdown-item>
            <el-dropdown-item command="clearAll">全部关闭</el-dropdown-item>
          </el-dropdown-menu>
        </template>
      </el-dropdown>
    </span>
  </div>
</template>

<script setup>
import useAppStore from "@/store/modules/app";
import { useTags } from "@/hooks/useTags";

const appStore = useAppStore();
const {
  activeTags,
  tagsList,
  tabChangeEvent,
  handleTagsRemoveEvent,
  commandEvent,
} = useTags();
</script>

<style scoped lang="scss">
:deep(.el-tooltip__trigger:focus-visible) {
  outline: unset !important;
}

:deep(.el-tabs__header) {
  margin-bottom: 0 !important;
}

:deep(.el-tabs--card > .el-tabs__header) {
  border-bottom: none !important;
}

:deep(.el-tabs__nav) {
  border: 0 !important;
}

:deep(.el-tabs--card > .el-tabs__header .el-tabs__item) {
  border-left: 0 !important;
  height: 32px !important;
  line-height: 32px !important;
  background-color: rgba(216, 226, 249, 0.3);
  @apply mx-1 rounded;
}

:deep(.el-tabs__nav-next),
:deep(.el-tabs__nav-prev) {
  line-height: 32px;
  height: 32px;
}

:deep(.is-disabled) {
  cursor: not-allowed;
  @apply text-gray-300;
}

.f-tag-list {
  height: 44px;
  z-index: 100;
  width: 100%;
  background: #fff;
  -webkit-box-shadow: 0 1px 3px 0 rgba(0, 0, 0, 0.12),
    0 0 3px 0 rgba(0, 0, 0, 0.04);
  box-shadow: 0 1px 3px 0 rgba(0, 0, 0, 0.12), 0 0 3px 0 rgba(0, 0, 0, 0.04);
  @apply bg-white flex items-center px-2;
}

.tag-btn {
  @apply bg-white rounded ml-auto flex items-center justify-center;
  height: 32px;
  width: 32px;
  -webkit-box-shadow: 0 0px 1px 0 rgba(0, 0, 0, 0.12),
    0 0 0px 0 rgba(0, 0, 0, 0.04);
  box-shadow: 0 px 1px 0 rgba(0, 0, 0, 0.12), 0 0 1px 0 rgba(0, 0, 0, 0.04);
}
</style>
到这里的话我们的tagsView布局和功能就开发完成了。
当然这里也可以自己手写一个,我这里给出一个手写的示例代码:


 5332
5332

 被折叠的 条评论
为什么被折叠?
被折叠的 条评论
为什么被折叠?
 到【灌水乐园】发言


