


1.sshd简介
软件名字openssh-server
sshd=secure shell
可以通过网络在主机中开机shell的服务
客户端软件
sshd
连接方式:
ssh username@ip ## 文本模式的链接
ssh -X username@ip ## 可以在链接成功后开机图形化
注意:
	第一次链接陌生主机是要建立认证文件
	所以会询问是否建立,需要输入yes
	再次链接此台主机时,因为已经生成~/.ssh/konw_hosts文件所以不需要再次输入yes
第一次连接
[root@westosclient ~]# ssh root@172.25.254.174
The authenticity of host ‘172.25.254.174 (172.25.254.174)’ can’t be established.
ECDSA key fingerprint is eb:24:0e:07:96:26:b1:04:c2:37:0c:78:2d:bc:b0:08.
Are you sure you want to continue connecting (yes/no)? yes
Warning: Permanently added ‘172.25.254.174’ (ECDSA) to the list of known hosts.
root@172.25.254.174’s password:
Last login: Mon Oct 14 22:19:31 2019 from 172.25.254.74
[root@westosserver ~]# exit
logout
Connection to 172.25.254.174 closed.
第二次连接
[root@westosclient ~]# ssh root@172.25.254.174
root@172.25.254.174’s password:
Last login: Mon Oct 14 22:20:58 2019 from 172.25.254.110
[root@westosserver ~]#
硬件问题:
su -
virt-manager
2.sshd的key认证
1.生成认证KEY
密钥:
cd
1.ssh-keygen	(ssh-keygen -f /root/.ssh/id_rsa -P "")	生成密钥
2.ssh-copy-id -i id_rsa.pub root@172.25.254.108	对主机锁定生成公钥,加密sshd服务
3.vim /etc/ssh/sshd_config			改变密码认证
4.systemctl restart sshd.server			重起服务
第一步:
[root@westosserver ~]# cd
[root@westosserver ~]# ssh-keygen
Generating public/private rsa key pair.
Enter file in which to save the key (/root/.ssh/id_rsa):
Created directory '/root/.ssh'.
Enter passphrase (empty for no passphrase):
Enter same passphrase again:
Your identification has been saved in /root/.ssh/id_rsa.
Your public key has been saved in /root/.ssh/id_rsa.pub.
The key fingerprint is:
f7:1a:09:bb:cb:7e:78:f8:e5:2f:63:e6:d7:a3:1a:7b root@westosserver.example.com
The key's randomart image is:
+--[ RSA 2048]----+
|                 |
|                 |
|                 |
|                 |
|        S .      |
|         + o     |
|        .oo.o  . |
|       .o.o=BE...|
|       .==o*=*o .|
+-----------------+
[root@westosserver ~]#
第二步:
[root@westosserver ~]# ls /root/.ssh/
id_rsa  id_rsa.pub
[root@westosserver ~]# cd /root/.ssh
[root@westosserver .ssh]# ssh-copy-id -i id_rsa.pub root@172.25.254.174
The authenticity of host '172.25.254.174 (172.25.254.174)' can't be established.
ECDSA key fingerprint is eb:24:0e:07:96:26:b1:04:c2:37:0c:78:2d:bc:b0:08.
Are you sure you want to continue connecting (yes/no)? yes
/usr/bin/ssh-copy-id: INFO: attempting to log in with the new key(s), to filter out any that are already installed
/usr/bin/ssh-copy-id: INFO: 1 key(s) remain to be installed -- if you are prompted now it is to install the new keys
root@172.25.254.174's password:

Number of key(s) added: 1

Now try logging into the machine, with:   "ssh 'root@172.25.254.174'"
and check to make sure that only the key(s) you wanted were added.

[root@westosserver .ssh]# ls
authorized_keys  id_rsa  id_rsa.pub  known_hosts
[root@westosserver .ssh]#
第三步:
# To disable tunneled clear text passwords, change to no here!
#PasswordAuthentication yes
#PermitEmptyPasswords no
PasswordAuthentication no
未发密钥:

2.分发密钥
scp /root/.ssh/id_rsa.pub root@172.25.254.208:/root/.ssh/	将密钥送给客户
mv authorized_keys authorized_keys.bak		控制客户是否可以链接主机
3.测试
在客户主机(172.25.254.108)
ssh root@172.25.254.208 ##链接时登陆不需要密码
发了密钥:

服务主机:
setenforce 0
systemctl stop firewalld 关闭防火墙
netstat -antlupe | grep sshd 查看端口号
vim /etc/ssh/sshd_config 服务配置文件
17行 端口号改为6666
systemctl restart sshd.server 重起服务
netstat -antlupe | grep sshd
#########
15 # semanage port -a -t ssh_port_t -p tcp #PORTNUMBER
16 #
17 #Port 22
18 #AddressFamily any
19 #ListenAddress 0.0.0.0
20 #ListenAddress ::
#########
测试(客户端):
ssh root@172.25.254.108

ssh root@172.25.254.108 -p 6666


| 内容格式 | 说明 |
|---|---|
| ListenAddress ip | 设定某个ip通过端口号连接上 |
| PermitRootLogin yes\no | 设定超级用户是否允许连接 |
| DenyUsers 用户名 | 设定黑名单,默认其他用户为白用户 |
| AllowUsers 用户名 | 设定白名单,默认其他用户为黑用户 |
| PasswordAuthentication yes\no | 设定是否能通过密码连接 |
| Port number | 设定端口号 |
远程上传和下载:
scp [-r] 本机路径  用户@172.25.254.8:要存储的路径	## 上传

scp [-r] 远程主机用户名@172.25.254.8:路径	本机路径 ## 下载


rsync -rtopgl 远程主机用户名@172.25.254.8:路径 本机路径 ## 下载
rsync -rD /dev/pts root@172.25.254.8:/mnt
	o	不忽略用户
	g	不忽略组
	t	不忽略时间戳
	p	不忽略权限
	l	不忽略链接
	r	复制目录
	D 	不忽略字符设备
time scp [-r] 本机路径  用户@172.25.254.8:要存储的路径	## 上传  查看时间

du -sh /usr/bin/ 	#查看文件大小
测试(rsync):
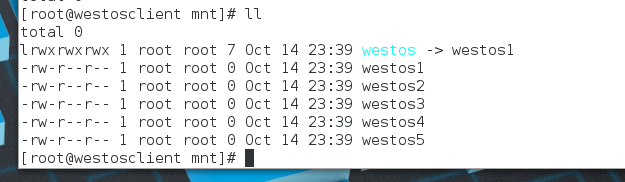
首先在sever中建立五个文件,再链一个文件(做以下工作):

1.rsync -r /mnt/ root@172.25.254.110:/mnt
发送方:

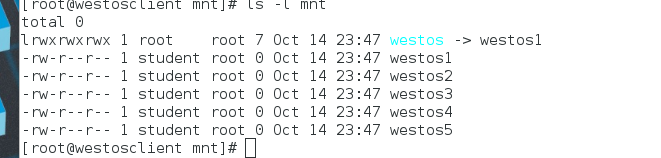
接受方:

2.rsync -r /mnt root@172.25.254.110:/mnt
发送方:

接受方:

2.rsync -lr /mnt root@172.25.254.110:/mnt
发送方:

接受方:
2.rsync -lor /mnt root@172.25.254.110:/mnt
发送方:

接受方:
2.rsync -ltopgr /mnt root@172.25.254.110:/mnt
发送方:

接受方:


 被折叠的 条评论
为什么被折叠?
被折叠的 条评论
为什么被折叠?
 到【灌水乐园】发言


