


编写hcnet-website的资源服务
- 依赖管理pom文件
hcnet-website工程的pom文件继承主maven的pom文件。在hcnet-website工程的pom文件中添加web功能的起步依赖spring-boot-starter-web, Oauth2的起步依赖spring-cloud-starter-oauth2,数据库链接依赖mysql-connector-java, Mybatis依赖,mybatis生成器依赖,mybatis分页插件依赖,Druid数据源,consul服务注册与发现,openfeign声明式服务消费,负载均衡, Hystrix服务熔断, swagger聚合文档起步依赖。 pom的代码如下:|
<?xml version="1.0" encoding="UTF-8"?>
<project xmlns="http://maven.apache.org/POM/4.0.0" xmlns:xsi="http://www.w3.org/2001/XMLSchema-instance"
xsi:schemaLocation="http://maven.apache.org/POM/4.0.0 https://maven.apache.org/xsd/maven-4.0.0.xsd">
<modelVersion>4.0.0</modelVersion>
<!--集成基本打包model-->
<parent>
<groupId>cn.hcnet2006.blog</groupId>
<artifactId>blog-base</artifactId>
<version>0.0.1-SNAPSHOT</version>
</parent>
<!--module名-->
<groupId>cn.hcnet2006.blog</groupId>
<artifactId>hcnet-website-1</artifactId>
<version>0.0.1-SNAPSHOT</version>
<name>hcnet-website</name>
<!--打包方式-->
<packaging>jar</packaging>
<description>Demo project for Spring Boot</description>
<!--本Model属性-->
<properties>
<spring-boot-admin.version>2.2.2</spring-boot-admin.version>
</properties>
<!--本Model依赖-->
<dependencies>
<!--集成swagger2文档-->
<dependency>
<groupId>io.springfox</groupId>
<artifactId>springfox-swagger2</artifactId>
<version>2.9.2</version>
</dependency>
<dependency>
<groupId>io.springfox</groupId>
<artifactId>springfox-swagger-ui</artifactId>
<version>2.9.2</version>
</dependency>
<!--OAuth2依赖-->
<!-- <dependency>-->
<!-- <groupId>org.springframework.cloud</groupId>-->
<!-- <artifactId>spring-cloud-starter-oauth2</artifactId>-->
<!-- </dependency>-->
<!--JSON WEB TOKEN-->
<dependency>
<groupId>io.jsonwebtoken</groupId>
<artifactId>jjwt</artifactId>
<version>0.9.1</version>
</dependency>
<!--添加MyBatis依赖-->
<dependency>
<groupId>org.mybatis.spring.boot</groupId>
<artifactId>mybatis-spring-boot</artifactId>
<version>2.1.1</version>
</dependency>
<!--添加MyBatis生成器-->
<dependency>
<groupId>org.mybatis.generator</groupId>
<artifactId>mybatis-generator-core</artifactId>
<version>1.4.0</version>
</dependency>
<!--MYBatis分页查询-->
<dependency>
<groupId>com.github.pagehelper</groupId>
<artifactId>pagehelper-spring-boot-starter</artifactId>
<version>1.2.13</version>
</dependency>
<!--MYSQL驱动-->
<dependency>
<groupId>mysql</groupId>
<artifactId>mysql-connector-java</artifactId>
<version>8.0.19</version>
</dependency>
<!--Druid数据源-->
<dependency>
<groupId>com.alibaba</groupId>
<artifactId>druid-spring-boot-starter</artifactId>
<version>1.1.21</version>
</dependency>
<!-- <!–健康监控–>-->
<dependency>
<groupId>org.springframework.boot</groupId>
<artifactId>spring-boot-starter-actuator</artifactId>
</dependency>
<!-- <!–集成服务发现–>-->
<dependency>
<groupId>org.springframework.cloud</groupId>
<artifactId>spring-cloud-consul-discovery</artifactId>
</dependency>
<!-- <!–集成配置–>-->
<!-- <dependency>-->
<!-- <groupId>org.springframework.cloud</groupId>-->
<!-- <artifactId>spring-cloud-starter-config</artifactId>-->
<!-- </dependency>-->
<!-- <!–集成服务熔断–>-->
<dependency>
<groupId>org.springframework.cloud</groupId>
<artifactId>spring-cloud-starter-netflix-hystrix</artifactId>
</dependency>
<!-- <!–集成服务消费–>-->
<dependency>
<groupId>org.springframework.cloud</groupId>
<artifactId>spring-cloud-starter-openfeign</artifactId>
</dependency>
<!-- <!–集成服务监控–>-->
<!-- <dependency>-->
<!-- <groupId>de.codecentric</groupId>-->
<!-- <artifactId>spring-boot-admin-starter-client</artifactId>-->
<!-- <version>${spring-boot-admin.version}</version>-->
<!-- </dependency>-->
<!-- <!–集成链路追踪–>-->
<!-- <dependency>-->
<!-- <groupId>org.springframework.cloud</groupId>-->
<!-- <artifactId>spring-cloud-starter-zipkin</artifactId>-->
<!-- </dependency>-->
<!-- <!–集成消息总线–>-->
<!-- <dependency>-->
<!-- <groupId>org.springframework.cloud</groupId>-->
<!-- <artifactId>spring-cloud-starter-bus-amqp</artifactId>-->
<!-- </dependency>-->
<!--使用GOOGLE ZING生成二维码-->
2.配置文件application.yml
在工程的配置文件中,配置程序名为hcnet-website,端口号为8211, 服务注册地址为http://localhost:8500,以及数据源,环境配置,mybatis映射配置,服务熔断配置
代码如下:
server:
  port: 8211 #应用端口
spring:
  application:
    name: hcnet-website #应用名
  servlet: #上传配置
    multipart:
      enabled: true
      file-size-threshold: 0
      max-file-size: 10000000
      max-request-size: 10000000
      resolve-lazily: false
  datasource: #数据库配置
    name: druidDataSource
    type: com.alibaba.druid.pool.DruidDataSource
    druid:
      username: root
      password: 123456
      driver-class-name: com.mysql.cj.jdbc.Driver
      url: jdbc:mysql:///hc_official_website_1?useUnicode=true&characterEncoding=UTF-8&serverTimezone=Asia/Shanghai
      filters: stat, wall, config
      initial-size: 1
      max-active: 100
      max-wait: 60000
      min-idle: 1
      time-between-eviction-runs-millis: 60000
      min-evictable-idle-time-millis: 300000
      validation-query: select 'x'
      test-while-idle: true
      test-on-borrow: false
      test-on-return: false
      pool-prepared-statements: true
      max-open-prepared-statements: 50
      max-pool-prepared-statement-per-connection-size: 20
      filter:
        wall:
          config:
            multi-statement-allow: true #允许一次批量更新操作,会导致SQL注入
  cloud:
    consul:
      host: localhost
      port: 8500
      discovery:
        service-name: ${spring.application.name}
        hostname: localhost
        health-check-url: http://localhost:8211/actuator/health

#  rabbitmq: #消息中间件
#    host: 47.97.170.173
#    port: 5672
#    username: guest
#    password: guest
#    virtual-host: /
management: #暴露健康状况
  endpoints:
    web:
      exposure:
        include: '*'
  endpoint:
    health:
      show-details: always
mybatis: #Mybaytis映射文件位置
  mapper-locations: classpath:/mappers/*Mapper.xml
#feign: #开启熔断
  hystrix:
    enabled: true
3.配置资源服务器REsource Server
在配置Resource Server之前,需要注入JwtTokenStore类型的Bean.建成一个JwtConfig类,加上@Configuration注解,开启配置文件功能。JwtTokenStore类型的Bean需要配置一个JwtAccessTokenConverter类型的Bean,该Bean用作JWT转化器。JwtAccessTokenConverter需要设置VerifierKey, VerfierKey为公钥,存放在Resource目录下的public.cert目录下
JwtCOnfig类的代码如下
package cn.hcnet2006.blog.hcnetwebsite.config;

import org.springframework.beans.factory.annotation.Autowired;
import org.springframework.beans.factory.annotation.Qualifier;
import org.springframework.context.annotation.Bean;
import org.springframework.context.annotation.Configuration;
import org.springframework.core.io.ClassPathResource;
import org.springframework.core.io.Resource;
import org.springframework.security.oauth2.provider.token.TokenStore;
import org.springframework.security.oauth2.provider.token.store.JwtAccessTokenConverter;
import org.springframework.security.oauth2.provider.token.store.JwtTokenStore;
import org.springframework.util.FileCopyUtils;

import java.io.IOException;

@Configuration
public class JwtConfig {
    @Autowired
    JwtAccessTokenConverter jwtAccessTokenConverter;

    @Bean
    @Qualifier("tokenStore")
    public TokenStore tokenStore(){
        return new JwtTokenStore(jwtAccessTokenConverter);
    }

    /**
     * JWT类型转换器
     * @return
     */
    @Bean
    protected JwtAccessTokenConverter jwtAccessTokenEnhancer(){
        JwtAccessTokenConverter converter = new JwtAccessTokenConverter();
        Resource resource = new ClassPathResource("public.cert");
        String publicKey;
        try{
            publicKey = new String(FileCopyUtils.copyToByteArray(
                    resource.getInputStream()));
        }catch (IOException e){
           throw new RuntimeException(e);
        }
        converter.setVerifierKey(publicKey);
        return converter;
    }
}
然后配置REsource Server,新建一个ResourceServerConfig的类,该类集成了REsourceServerConfigurerAdapter类,在ResourceServerCOnfig类加上@EnableResourceServer注解,开启REsourceServer功能,作为Resource Server,需要配置HttpSecurity和ResourceServerSecurityConfiggurer这两个选项。HttpSecurity配置了那些请求需要验证,那些请求不需要验证。在本案例中。"/user/login"和"/user/register"两个API接口不需要验证,其他都需要验证。REsourceServerSecurityConfigurer需要配置tokenStore,tokenStore为之前注入IOC容器中的tokenStore.代码如下
package cn.hcnet2006.blog.hcnetwebsite.config;

import org.springframework.beans.factory.annotation.Autowired;
import org.springframework.context.annotation.Configuration;
import org.springframework.http.HttpMethod;
import org.springframework.security.config.annotation.web.builders.HttpSecurity;
import org.springframework.security.oauth2.config.annotation.web.configuration.EnableResourceServer;
import org.springframework.security.oauth2.config.annotation.web.configuration.ResourceServerConfigurerAdapter;
import org.springframework.security.oauth2.config.annotation.web.configurers.ResourceServerSecurityConfigurer;
import org.springframework.security.oauth2.provider.token.TokenStore;
import org.springframework.security.oauth2.provider.token.store.JwtAccessTokenConverter;

@EnableResourceServer
@Configuration
public class ResourceServerConfig extends ResourceServerConfigurerAdapter {
    @Autowired
    private TokenStore tokenStore;
    @Autowired
    JwtAccessTokenConverter tokenConverter;
    /**
     * 注入IOC 容器中的tokenStore
     * @param resources
     * @throws Exception
     */
    @Override
    public void configure(ResourceServerSecurityConfigurer resources) throws Exception {
        resources.resourceId("/**").tokenStore(tokenStore);
    }

    /**
     * URL访问控制
     * @param http
     * @throws Exception
     */
    @Override
    public void configure(HttpSecurity http) throws Exception {
        // 禁用 csrf, 由于使用的是JWT,我们这里不需要csrf
        http.cors().and().csrf().disable()
                .authorizeRequests()
                // 跨域预检请求
                .antMatchers(HttpMethod.OPTIONS, "/**").permitAll()
                // web jars
                .antMatchers("/webjars/**").permitAll()
                // 查看SQL监控(druid)
                .antMatchers("/druid/**").permitAll()
                // 首页和登录页面
                .antMatchers("/").permitAll()
                .antMatchers("/login").permitAll()
                .antMatchers("/upload.html").permitAll()
                // swagger
                .antMatchers("/swagger-ui.html").permitAll()
                .antMatchers("/swagger-resources/**").permitAll()
                .antMatchers("/v2/api-docs").permitAll()
                .antMatchers("/webjars/springfox-swagger-ui/**").permitAll()
                // 验证码
                .antMatchers("/kaptcha").permitAll()
                .antMatchers("/qrcode/**").permitAll()
                // 服务监控
                .antMatchers("/actuator/**").permitAll()
                .antMatchers("/user/login").permitAll()
                // 其他所有请求需要身份认证
                .anyRequest().authenticated();
    }
}
4.配置Spring Security
新建一个配置类 GlobalMethodSecurityConfig 在此类中通过@EnableGlobalMethodSecurity(prePostEnabled=true)注解开启方法级别的安全验证。代码如下:
//开启全局方法验证
@Configuration
@EnableGlobalMethodSecurity(prePostEnabled = true)
public class GlobalMethodSecurityConfig {
}
5.编写用户注册接口
 @ApiOperation(value = "用户注册",notes = "用户注册" +
            "参数包括:" +
            "1.")
    @ApiImplicitParams({
            @ApiImplicitParam(type = "query", name = "name",value = "用户名",required = true),
            @ApiImplicitParam(type = "query", name = "password",value = "密码",required = true),
            @ApiImplicitParam(type = "query", name = "deptId",value = "所属方向ID",required = true),
            @ApiImplicitParam(type = "query", name = "grade",value = "年级,比如2018",required = true),
            @ApiImplicitParam(type = "query", name = "email",value = "邮箱,确保格式正确",required = true),
            @ApiImplicitParam(type = "query", name = "mobile",value = "手机,确保格式正确",required = true),
            @ApiImplicitParam(type = "query", name = "createBy",value = "创建者",required = true),
            //@ApiImplicitParam(type = "query", name = "createTime",value = "创建时间",required = true)
    })
    @PostMapping("/register")
    //@PreAuthorize("hasAuthority('ROLE_USER')")
    public HttpResult register(SysUser sysUser, @ApiParam(value = "uploadFile", required = true) MultipartFile uploadFile,
                               HttpServletRequest request) throws FileNotFoundException {

        //新建暂时缓存目录,该目录一定存在
        String url = ResourceUtils.getURL("").getPath()+uploadFile.getOriginalFilename();
        System.out.println(url);
        File folder = new File(url);
        try{
            //转义文件到服务器
            uploadFile.transferTo(folder);
            //从服务器获取文件传递到阿里云OSS.返回下载链接地址
            String avator_url = OSSUtils.upload(folder,sysUser.getName()+".jpg");
            //删除服务器缓存文件
            folder.delete();
            //设置属性
            //设置用户头像
            sysUser.setAvator(avator_url);
            //设置创建时间
            sysUser.setCreateTime(new Date());
            //设置更新时间
            sysUser.setLastUpdateTime(new Date());
            //设置创建者
            sysUser.setLastUpdateBy(sysUser.getCreateBy());
            //删除标志
            sysUser.setDelFlag((byte)0);
            //密码加密
            sysUser.setPassword(new BCryptPasswordEncoder().encode(sysUser.getPassword()));
            //保存
            System.out.println("time:"+sdf.format(new Date()));
            sysUserService.save(sysUser);
            return HttpResult.ok(sysUser);
        }catch (DuplicateKeyException e){
            return HttpResult.error("重复注册");
        }catch (IOException e){
            e.printStackTrace();
            return HttpResult.error("注册失败");
        }

    }
6.编写用户登录接口
    @Autowired
    AuthServiceClient client;
    public UserLoginDTO login(String username, String password){
        SysUser  user = sysUserService.findByName(username);
        if(user == null){
            throw new UserLoginException("该用户不存在");
        }
        if(!PassWordEncoderUtil.matches(password,user.getPassword())){
            throw new UserLoginException("密码错误");
        }
        System.out.println("user:"+user.getName());
        System.out.println("pass:"+user.getPassword());
        JWT jwt = client.getToken("Basic dXNlci1zZXJ2aWNlOjEyMzQ1Ng==","password",username,password );
        if(jwt == null){
            throw new UserLoginException("error internal");
        }
        UserLoginDTO userLoginDTO = new UserLoginDTO();
        userLoginDTO.setJwt(jwt);
        userLoginDTO.setUserDetails(user);
        return userLoginDTO;
    }
开启声明式服务消费客户端feign
//开启服务熔断
@EnableHystrix
//开启声明式服务消费客户端
@EnableFeignClients
//开启服务发现
@EnableDiscoveryClient
@SpringBootApplication
public class HcnetWebsiteApplication {

    public static void main(String[] args) {
        SpringApplication.run(HcnetWebsiteApplication.class, args);
    }

    @Bean
    @LoadBalanced
    public RestTemplate restTemplate(){
        return new RestTemplate();
    }
}
声明服务消费
/**
 * 声明式服务消费
 */
@FeignClient(value = "uaa-server",fallback = AuthServiceHystrix.class)
public interface AuthServiceClient {
    @PostMapping(value = "/oauth/token")
    public JWT getToken(@RequestHeader("Authorization") String authorization,
                        @RequestParam("grant_type") String type,
                        @RequestParam("username") String username,
                        @RequestParam("password") String password);

}
声明服务熔断
@Component
public class AuthServiceHystrix implements AuthServiceClient{

    @Override
    public JWT getToken(String authorization, String type, String username, String password) {
        return null;
    }
}
几个工具类
public class UserLoginDTO {
    private JWT jwt;
    private SysUser userDetails;

    public JWT getJwt() {
        return jwt;
    }

    public void setJwt(JWT jwt) {
        this.jwt = jwt;
    }

    public SysUser getUserDetails() {
        return userDetails;
    }

    public void setUserDetails(SysUser userDetails) {
        this.userDetails = userDetails;
    }
}
登录接口封装对象
/**
 * 登录接口封装对象
 */
public class LoginBean {
    private String account;
    private String password;
    private String captcha;

    public String getAccount() {
        return account;
    }

    public void setAccount(String account) {
        this.account = account;
    }

    public String getPassword() {
        return password;
    }

    public void setPassword(String password) {
        this.password = password;
    }

    public String getCaptcha() {
        return captcha;
    }

    public void setCaptcha(String captcha) {
        this.captcha = captcha;
    }
}
统一异常处理
/**
 * 统一异常处理
 */
public class UserLoginException extends RuntimeException {
    public UserLoginException(String message){
        super(message);
    }
}
结果
这个写的比较烂,现在是02:16,太困了,效率太低,不过还好测出来了
睡觉明天再改
收尾工作:
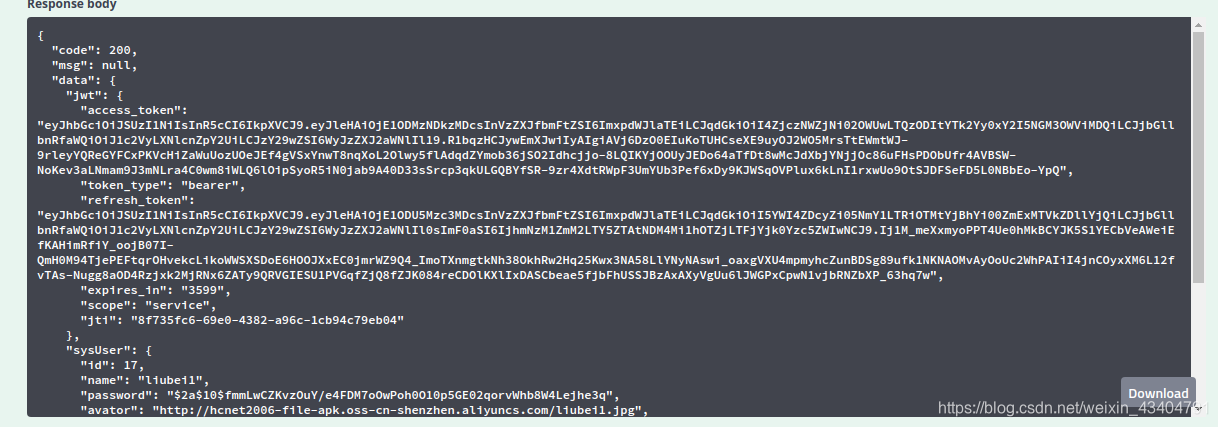
1.登录获取JWT
{
  "code": 200,
  "msg": null,
  "data": {
    "jwt": {
      "access_token": "eyJhbGciOiJSUzI1NiIsInR5cCI6IkpXVCJ9.eyJleHAiOjE1ODM0OTAzMzQsInVzZXJfbmFtZSI6ImxpdWJlaSIsImF1dGhvcml0aWVzIjpbIlJPTEVfVVNFUiJdLCJqdGkiOiJmYjUwOGY4ZC0yNzYyLTRlZmQtODk1Mi1kMDkzOWUxMjgyNTgiLCJjbGllbnRfaWQiOiJ1c2VyLXNlcnZpY2UiLCJzY29wZSI6WyJzZXJ2aWNlIl19.bh-akZbG4X4tuqOIljeJeGFkjPY06BQyBpFrx57vBgGdKZpUZlyXKNhBVcUxp939Bjt8DLubLxr6ggUZMRU3ZEZ1eRNxvzn4kI3IXXaZKgIxoLRUGyjh2qQyKc329u7U7KRB-yX8hk7JY4weeS3ank-s9vDzSG2QUsVsrlbHPH9ZAQ7lpZWY7hQC9gMY37smzRNj55ry2IZiZrt7aKZymW29SgEPNnRYWbYiJ1RisLD37iLNN66BBVxkcYCf9kB4Zs34HlzTKbsc3wneHwVfY9nVOYVxdbZP-H_Mv-ts4yAzCAxW6pCsQics6-GnCIF-Zav-FJM-0F2MggZWXt3UFw",
      "token_type": "bearer",
      "refresh_token": "eyJhbGciOiJSUzI1NiIsInR5cCI6IkpXVCJ9.eyJ1c2VyX25hbWUiOiJsaXViZWkiLCJzY29wZSI6WyJzZXJ2aWNlIl0sImF0aSI6ImZiNTA4ZjhkLTI3NjItNGVmZC04OTUyLWQwOTM5ZTEyODI1OCIsImV4cCI6MTU4NjA3ODczNCwiYXV0aG9yaXRpZXMiOlsiUk9MRV9VU0VSIl0sImp0aSI6IjNkNzYxNjI0LTViMWQtNGQwYS1iMTgyLTUxOWEwNDlmN2Y2YyIsImNsaWVudF9pZCI6InVzZXItc2VydmljZSJ9.ELeZAWSDv4xrqpjtv7quyuR2MVFXR3Cf9NtNs0qNE-VrKsrVHilQceZh3LxSqEcCZ1RLiaYI2qAXdFgJJOaV5VXkgBTkKCsfzEE1XP9x6nvzEVMOj-oQCWaj9WVaQNCenVXV7Yzxj6XQTlZXnLoEz0sVUKO0MgLjlSxLPLotqEVx26N6yEduMGlu9HdjVteUk09iXAkJiX-wQyqAcx2xENVWm3_RPsdhyyaBJUKCwGVMmw3xGEAayGYIjT07ue2yAaraI8Xjn3EisRODe7CzQazRL2vpDxqp6XmuHEWyzsGrEGmJkw_57XlMlf4SOPEgyoiBSzbyRpa5c4Ur7M2GUA",
      "expires_in": "3599",
      "scope": "service",
      "jti": "fb508f8d-2762-4efd-8952-d0939e128258"
    },
    "sysUser": {
      "id": 15,
      "name": "liubei",
      "password": "$2a$10$msaVKbkxkN4lPzUM1I1Iy.RAPCF7pmjt.OmW5sY5zKOXLzPNasS9S",
      "avator": "http://hcnet2006-file-apk.oss-cn-shenzhen.aliyuncs.com/liubei.jpg",
      "grade": "1",
      "email": "1",
      "mobile": "11",
      "deptId": 1,
      "deptZh": "12",
      "createBy": "1",
      "createTime": "2020-03-05",
      "lastUpdateTime": "2020-03-05",
      "lastUpdateBy": "1",
      "delFlag": 0
    }
  }
}
2.根据JWT解析方法权限
请求:

结果
{
  "code": 200,
  "msg": null,
  "data": {
    "pageNum": 1,
    "pageSize": 10,
    "totalSize": 11,
    "totalPages": 2,
    "content": [
      {
        "id": 1,
        "name": "1223456",
        "password": "23456",
        "avator": "http://hcnet2006-file-apk.oss-cn-shenzhen.aliyuncs.com/27505428-25dc-4244-92b3-8f7cd6f7855d.jpg",
        "grade": "2121",
        "email": "212",
        "mobile": "123456",
        "deptId": 1,
        "deptZh": "12",
        "createBy": "1",
        "createTime": "2020-03-02",
        "lastUpdateTime": "2020-03-03",
        "lastUpdateBy": "ldyff",
        "delFlag": -1
      },
      {
        "id": 2,
        "name": "21",
        "password": "2",
        "avator": "http://hcnet2006-file-apk.oss-cn-shenzhen.aliyuncs.com/21.jpg",
        "grade": "1",
        "email": "1",
        "mobile": "1",
        "deptId": 1,
        "deptZh": "12",
        "createBy": "1",
        "createTime": "2020-03-02",
        "lastUpdateTime": "2020-03-02",
        "lastUpdateBy": "1",
        "delFlag": 0
      },
      {
        "id": 5,
        "name": "22",
        "password": "2",
        "avator": "http://hcnet2006-file-apk.oss-cn-shenzhen.aliyuncs.com/22.jpg",
        "grade": "1",
        "email": "1",
        "mobile": "1",
        "deptId": 1,
        "deptZh": "12",
        "createBy": "1",
        "createTime": "2020-03-02",
        "lastUpdateTime": "2020-03-02",
        "lastUpdateBy": "1",
        "delFlag": 0
      },
      {
        "id": 6,
        "name": "1",
        "password": "1",
        "avator": "http://hcnet2006-file-apk.oss-cn-shenzhen.aliyuncs.com/1.jpg",
        "grade": "2018",
        "email": "1",
        "mobile": "1",
        "deptId": 1,
        "deptZh": "12",
        "createBy": "1",
        "createTime": "2020-03-03",
        "lastUpdateTime": "2020-03-03",
        "lastUpdateBy": "1",
        "delFlag": 0
      },
      {
        "id": 9,
        "name": "1212e",
        "password": "1",
        "avator": "http://hcnet2006-file-apk.oss-cn-shenzhen.aliyuncs.com/1212e.jpg",
        "grade": "1",
        "email": "1",
        "mobile": "1",
        "deptId": 1,
        "deptZh": "12",
        "createBy": "11",
        "createTime": "2020-03-03",
        "lastUpdateTime": "2020-03-03",
        "lastUpdateBy": "11",
        "delFlag": 0
      },
      {
        "id": 11,
        "name": "1212ex",
        "password": "1",
        "avator": "http://hcnet2006-file-apk.oss-cn-shenzhen.aliyuncs.com/1212ex.jpg",
        "grade": "1",
        "email": "1",
        "mobile": "1",
        "deptId": 1,
        "deptZh": "12",
        "createBy": "11",
        "createTime": "2020-03-03",
        "lastUpdateTime": "2020-03-03",
        "lastUpdateBy": "11",
        "delFlag": -1
      },
      {
        "id": 12,
        "name": "李",
        "password": "1",
        "avator": "http://hcnet2006-file-apk.oss-cn-shenzhen.aliyuncs.com/%E6%9D%8E.jpg",
        "grade": "1",
        "email": "1",
        "mobile": "1",
        "deptId": 1,
        "deptZh": "12",
        "createBy": "11",
        "createTime": "2020-03-03",
        "lastUpdateTime": "2020-03-03",
        "lastUpdateBy": "11",
        "delFlag": 0
      },
      {
        "id": 13,
        "name": "6",
        "password": "67",
        "avator": "http://hcnet2006-file-apk.oss-cn-shenzhen.aliyuncs.com/6.jpg",
        "grade": "7",
        "email": "7",
        "mobile": "7",
        "deptId": 1,
        "deptZh": "12",
        "createBy": "7",
        "createTime": "2020-03-05",
        "lastUpdateTime": "2020-03-05",
        "lastUpdateBy": "7",
        "delFlag": 0
      },
      {
        "id": 14,
        "name": "a6",
        "password": "$2a$10$URIS/xjA3bt2/NCa1rYvI.DtDffTYm3PtyWE6CkCnavABZnJY4MeS",
        "avator": "http://hcnet2006-file-apk.oss-cn-shenzhen.aliyuncs.com/a6.jpg",
        "grade": "7",
        "email": "7",
        "mobile": "7",
        "deptId": 1,
        "deptZh": "12",
        "createBy": "7",
        "createTime": "2020-03-05",
        "lastUpdateTime": "2020-03-05",
        "lastUpdateBy": "7",
        "delFlag": 0
      },
      {
        "id": 15,
        "name": "liubei",
        "password": "$2a$10$msaVKbkxkN4lPzUM1I1Iy.RAPCF7pmjt.OmW5sY5zKOXLzPNasS9S",
        "avator": "http://hcnet2006-file-apk.oss-cn-shenzhen.aliyuncs.com/liubei.jpg",
        "grade": "1",
        "email": "1",
        "mobile": "11",
        "deptId": 1,
        "deptZh": "12",
        "createBy": "1",
        "createTime": "2020-03-05",
        "lastUpdateTime": "2020-03-05",
        "lastUpdateBy": "1",
        "delFlag": 0
      }
    ]
  }
}


 29
29


 被折叠的 条评论
为什么被折叠?
被折叠的 条评论
为什么被折叠?
 到【灌水乐园】发言


