


CAS单点登录框架使用
CAS Server
1.GitHub上下载项目
https://github.com/apereo/cas-overlay-template/tree/5.3
5.3之后的都是gradle项目,5.3以之前都是maven 项目,我下载5.3版本的
git clone -b [分支名] [url]

2.用IDEA打开项目
(1)import 为Maven项目,把pom 里面的仓库地址去掉,国外的仓库地址比较慢,Maven导入依赖。
(2)在根目录下建/src/main/java目录和/src/main/resources目录
(3)将overlays目录下的WEB-INF/classes/目录中的application.properties文件复制到src/main/resources中
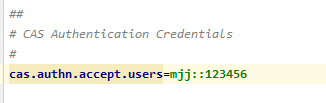
(4)修改application.properties

(5)设置JDK环境为JDK 1.8
3.运行

4.访问
http://localhost:8443/cas/login
CAS Client
SpringBoot 整合 CAS client
1.导入依赖
<!--SpringBoot整合cas客户端-->
<dependency>
    <groupId>net.unicon.cas</groupId>
    <artifactId>cas-client-autoconfig-support</artifactId>
    <version>1.5.0-GA</version>
</dependency>
2.修改配置文件
# 项目端口
server.port=8080
# 填CAS服务器的前缀
cas.server-url-prefix=http://localhost:8443/cas
# 填CAS服务器的登录地址
cas.server-login-url=http://localhost:8443/cas/login
# 填客户端的访问前缀
cas.client-host-url=http://localhost:8080

cas.validation-type=CAS3
3.使能CAS Client
@EnableCasClient //在启动类上注解
问题解决:

解决办法: 服务端开启http,默认只开始https和imaps。
(1)将overlays目录下面的service拷贝到src/main/resources目录下面进行修改,项目启动src目录代码会覆盖overlays代码
(2) 修改services\HTTPSandIMAPS-10000001.json文件

(3) 在application.properties文件中添加
#开启http
cas.tgc.secure=false
cas.serviceRegistry.initFromJson=true
CAS Server 连接数据库验证
1.导入依赖
<!--新增支持jdbc验证-->
<dependency>
    <groupId>org.apereo.cas</groupId>
    <artifactId>cas-server-support-jdbc</artifactId>
    <version>${cas.version}</version>
</dependency>
<!--使用mysql驱动-->
<!--mysql 8.0 以上使用 8.0.15 版本-->
<dependency>
    <groupId>mysql</groupId>
    <artifactId>mysql-connector-java</artifactId>
    <version>5.1.21</version>
</dependency>
2.创建数据库cas
-- ----------------------------
-- Table structure for sys_user
-- ----------------------------
DROP TABLE IF EXISTS `sys_user`;
CREATE TABLE `sys_user` (
  `id` int(11) NOT NULL AUTO_INCREMENT,
  `username` varchar(255) DEFAULT NULL,
  `password` varchar(255) DEFAULT NULL,
  `expired` int(11) DEFAULT NULL,
  `disabled` int(11) DEFAULT NULL,
  PRIMARY KEY (`id`)
) ENGINE=InnoDB AUTO_INCREMENT=4 DEFAULT CHARSET=utf8;

-- ----------------------------
-- Records of sys_user
-- ----------------------------
INSERT INTO `sys_user` VALUES ('1', 'admin', '21232f297a57a5a743894a0e4a801fc3', '0', '1');
INSERT INTO `sys_user` VALUES ('2', 'cainiao', '6b757206058785025cd90c8d865c8e43', '1', '0');
INSERT INTO `sys_user` VALUES ('3', 'mashu', 'd1f21ceb3f710ebbd9f408274aee1193', '0', '0');
3.在application.properties中在添加
#查询账号密码sql,必须包含密码字段
cas.authn.jdbc.query[0].sql=select * from sys_user where username=?
#指定上面的sql查询字段名(必须)
cas.authn.jdbc.query[0].fieldPassword=password
#指定过期字段,1为过期,若过期需要修改密码
cas.authn.jdbc.query[0].fieldExpired=expired
#为不可用字段段,1为不可用,
cas.authn.jdbc.query[0].fieldDisabled=disabled
#数据库方言hibernate的知识
cas.authn.jdbc.query[0].dialect=org.hibernate.dialect.MySQLDialect
#数据库驱动
cas.authn.jdbc.query[0].driverClass=com.mysql.jdbc.Driver
#数据库连接
cas.authn.jdbc.query[0].url=jdbc:mysql://localhost:3306/cas?useUnicode=true&characterEncoding=UTF-8
#数据库用户名
cas.authn.jdbc.query[0].user=root
#数据库密码
cas.authn.jdbc.query[0].password=123456
#默认加密策略,通过encodingAlgorithm来指定算法,默认NONE不加密
cas.authn.jdbc.query[0].passwordEncoder.type=DEFAULT
cas.authn.jdbc.query[0].passwordEncoder.characterEncoding=UTF-8
cas.authn.jdbc.query[0].passwordEncoder.encodingAlgorithm=MD5
输入
账号:mashu 密码:mashu登录
mashu正常登录,cainiao需要修改密码,admin被禁用,符合预期。


 2917
2917


 被折叠的 条评论
为什么被折叠?
被折叠的 条评论
为什么被折叠?
 到【灌水乐园】发言


