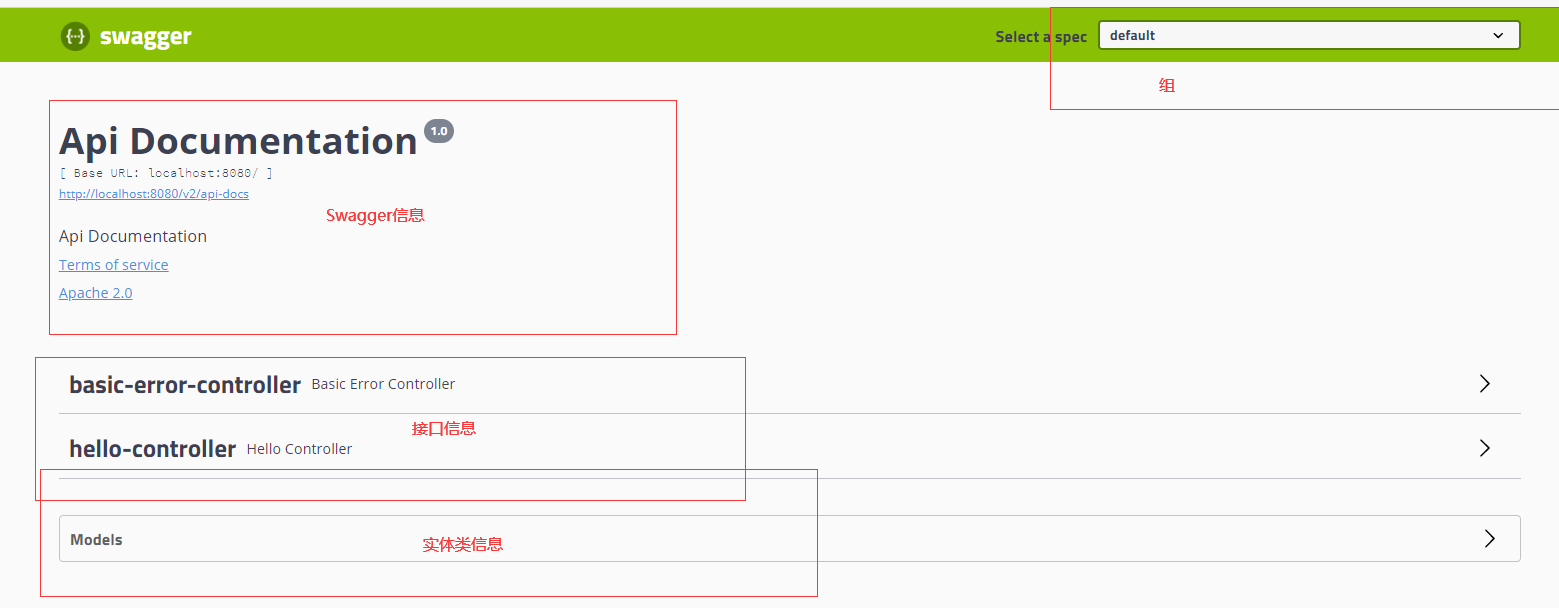
Swagger
Swagger简介
前后端分离
前后端分离式时代
-
后端:控制层,服务层,数据访问层【后端团队】
-
前端:前端控制层,视图层【前端团队】
- 伪造后端数据,json。以及存在了,不需要后端,前端工程师依旧能够跑起来
-
前端后端如何交互 ==> API
-
前后端相对独立,松耦合;
-
前后端甚至可以部署在不同的服务器上
产生的问题:
- 前后端集成协调,前端人员和后端人员无法做到“即时协商,尽早解决”,最终导致问题集中爆发;
解决的方案
- 首先指定schema【计划的提纲】,实时更新最新API,降低集成的风险;
- 早先:制定word计划文档;
- 前后端分离:
- 前端测试后端接口:postman
- 后端提供接口,需要实时更新最新的消息及改动
Swagger
- 最流行的Api框架
- RestFul Api 文档在线自动生成工具=> Api文档与API定义同步更新
- 直接运行,可以在线测试API接口
- 支持多种语言:(Java;PHP等)
官网:https://swagger.io/
在项目中使用Swagger需要 springbox
SpringBoot继承Swagger
1、新建SpringBoot-Web项目
2、导入依赖
<!-- https://mvnrepository.com/artifact/io.springfox/springfox-swagger2 -->
<dependency>
    <groupId>io.springfox</groupId>
    <artifactId>springfox-swagger2</artifactId>
    <version>2.9.2</version>
</dependency>

<!-- https://mvnrepository.com/artifact/io.springfox/springfox-swagger-ui -->
<dependency>
    <groupId>io.springfox</groupId>
    <artifactId>springfox-swagger-ui</artifactId>
    <version>2.9.2</version>
</dependency>
3、编写
4、配置Swagger ==> Config
@Configuration
@EnableSwagger2  // 开启Swagger2
public class SwaggerConfig {

}
5、测试运行

配置Swagger
Swagger的bean实例Docket
1、配置Swagger
package com.springbootswagger.swagger.config;

import org.springframework.context.annotation.Bean;
import org.springframework.context.annotation.Configuration;
import springfox.documentation.service.ApiInfo;
import springfox.documentation.service.Contact;
import springfox.documentation.service.VendorExtension;
import springfox.documentation.spi.DocumentationType;
import springfox.documentation.spring.web.plugins.Docket;
import springfox.documentation.swagger2.annotations.EnableSwagger2;

import java.util.ArrayList;

@Configuration  //已经被Spring扫描到了
@EnableSwagger2  // 开启Swagger2
public class SwaggerConfig {
//    配置了Swagger的docket 的bean实例
    @Bean
    public Docket docket(){
        return new Docket(DocumentationType.SWAGGER_2)
                .apiInfo(apiInfo());
    }


//    配置Swagger信息 = apiInfo
    private ApiInfo apiInfo(){
//        作者信息
        Contact contact = new Contact("小灰灰", "https://www.cnblogs.com/", "23456719@qq.com");

        return new ApiInfo(
                "小灰灰的API日记",
                "API起飞",
                "1.0",
                "https://www.cnblogs.com/",
                contact,
                "Apache 2.0",
                "http://www.apache.org/licenses/LICENSE-2.0",
                new ArrayList<VendorExtension>());
    }
}
Swagger配置扫描接口
Docket.select()
   @Bean
    public Docket docket(){
        return new Docket(DocumentationType.SWAGGER_2)
                .apiInfo(apiInfo())
                .select()
             /*    RequestHandlerSelectors,配置要扫描接口的方式
                   basePackage:指定要扫描的包
                   any:扫描全部
                   none:都不扫描
                   withClassAnnotation:扫描类上的注解
                   withMethodAnnotation:扫描方法上的注解
                 */
                .apis(RequestHandlerSelectors.basePackage("com.springbootswagger.swagger.controller"))
//                paths:过滤什么路径
                .paths(PathSelectors.ant("/swagger/**"))
                .build();
    }
配置是否开启扫描Swagger
   @Bean
    public Docket docket(){
        return new Docket(DocumentationType.SWAGGER_2)
                .apiInfo(apiInfo())
//                enable:是否启动Swagger;如果为false 则不能在浏览器访问,反之则行
                .enable(false)
                .select()

                .apis(RequestHandlerSelectors.basePackage("com.springbootswagger.swagger.controller"))
//                paths:过滤什么路径
//                .paths(PathSelectors.ant("/swagger/**"))
                .build();
    }
1、配置开发环境(1)

   @Bean
    public Docket docket(Environment environment){
//        设置要显示的Swagger环境
        Profiles profiles = Profiles.of("dev","test");
        System.out.println(profiles);

//        通过environment。acceptsProfiles判断是否处在自己设定的环境当中
        boolean flag = environment.acceptsProfiles(profiles);
配置开发环境(2、相对来说更加简便):
通过@Value注入
luo.flag=true
@Value("${luo.flag}")
    private boolean flag;
配置API文档的分组
.groupName("小灰灰")
配置多个文档分组
    @Bean
    public Docket docket1(){
        return new Docket(DocumentationType.SWAGGER_2).groupName("A");
    }

    @Bean
    public Docket docket2(){
        return new Docket(DocumentationType.SWAGGER_2).groupName("B");
    }

    @Bean
    public Docket docket3(){
        return new Docket(DocumentationType.SWAGGER_2).groupName("C");
    }
实体类配置
package com.springbootswagger.swagger.pojo;

import io.swagger.annotations.ApiModel;
import io.swagger.annotations.ApiModelProperty;

//@Api(注释)
@ApiModel("用户实体类")
public class User {
    @ApiModelProperty("用户名")
    public String username;
    @ApiModelProperty("密码")
    public String password;

    public User() {
    }

    public User(String username, String password) {
        this.username = username;
        this.password = password;
    }

    public String getUsername() {
        return username;
    }

    public void setUsername(String username) {
        this.username = username;
    }

    public String getPassword() {
        return password;
    }

    public void setPassword(String password) {
        this.password = password;
    }
}
controller
package com.springbootswagger.swagger.controller;

import com.springbootswagger.swagger.pojo.User;
import io.swagger.annotations.Api;
import io.swagger.annotations.ApiOperation;
import io.swagger.annotations.ApiParam;
import org.springframework.stereotype.Controller;
import org.springframework.web.bind.annotation.*;

import javax.xml.ws.RequestWrapper;
//Operation接口
@RestController
public class HelloController {
//  默认会发起两个请求 第一个肯定是 /error
    @GetMapping ("/hello")
    public String hello(){
        return "hello";
    }

//    只要接口中,返回值存在实体类,他就会被扫描到Swagger中
    @PostMapping("/user")
    public User user(){
        return new User();
    }

//    Operation接口中;返回值中存在实体类,他就会被扫描到Swagger中
    @ApiOperation("Hello控制类")
    @GetMapping("/hello2")
    public String hello2(@ApiParam("用户名") String username){
        return "hello" + username;
    }

    @ApiOperation("Post测试类")
    @PostMapping ("/postt")
    public User postt(@ApiParam("用户")User user){
//        int i = 5/0;
        return user;
    }
}
测试代码在Gitee上面:
https://gitee.com/luo-yun1/framework-code-notes/tree/master/Swagger/swagger-demo


 3000
3000


 被折叠的 条评论
为什么被折叠?


