


一、热部署
热部署不会用在生产环境,但对于程序员开发的效率,还是有一定帮助的,所谓的热部署,就是在应用程序在不停止的情况下,实现新的部署
spring-boot-devtools 是一个为开发者服务的一个模块,其中最重要的功能就是自动应用代码更改到最新的App上面去。原理是在发现代码有更改之后,重新启动应用,但是速度比手动停止后再启动还要更快,更快指的不是节省出来的手工操作的时间。
其深层原理是使用了两个ClassLoader,一个Classloader加载那些不会改变的类(第三方Jar包),另一个ClassLoader加载会更改的类,称为 restart ClassLoader
,这样在有代码更改的时候,原来的restart ClassLoader 被丢弃,重新创建一个restart ClassLoader,由于需要加载的类相比较少,所以实现了较快的重启时间。
修改pom文件,增加
<dependency>
    <groupId>org.springframework.boot</groupId>
    <artifactId>spring-boot-devtools</artifactId>
</dependency>
修改properties或者yml文件
如果使用的 Thymeleaf 模板,那么请直接在application.properties中添加
spring.thymeleaf.cache=false
如果使用的 FreeMarker 模板,那么请直接在application.properties中添加
spring.freemarker.cache=false
注意:
如果你是使用eclipse,请忽略,但如果你是使用IDEA,由于idea 没有保存修改的,也就是说在idea中并不会因为你ctrl+s 就重新编译代码。那么就需要额外的配置,在pom文件中,增加编译插件,让代码有变动的时候也编译。
<build>
    <plugins>
        <plugin>
            <groupId>org.springframework.boot</groupId>
            <artifactId>spring-boot-maven-plugin</artifactId            <configuration>
                <!-- 如果不设置fork,那么不会restart,devtools热部署不会起作用-->
                <fork>true</fork>
            </configuration>
        </plugin>
    </plugins>
</build>
1、手动:修改完代码,按快捷键Ctrl+F9,手动构建项目,或者只修改单个类文件的话,按Ctrl+Shift+F9,重新编译该类文件,即可触发重启服务。
2、自动
1)File -> Settings ->Build,Execution,Deployment-> Compiler,勾选 Build Project automatically
 2)按快捷键Ctrl+Shift+Alt+/,选择1.Registry…
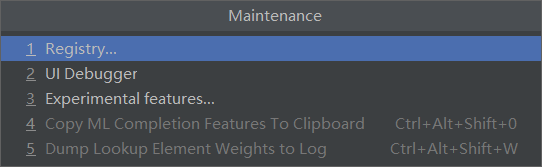
3)勾选 compiler.automake.allow.when.app.running 即可

个人感觉:有时候自动更新有点慢,不如直接Ctrl+F9直接手动更新哈哈哈。
二、编译打包
jar包部署(推荐使用)
pom文件新增
 <build>
        <plugins>
            <plugin>
                <groupId>org.springframework.boot</groupId>
                <artifactId>spring-boot-maven-plugin</artifactId>
                <configuration>
                    <!-- 如果不设置fork,那么不会restart,devtools热部署不会起作用-->
                    <fork>true</fork>
                </configuration>
                <executions>
                    <execution>
                        <goals>
                            <goal>repackage</goal>
                        </goals>
                    </execution>
                </executions>
            </plugin>
        </plugins>

    </build>
在项目pom路径下使用mvn clean package 打包。如果提示测试用例有错误,那就是测试类的所在文件夹跟main下面的文件夹名字不一致造成的。
java –jar target目录下生成的jar包。
war包部署
如果并不希望使用内置的tomcat,希望部署到其他tomcat服务器,那么就需要使用war包部署了。
修改pom文件,打包方式改成war。

修改在pom文件,剔除内置tomcat的支持,否则会和外面的tomcat冲突。
<dependency>
            <groupId>org.springframework.boot</groupId>
            <artifactId>spring-boot-starter-tomcat</artifactId>
            <!--打包的时候可以不用包进去,别的设施会提供。事实上该依赖理论上可以参与编译,测试,运行等周期。
                相当于compile,但是打包阶段做了exclude操作-->
            <scope>provided</scope>
</dependency>
修改启动类:
import org.mybatis.spring.annotation.MapperScan;
import org.springframework.boot.SpringApplication;
import org.springframework.boot.autoconfigure.SpringBootApplication;
import org.springframework.boot.builder.SpringApplicationBuilder;
import org.springframework.boot.web.servlet.support.SpringBootServletInitializer;
@SpringBootApplication
@MapperScan("com.bruce.dao")
public class Application extends SpringBootServletInitializer  {

    public static void main(String[] args) throws Exception {
        SpringApplication.run(Application.class, args);
    }

    @Override
    protected SpringApplicationBuilder configure(SpringApplicationBuilder builder) {
        return builder.sources(Application.class);
    }

}
使用mvn clean package 打包。
把war包拷贝到tomcat webapps中。
三、自定义Start
在学习SpringBoot的过程中,不管是集成redis还是RabbitMQ,甚至是前面集成mybatis已经学习了很多starter,这些starter都是springboot为我们提供的一些封装,这些starter能非常方便快捷的增加功能,并不需要很多配置,即使需要配置也就在application.properties稍微配置下就可以了。那么接下来就学习下怎么创建属于自己的starter。
Redis-start插件
spring-boot-starter-data-redis这个是spring官方提供的插件,这个starter是用来集成redis的,那么接下来完成一个starter,这个starter也就集成下redis,新建一个项目,这个项目不需要web功能。
pom文件
<?xml version="1.0" encoding="UTF-8"?>
<project xmlns="http://maven.apache.org/POM/4.0.0"
         xmlns:xsi="http://www.w3.org/2001/XMLSchema-instance"
         xsi:schemaLocation="http://maven.apache.org/POM/4.0.0 http://maven.apache.org/xsd/maven-4.0.0.xsd">
    <modelVersion>4.0.0</modelVersion>

    <groupId>com.bruce</groupId>
    <artifactId>testredisstarter</artifactId>
    <version>1.0-SNAPSHOT</version>

    <properties>
        <maven.compiler.source>11</maven.compiler.source>
        <maven.compiler.target>11</maven.compiler.target>
    </properties>

    <parent>
        <groupId>org.springframework.boot</groupId>
        <artifactId>spring-boot-starter-parent</artifactId>
        <version>2.3.11.RELEASE</version>
    </parent>
    <dependencies>
        <dependency>
            <groupId>org.springframework.boot</groupId>
            <artifactId>spring-boot-starter</artifactId>
        </dependency>
        <dependency>
            <groupId>redis.clients</groupId>
            <artifactId>jedis</artifactId>
            <version>3.0.1</version>
        </dependency>

        <dependency>
            <groupId>org.springframework.boot</groupId>
            <artifactId>spring-boot-configuration-processor</artifactId>
            <optional>true</optional>
        </dependency>
    </dependencies>
</project>
创建一个RedisProperties用于加载Redis需要的配置,这里为简单起见,并没有设置密码。
import org.springframework.boot.context.properties.ConfigurationProperties;
import org.springframework.stereotype.Component;
/**
 * 加载Redis需要的配置
 */
@Component
@ConfigurationProperties(prefix = "redis") //配置文件中的前缀
public class RedisProperties {

    private String host;
    private int port;

    public int getPort() {
        return port;
    }

    public void setPort(int port) {
        this.port = port;
    }

    public String getHost() {
        return host;
    }

    public void setHost(String host) {
        this.host = host;
    }
}
创建一个配置类,这个配置类用于加载配置,并实例化Jedis客户端。
/**
 * 创建一个配置类,这个配置类用于加载配置,并实例化Jedis客户端
 * @Configuration:标注类为配置组件
 * @EnableConfigurationProperties:这是一个开启使用配置参数的注解,value值就是我们配置实体参数映射的ClassType,将配置实体作为配置来源。
 * SpringBoot内置条件注解
 * 有关@ConditionalOnXxx相关的注解这里要系统的说下,因为这个是我们配置的关键,根据名称我们可以理解为具有Xxx条件,当然它实际的意义也是如此,条件注解是一个系列,下面我们详细做出解释
 * @ConditionalOnBean:当SpringIoc容器内存在指定Bean的条件
 * @ConditionalOnClass:当SpringIoc容器内存在指定Class的条件
 * @ConditionalOnExpression:基于SpEL表达式作为判断条件
 * @ConditionalOnJava:基于JVM版本作为判断条件
 * @ConditionalOnMissingBean:当SpringIoc容器内不存在指定Bean的条件
 * @ConditionalOnMissingClass:当SpringIoc容器内不存在指定Class的条件
 * @ConditionalOnNotWebApplication:当前项目不是Web项目的条件
 * @ConditionalOnProperty:指定的属性是否有指定的值
 * @ConditionalOnResource:类路径是否有指定的值
 * @ConditionalOnSingleCandidate:当指定Bean在SpringIoc容器内只有一个,或者虽然有多个但是指定首选的Bean
 * @ConditionalOnWebApplication:当前项目是Web项目的条件
 */
@Configuration //开启配置
@ConditionalOnClass(Jedis.class)
@EnableConfigurationProperties(RedisProperties.class) //开启使用映射实体对象
@ConditionalOnProperty//存在对应配置信息时初始化该配置类
 (
 prefix = "redis",//存在配置前缀redis
 value = "enabled",//开启
 matchIfMissing = true//缺失检查
 )
public class RedisAutoConfiguration {
    @Bean
    @ConditionalOnMissingBean
    public Jedis jedis(RedisProperties redisProperties){
        return new Jedis(redisProperties.getHost(), redisProperties.getPort());
    }
}
到目前为止我们还没有完成自动化配置starter,我们需要了解SpringBoot运作原理后才可以完成后续编码。
Starter自动化运作原理
在注解@SpringBootApplication上存在一个开启自动化配置的注解@EnableAutoConfiguration来完成自动化配置,注解源码如下所示:
@Target({ElementType.TYPE})
@Retention(RetentionPolicy.RUNTIME)
@Documented
@Inherited
@AutoConfigurationPackage
@Import({AutoConfigurationImportSelector.class})
public @interface EnableAutoConfiguration {
    String ENABLED_OVERRIDE_PROPERTY = "spring.boot.enableautoconfiguration";

    Class<?>[] exclude() default {};

    String[] excludeName() default {};
}
在@EnableAutoConfiguration注解内使用到了@import注解来完成导入配置的功能,而AutoConfigurationImportSelector内部的getCandidateConfigurations()方法使用了SpringFactoriesLoader.loadFactoryNames方法进行扫描具有META-INF/spring.factories文件的jar包。我们可以先来看下spring-boot-autoconfigure包内的spring.factories文件内容,如下所示:

可以看到配置的结构形式是Key=>Value形式,多个Value时使用,隔开,那我们在自定义starter内也可以使用这种形式来完成,我们的目的是为了完成自动化配置,所以我们这里Key则是需要使用org.springframework.boot.autoconfigure.EnableAutoConfiguration
自定义spring.factories
我们在src/main/resource目录下创建META-INF目录,并在目录内添加文件spring.factories,具体内容如下所示:
#配置自定义Starter的自动化配置
org.springframework.boot.autoconfigure.EnableAutoConfiguration=com.bruce.redis.RedisAutoConfiguration
目前为止自定义的starter已经开发完毕。然后通过maven的clean、install、depoy部署到本地仓库中。
测试新建的Starter
在新的项目pom文件中加入依赖
		<dependency>
            <groupId>com.bruce</groupId>
            <artifactId>testredisstarter</artifactId>
            <version>1.0-SNAPSHOT</version>
        </dependency>
注意:
如果maven在引入依赖的时候报错,提示远程仓库不存在这个依赖。一般来说本地仓库有依赖包,构建过程就可以优先被使用,你还要确保本地的依赖包是完整、可用的才行。
如何确认?就是依赖包目录中,没有像xxx.repositories或xxx.lastUpdated之类的文件。
如果能确保本地依赖包是完整的、可用的,可用手动将这些文件删掉,构建过程就不会再联网去远程仓库验证了,就可以优先使用本地依赖包了。
新建一个springboot启动类
mport org.springframework.boot.SpringApplication;
import org.springframework.boot.autoconfigure.SpringBootApplication;
@SpringBootApplication
public class App {
    public static void main(String[] args) {
        SpringApplication.run(App.class,args);
    }
}
新建application.yml在里面配置redis连接相关信息
redis:
  host: 127.0.0.1
  port: 6379
准备好这些后,启动redis,新建立一个测试类,运行测试方法
import org.junit.Test;
import org.junit.runner.RunWith;
import org.springframework.boot.test.context.SpringBootTest;
import org.springframework.test.context.junit4.SpringRunner;
import redis.clients.jedis.Jedis;
import javax.annotation.Resource;
@SpringBootTest
@RunWith(SpringRunner.class)
public class RedisTest {
    @Resource
    Jedis jedis;
    @Test
    public  void test() {
        jedis.set("name","bruce");
        String enjoy = jedis.get("name");
        System.out.println(enjoy);
    }
}
测试成功,自定义starter完成。
SpringBoot CTL
Spring Boot CLI是一个命令行工具,如果想使用Spring进行快速开发可以使用它。它允许你运行Groovy脚本,这意味着你可以使用熟悉的类Java语法,并且没有那么多的模板代码。你可以通过Spring Boot CLI启动新项目,或为它编写命令。
Groovy是个基于JVM(Java虚拟机)的敏捷开发语音,既然是基于jvm,那么在groovy里面使用任何java的组件他都是可以支持识别的。
解压安装SpringBoot CLI
https://repo.spring.io/artifactory/release/org/springframework/boot/spring-boot-cli/
解压后目录如下:
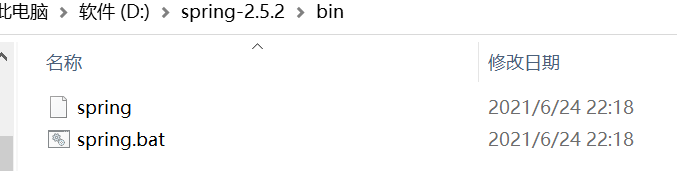
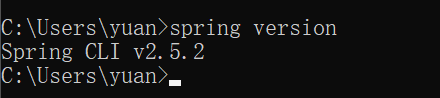
可以配饰环境变量:输入spring version会出现版本(也可以到上面bin目录下,cmd,然后输入命令)
新建一个groovy的文件 Example.groovy
import org.springframework.web.bind.annotation.RequestMapping
import org.springframework.web.bind.annotation.RestController

//@Grab("spring-boot-starter-security")
@RestController
class Example{
    @RequestMapping("/hello")
    public String hello(){
        return "helloworld";
    }
}
使用命令可以启动
spring run hello.groovy

这个时候他会自动下载依赖,并运行项目。
可以通过http://localhost:8080/hello来访问了
@Grab
这个注解后面可以加入各种模块,在运行文件的时候,自动部署对应的环境,比如上面的代码注释中加入了,安全模块,重启groovy文件的时候,再访问改路径时,就会提示输入密码。


 374
374


 被折叠的 条评论
为什么被折叠?
被折叠的 条评论
为什么被折叠?
 到【灌水乐园】发言


