


Vue3组件间通信的五种常用方式
写在前面
本文采用<script setup>语法糖的编写方式,比options API更自由。
<script setup>语法糖详细内容看查看文档:setup语法糖官方文档
然后我们会讲以下五种常用的组件通信方式
- props
- emit
- v-model
- refs
- provide/inject
一、props
为了在声明props选项中获得完整的类型推导支持,我们可以使用definePropsAPI,它们将自动地在<script setup>中可用:
<script setup>
const props = defineProps({
  foo: String
})

const emit = defineEmits(['change', 'delete'])
// setup 代码
</script>
defineProps是只能在<script setup>中使用的编译器宏。它不需要导入,且会随着<script setup>的处理过程一同被编译掉。defineProps接收与props选项相同的值。defineProps在选项传入后,会提供恰当的类型推导。- 传入到
defineProps的选项会从setup中提升到模块的作用域。因此,传入的选项不能引用在setup作用域中声明的局部变量。这样做会引起编译错误。但是,它可以引用导入的绑定,因为它们也在模块作用域内。
props是Vue3中最常见的父子通信方式,用于父组件向子组件传递数据。使用起来也比较简单,下面我们看以下demo以理解Vue3中的props。
我们在父组件定义了数据,子组件声明props以接收数据。
父组件App.vue:
<template>
  <div>
    <!-- 实例化子组件 -->
    <children-component :listName="list"></children-component>
  </div>
</template>

<script setup>
// 导入子组件
import ChildrenComponent from "./components/ChildComponent.vue";
import { ref } from "vue";
// data
const list = ref(["JavaScript", "HTML", "CSS"]);
</script>

<style lang="scss" scoped></style>
子组件ChildComponent.vue:
<template>
  <!-- 使用props接收的来自父组件的数据 -->
  <div v-for="(item, index) in listName" :key="index">{{ item }}</div>
</template>

<script setup>
// 定义props接收父组件传来的数据
const props = defineProps({
  listName: {
    type: Array,
    default: () => [],
  },
});
</script>

<style lang="scss" scoped></style>
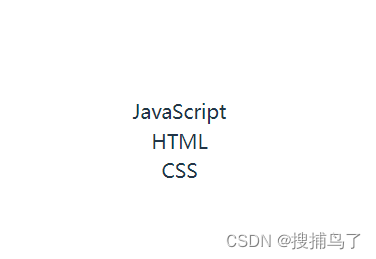
运行结果:数据list被成功遍历渲染。
二、emit
为了在声明emits选项中获得完整的类型推导支持,我们可以使用defineEmitsAPI,它们将自动地在<script setup>中可用:
<script setup>
const props = defineProps({
  foo: String
})

const emit = defineEmits(['change', 'delete'])
// setup 代码
</script>
defineEmits是只能在<script setup>中使用的编译器宏。它不需要导入,且会随着<script setup>的处理过程一同被编译掉。defineEmits接收与props选项相同的值。defineEmits在选项传入后,会提供恰当的类型推导。- 传入到
defineEmits的选项会从setup中提升到模块的作用域。因此,传入的选项不能引用在setup作用域中声明的局部变量。这样做会引起编译错误。但是,它可以引用导入的绑定,因为它们也在模块作用域内。
emit是Vue3中最常见的父子通信方式,用于子组件向父组件传递消息[子组件调用父组件的方法]。使用起来也比较简单,下面我们看以下demo以理解Vue3中的emit。
我们在父组件定义了数据和方法,子组件定义了数据并声明emit接收父组件传递的方法,子组件调用方法实现将子组件的数据通过该方法传递给父组件。
父组件App.vue:
<template>
  <div>
    <!-- 实例化子组件,向子组件传递方法 -->
    <children-component @addName="add"></children-component>
  </div>
</template>

<script setup>
// 导入子组件
import ChildrenComponent from "./components/ChildComponent.vue";
import { ref } from "vue";
// 父组件data
const list = ref(["JavaScript", "HTML", "CSS"]);
// 定义父组件方法
const add = (value) => {
  list.value.push(value);
  console.log(list.value);
};
</script>

<style lang="scss" scoped></style>
子组件ChildComponent.vue:
<template>
<!-- 使用props接收的来自父组件的数据 -->
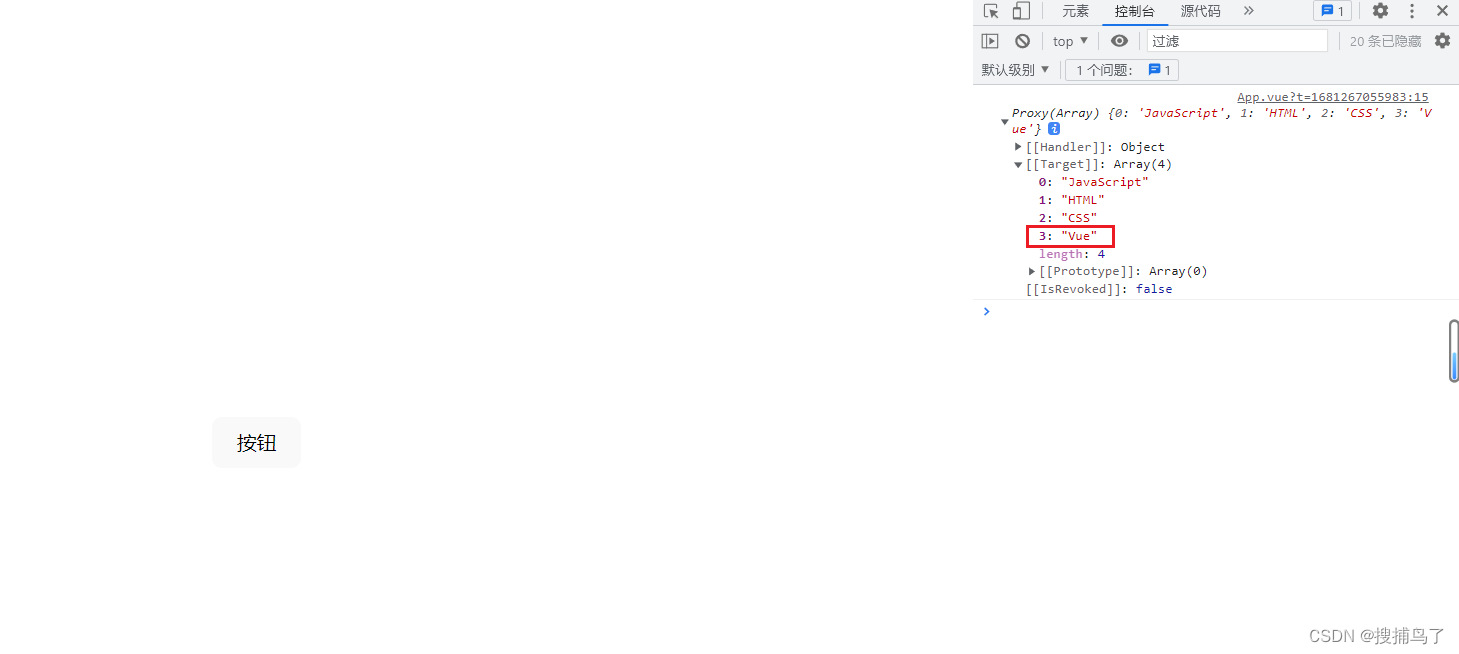
<button @click="handleAdd(others)">按钮</button>
</template>
<script setup>
import { ref } from "vue";
const others = ref("Vue");
// 定义emit接收父组件传来的方法
const emit = defineEmits(["addName"]);
// 定义子组件的方法来使用父组件传来的方法,并将子组件的数据others传递给父组件
const handleAdd = (value) => {
emit("addName", value);
};
</script>
<style lang="scss" scoped></style>
运行结果:点击按钮,输出父组件的数据,可以看到子组件传递来的数据Vue成功被父组件接收到了。
三、v-model
在介绍Vue3——v-model前,我们必须先了解一下update:属性名中的update是干啥的?其实通俗易懂一点,它就是用来同步更新父组件的值,不需要再用父组件调用自定义事件。
v-model是Vue中一个优秀的语法糖,写法:
<ChildCompont v-model:title = "title">
// 或者
<ChildCompont :modelValue = "title" @update:modelValue = "title = $event">
// 或者
<ChildCompont :title = "title" @update:title = "title = $event">
下面我们来看demo,
在子组件中我们先定义props接收父组件的数据和emits定义发送更新数据的事件,添加完成后再发送指定的事件。
父组件使用v-model绑定要发送的数据,并展示数据以监测父组件的数据是否更新。
父组件App.vue:
<template>
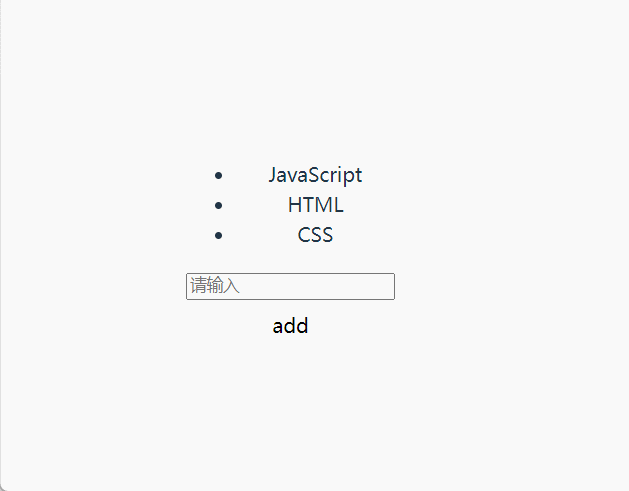
<ul>
<!-- 渲染data,监测父组件数据是否发生变化 -->
<li v-for="item in list" :key="item">{{ item }}</li>
</ul>
<!-- 实例化子组件,使用v-model方法向子组件传递数据 -->
<children-component :list="list" @update:list="list = $event"
></children-component>
</template>
<script setup>
// 导入子组件
import ChildrenComponent from "./components/ChildComponent.vue";
import { ref } from "vue";
// 父组件data
const list = ref(["JavaScript", "HTML", "CSS"]);
</script>
<style lang="scss" scoped></style>
子组件ChildComponent.vue:
<template>
  <div>
    <!-- 输入要新增的数据 -->
    <input type="text" v-model="value" placeholder="请输入" />
    <div>
      <!-- 点击按钮触发新增数据的方法 -->
      <button @click="handleAdd" type="button">add</button>
    </div>
  </div>
</template>

<script setup>
import { ref } from "vue";
const value = ref("");
// 定义props接收父组件传来的数据
const props = defineProps({
  list: {
    type: Array,
    default: () => [],
  },
});
// 定义emit发送更新list的事件
const emit = defineEmits(["update:list"]);
// 定义子组件的方法来使用父组件传来的方法,并将子组件的数据others传递给父组件
const handleAdd = () => {
  const arr = props.list; // 将父组件发送来的数据用arr接收
  arr.push(value.value); // 向arr添加输入框输入的数据
  emit("update:list", arr); // 发送更新父组件数据list的事件
  value.value = "";
};
</script>

<style lang="scss" scoped></style>
运行结果:输入要新增的list内容,点击add按钮,可以看到页面实时更新了新增的内容。
四、expose和ref
使用 <script setup> 的组件是默认关闭的——即通过模板引用或者 $parent 链获取到的组件的公开实例,不会暴露任何在 <script setup> 中声明的绑定。
可以通过 defineExpose 编译器宏来显式指定在 <script setup> 组件中要暴露出去的属性:
<script setup>
import { ref } from 'vue'

const a = 1
const b = ref(2)

defineExpose({
  a,
  b
})
</script>
当父组件通过模板引用的方式获取到当前组件的实例,获取到的实例会像这样 { a: number, b: number } (ref 会和在普通实例中一样被自动解包)
使用API Option时,我们可以通过this.$refs.name获取指定的元素或组件,但在组合API中不行。如果我们想通过ref获取,需要定义一个同名的Ref对象,在组件挂载后可以访问。
下面我们来看demo
我们在子组件定义了数据并用defineExpose暴露,父组件中可以在通过refName?.属性名的方式使用数据。
父组件App.vue:
<template>
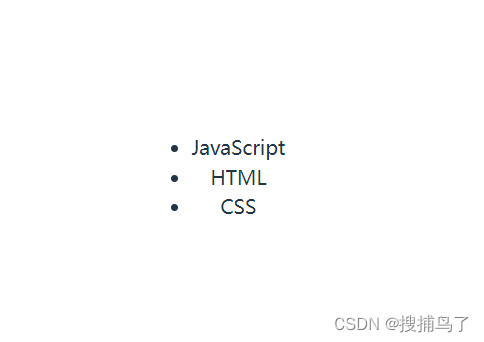
<ul>
<li v-for="item in childRef?.list" :key="item">{{ item }}</li>
</ul>
<!-- 实例化子组件 -->
<ChildrenComponent ref="childRef"></ChildrenComponent>
</template>
<script setup>
// 导入子组件
import ChildrenComponent from "./components/ChildComponent.vue";
import { ref } from "vue";
const childRef = ref(null);
</script>
<style lang="scss" scoped></style>
子组件ChildComponent.vue:
<template>
  <div></div>
</template>

<script setup>
import { ref } from "vue";
const list = ref(["JavaScript", "HTML", "CSS"]);

defineExpose({ list });
</script>

<style lang="scss" scoped></style>
运行结果:可以看到父组件成功输出子组件的数据

五、provide/inject
provide/inject是 Vue 中提供的一对 API。无论层级多深,都可以实现父组件到子组件的数据传递。
下面我们来看demo
父组件App.vue:
<template>
  <!-- 实例化子组件 -->
  <ChildrenComponent></ChildrenComponent>
</template>

<script setup>
// 导入子组件
import ChildrenComponent from "./components/ChildComponent.vue";
import { ref, provide } from "vue";
const list = ref(["JavaScript", "HTML", "CSS"]);
provide("list", list.value);
</script>

<style lang="scss" scoped></style>
子组件ChildComponent.vue:
<template>
  <ul>
    <li v-for="item in list" :key="item">{{ item }}</li>
  </ul>
</template>

<script setup>
import { inject } from "vue";
const list = inject("list");
console.log(list); // ["JavaScript", "HTML", "CSS"]
</script>

<style lang="scss" scoped></style>
运行结果:可以看到子组件成功输出父组件的数据


 1669
1669


 被折叠的 条评论
为什么被折叠?
被折叠的 条评论
为什么被折叠?
 到【灌水乐园】发言


