你在工作时,是否遇到产品要求添加只读模式,需要大片的配置项都需要只读,代码层级深,改动内容多,全加上disable费事费力,期望简单的实现只读?那你可能需要一个代码界的“消防队”来救场啦!🚒
本文实现了一个只读指令,只需要在需要的地方加上v-read-only即可达到只读效果,快捷方便。就像在繁忙的城市中找到一条不堵车的捷径一样!🚀
当前代码已经在使用中,效果良好,仿佛魔法一样,一挥手,一切尽在掌控之中!
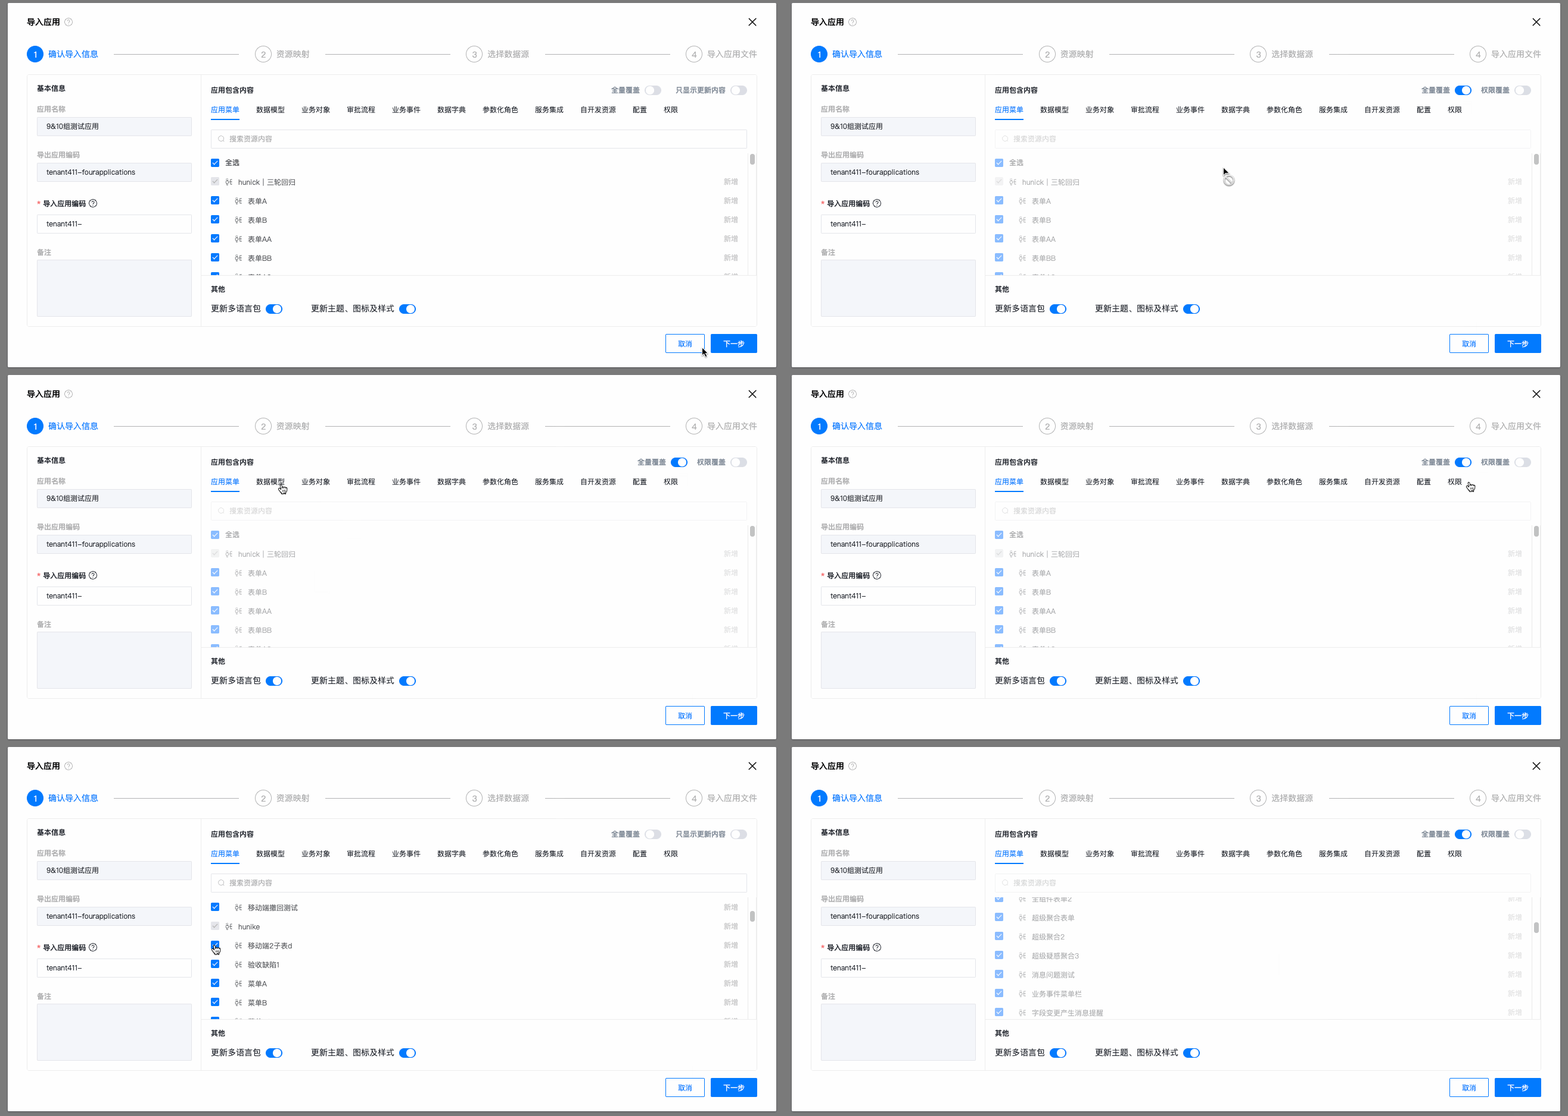
先看效果

开关开启,滚动内容全为只读,并且多个tab页面下面的内容都是只读的。这里展示的部分内容,在第二页的资源映射上也有配置项是只读的。就像有了一件隐形斗篷,用户操作无法透过这层保护!
实现思路
要想简单快捷的实现,最好用的就是写一个遮罩层,通过遮罩来隔绝用户的操作。这比改变原有代码要来得更加轻松,不是吗?
原始代码如下:
<template>
 <div class="resource-association-item">
    <div v-if="visible" class="read-only"></div>
    <!-- 真正的业务代码 -->
    <div>
      <div>配置项1</div>
      <div>配置项2</div>
      <div>配置项3</div>
      <div>配置项4</div>
    </div>
</div>
</template>

<script>
export default {
  name: 'ResourceAssociationItem',
  props: {
    visible: {
      type: Boolean,
      default: false
    }
  }
}

<style lang="scss" scoped>
.resource-association-item {
  display: flex;
  align-items: center;
  margin: 16px 0 22px 0;
  justify-content: space-between;
  position: relative;
  .read-only {
    position: absolute;
    top: 0;
    left: 0;
    width: 100%;
    height: calc(100%);
    background: rgba(255, 255, 255, 0.5);
    z-index: 10;
  }
}
</style>
而重复的代码几乎都可抽离出来,我们可以想起vue指令可以操作dom,并且可以接受参数,这就满足的上面代码的要求:
- 父元素下添加一个遮罩层元素
- 遮罩层元素的显示隐藏由参数决定
接下来我们就来实现这个指令,让它像一把神奇的魔法棒,点点手就能让一切变得简单!🪄
实现指令
vue2上代码
import Vue from 'vue'

const readOnly = {
  bind(el, binding) {
    const mask = document.createElement('div')
    mask.className = 'read-only-mask'

    const defaultOptions = {
      top: '0',
      left: '0',
      width: '100%',
      height: '100%'
    }

    const options = { ...defaultOptions, ...(binding.value || {}) }

    mask.style.position = 'absolute'
    mask.style.top = options.top
    mask.style.left = options.left
    mask.style.width = options.width
    mask.style.height = options.height
    mask.style.background = 'rgba(255, 255, 255, 0.5)'
    mask.style.zIndex = '10'
    mask.style.cursor = 'not-allowed'

    el.style.position = 'relative'
    el.appendChild(mask)
    mask.style.display = options.visible ? 'block' : 'none'
    el._readonlyMask = mask
  },
  update(el, binding) {
    if (el._readonlyMask) {
      const options = { ...el._readonlyMask.dataset, ...(binding.value || {}) }
      el._readonlyMask.style.display = options.visible ? 'block' : 'none'
      el._readonlyMask.style.top = options.top
      el._readonlyMask.style.left = options.left
      el._readonlyMask.style.width = options.width
      el._readonlyMask.style.height = options.height
    }
  },
  unbind(el) {
    if (el._readonlyMask) {
      el._readonlyMask.remove()
      delete el._readonlyMask
    }
  }
}

Vue.directive('readOnly', readOnly)
vue3 版本
src/directives/readOnly.js
const readOnly = {
  beforeMount(el, binding) {
    let mask = null;
    if (!el._readonlyMask) {
      mask = document.createElement("div");
      mask.className = "read-only-mask";
    } else {
      mask = el._readonlyMask;
    }

    const defaultOptions = {
      visible: true,
      top: "0",
      left: "0",
      width: "100%",
      height: "100%",
    };

    // 初始化遮罩样式
    mask.style.position = "absolute";
    mask.style.top = defaultOptions.top;
    mask.style.left = defaultOptions.left;
    mask.style.width = defaultOptions.width;
    mask.style.height = defaultOptions.height;
    mask.style.background = "rgba(255, 255, 255, 0.5)";
    mask.style.zIndex = "10";
    mask.style.cursor = "not-allowed";

    el.style.position = "relative";
    el.appendChild(mask);
    el._readonlyMask = mask;

    // 根据传递的值设置遮罩样式
    readOnly.updateMaskStyle(el, binding);
  },
  updated(el, binding) {
    console.log("updated called", binding.value); // 添加调试日志
    readOnly.updateMaskStyle(el, binding);
  },
  unmounted(el) {
    if (el._readonlyMask) {
      el._readonlyMask.remove();
      delete el._readonlyMask;
    }
  },
  updateMaskStyle(el, binding) {
    const arg = binding.arg;
    const value = binding.value;

    if (arg === "visible") {
      el._readonlyMask.style.display = value ? "block" : "none";
    } else if (arg === "width") {
      el._readonlyMask.style.width = value;
    } else if (arg === "height") {
      el._readonlyMask.style.height = value;
    } else if (arg === "top") {
      el._readonlyMask.style.top = value;
    }
  },
};

export default readOnly;
局部使用:
<template>
  <div>
    <div
      v-read-only:visible="readonlyOptions.visible"
      v-read-only:width="readonlyOptions.width"
      class="content"
    >
      <p>这个区域是只读的</p>
    </div>
    <button @click="toggleReadOnly">切换只读状态</button>
  </div>
</template>

<script setup>
import { ref, reactive } from 'vue';
import readOnly from '../directives/readonly.js';

const readonlyOptions = reactive({
  visible: true,
  top: '0',
  left: '0',
  width: '100%',
  height: '100%'
});

const toggleReadOnly = () => {
  readonlyOptions.visible = !readonlyOptions.visible;
  console.log(readonlyOptions.visible);
};
const vReadOnly = {
  ...readOnly
};
</script>


<style scoped>
.content {
  padding: 20px;
  border: 1px solid #ccc;
}
</style>
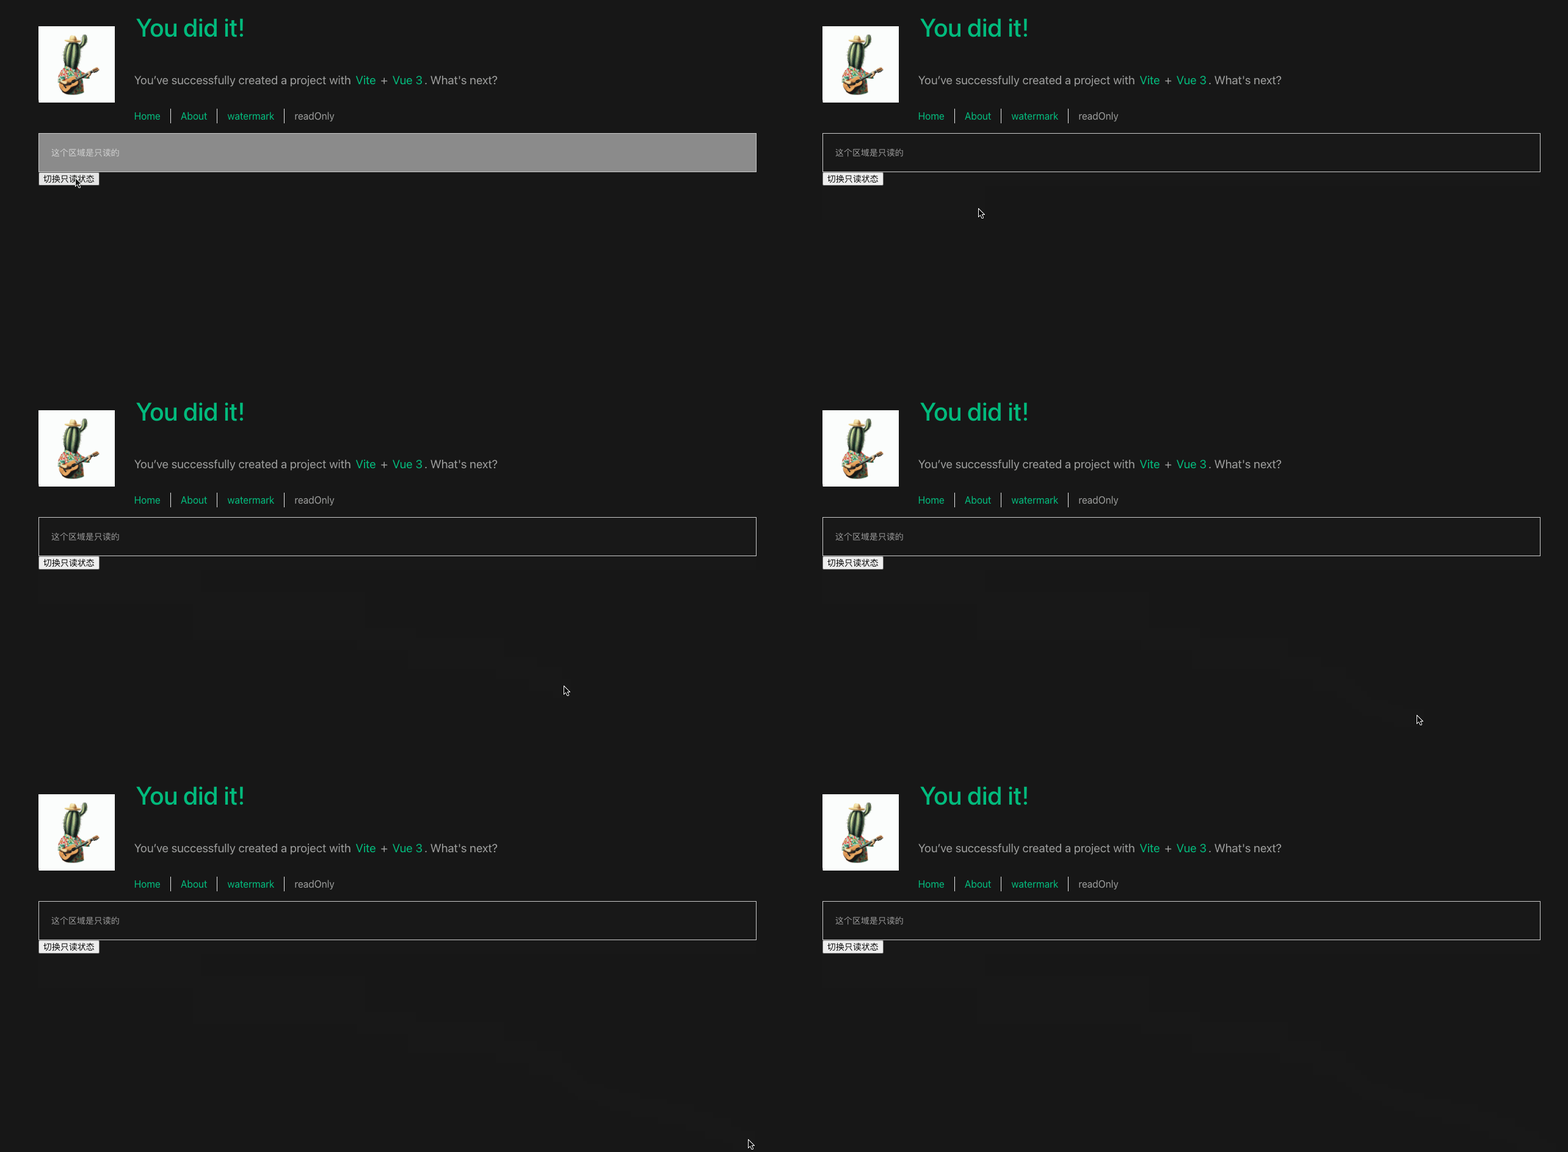
效果:

这个指令只读模式变得轻而易举。最后,如果你有更好的实现方式或者想要加入一点幽默,欢迎留言。毕竟,开发不应该是枯燥的,对吧?😉


 1400
1400

 被折叠的 条评论
为什么被折叠?


