Nginx增加SSL证书时报错:/configure: error: SSL modules require the OpenSSL library.

错误详情:

/configure: error: SSL modules require the OpenSSL library.
You can either do not enable the modules, or install the OpenSSL library into the system, or build the OpenSSL library statically from the source with nginx by using --with-openssl= option.
在这里插入图片描述

步骤1:先看下是否安装OpenSSL依赖

注意:nginx不是全局的话需要到nginx的sbin里面执行

nginx -V

结果:

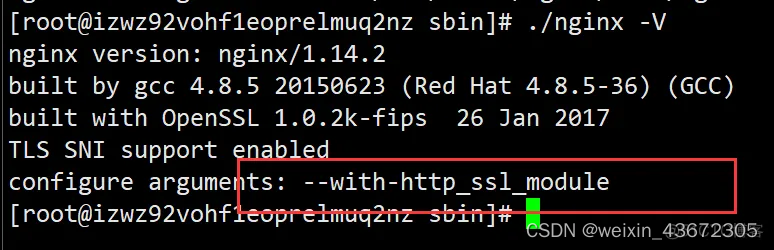
[root@zwb ~]# nginx -V
nginx version: nginx/1.15.9
built by gcc 4.8.5 20150623 (Red Hat 4.8.5-44) (GCC) 
configure arguments: --prefix=/usr/local/nginx --user=nginx --group=nginx --with-http_stub_status_module

configure arguments中不包含** --with-http_ssl_module**这个参数的表示未安装,否则可跳过安装OpenSSL的步骤

步骤2:安装OpenSSL(两种方式)

第一种:通过yum 快速安装

命令为:

# -y 自动安装,需要确认全部为是,不然需要手动输y/n
yum -y install openssl openssl-devel 

等待完成即可

第二种:内网离线安装

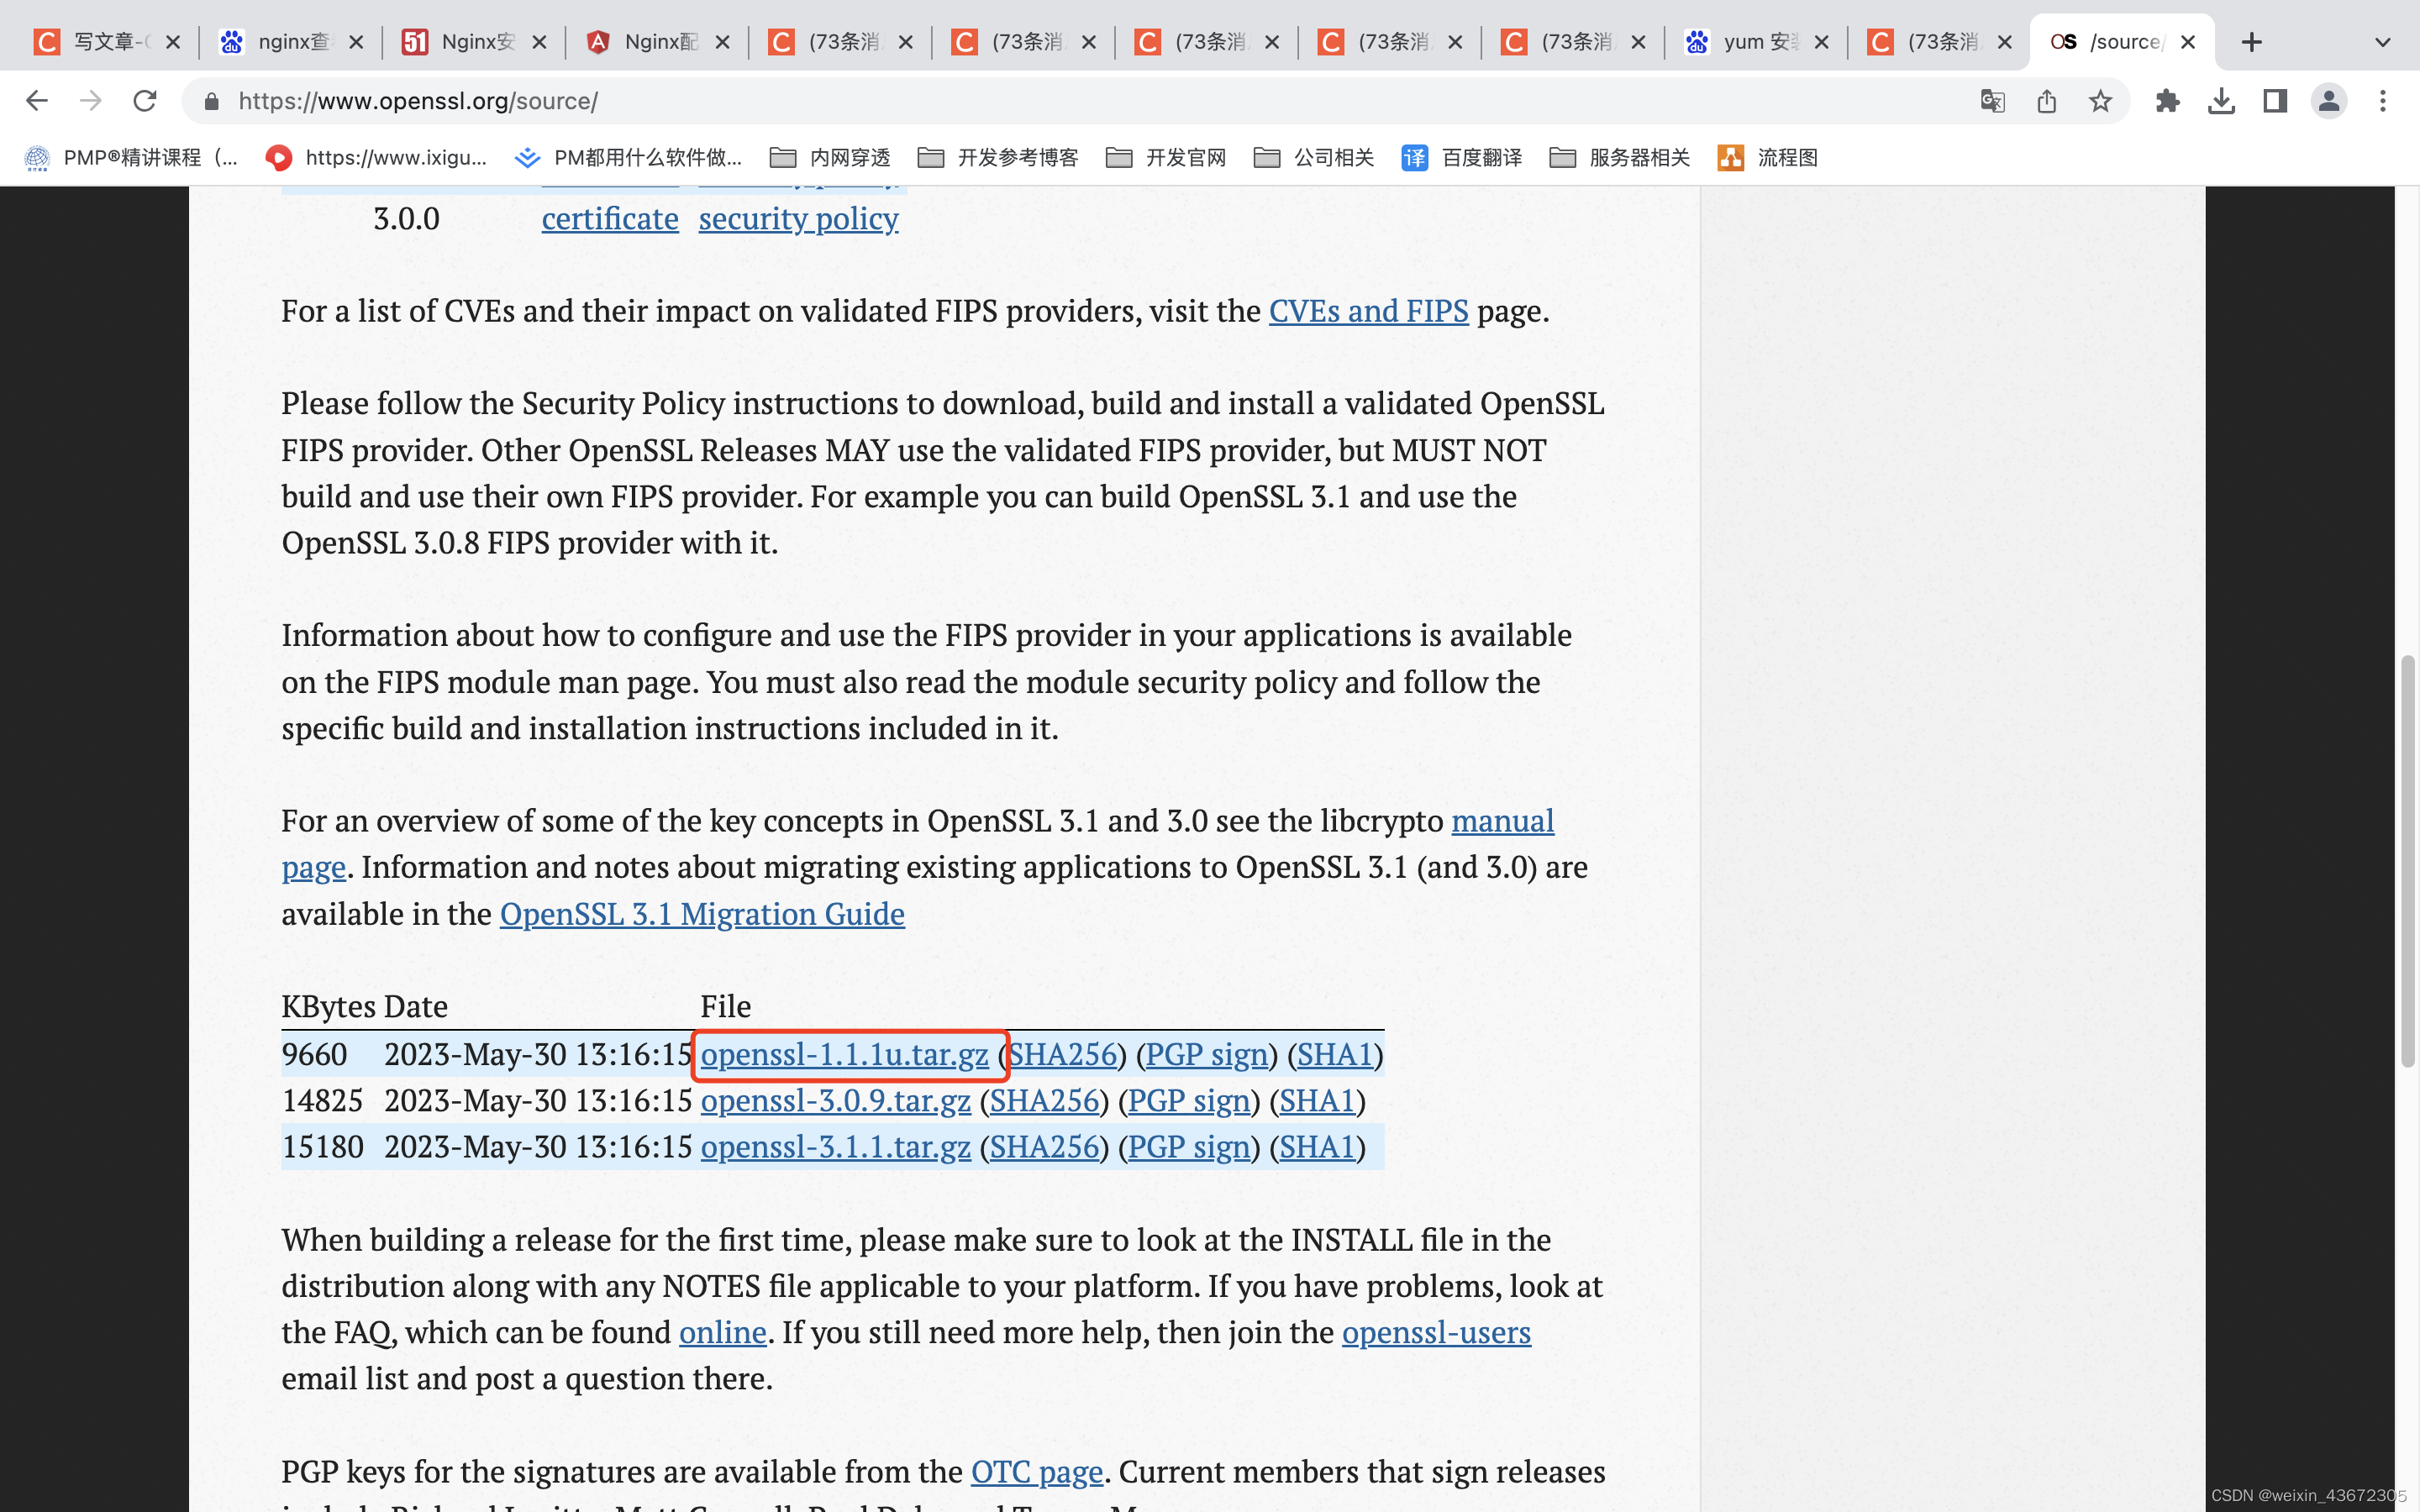
源码文件下载地址:https://www.openssl.org/,进入download中,我用的是1.1所以我下载是这个,看实际情况而定
在这里插入图片描述
下载好之后解压到路径中,记住这个路径,一会要用!!!

步骤3

进入Nginx的源码包,注意是源码包,就是你从Nginx官网下载然后解压的包,里面有一个configure名字的可执行文件,然后执行:

通过yum安装的
./configure --with-http_ssl_module
离线安装的
./configure --with-http_ssl_module --with-openssl=离线解压的路径(上一步让你记住的那个)

然后进行编译:

make && make install

只用make也行,会在Nginx目录下的objs中生成编译文件,上述命令则会直接编译并安装,默认路径为:/usr/local/nginx/sbin

步骤4

确认是否安装成功

nginx -V

结果如下就成功了
在这里插入图片描述

步骤五

给Nginx增加SSL证书,可参考https://blog.csdn.net/weixin_43672305/article/details/131858293

  • 3
    点赞
  • 6
    收藏
    觉得还不错? 一键收藏
  • 0
    评论
如果在执行`./configure`命令出现了`SSL modules require the OpenSSL library`错误提示,这意味着您的系统缺少OpenSSL库。为了解决这个问题,您可以按照以下步骤安装OpenSSL库: 1. 首先,确保您的系统已经安装了必要的编译工具和依赖项。执行以下命令安装所需的依赖项: ``` sudo yum install -y gcc pcre-devel zlib-devel ``` 2. 下载OpenSSL的源码包。您可以在OpenSSL官方网站(https://www.openssl.org/source/)上找到最新的稳定版本。使用wget命令下载源码包: ``` wget https://www.openssl.org/source/openssl-x.x.x.tar.gz ``` (请将 "x.x.x" 替换为所需的版本号) 3. 解压源码包: ``` tar -zxvf openssl-x.x.x.tar.gz ``` 4. 进入解压后的目录: ``` cd openssl-x.x.x ``` 5. 执行configure命令生成OpenSSL的编译配置: ``` ./config --prefix=/usr/local/openssl ``` 6. 编译并安装OpenSSL: ``` make sudo make install ``` 7. 安装完成后,将OpenSSL库路径添加到系统环境变量中,以便Nginx在编译找到它: ``` export LD_LIBRARY_PATH=/usr/local/openssl/lib:$LD_LIBRARY_PATH ``` 8. 然后返回Nginx源码目录,重新执行`./configure`命令,并指定OpenSSL库的路径: ``` cd /path/to/nginx-source ./configure --with-http_ssl_module --with-openssl=/usr/local/openssl ``` (请将 "/path/to/nginx-source" 替换为您的Nginx源码目录) 9. 接下来,继续编译并安装Nginx: ``` make sudo make install ``` 现在,您应该能够成功编译和安装带有OpenSSL支持的Nginx。请确保按照正确的路径和版本号替换上述命令中的占位符。完成后,您可以启动Nginx服务并进行相应的配置。

“相关推荐”对你有帮助么?

  • 非常没帮助
  • 没帮助
  • 一般
  • 有帮助
  • 非常有帮助
提交
评论
添加红包

请填写红包祝福语或标题

红包个数最小为10个

红包金额最低5元

当前余额3.43前往充值 >
需支付:10.00
成就一亿技术人!
领取后你会自动成为博主和红包主的粉丝 规则
hope_wisdom
发出的红包
实付
使用余额支付
点击重新获取
扫码支付
钱包余额 0

抵扣说明:

1.余额是钱包充值的虚拟货币,按照1:1的比例进行支付金额的抵扣。
2.余额无法直接购买下载,可以购买VIP、付费专栏及课程。

余额充值