


一、查看当前系统及ssh版本:ssh -V

二、准备前置依赖
1.安装telnet(上传telnet-server-0.17-66.el7.x86_64.rpm至/home目录下):
执行命令:
安装:rpm -Uvh telnet-server-0.17-66.el7.x86_64.rpm
启动并设置开机自启动:systemctl start telnet.socket && systemctl enable telnet.socket
如果有防火墙,则需要放行23端口:
firewall-cmd --add-port=23/tcp
firewall-cmd --add-port=23/tcp --permanent
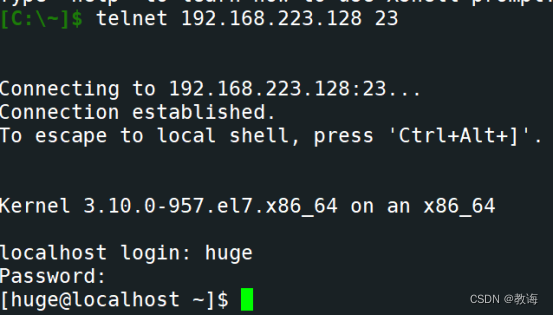
添加普通用户并设置密码:
useradd huge
echo 123456 | passwd --stdin huge
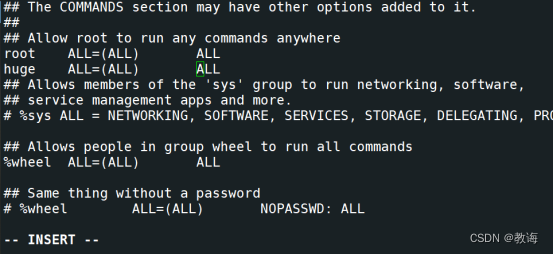
增加huge账号的sudo权限:
chmod u+w /etc/sudoers
vim /etc/sudoers
huge ALL=(ALL) ALL
上面配置完成后就可以在windows下的终端中使用telnet命令来测试连接 telnet IP 23
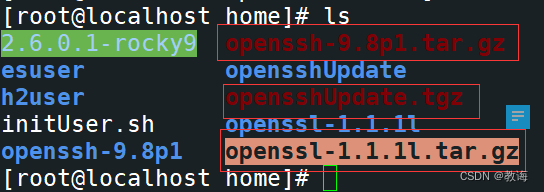
2.上传openssl-1.1.1l.tar.gz、openssh-9.8p1.tar.gz、opensshUpdate.tgz至后台/home目录下
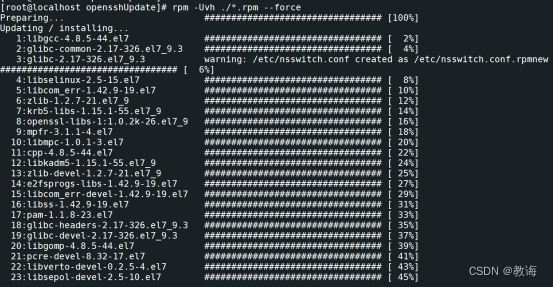
3. 解压opensshUpdate.tgz

4.进入opensshUpdate目录下执行:rpm -Uvh ./*.rpm --force
5.执行命令:cd ..
三、卸载已有的OpenSSH
1.注意卸载openssh时请不要断开当前ssh连接!!!
2.执行命令:rpm -qa | grep openssh | xargs rpm -e --nodeps
![]()
四、更新openssl
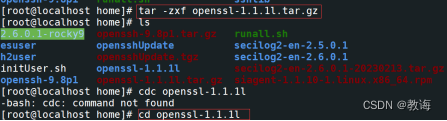
1.解压openssl-1.1.1l.tar.gz压缩包(openssl-1.1.1l.tar.gz)并进入目录:
1.1 tar -zxf openssl-1.1.1l.tar.gz
1.2 cd openssl-1.1.1l
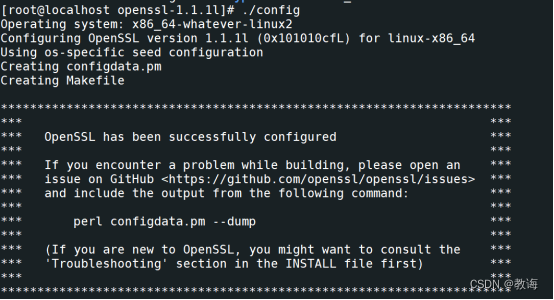
1.3编译并安装:./config --prefix=/usr/local/openssl --shared
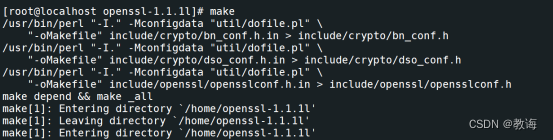
make
make install

执行命令:
sudo ln -s /usr/local/lib64/libssl.so.1.1 /usr/lib64/
sudo ln -s /usr/local/lib64/libcrypto.so.1.1 /usr/lib64/
mv /usr/bin/openssl /root/
ln -s /usr/local/bin/openssl /usr/bin/openssl
查看openssl版本:
openssl version

五、编译安装新版本的OpenSSH
1.解压源码压缩包(openssh-9.8p1.tar.gz)并进入目录:
1.1 tar zxf openssh-9.8p1.tar.gz
1.2 cd openssh-9.8p1/

1.3 预编译:./configure --prefix=/usr/local/openssh9p7 --sysconfdir=/etc/ssh --with-pam --with-ssl-dir=/usr/local/openssl --with-md5-passwords --with-zlib
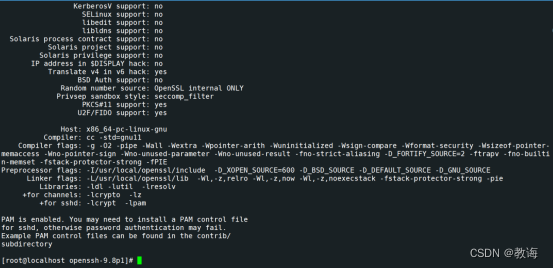
1.4 进行编译:make
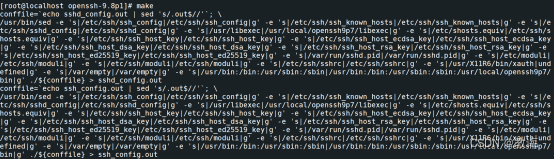
1.5 进行安装:make install
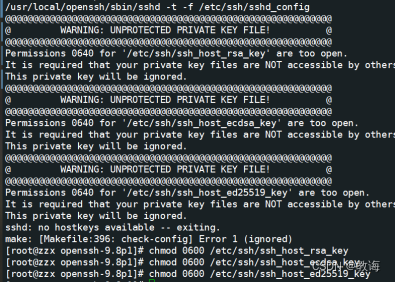
如果出现以下错误:
Permissions 0640 for '/etc/ssh/ssh_host_ed25519_key' are too open.
It is required that your private key files are NOT accessible by others.
This private key will be ignored.
sshd: no hostkeys available -- exiting.
make: [Makefile:396: check-config] Error 1 (ignored)
请执行以下命令后重新执行make install:
chmod 0600 /etc/ssh/ssh_host_rsa_key
chmod 0600 /etc/ssh/ssh_host_ecdsa_key
chmod 0600 /etc/ssh/ssh_host_ed25519_key
1.6 配置openssh(复制目录时若报错使用find / -name ssh查看ssh准确位置):

1. cp /usr/local/openssh9p7/sbin/sshd /usr/sbin/sshd
2. cp /usr/local/openssh9p7/bin/ssh /usr/bin/ssh
3. cp /usr/local/openssh9p7/bin/ssh-keygen /usr/bin/ssh-keygen
4. mkdir -p /etc/init.d/
5. cp contrib/redhat/sshd.init /etc/init.d/sshd

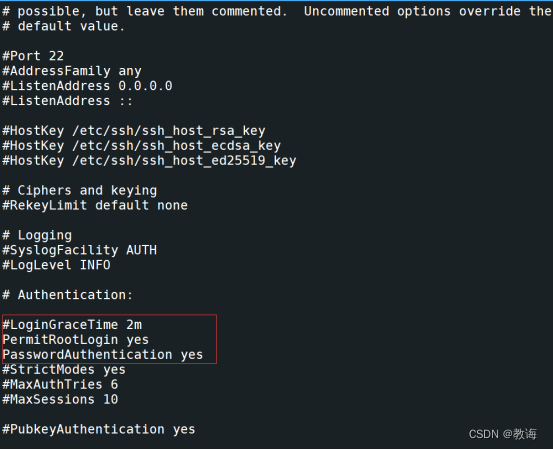
1.7 配置新的sshd_config文件:
vi /etc/ssh/sshd_config
PermitRootLogin yes
PasswordAuthentication yes
1.8 创建新的sshd服务:
- 执行命令:touch /etc/sysconfig/sshd
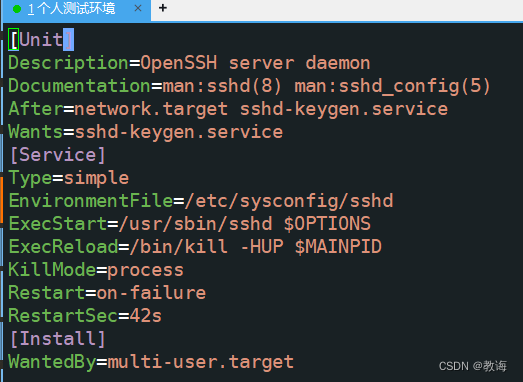
- 执行命令:vi /usr/lib/systemd/system/sshd.service
- 填充内容:
[Unit]
Description=OpenSSH server daemon
Documentation=man:sshd(8) man:sshd_config(5)
After=network.target sshd-keygen.service
Wants=sshd-keygen.service
[Service]
Type=simple
EnvironmentFile=/etc/sysconfig/sshd
ExecStart=/usr/sbin/sshd $OPTIONS
ExecReload=/bin/kill -HUP $MAINPID
KillMode=process
Restart=on-failure
RestartSec=42s
[Install]
WantedBy=multi-user.target
1.9 执行最后的操作:
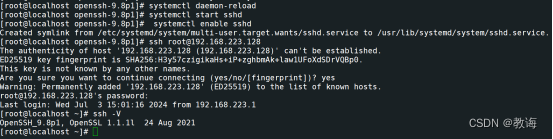
1. systemctl daemon-reload
2. systemctl start sshd
3. systemctl enable sshd
1.10 验证:ssh root@host_ip


 5491
5491

 被折叠的 条评论
为什么被折叠?
被折叠的 条评论
为什么被折叠?
 到【灌水乐园】发言


