


前言
本篇文章将尝试回答下面几个问题:
1、不通过框架、原生的JDBC如何写,如何实现事务呢?
2、如何使用spring框架进行jdbc 并控制事务、底层原理如何?
3、利用AOP、自己实现一个@MyTransaction事务控制注解!
1.创建一个Spring Boot测试项目
进行事务控制需要导入spring-boot-starter-jdbc依赖pom文件如下(包含其他相关依赖):
<dependencies>
       <!--jdbc中包含事务的相关依赖-->
		<dependency>
			<groupId>org.springframework.boot</groupId>
			<artifactId>spring-boot-starter-jdbc</artifactId>
		</dependency>
		<dependency>
			<groupId>org.springframework.boot</groupId>
			<artifactId>spring-boot-starter-web</artifactId>
		</dependency>
		<dependency>
			<groupId>mysql</groupId>
			<artifactId>mysql-connector-java</artifactId>
			<scope>runtime</scope>
		</dependency>
		<dependency>
			<groupId>org.springframework.boot</groupId>
			<artifactId>spring-boot-starter-test</artifactId>
			<scope>test</scope>
		</dependency>
		<!--引入自定义数据源druid-->
		<dependency>
			<groupId>com.alibaba</groupId>
			<artifactId>druid</artifactId>
			<version>1.1.17</version>
		</dependency>
	</dependencies>
1.1进行相关配置
如数据库连接信息:
spring.datasource.username=root
spring.datasource.password=root
spring.datasource.url=jdbc:mysql:///springbootidea
spring.datasource.driver-class-name=com.mysql.jdbc.Driver
spring.datasource.type=com.alibaba.druid.pool.DruidDataSource
2.原生JDBC代码
我们现在先演示如何使用原生JDBC 代码来操作数据库,其实很多人学习java的时候,可能上手学习的就是直接spring框架,并没有接触过原生的,其实这对技术的演进认知会有一个段层。不利于对技术产生一个宏观上的认识,废话不多说,开干了。
@RunWith(SpringRunner.class)
@SpringBootTest
public class SpringbootDataJdbcApplicationTests {

	@Autowired
	DataSource source;
	//
	@Test
    public void testOrg() throws SQLException {
         // 这里本来是驱动加载 然后获得连接的  但是我们就省去那几步 直接利用数数据源获得连接
	    // 获得连接
        Connection connection = source.getConnection();
        // 获得sql操作对象平台
        Statement statement = connection.createStatement();
        // 执行sql语句
        statement.executeUpdate("INSERT INTO department VALUES (1,'事业部门')");
        statement.executeUpdate("INSERT INTO tbl_user VALUES (1,'老刘员工')");
        // 关闭连接
        connection.close();
    }
}
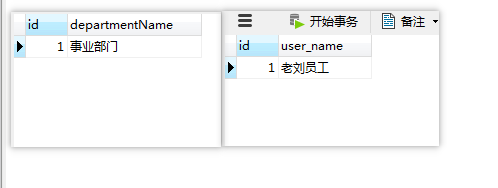
我们使用的是 SpringBoot 提供的单元测试进行操作。执行测试方法,显示执行成功。

刷新数据库,可以看到数据已经正常插入了.
那么原生的数据操作,如何来控制事务呢?我们用 int i = 1/0来模拟业务逻辑当中 出现了异常。如何在抛出异常的前提下,使得我们这两条插入操作 保持事务的原子性呢? 我们需要手动回滚事务
    @Test
    public void testOrgWithTran() throws SQLException {
        // 获得连接
        Connection connection = source.getConnection();
        // 获得sql操作对象平台
        Statement statement = connection.createStatement();
        // 设置手动提交事务
        connection.setAutoCommit(false);
        //          ------执行业务逻辑操作------
        try {
            statement.executeUpdate("INSERT INTO department VALUES (2,'人事部门')");
            int i = 1/0;
            statement.executeUpdate("INSERT INTO tbl_user VALUES (2,'人事1号员工')");
        }catch (Exception ex){
            // 回滚操作
            connection.rollback();
        }
        // 如果没有异常 那么提交事务
		connection.commit();
        // 关闭连接
        connection.close();
    }
执行完成之后 ,检查数据库 发现 2 人事部门 这条在异常发生之前执行的数据并没有成功插入,说明事务控制成功,正常回滚。
3.使用spring完成JDBC操作
Spring 给我们提供了一个jdbcTemplate ,来方便我们对数据库进行操作。只需要自动注入它,就可以直接使用了。
因为我们使用的是springboot 他有大量的自动配置,因为我们引入了spring-boot-starter-jdbc ,springboot在启动的时候就帮我自动配置了该模板引擎
JdbcTemplate。在传统使用spring的时候 要自己的方式,自己配置一个jdbcTemplate,并把数据源注入到该模板当中,但是使用springboot便自己帮我们配置了。
@RunWith(SpringRunner.class)
@SpringBootTest
public class SpringbootDataJdbcApplicationTests {
	@Autowired
	JdbcTemplate jdbcTemplate;
	@Test
	public void contextLoads() throws SQLException {
		// 没有insert操作 只有update
		jdbcTemplate.update("INSERT INTO department(departmentName) VALUES(?)","开发部门");
		jdbcTemplate.update("INSERT INTO tbl_user(user_name) VALUES(?)","程序员");
	}
	}
4.如何使用Spring完成事务控制
  @Transactional
	public void contextLoads() throws SQLException {
		// 没有insert操作 只有update
		jdbcTemplate.update("INSERT INTO department(departmentName) VALUES(?)","开发部门");
		int i = 1/0;
		jdbcTemplate.update("INSERT INTO tbl_user(user_name) VALUES(?)","程序员");
	}
使用spring的提供的注解@Transactional标注在方法上,便可以进行事务控制了。在springboot的启动类上还需要标注上一个注解 表示开启事物并且注入事务管理器@EnableTransactionManagement 。执行上面那段测试代码
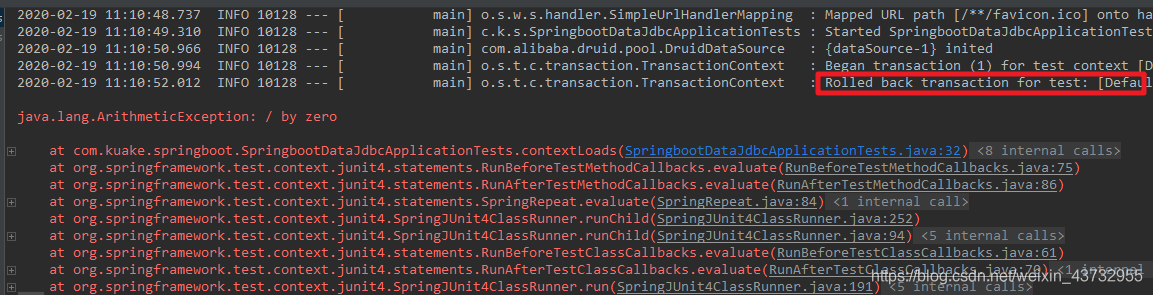
抛出了运行时候的异常!根据日志显示,事务已经发生回滚说明事务控制成功。我们简单的来探究一下这下面的原理
@EnableTransactionManagement
@Target(ElementType.TYPE)
@Retention(RetentionPolicy.RUNTIME)
@Documented
@Import(TransactionManagementConfigurationSelector.class)
public @interface EnableTransactionManagement {
注意到 这个注解里面有个 @Import(TransactionManagementConfigurationSelector.class) 根据import注解的功能,它会自动实例化该类,并会调用它的selectImports方法。这个方法的代码如下:
@Override
	protected String[] selectImports(AdviceMode adviceMode) {
		switch (adviceMode) {
			case PROXY:
				return new String[] {AutoProxyRegistrar.class.getName(),
						ProxyTransactionManagementConfiguration.class.getName()};
			case ASPECTJ:
				return new String[] {
						TransactionManagementConfigUtils.TRANSACTION_ASPECT_CONFIGURATION_CLASS_NAME};
			default:
				return null;
		}
	}
给容器中添加的是事务管理器,具体相关的底层就不再展示了。到这里我们可以明白是事务管理器在起作用。底层其实是跟AOP相关,AOP的相关源码详细分析可以参考博客AOP源码分析系列文章
5.利用AOP,自己手写事务
像spring的jdbcTemplate方法,我们使用起来特别方便,在他的内部其实也就是对原生jdbc代码的封装,不用我们每次都经过那么繁琐的步骤,那么我们也可以模仿jdbcTemplate方法,写一个自己的工具类
MyjdbcTemplate
public class MyjdbcTemplate {

    @Autowired
    DataSource source;

    Connection connection = null;

    // 控制只有一个连接
    public Connection getConnection() throws Exception{
    	// 这里简单模拟 所以并未加锁 和 指令重排等考虑
        if (connection == null){
            connection = source.getConnection();
        }
        return connection;
    }

    public void execute(String sql) throws Exception{
        // 获得连接
        Connection connection = source.getConnection();
        // 获得sql操作对象平台
        Statement statement = connection.createStatement();
        // 执行sql语句
        statement.executeUpdate(sql);
    }
}
在一个事务操作中,调用两次插入的方法
@Service
public class UserService {
    @Autowired
    MyjdbcTemplate myjdbcTemplate;
    public void doTran() throws  Exception{
        // ---------业务处理----------
        myjdbcTemplate.execute("INSERT INTO department VALUES (2,'开发部门')");
        myjdbcTemplate.execute("INSERT INTO tbl_user VALUES (2,'一号程序员')");
        int i = 1/0;
    }
}
假如我们要对上面的业务处理方法doTran进行事务,我们采用原生的方法,代码改进如下:
@Service
public class UserService {
    @Autowired
    MyjdbcTemplate myjdbcTemplate;
    public void doTran() throws  Exception{

        System.out.println("====开始事务====");
        Connection con = myjdbcTemplate.getConnection();
        con.setAutoCommit(false);
        try {

            // ---------业务处理----------
            myjdbcTemplate.execute("INSERT INTO department VALUES (2,'开发部门')");
            myjdbcTemplate.execute("INSERT INTO tbl_user VALUES (2,'一号程序员')");
            int i = 1/0;
            con.commit();
            System.out.println("====事务提交成功====");


        }catch (Exception ex){
            System.out.println("====发生异常事务回滚===");
            con.rollback();
        }finally {
            if (con != null) {
                con.close();
            }
        }
    }
}
看起来我们似乎控制了单例,保证获得的是同一个连接,但是还有一个问题,就是多个线程的情况下,可能是共用一个连接,那么也就是说需要将 连接与当前的线程绑定起来 所以需要 ThreadLoacl关键字,改进方法如下:
   ThreadLocal<Connection> connection = null;

    // 控制只有一个连接
    public Connection getConnection() throws Exception{
        if (connection == null){
            connection.set(source.getConnection());
        }
        return connection.get();
    }
7.定义一个自己的事务注解@MyTransactional
我们发现上面的那种方式 控制事务那是相当的麻烦啊,那么如何能够像Spring的事务控制的那么方便呢,直接一个注解就完事了。我们发现手动控制事务个过程中,其实就是在业务代码的前后,环绕上事务控制代码 如下图:
        System.out.println("====开始事务====");
        Connection con = myjdbcTemplate.getConnection();
        con.setAutoCommit(false);
        try {
            //=================业务处理代码=====================
             //=================业务处理代码=====================
              //=================业务处理代码=====================
               //=================业务处理代码=====================
            con.commit();
            System.out.println("====事务提交成功====");


        }catch (Exception ex){
            System.out.println("====发生异常事务回滚===");
            con.rollback();
        }finally {
            if (con != null) {
                con.close();
            }
        }
    }
}
那么我们是否就可以利用SpringAop中的Around通知方法来实现该功能呢。关于Around通知方法,详细参见AOP源码分析系列文章。
这里简单说一下 Around通知,就是在目标方法的前后 进行功能增强。
引入AOP的相关依赖:
        <dependency>
            <groupId>org.springframework.boot</groupId>
            <artifactId>spring-boot-starter-aop</artifactId>
        </dependency>
我们定义切面类 MyAspectj
@Component
@Aspect
public class MyAspectj {

    @Autowired
    MyjdbcTemplate myjdbcTemplate;
    @Autowired
    UserService userService;

    @Around("@annotation(MyTransactional)")
    public void doTran(ProceedingJoinPoint joinPoint) throws  Exception{

        System.out.println("====开始事务====");
        Connection con = myjdbcTemplate.getConnection();
        con.setAutoCommit(false);
        try {
            // 执行目标方法 也就是doTrn()方法
            joinPoint.proceed();
            con.commit();
            System.out.println("====事务提交成功====");

        }catch (Exception ex){
            System.out.println("====发生异常事务回滚===");
            con.rollback();
        } catch (Throwable throwable) {
            throwable.printStackTrace();
        } finally {
            if (con != null) {
                con.close();
            }
        }
    }
}
在切面类中定义了一个环绕通知方法,并且切点为标注了@MyTransactional的方法。那么我们只需在想要进行事务控制的方法上 标注上该注解即可
    @MyTransactional
    public void insert() throws Exception {

        // ---------业务处理----------
        myjdbcTemplate.execute("INSERT INTO department VALUES (2,'开发部门')");
        int i = 1/0;
        myjdbcTemplate.execute("INSERT INTO tbl_user VALUES (2,'一号程序员')");

    }
进行方法测试:
    @Test
    public void testTran() throws Exception {
        // 该userService 是被代理的
        userService.doTran();
    }

演示使用AOP 实现事务这并不是复杂,只是简单的应用,这其实也就是底层原理的一种简单表现形式,这也就是为什么看源码有助于我们认识这些技术全局效应,他们是如何串联起来,而不是仅仅掌握如何取使用,更应该知道他内部的流程…


 392
392


 被折叠的 条评论
为什么被折叠?
被折叠的 条评论
为什么被折叠?
 到【灌水乐园】发言


