


前几天在重新翻看《第一行代码》时,发现了很多因为之前偷懒没有注意的东西。比如Listview中构建FruitAdapter时用到的inflate方法,去年学的时候一直没去了解,这次打算学习一下。
LayoutInflater.java中inflate函数的定义为:
public View inflate(@LayoutRes int resource, @Nullable ViewGroup root, boolean attachToRoot)
这三个参数的意思是:
- resource :布局的资源id
- root :填充的根视图
- attachToRoot :是否将载入的视图绑定到根视图中
就像书上所说的,前两个参数的意思就是将resource指定的布局添加到root中去。但第三个参数attachToRoot的含义他说的太过于模糊,如果只是为了不把他添加到父布局中,为什么不能直接把root设置为空值。
抱着试一试的想法,我把parent改成了null,但是运行的结果和之前没有任何差别。
为了搞懂attachToRoot所带来的影响,我建立了一个简单的testInflate项目。
其中activity_main.xml内容如下:
<?xml version="1.0" encoding="utf-8"?>
<LinearLayout xmlns:android="http://schemas.android.com/apk/res/android"
    xmlns:app="http://schemas.android.com/apk/res-auto"
    android:id="@+id/main"
    xmlns:tools="http://schemas.android.com/tools"
    android:layout_width="match_parent"
    android:layout_height="match_parent"
    android:gravity="center"
    tools:context=".MainActivity">

    <Button
        android:layout_width="20dp"
        android:layout_height="20dp"
        android:gravity="center"
        android:background="#E89C17"
         />

</LinearLayout>
另外新建了一个inflate.xml,内容如下
<?xml version="1.0" encoding="utf-8"?>
<LinearLayout xmlns:android="http://schemas.android.com/apk/res/android"

    android:layout_width="300dp"
    android:layout_height="300dp"
    android:background="@color/colorAccent"
    android:gravity="center"
    android:orientation="vertical">

    <Button
        android:layout_width="50dp"
        android:layout_height="50dp" />
</LinearLayout>
MainActivity.java中的启动函数写为:
public class MainActivity extends AppCompatActivity {

    @Override
    protected void onCreate(Bundle savedInstanceState) {
        super.onCreate(savedInstanceState);
        setContentView(R.layout.activity_main);
        LinearLayout test = (LinearLayout) findViewById(R.id.main);
        LayoutInflater inflater = LayoutInflater.from(this);
        inflater.inflate(R.layout.inflate, test,true);
    }
}
attachToRoot设置为true
首先我们先将attachToRoot设置为true,其他参数不变,运行结果如下:
很显然成功的将inflate.xml作为子布局添加到activity_man.xml中。
那么如果不直接使用inflater.inflate()函数,而是赋值给一个view,将view传入父布局中呢?所以可以将MainActivity函数改成如下:
    protected void onCreate(Bundle savedInstanceState) {
        super.onCreate(savedInstanceState);
        setContentView(R.layout.activity_main);
        LinearLayout test = (LinearLayout) findViewById(R.id.main);
        LayoutInflater inflater = LayoutInflater.from(this);
        View view = inflater.inflate(R.layout.inflate, test, true);
        test.addView(view);
    }
虽然项目可以运行,但是却出现了秒退的现象,我们查看报错信息发现:

这说明当attachToRoot设置为true时,inflate方法中view的添加是自动实现的。这时我算是理解了《第一行代码》中说的:将第三个参数指定为false,表示只是为了在父布局中声明的layout属性生效,但不为这个View添加父布局,因为一旦View有了父布局之后,他就不能再添加到ListView中。就是因为当attachToRoot设置为true时的自动添加。
如果我们将最后一行的 test.addView(view);删掉,程序正常。
attachToRoot设置为false
将attachToRoot设置为false,其他参数不变,运行结果与attachToRoot为true时相同,可以想到的是当MainActivity.java代码如下时(即attachToRoot设置为false,再将view添加到test中):
    protected void onCreate(Bundle savedInstanceState) {
        super.onCreate(savedInstanceState);
        setContentView(R.layout.activity_main);
        LinearLayout test = (LinearLayout) findViewById(R.id.main);
        LayoutInflater inflater = LayoutInflater.from(this);
        View view = inflater.inflate(R.layout.inflate, test, false);
        test.addView(view);
    }
程序正常。
root设置为null
那么如果直接将root设置为null,此时attachToRoot为何值都不会有影响。MainActivity.java代码如下:
    protected void onCreate(Bundle savedInstanceState) {
        super.onCreate(savedInstanceState);
        setContentView(R.layout.activity_main);
        LinearLayout test = (LinearLayout) findViewById(R.id.main);
        LayoutInflater inflater = LayoutInflater.from(this);
        View view = inflater.inflate(R.layout.inflate, null, false);
        test.addView(view);
    }
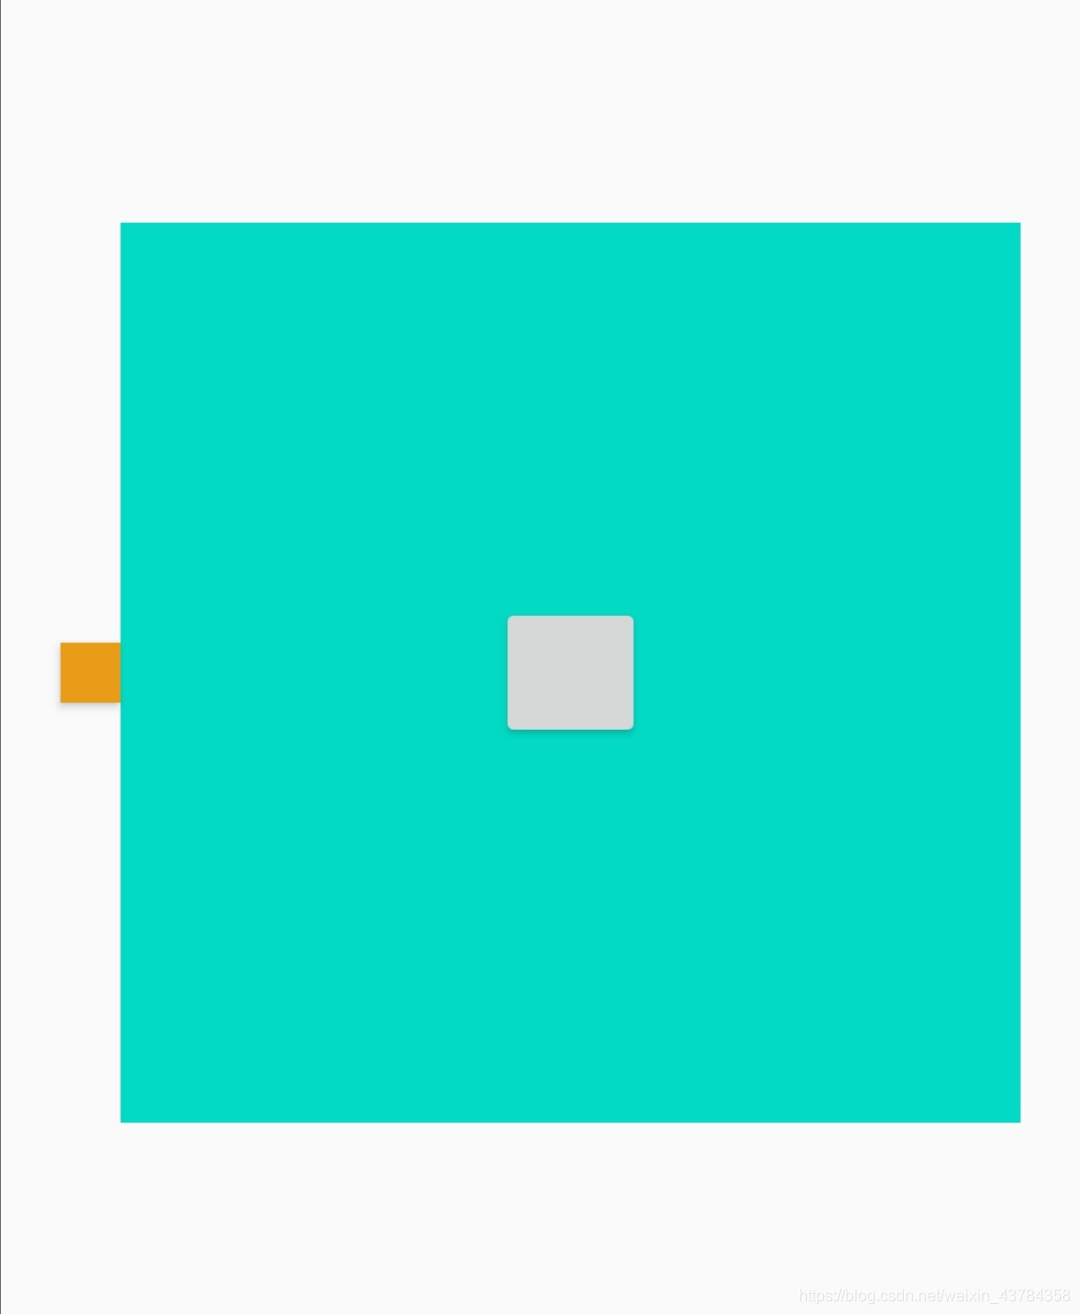
运行结果为:

仔细看差别还是很大的,我在inflate.xml中设置的布局属性,严谨的说是LinearLayout的属性(我这里设置的长度和宽度)失效了。这是为什么呢?
在查阅资料后发现,当root不为null时,可以说是父布局充当了要添加的子布局的一个容器,当root为null时,表示我不需要将第一个参数所指定的布局添加到任何容器中,所以由于整个LinearLayout并没有处于某一个容器中,所以它的根节点的宽高属性会失效,但是因为里面的Button是从属于inflate.xml的LinearLayout的,也就是说LinearLayout充当了Button的容器,所以Button的属性可以显示出来。


 6503
6503


 被折叠的 条评论
为什么被折叠?
被折叠的 条评论
为什么被折叠?
 到【灌水乐园】发言


