


文章目录
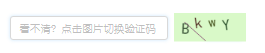
此为最终实现效果!
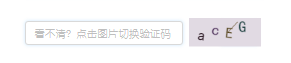
点击图片可切换验证码
开始进行编写
html添加canvas标签
  <canvas
          onClick={this.reloadPic} //点击切换事件
          ref={this.canvas} //ref含义下面讲解
          width="100"
          height="40" //设置高度宽度
  ></canvas>
ref讲解
组件内的标签都可以定义 ref 属性来标识自己
1.通过React.createRef()创建Refs并通过ref属性联系到React组件
2.当一个ref通过render放入一个元素中,一个对节点的引用可以通过ref的current属性得到
页面初始化生成验证码
//页面初始化后获取canvas组件,并在canvas组件内生成验证码
  componentWillMount() {
    this.canvas = React.createRef();
  }
  componentDidMount() {
    this.randomCode();
  }
### 设置初始值

```javascript
  constructor(props) {
    super(props);
    this.state = {
      code: "",
      codeLength: 4,//验证码长度
      contentWidth: 96,
      contentHeight: 38,//内容高度/宽带
      showError: false,
    };
  }
设置生成随机数函数 randomNum()
  //生成一个随机数
  randomNum = (min, max) => {
    return Math.floor(Math.random() * (max - min) + min);
  };

  //生成一个随机颜色
  randomColor(min, max) {
    const r = this.randomNum(min, max);
    const g = this.randomNum(min, max);
    const b = this.randomNum(min, max);
    return `rgb(${r}, ${g}, ${b})`;
  }
设置干扰线函数drawLine()
具体绘制请看下面 ->绘制路径(path)
    // 绘制干扰线
  drawLine(ctx) {
    for (let i = 0; i < 1; i++) {
      ctx.strokeStyle = this.randomColor(40,180);
      //strokeStyle = color 设置图形轮廓的颜色
      ctx.beginPath();
      ctx.moveTo(
        this.randomNum(0, this.state.contentWidth),
        this.randomNum(0, this.state.contentHeight)
      );
      ctx.lineTo(
        this.randomNum(0, this.state.contentWidth),
        this.randomNum(0, this.state.contentHeight)
      );
      ctx.stroke();
    }
  }

  //绘制干扰点
  drawDot(ctx) {
    for (let i = 0; i < this.state.contentWidth/4; i++) {
      ctx.fillStyle = this.randomColor(0, 255);
      //fillStyle = color 设置图形的填充颜色
      ctx.beginPath();
      ctx.arc(
        this.randomNum(0, this.state.contentWidth),
        this.randomNum(0, this.state.contentHeight),
        1,
        0,
        2 * Math.PI
      );
      ctx.fill();
    }
  }
绘制路径 (path)
使用路径绘制图形需要一些额外的步骤:
1.创建路径起始点
2.调用绘制方法去绘制出路径
3.把路径封闭
4.一旦路径生成,通过描边或填充路径区域来渲染图形。
下面是需要用到的方法:
1.beginPath()
新建一条路径,路径一旦创建成功,图形绘制命令被指向到路径上生成路径
2.moveTo(x, y)
把画笔移动到指定的坐标(x, y)。相当于设置路径的起始点坐标。
3.closePath()
闭合路径之后,图形绘制命令又重新指向到上下文中
4.stroke()
通过线条来绘制图形轮廓
5.fill()
通过填充路径的内容区域生成实心的图形
设置生成字体颜色和大小及位置 drawText()
  drawText(ctx, txt, i) {
    //随机生成字体颜色 调用随机数函数
    ctx.fillStyle = this.randomColor(100, 200);
    //随机生成字体大小字号 调用随机数函数
    const fontSize = this.randomNum(10, 20);
    ctx.font = fontSize + "px SimHei"; //给字号加单位,生成字体

    //设置位置
    const padding = 10;
    //偏移量
    const offset = (this.state.contentWidth - 40) (this.state.code.length - 1);
    let x = padding;
    if (i > 0) {
      x = padding + i * offset;
    }
    //调用随机数函数
    let y = this.randomNum(20, this.state.contentHeight - 5);
    const deg = this.randomNum(-10, 10);

    // 设置坐标原点和旋转角度
    ctx.translate(x, y);
    ctx.rotate((deg * Math.PI) / 180);
    ctx.fillText(txt, 0, 0);

    // 恢复坐标原点和旋转角度
    ctx.rotate((-deg * Math.PI) / 180);
    ctx.translate(-x, -y);
  }
生成字母数字组合 randomCode()
  //生成字母数字数组
  randomCode() {
    let random = "";
    const str = "QWERTYUPLKJHGFIODSAZXCVBNMqwlioertyupkjhgfdsazxcvbnm1234567890";
    for (let i = 0; i < this.state.codeLength; i++) {
      const index = Math.floor(Math.random() * 57);
      //取得随机数的索引(0~57)
      random += str[index];
      //根据索引取得随机数加到code上
    }
   this.setState(
      {  code: random,//赋值给code  },
      () => {
        const canvas = this.canvas.current;
         //拿到canvas组件 如果不懂请看ref讲解
        const ctx = canvas.getContext("2d");
       //getContext("2d") 对象是内建的 HTML5 对象
       //拥有多种绘制路径、矩形、圆形、字符以及添加图像的方法
       ctx.textBaseline = "bottom";
       //textBaseline = value 基线对齐选项
       //常用值:top, hanging, middle, bottom。

        // 绘制背景颜色
        ctx.fillStyle = this.randomColor(10, 200 );
        //fillStyle = color 设置图形的填充颜色
        ctx.fillRect(0, 0, this.state.contentWidth, this.state.contentHeight);
        //fillRect(x, y, width, height):绘制一个填充的矩形。

        for (let i = 0; i < this.state.code.length; i++) {
          this.drawText(ctx, this.state.code[i], i);
          //调用生成字体颜色和大小及位置函数
        }
       this.drawLine(ctx); //调用绘制干扰线函数 如同的线条
      //  this.drawDot(ctx);//调用绘制干扰点函数 个人觉得不好看 但是也可以讲解一下,后文会在干扰线后面写

      }
    );
  }
设置点击事件
reloadPic = () => {
    this.randomCode();//调用生成字母数字组合函数
    //同时
    this.props.form.setFieldsValue({
      sendcode: "",  //清空输入框的验证码
    });
  };
验证验证码是否正确
//验证验证码是否正确
  changeCode = (e) => {
    //toLowerCase()的意思是把字符串所有英文字母转为小写
    //对验证码进行验证
    var code=e.target.value.toLowerCase();
    //得到当前输入的值
    var v_code=this.state.code.toLowerCase();
    //当前canvas验证码的值
    //判断是否相等,不相等则更新
    if(code!==''&&code!==v_code){
      this.setState({
        showError: true,
      });
    }else{
      this.setState({
        showError: false,
      });
    }
  }
完成!如有不懂的请在在下方留言


 4145
4145


 被折叠的 条评论
为什么被折叠?
被折叠的 条评论
为什么被折叠?
 到【灌水乐园】发言


