


----------------------------------------------------------纸上得来终觉浅,绝知此事要躬行---------------------------------------------------------
一、依赖注入概念
依赖注入( Dependency Injection ,简称 DI) 与控制反转 (loC) 的含义相同,只不过这两个称呼是从两个角度描述的同一个概念。 对于一个 Spring 初学者来说,这两种称呼很难理解, 下面我们将通过简单的语言来描述这两个概念。
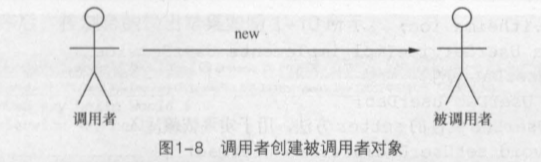
当某个 Java 对象(调用者)需要调用另一个 Java 对象(被调用者,即被依赖对象)时, 在传统模式下,调用者通常会采用 "new 被调用者"的代码方式来创建对象,如图 1-8 所示。 这种方式会导致调用者与被调用者之间的捐合性增加,不利于后期项目的升级和维护。
在使用 Spring 框架之后,对象的实例不再由调用者来创建,而是由 Spring 容器来创建, Spring 容器会负责控制程序之间的关系,而不是由调用者的程序代码直接控制。 这样,控制权 由应用代码转移到了 Spring 容器,控制权发生了反转,这就是 Spring 的控制反转。 从 Spring 容器的角度来看, Spring 容器负责将被依赖对象赋值给调用者的成员变量,这相当于为调用者注入了它依赖的实例,这就是 Spring 的依赖注入,如图 1-9 所示。

1、IOC 和 DI
- IOC:其思想是反转获取的方向。应用了IOC后,容器主动的将资源推送给它所管理的组件,组件所要做的仅是选择一种合适的方式来接受资源。
- DI:IOC的另一种方式。即组件以一些预先定义好的方式(如setter方法)接受来自容器的资源注入,更直接的表达。
二、依赖注入的实现方式
依赖注入的作用就是在使用 Spring 框架创建对象时,动态地将其所依赖的对象注入 Bean 组件中,其实现方式有三种:属性注入,构造方法注入,工厂方法注入(很少用,不推荐)。具体介绍如下。
- 属性注入:即通过 setter 方法注入Bean 的属性值或依赖的对象。属性注入使用
<property>元素, 使用name属性指定 Bean 的属性名称,value属性或<value>子节点指定属性值 。属性注入是实际应用中最常用的注入方式 - 构造方法注入:Bean 的属性值或依赖的对象,它保证了 Bean 实例在实例化后就可以使用。构造器注入在
<constructor-arg>元素里声明属性,<constructor-arg>中没有name属性
1、属性注入实现
具体配置环境,建立项目的步骤,或者需要导入的jar包就不在这里赘述,可见我的前面博客【Spring学习01】
(1)编写两个实体类
- Dog类
public class Dog {
    private Integer id;
    private String name;

    public Integer getId() {
        return id;
    }

    public void setId(Integer id) {
        System.out.println("setId:" + id);
        this.id = id;
    }

    public String getName() {
        return name;
    }

    public void setName(String name) {
        System.out.println("setName:" + name);
        this.name = name;
    }

    @Override
    public String toString() {
        return "Dog{" +
                "id=" + id +
                ", name='" + name + '\'' +
                '}';
    }
}
- Person类
public class Person {
    private String idCard;
    private String name;
    private Dog dog;

    public Dog getDog() {
        return dog;
    }

    public void setDog(Dog dog) {
        this.dog = dog;
    }

    public String getIdCard() {
        return idCard;
    }

    public void setIdCard(String idCard) {
        this.idCard = idCard;
    }

    public String getName() {
        return name;
    }

    public void setName(String name) {
        this.name = name;
    }

    @Override
    public String toString() {
        return "Person{" +
                "idCard='" + idCard + '\'' +
                ", name='" + name + '\'' +
                ", dog=" + dog +
                '}';
    }
}
(2)编写配置文件
- applicationContext.xml
1、加入一些依赖:
<?xml version="1.0" encoding="UTF-8"?>
<beans xmlns="http://www.springframework.org/schema/beans"
       xmlns:xsi="http://www.w3.org/2001/XMLSchema-instance"
       xmlns:context="http://www.springframework.org/schema/context"
        xsi:schemaLocation="http://www.springframework.org/schema/beans
          http://www.springframework.org/schema/beans/spring-beans.xsd
          http://www.springframework.org/schema/context
          http://www.springframework.org/schema/context/spring-context.xsd
2、添加配置bean
<bean id="dog" class="com.ordinary.domain.Dog">
        <property name="id" value="9527"/>
        <property name="name" value="丘吉尔"/>
    </bean>
    <bean id="person" class="com.ordinary.domain.Person">
        <property name="name" value="张三"/>
        <property name="idCard" value="123456787"/>
        <property name="dog" ref="dog"/>
    </bean>
(3)编写测试类
这里使用单元测试 junit
    @Test
    public void testPerson(){
        //1.创建Ioc容器
        ApplicationContext ctx = new ClassPathXmlApplicationContext("applicationContext.xml");
        //2.拿对象
        Person person = (Person) ctx.getBean("person");
        System.out.println(person);
    }
结果如下:
Person{idCard=‘123456787’, name=‘张三’, dog=Dog{id=9527, name=‘丘吉尔’}}
2、构造注入实现
(1)创建实体类
- Car
public class Car {
   private String brand;//品牌
   private String corp;//厂家
   private Double price;//价格

   public Car() {
   }

   public Car(String brand, String corp, Double price) {
       this.brand = brand;
       this.corp = corp;
       this.price = price;
   }

   public String getBrand() {
       return brand;
   }

   public void setBrand(String brand) {
       this.brand = brand;
   }

   public String getCorp() {
       return corp;
   }

   public void setCorp(String corp) {
       this.corp = corp;
   }

   public Double getPrice() {
       return price;
   }

   public void setPrice(Double price) {
       this.price = price;
   }

   @Override
   public String toString() {
       return "Car{" +
               "brand='" + brand + '\'' +
               ", corp='" + corp + '\'' +
               ", price=" + price +
               '}';
   }
}
(2)添加如下代码到配置文件
- applicationContext.xml
<bean id="car" class="com.ordinary.domain.Car">
       <constructor-arg value="audi"/>
       <constructor-arg value="yiqi"/>
       <constructor-arg value="300000"/>
   </bean>
(3)编写测试方法
@Test
    public void testCar(){
        //1.创建Ioc容器
        ApplicationContext ctx = new ClassPathXmlApplicationContext("applicationContext.xml");
        //2.拿对象
        Car car = (Car) ctx.getBean("car");
        System.out.println(car);
    }
结果如下:
Car{brand=‘audi’, corp=‘yiqi’, price=300000.0}
三、注解方式实现依赖注入
现在,在Spring中,注解是用的比较多的。后面的SpringBoot更是用得频繁,其大大简化了我们的开发。在这里,基于注解实现依赖注入,我们就不必再去编写繁琐的xml配置文件,学习了上面的xml配置方式,那么对于注解实现会更好的理解。现在我们就用注解的方式来实现依赖注入。
1、添加配置文件
添加如下内容到applicationContext.xml文件中:
<context:component-scan base-package="com.ordinary"/>
作用是开启注解扫描模式,在这里我开启的是ordinary包下的类。
2、编写Dao层测试类
在ordinary包下创建dao包,然后创建如下两个实体类。用来模拟数据库插入操作。
- DepartmentDao
public interface DepartmentDao {
    void insert(Department department);
}
- DepartmentDaoImpl
@Repository
public class DepartmentDaoImpl implements DepartmentDao{
    @Override
    public void insert(Department department) {
        System.out.println("DepartmentDaoImpl add....");
    }
}
3、编写Service层测试类
在ordinary包下创建service包,然后创建如下两个实体类。
- DepartmentService
public interface DepartmentService {
    void add(Department department);
}
- DepartmentServiceImpl
@Service
public class DepartmentServiceImpl implements DepartmentService{
    @Autowired
    private DepartmentDao departmentDao;
    @Override
    public void add(Department department) {
        departmentDao.insert(department);
    }
}
4、编写测试方法
在这里,使用测试方法来代替了controller层
   	@Test
    public void testDepartment(){
        ApplicationContext ctx = new ClassPathXmlApplicationContext("applicationContext.xml");
        DepartmentService departmentService = (DepartmentService) ctx.getBean("departmentServiceImpl");//将@Service注解下的类第一个字母小写获取到名字
        System.out.println(departmentService);
        departmentService.add(new Department());
    }
测试结果如下:
com.ordinary.service.DepartmentServiceImpl@67a20f67
DepartmentDaoImpl add…
这里所用到的注解简述:
- @Respository:标识持久层组件
- @Service: 标识服务层(业务层)组件
- @Controller:标识表现层组件
- @Autowired:自动装配组件
注解的详细描述,以及配置文件中的标签,配置文件加载器等,我会在后续文章中写到。
----------------------------------------------------------纸上得来终觉浅,绝知此事要躬行---------------------------------------------------------


 910
910


 被折叠的 条评论
为什么被折叠?
被折叠的 条评论
为什么被折叠?
 到【灌水乐园】发言


