


本文详细介绍了一个支持增删查改的、前后端完全分离,仅通过Axios进行json数据的异步传输,页面完全不需要刷新的Java Web通讯录,项目结构详细考虑了实际使用当中可能用到的各种优化体验。文中包含详细的项目搭建过程以及全部代码!!!
相比于上一篇文章: 支持增删查改的进阶版Java Web通讯录超详细教程【SpringBoot+JSP+MySQL+Ajax页面不刷新】中前端使用的JSP,虽然也做到了前后端分离,但是没有彻底将前后端代码分开,MVC框架中Controller对于index.jsp的跳转仍然需要考虑到,不算彻底的前后端分离。
本项目中,前端使用的具体技术栈包括:JavaScript、Vue 2、Axios、Element UI,集成开发环境IDE为Visual Studio Code;后端使用的具体技术栈包括Java 17、SpringBoot、Maven、MyBatis,集成开发环境IDE为IntelliJ IDEA 2022。数据库为MySQL8.0.31+Navicat Premium 16.0.7,浏览器为Safari 16.5.2。硬件环境为MacBook Air M2+macOS Ventura 13.4.1。
本文中代码将占到绝大多数篇幅,代码中会穿插有大量的注释,记录了绝大多数在开发过程中遇到的坑!!!。
一、准备工作
1.配置Tomcat服务器
见链接🔗:Mac OS配置Tomcat服务器教程
2.配置Maven环境
见链接🔗:Mac OS配置Maven环境教程(IntelliJ IDEA)
3.安装MySQL服务器并连接数据库GUI管理工具
首先配置MySQL数据库,教程见链接🔗:Mac OS安装配置MySQL 8.0.31教程,然后连接一个数据库GUI管理工具,笔者使用的是Navicat Premium 16.0.7,也可以使用如Sequel Ace、DBeaver等平替,当然也可以使用MySQL命令行直接操作。以下默认安装了Navicat。
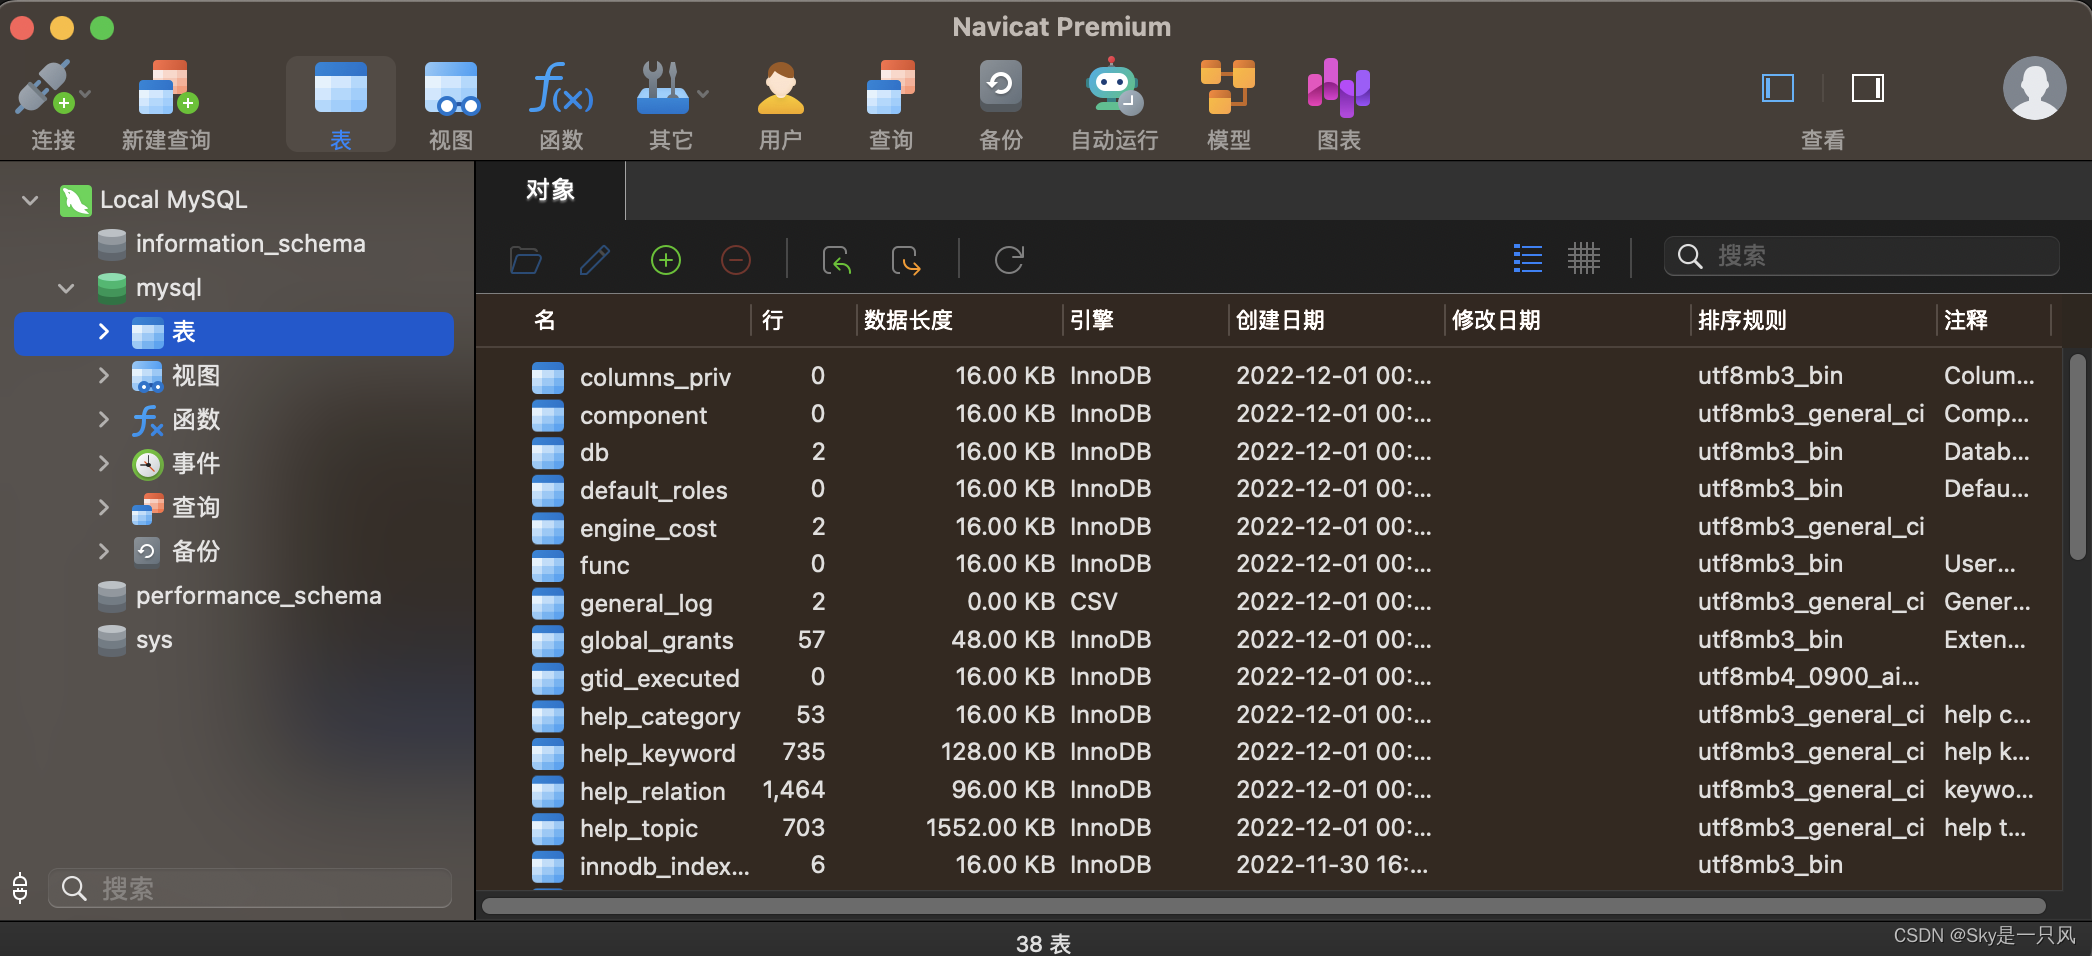
打开Navicat,点击左上角连接,然后选择MySQL。
自定义一个连接名,输入MySQL密码。

然后点击左下角的“测试连接”,提示连接成功,点击“好”并点击“保存”。 至此,Navicat Premium成功连接本地MySQL。
二、数据库准备
本项目以最简单的通讯录进行,通讯录内包括【姓名】和【联系方式】两部分,除此之外还需要一个数据库内部ID用于精准定位和方便增减数据。
在本地MySQL数据库下新建一个数据库命名为address_book,右击Local MySQL,点击“新建数据库”,在数据库名处输入“address_book”,然后点击“好”。


双击数据库address_book将其打开,然后在该数据库下右击“表”点击新建表(或command+N快捷新建),新建一个数据表(table),在表中新建三个字段,分别为ID、Name和Phone_number,字段类型、长度、null和主键设置如下图,注意ID要勾选自动递增,小窗左上角点击保存,并命名为address_book_data,点击“保存”。


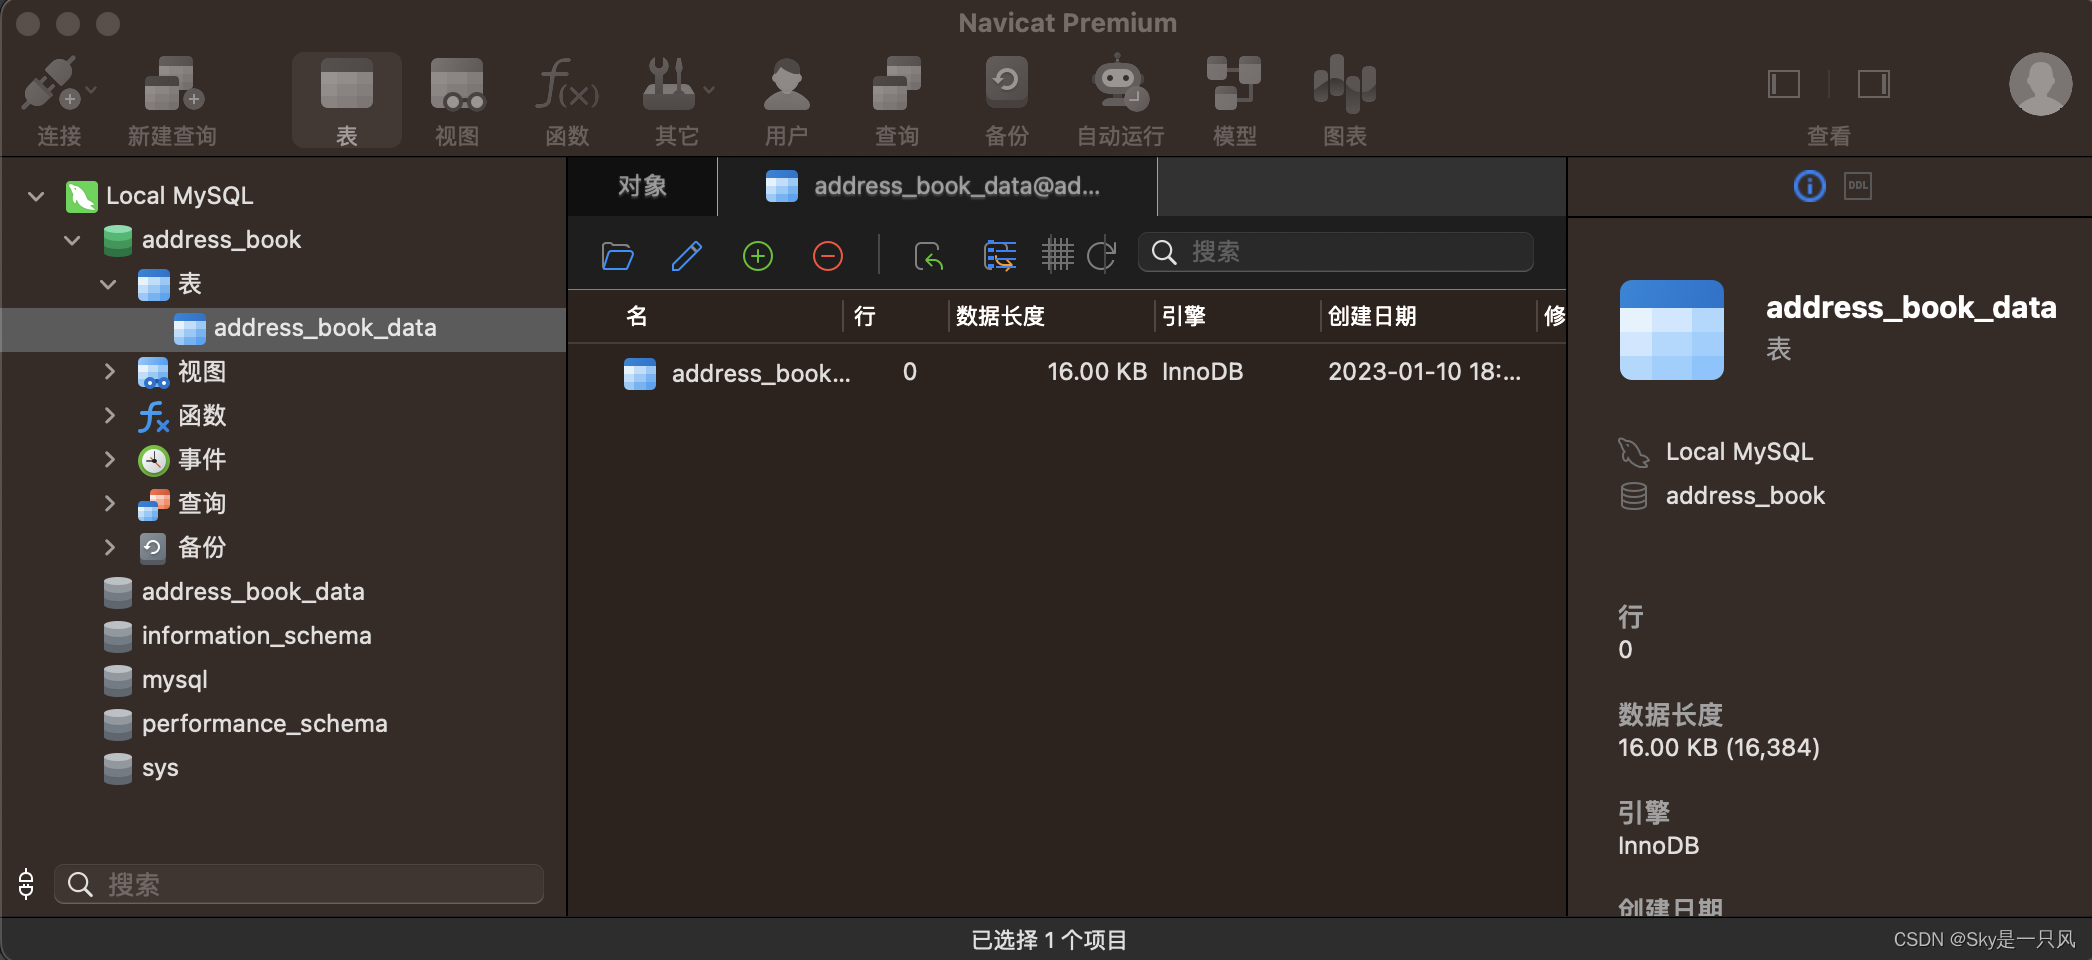
如下图所示,在address_book数据库下能够找到address_book_data数据表即可,项目的所有通讯录数据将存储于该table中,此时数据库准备完成。
三、后端开发
1.新建SpringBoot工程
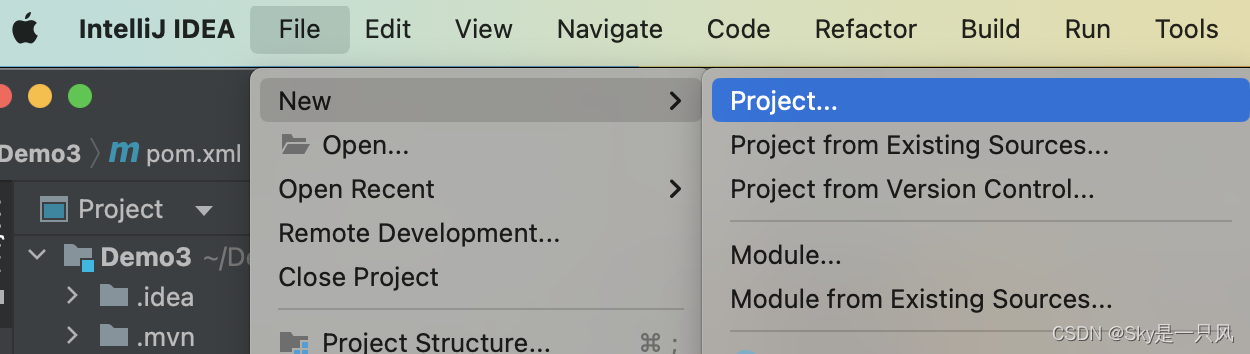
打开IDEA,新建Project。
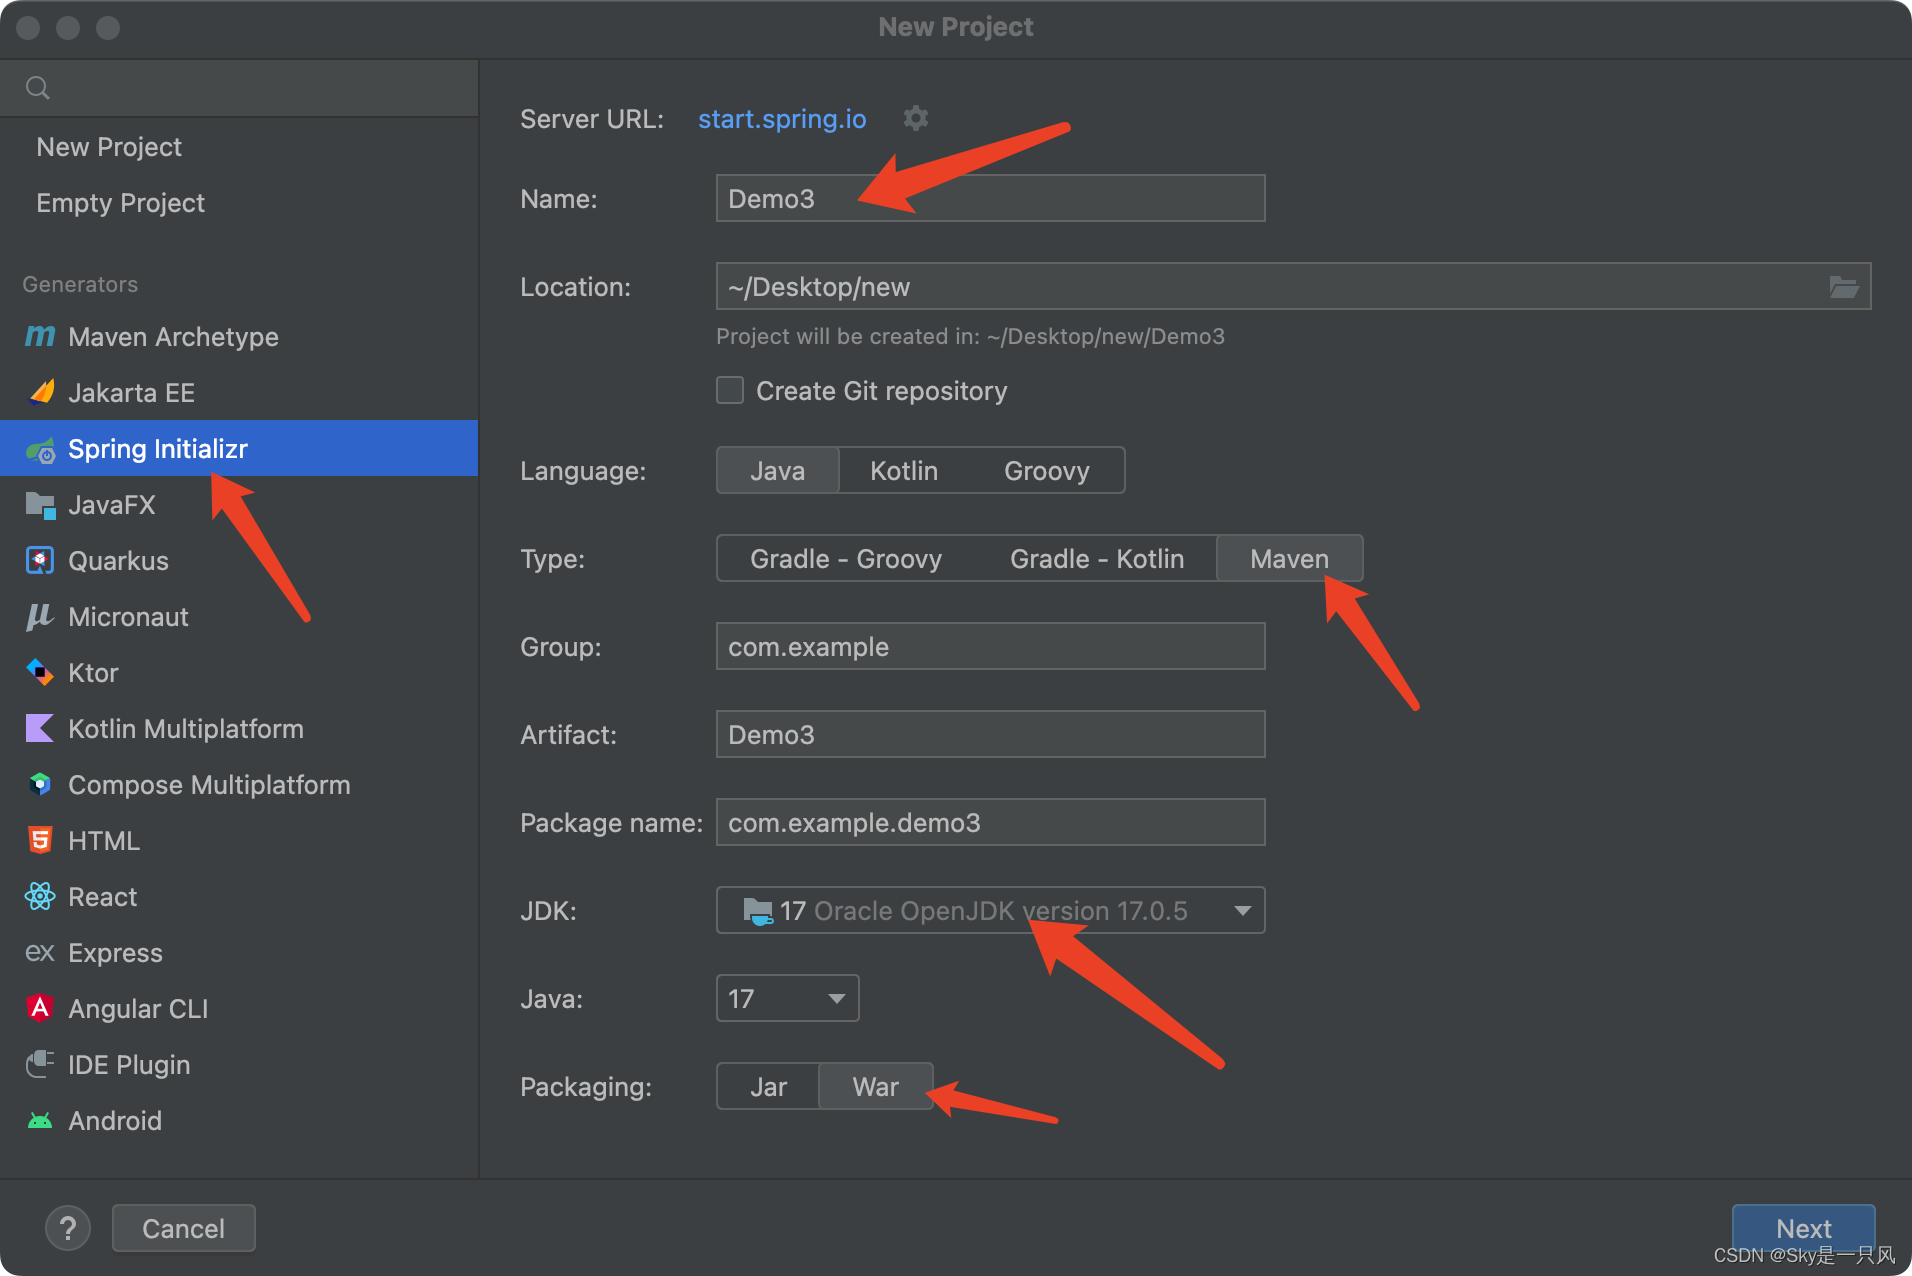
左侧选择Spring Initalizr,给自己的项目命名,Type选择Maven,JDK选择17(其他版本的Java JDK也可以),Packaging选择War,然后Next。
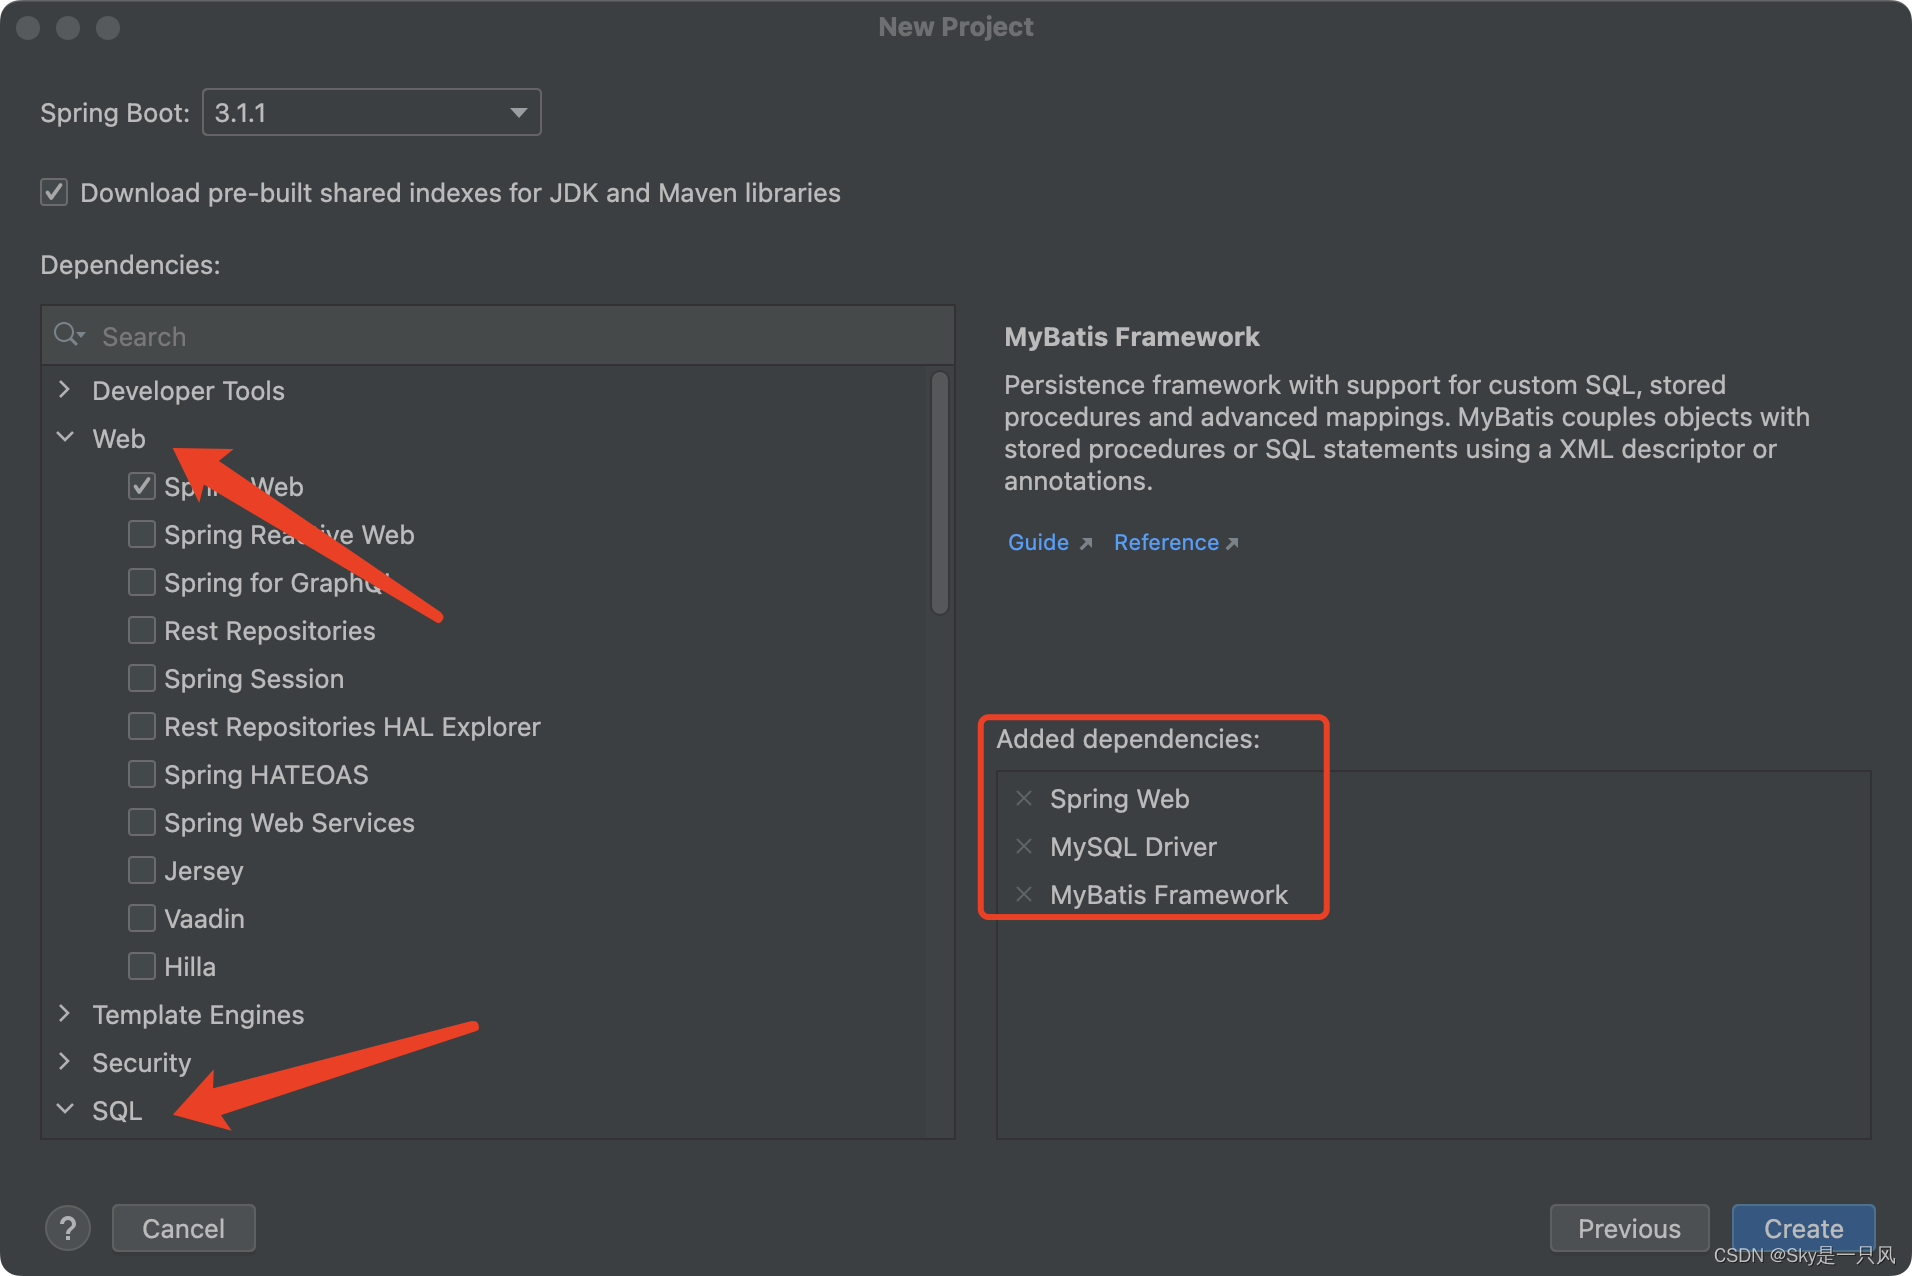
选择Dependencies,分别为Web中的Spring Web和SQL中的MySQL Driver和MyBatis Framework,然后Create。
新建Project完成后,项目结构如图(忽略里面的Demox,笔者实际使用的项目名称为Demo3)。

2.工程结构
com.example.demo3目录下新建四个新Package目录。
bean目录下新建Java Class为User;
controller目录下新建Java Class为UserController;
mapper目录下新建Interface为UserMapper;
service目录下新建Java Class为UserService。
完成后,项目最终结构如下:

3.代码
Talk is cheap!
User.java
package com.example.demo3.bean;

// model层的实体类,数据访问层
public class User {
    private int ID;
    private String Name;
    private String Phone_number;

    public int getID(){
        return ID;
    }
    public void setID(int ID){
        this.ID = ID;
    }

    public String getName() {
        return Name;
    }
    public void setName(String Name) {
        this.Name = Name;
    }

    public String getPhone_number() {
        return Phone_number;
    }
    public void setPhone_number(String Phone_number) {
        this.Phone_number = Phone_number;
    }
}
UserController.java
package com.example.demo3.controller;

import com.example.demo3.bean.User;
import com.example.demo3.service.UserService;
import org.springframework.beans.factory.annotation.Autowired;
import org.springframework.stereotype.Controller;
import org.springframework.ui.Model;
import org.springframework.web.bind.annotation.GetMapping;
import org.springframework.web.bind.annotation.RequestMapping;
import org.springframework.web.bind.annotation.ResponseBody;
import org.springframework.web.bind.annotation.RestController;

import java.util.List;

// @RestController和@Controller都是Spring框架中用来标识一个类为控制器的注解。
// @RestController注解是Spring4.0版本引入的新特性,它的作用是将该类下的所有方法的返回值都默认为JSON格式的数据。这意味着在使用@RestController
// 注解标注的类中所有方法的返回值都会被自动转换为JSON格式并返回给客户端。而@Controller注解则是Spring MVC框架中的一个基本注解,它的作用是标识一个
// 类为控制器并且该类中的方法通常用来处理HTTP请求和响应。在使用@Controller注解的类中,通常需要配合使用其他注解来实现请求参数绑定、视图渲染等功能
// 比如@RequestMapping、@RequestParam、@ModelAttribute等。
// @RestController是@Controller和@ResponseBody的组合注解

@Controller
// @Controller是一个特殊的@Component,用于标识一个类为控制器层的组件,通常用于接收请求,处理请求参数,调用Service层提供的服务,返回响应结果。
// 控制器Controller层
public class UserController {
    @Autowired
    private UserService userService;

    // @RequestMapping是一个通用的注解,可以用于处理任何类型的HTTP请求,包括GET、POST、PUT、DELETE等。它可以用于类级别和方法级别,用于指定请求的URL路径和请求方法。
    // @GetMapping是@RequestMapping的一个特殊化版本,用于处理HTTP GET请求。它只能用于方法级别,用于指定请求的URL路径。相比于@RequestMapping,它更加简洁明了,也更加易于使用。
    // 总的来说,如果只需要处理HTTP GET请求,建议使用@GetMapping;如果需要处理其他类型的HTTP请求,可以使用@RequestMapping。
    // 注意,这里对于注解的使用会直接影响到view层中ajax对于post和get的选择,对应错了是跑不通的!

    @RequestMapping("test")
    @ResponseBody
    // @ResponseBody注解用于将Controller的方法返回的对象,通过适当的转换器转换为指定的格式之后,写入到response对象的body区,通常用来返回JSON数据或者是XML数据,一般在异步获取数据时使用
    public List<User> getUserList(){
        return userService.getUserList();
    }// 上面这个方法简单将数据库中的所有数据全部输出,在项目中没有实际使用,主要用来帮助理解、测试和debug

    // 用于查找
    @RequestMapping("select")
    @ResponseBody
    public List<User> selectUser(String Name){
        return userService.selectUser(Name);
    }// 返回json格式的结果

    // 用于添加
    @RequestMapping("add")
    @ResponseBody
    public void addUser(String Name,String Phone_number){
        userService.addUser(Name,Phone_number);
    }

    // 用于删除
    @RequestMapping("del")
    @ResponseBody
    public void delUser(int ID){
        userService.delUser(ID);
    }

    // 用于更改
    @RequestMapping("update")
    @ResponseBody
    public void updateUser(int ID,String Name,String Phone_number){
        userService.updateUser(ID,Name,Phone_number);
    }
}
UserMapper.java
package com.example.demo3.mapper;

import com.example.demo3.bean.User;
import org.apache.ibatis.annotations.*;//用于在MyBatis框架中定义Mapper接口
import java.util.List;

@Mapper
// @mapper 是一种数据映射模式,用于将对象与数据库表之间的映射关系定义。它可以帮助程序员简化对数据库的操作,使用对象而不是原始 SQL 语句来操作数据库。
// 帮助开发者能够使用注解或者xml文件通过sql语句直接操作数据库
public interface UserMapper {
    //数据持久层,用于存放sql语句,在SpringBoot中用注解来为每一个方法注入sql语句,也叫Dao层
    @Select("select * from address_book_data")
    List<User> getUserList();
    // 查询数据库中对应的所有数据

    @Select("select * from address_book_data where Name like concat('%',#{Name},'%')")
    List<User> selectUser(String Name);
    //根据Name进行模糊查询

    @Insert("insert into address_book_data(Name,Phone_number)values(#{Name},#{Phone_number})")
    void addUser(String Name,String Phone_number);
    // 向数据库中添加新的数据,主要包括Name和Phone_number,而ID在数据库中作为主键已经设置为自增

    @Delete("delete from address_book_data where ID =#{ID}")
    void delUser(int ID);
    // 根据ID将数据库中的数据删除

    @Update("update address_book_data set Name =#{Name}, Phone_number =#{Phone_number} where ID =#{ID}")
    void updateUser(int ID, String Name, String Phone_number);
    // 更新对应的数据
}
UserService.java
package com.example.demo3.service;

import com.example.demo3.bean.User;
import com.example.demo3.mapper.UserMapper;
import org.springframework.beans.factory.annotation.Autowired;
import org.springframework.stereotype.Service;
import java.util.List;
@Service
// @Component是一个通用的注解,用于标识一个类为Spring容器中的组件,可以被其他组件依赖注入。
// @Service是一个特殊的@Component,用于标识一个类为业务逻辑层的组件,通常用于封装业务逻辑,提供给Controller层调用。
// 业务逻辑层,用于完成功能设计,一般用于调用dao层的接口,实现业务功能
public class UserService {
    @Autowired
    private UserMapper userMapper;

    // 以下五个业务功能分别对应Mapper中的五个数据操作
    public List<User> getUserList(){
        return userMapper.getUserList();
    }
    public List<User> selectUser(String Name){
        return userMapper.selectUser(Name);
    }
    public void addUser(String Name,String Phone_number){
        userMapper.addUser(Name,Phone_number);
    }
    public void delUser(int ID){
        userMapper.delUser(ID);
    }
    public void updateUser(int ID,String Name,String Phone_number){
        userMapper.updateUser(ID,Name,Phone_number);
    }
}
application.properties
# 设置端口号,不设置的默认是8080,会和前端端口冲突
server.port=8081

# 数据库连接,注意此处的url和password需要修改成你自己对应的地址和MySQL密码
spring.datasource.driver-class-name = com.mysql.cj.jdbc.Driver
spring.datasource.url=jdbc:mysql://localhost:3306/address_book?serverTimezone=GMT%2B8
spring.datasource.username=root
spring.datasource.password=00000000
pom.xml
注意,如果你完全按照教程建立的项目,那么pom.xml文件应该是不再需要修改的!
<?xml version="1.0" encoding="UTF-8"?>
<project xmlns="http://maven.apache.org/POM/4.0.0" xmlns:xsi="http://www.w3.org/2001/XMLSchema-instance"
         xsi:schemaLocation="http://maven.apache.org/POM/4.0.0 https://maven.apache.org/xsd/maven-4.0.0.xsd">
    <modelVersion>4.0.0</modelVersion>
    <parent>
        <groupId>org.springframework.boot</groupId>
        <artifactId>spring-boot-starter-parent</artifactId>
        <version>3.1.1</version>
        <relativePath/> <!-- lookup parent from repository -->
    </parent>
    <groupId>com.example</groupId>
    <artifactId>Demo3</artifactId>
    <version>0.0.1-SNAPSHOT</version>
    <packaging>war</packaging>
    <name>Demo3</name>
    <description>Demo3</description>
    <properties>
        <java.version>17</java.version>
    </properties>
    <dependencies>
        <dependency>
            <groupId>org.springframework.boot</groupId>
            <artifactId>spring-boot-starter-web</artifactId>
        </dependency>
        <dependency>
            <groupId>org.mybatis.spring.boot</groupId>
            <artifactId>mybatis-spring-boot-starter</artifactId>
            <version>3.0.2</version>
        </dependency>

        <dependency>
            <groupId>com.mysql</groupId>
            <artifactId>mysql-connector-j</artifactId>
            <scope>runtime</scope>
        </dependency>
        <dependency>
            <groupId>org.springframework.boot</groupId>
            <artifactId>spring-boot-starter-tomcat</artifactId>
            <scope>provided</scope>
        </dependency>
        <dependency>
            <groupId>org.springframework.boot</groupId>
            <artifactId>spring-boot-starter-test</artifactId>
            <scope>test</scope>
        </dependency>
        <dependency>
            <groupId>org.mybatis.spring.boot</groupId>
            <artifactId>mybatis-spring-boot-starter-test</artifactId>
            <version>3.0.2</version>
            <scope>test</scope>
        </dependency>
    </dependencies>

    <build>
        <plugins>
            <plugin>
                <groupId>org.springframework.boot</groupId>
                <artifactId>spring-boot-maven-plugin</artifactId>
            </plugin>
        </plugins>
    </build>

</project>
4.项目启动
很简单的两步,首先在IDE右侧工具栏打开Maven,点击Maven工具左上角的刷新按钮Reload All Maven Projects,将项目所需的依赖全部下载。然后IDE右上角绿色三角形一键运行!

5.后端运行验证
在Safari浏览器的地址栏中输入http://localhost:8081/test,如果能够看到数据库中的联系人json数据,则后端运行成功!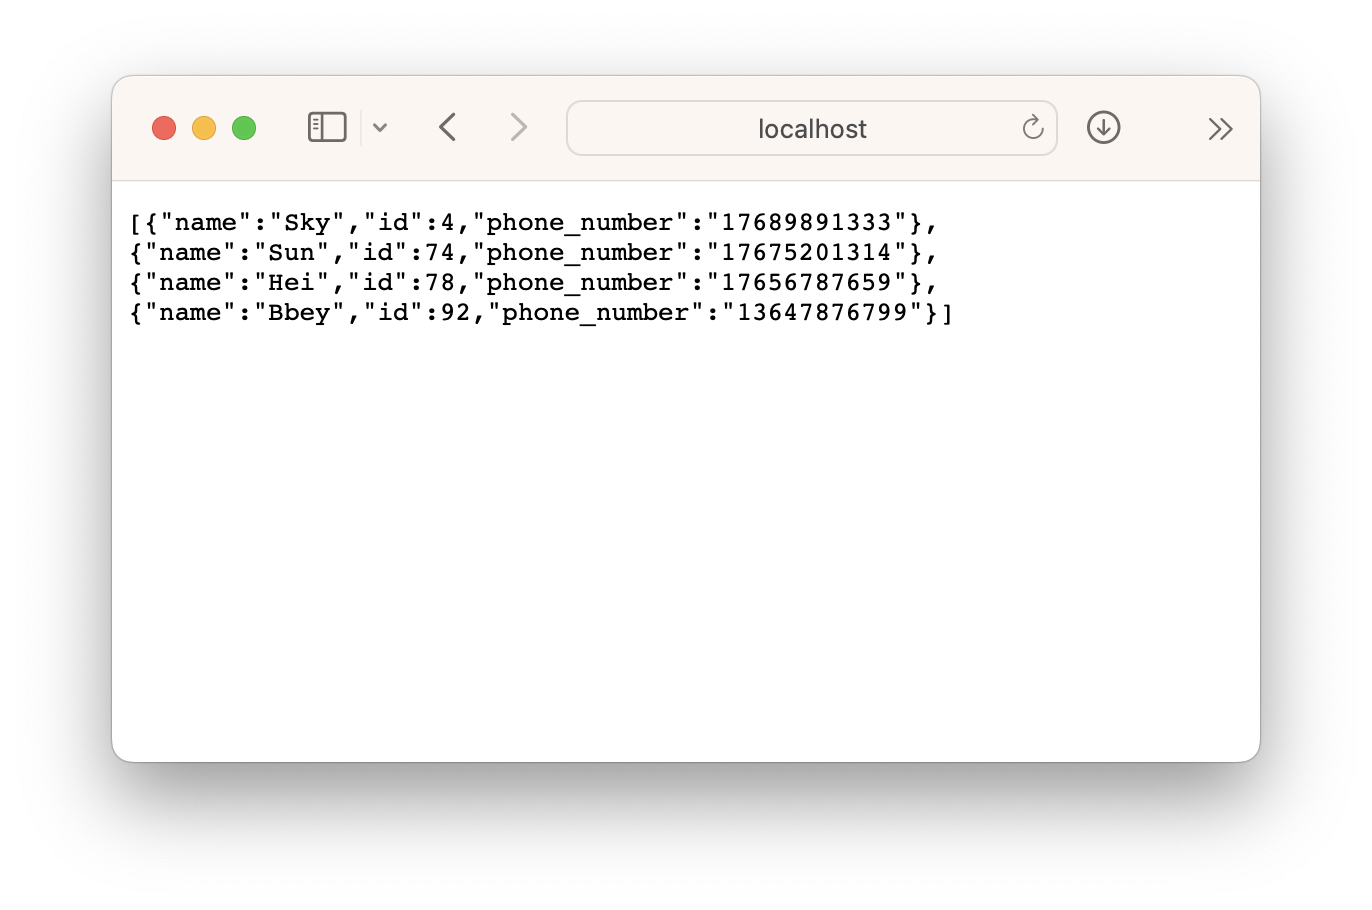
四、前端开发
1.安装Vue CLI脚手架
见链接🔗:Mac OS安装Vue CLI脚手架并创建一个基础项目教程,仅安装成功即可。
2.新建Vue2项目
注意,上面链接中对于Vue项目的新建使用的是vue create命令,是vue-cli3.x的初始化方式,本文中使用的是vue init webpack命令,是vue-cli2.x的初始化方式。
先在终端中使用cd命令进入到需要创建该项目的位置,笔者的位置为“new”文件夹,然后输入输入命令:
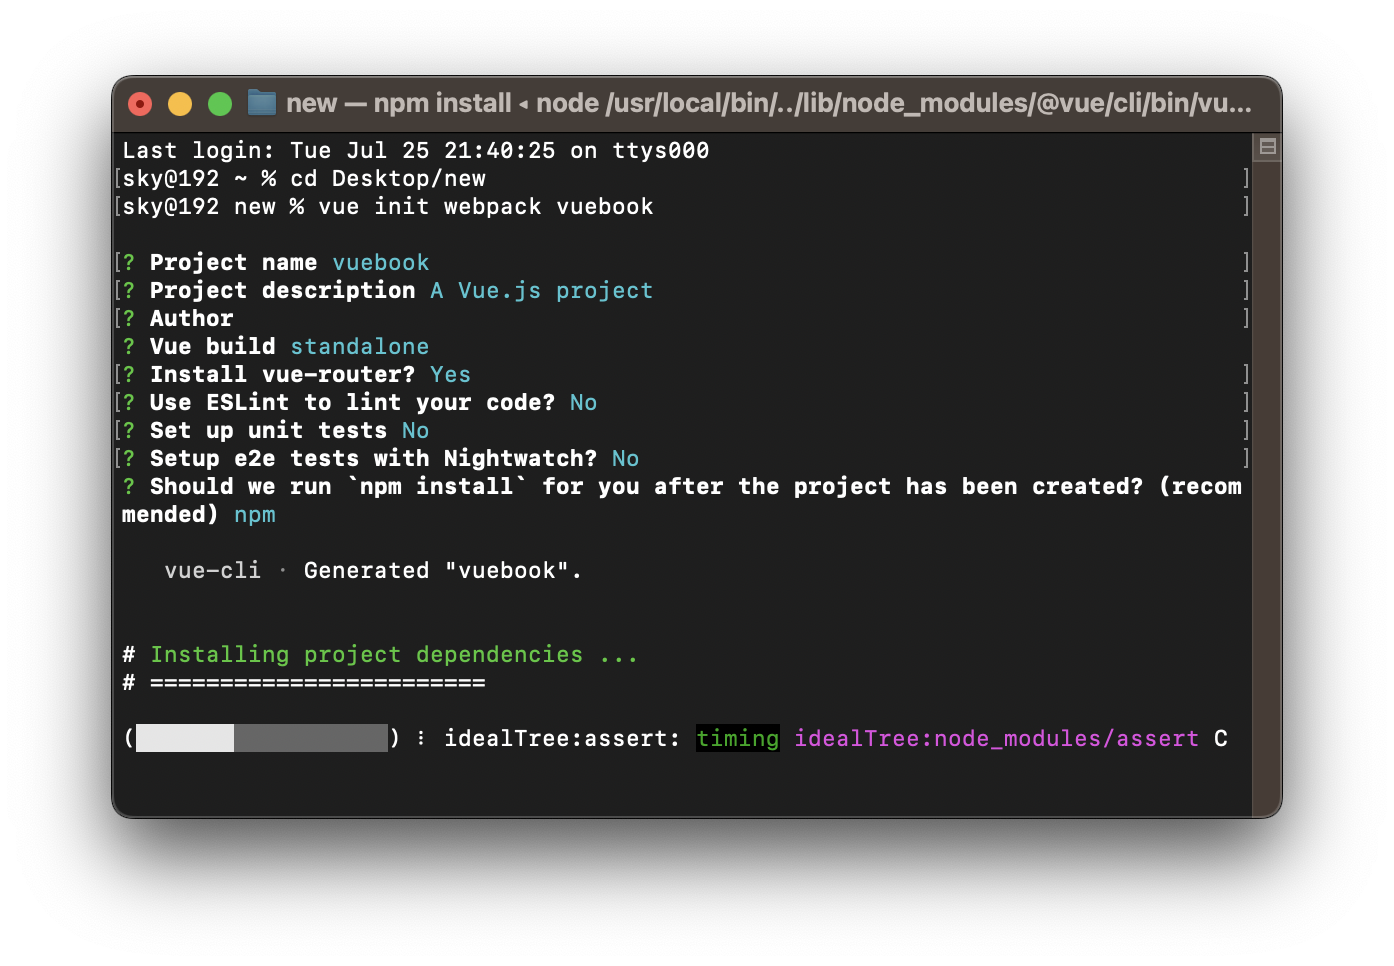
% vue init webpack vuebook
然后根据下图选择我们所需要的配置。第四项“Vue build”直接选择第一个Runtime + Compiler即可。一路选择完毕后,Vue会自动新建该项目。中途会出现很多WARN,不要在意,是正常的。
新建完成后,如下图所示:
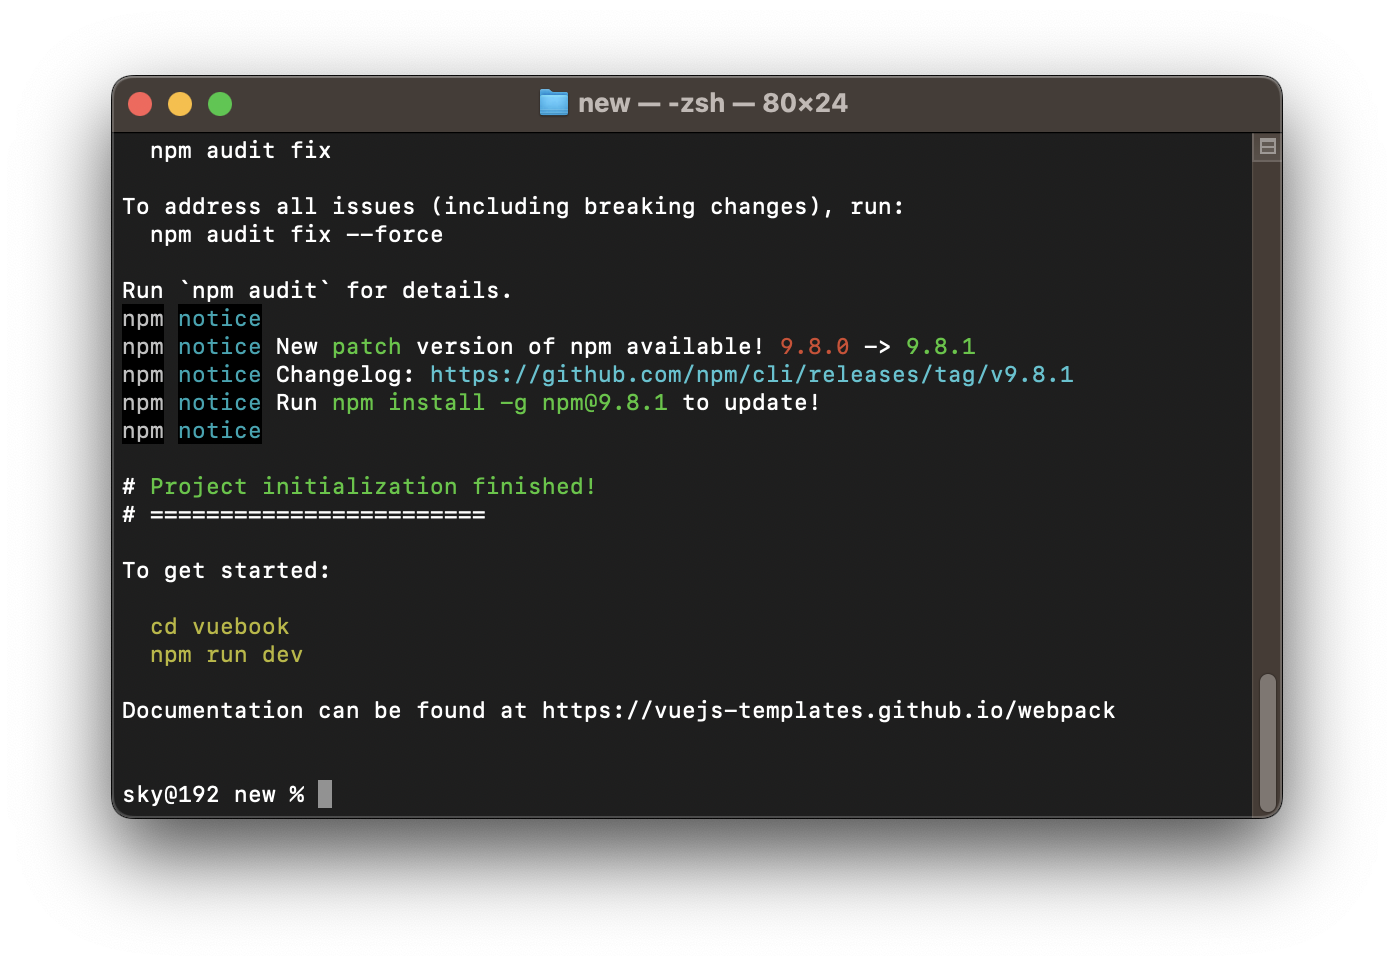
根据提示cd进入工程目录中,运行命令
% npm run dev
项目自动运行,如下图所示,即为运行成功。
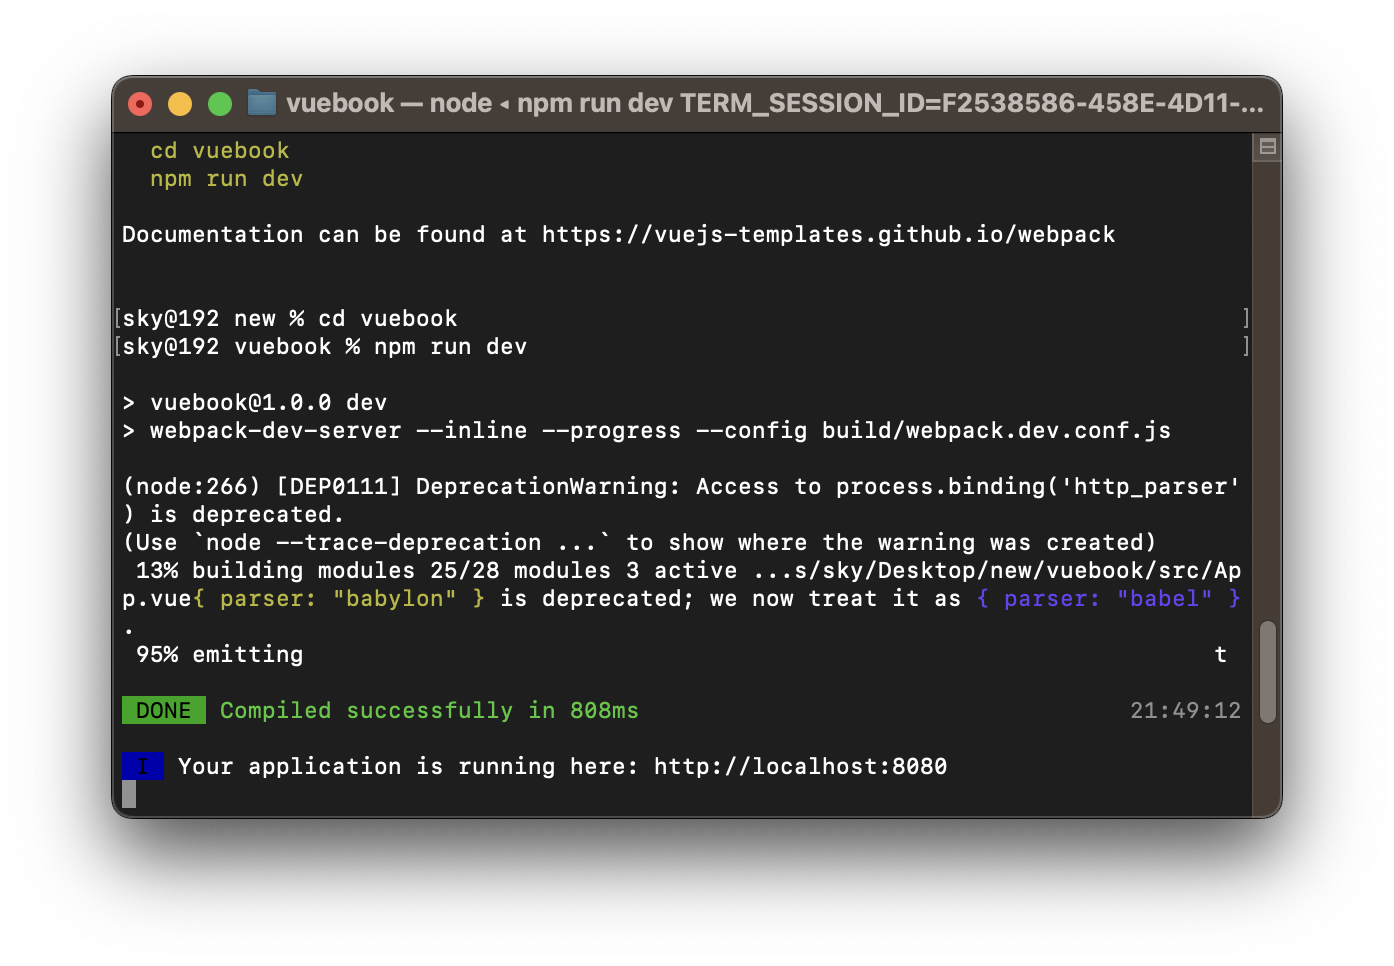
此时在Safari浏览器地址栏中输入http://localhost:8080,能够打开Vue欢迎界面。

3.代码
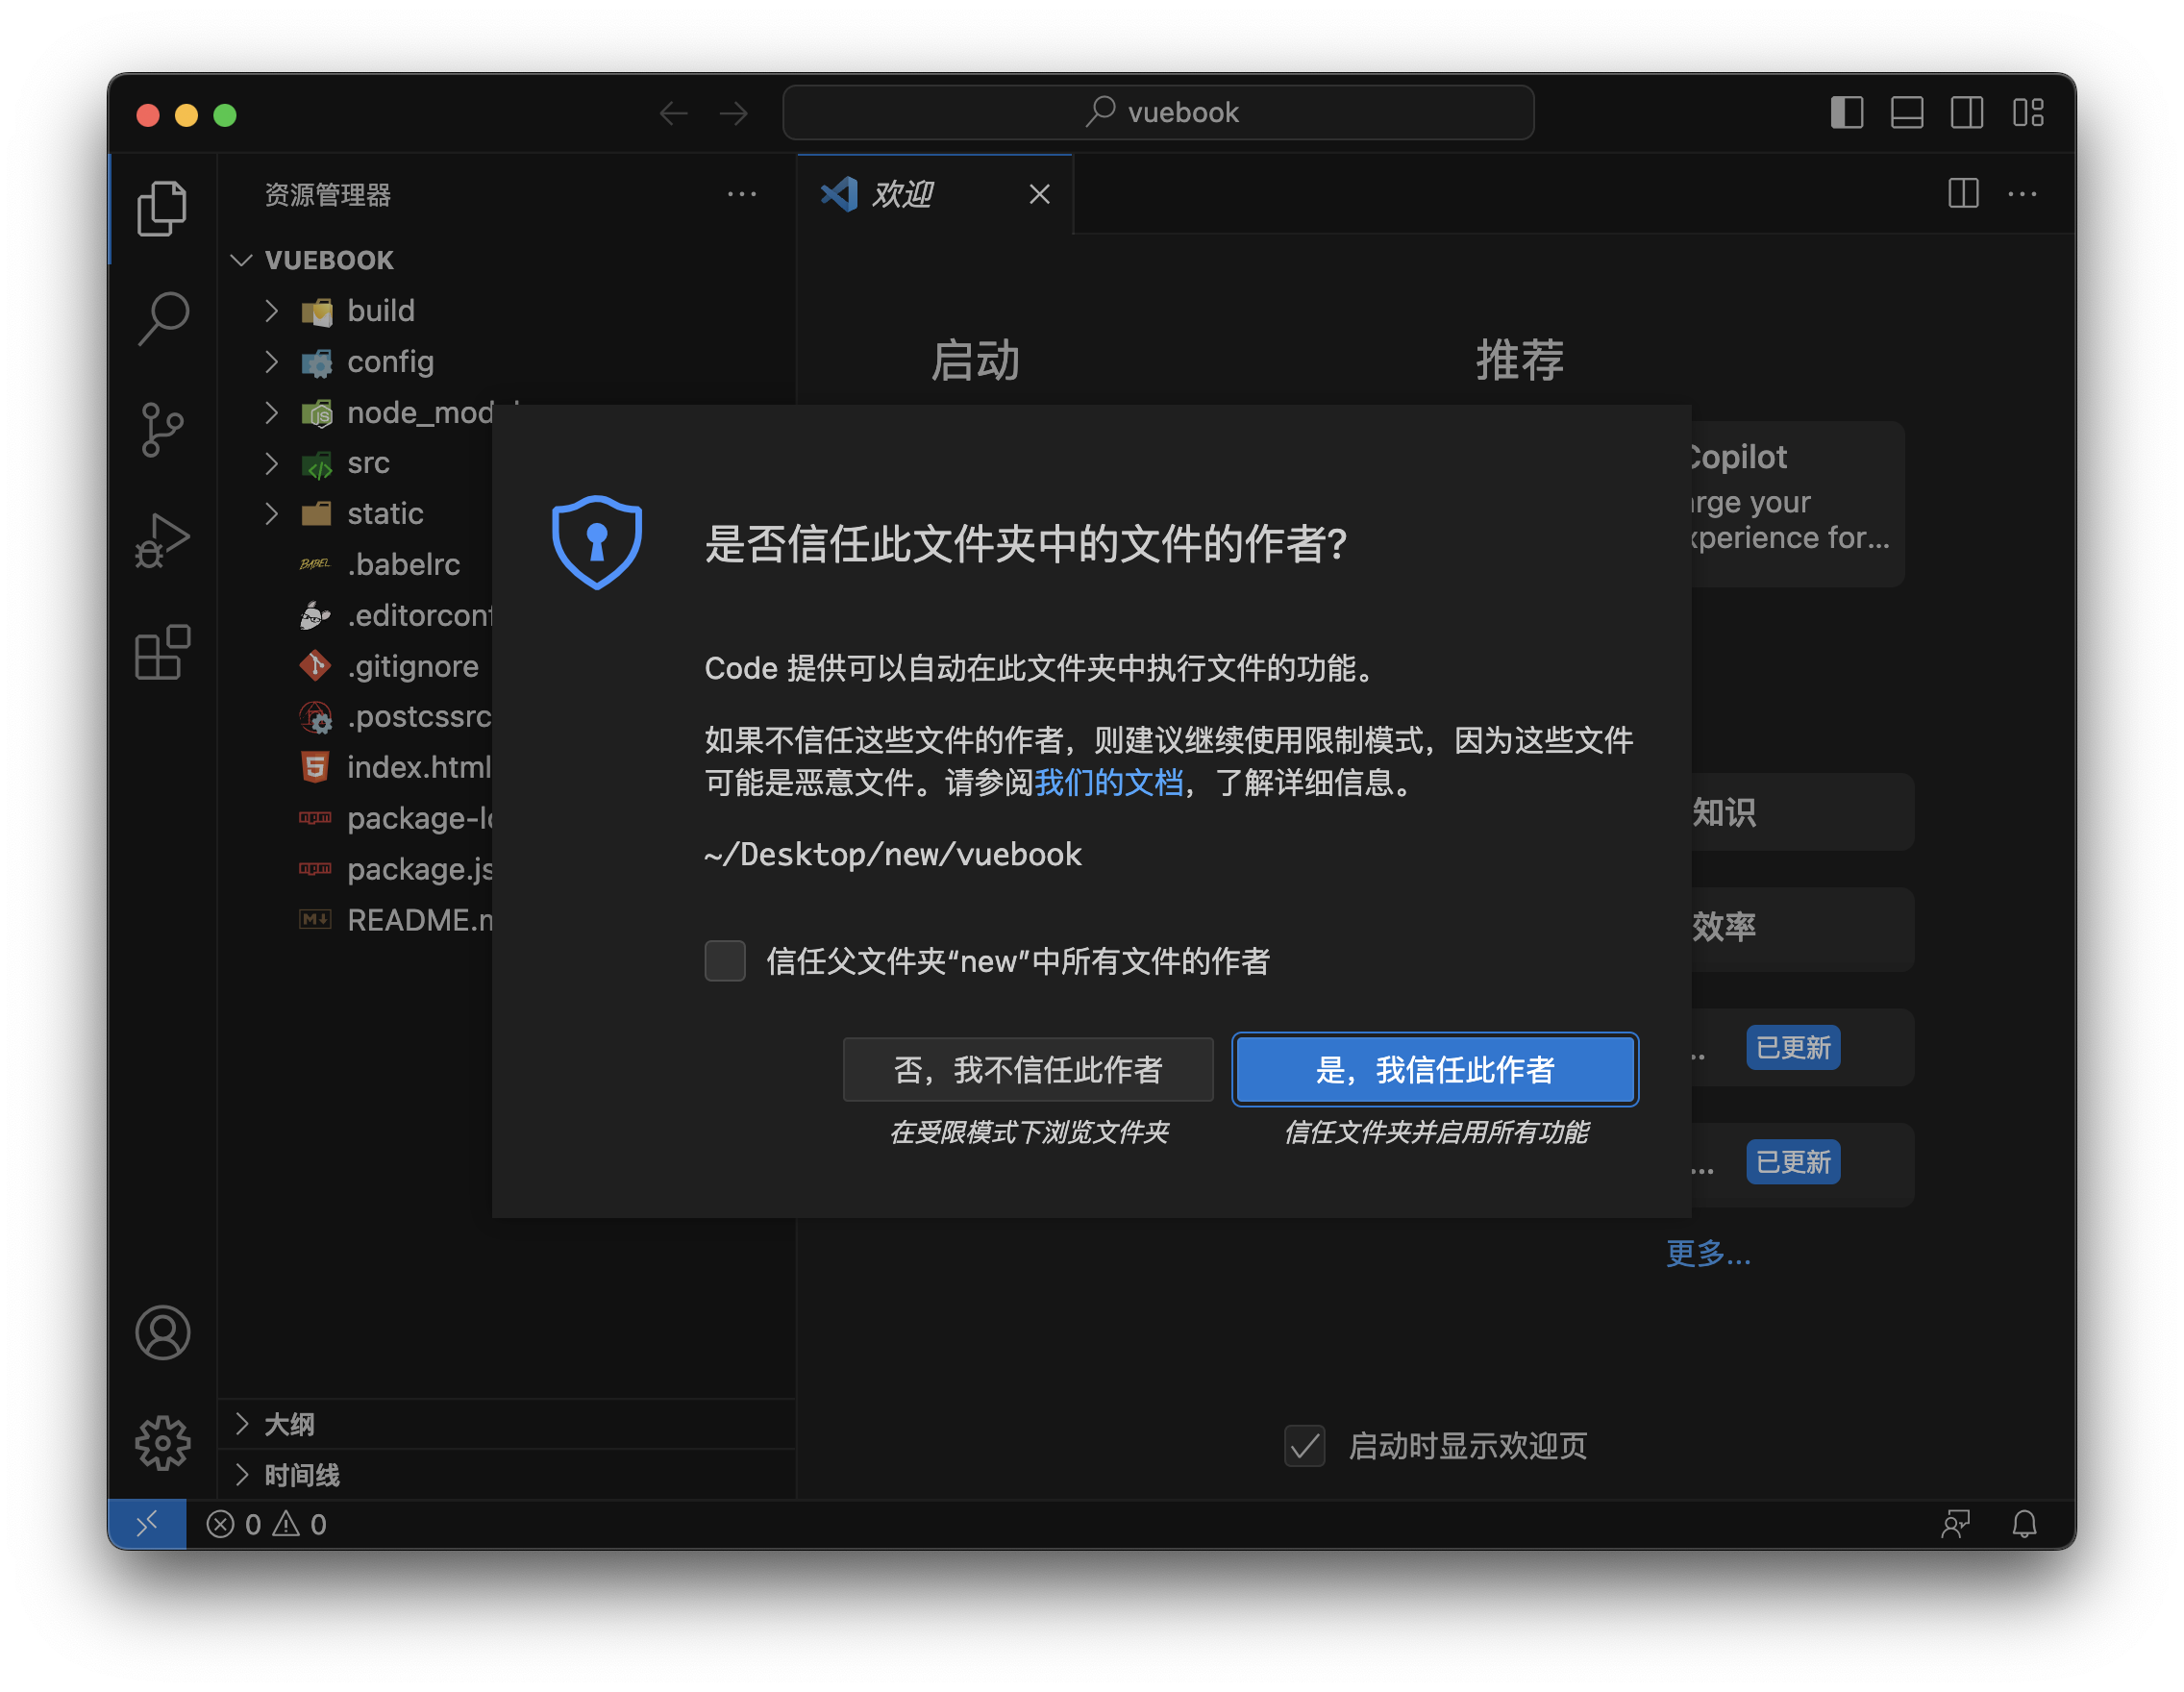
将刚刚新建好的工程文件夹拖入VS code中,选择信任此作者。
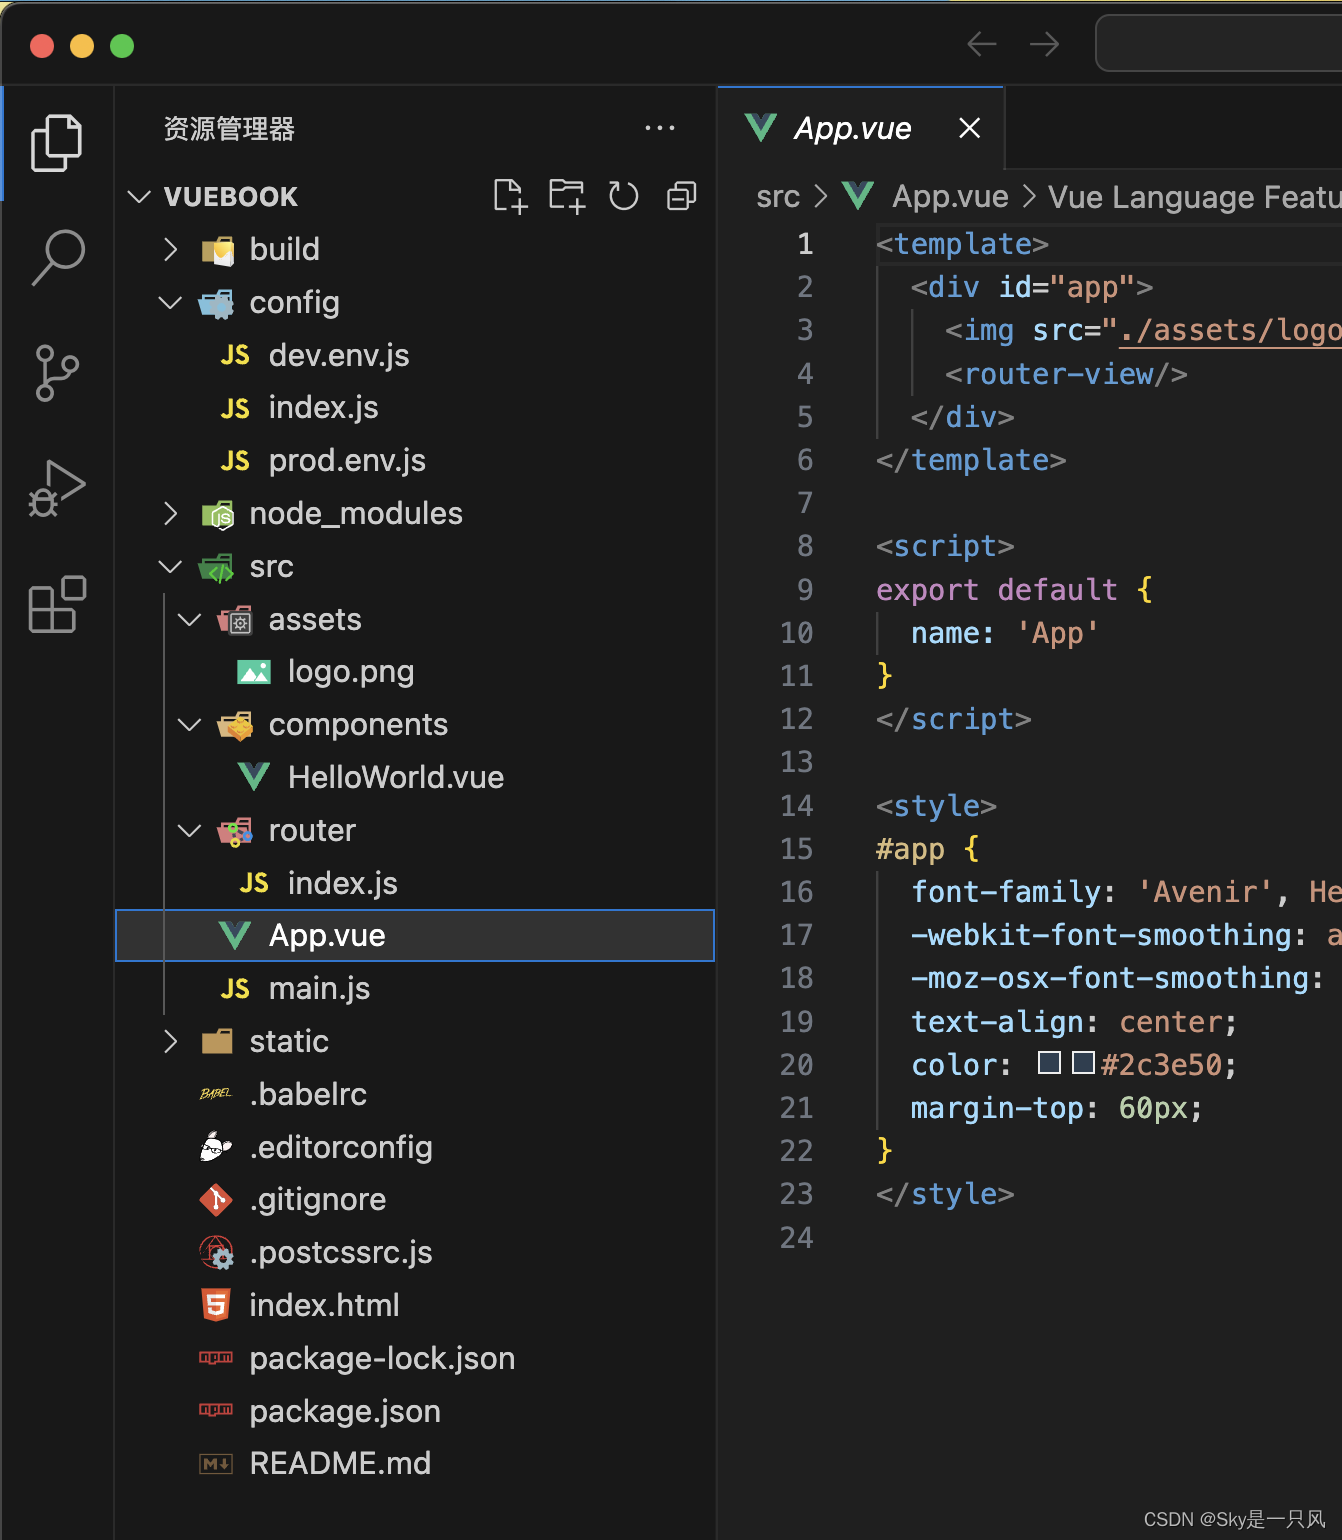
然后得到的工程结构如下图所示:
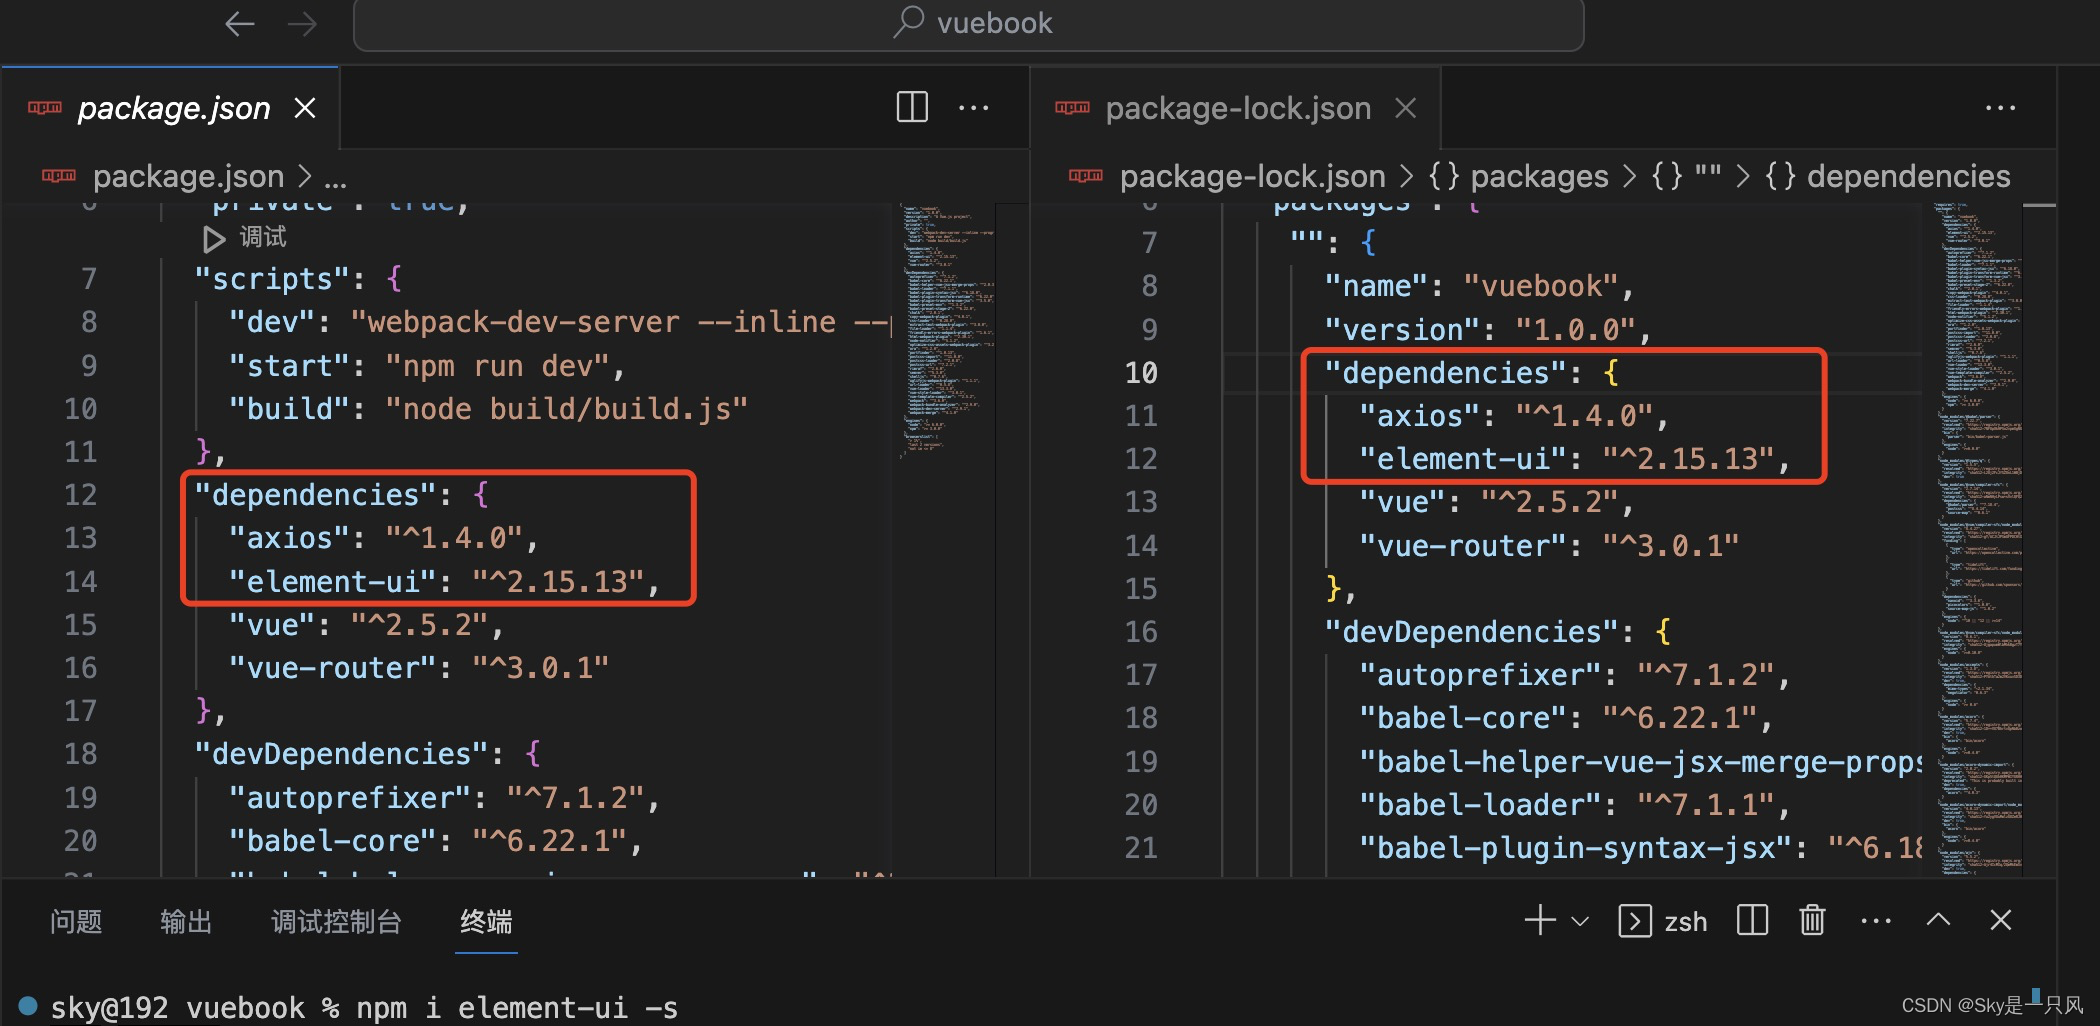
然后在VS code中打开终端,分别运行命令,安装Element UI和Axios。
% npm i element-ui -s
% npm i axios -s
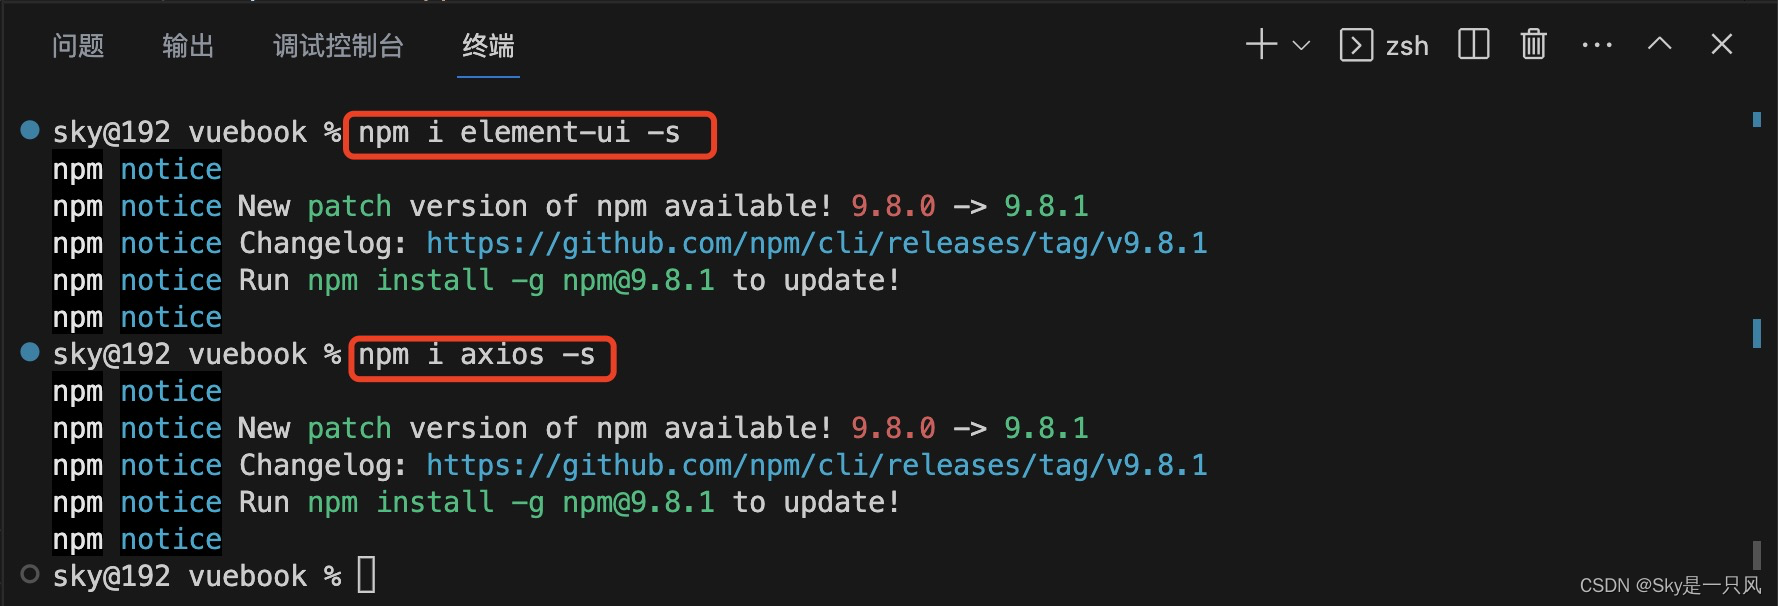
安装成功后,检查package-lock.json和package.json中的"dependencies",是否出现了对应的依赖,出现即可。
接下来我们上代码
config/index.js
由于前端和后端的端口不一致,所以这里主要是配置跨域代理的问题,如果是Vue 3项目则对应的文件是在vue项目根目录下的vue.config.js文件(如果没有该文件则自己创建)。然后在proxyTable中进行配置。
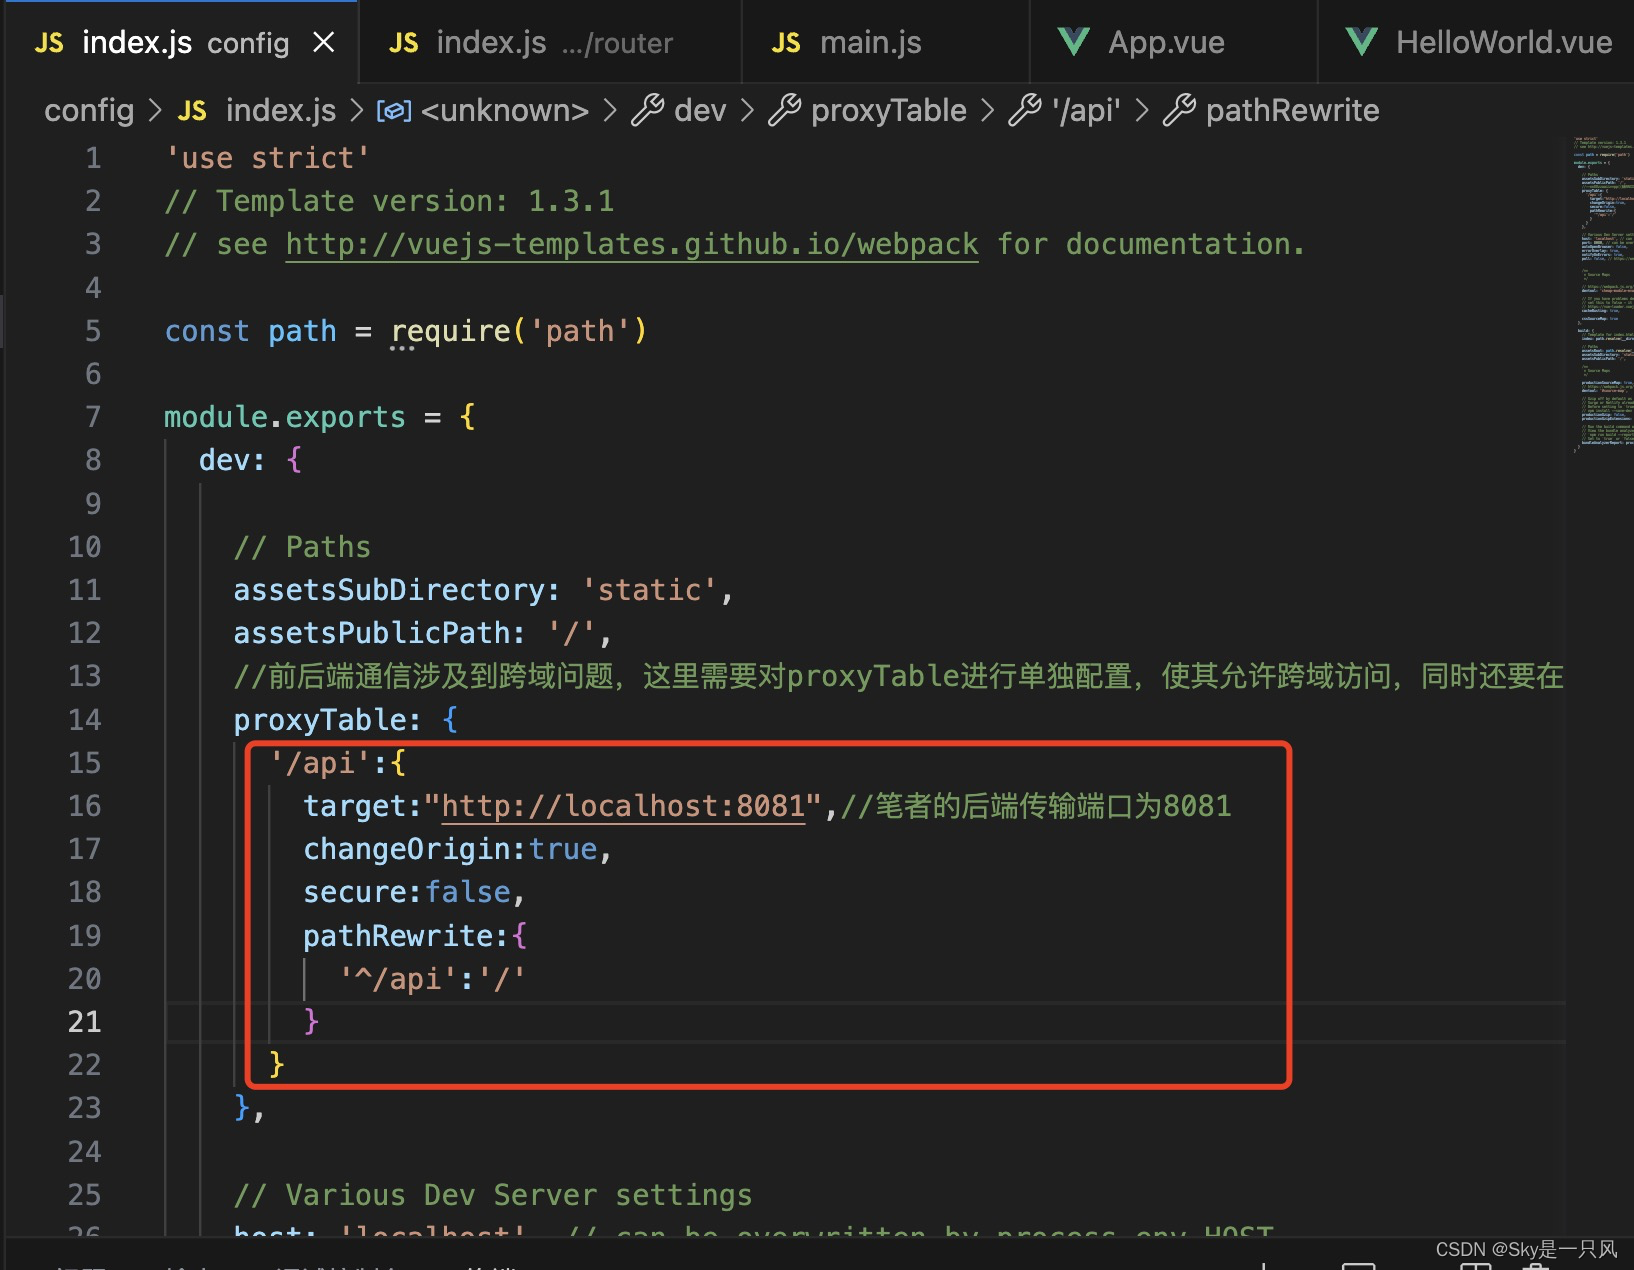
下面为文件全部代码
'use strict'
// Template version: 1.3.1
// see http://vuejs-templates.github.io/webpack for documentation.

const path = require('path')

module.exports = {
  dev: {

    // Paths
    assetsSubDirectory: 'static',
    assetsPublicPath: '/',
    //前后端通信涉及到跨域问题,这里需要对proxyTable进行单独配置,使其允许跨域访问,同时还要在main.js中设置接口请求的前缀地址:axios.defaults.baseURL
    proxyTable: {
      '/api':{
        target:"http://localhost:8081",//笔者的后端传输端口为8081
        changeOrigin:true,
        secure:false,
        pathRewrite:{
          '^/api':'/'
        }
      }
    },

    // Various Dev Server settings
    host: 'localhost', // can be overwritten by process.env.HOST
    port: 8080, // can be overwritten by process.env.PORT, if port is in use, a free one will be determined
    autoOpenBrowser: false,
    errorOverlay: true,
    notifyOnErrors: true,
    poll: false, // https://webpack.js.org/configuration/dev-server/#devserver-watchoptions-


    /**
     * Source Maps
     */

    // https://webpack.js.org/configuration/devtool/#development
    devtool: 'cheap-module-eval-source-map',

    // If you have problems debugging vue-files in devtools,
    // set this to false - it *may* help
    // https://vue-loader.vuejs.org/en/options.html#cachebusting
    cacheBusting: true,

    cssSourceMap: true
  },

  build: {
    // Template for index.html
    index: path.resolve(__dirname, '../dist/index.html'),

    // Paths
    assetsRoot: path.resolve(__dirname, '../dist'),
    assetsSubDirectory: 'static',
    assetsPublicPath: '/',

    /**
     * Source Maps
     */

    productionSourceMap: true,
    // https://webpack.js.org/configuration/devtool/#production
    devtool: '#source-map',

    // Gzip off by default as many popular static hosts such as
    // Surge or Netlify already gzip all static assets for you.
    // Before setting to `true`, make sure to:
    // npm install --save-dev compression-webpack-plugin
    productionGzip: false,
    productionGzipExtensions: ['js', 'css'],

    // Run the build command with an extra argument to
    // View the bundle analyzer report after build finishes:
    // `npm run build --report`
    // Set to `true` or `false` to always turn it on or off
    bundleAnalyzerReport: process.env.npm_config_report
  }
}
components/HelloWorld.vue
<template>
  <!-- 以下大量使用了element ui框架 -->
  <div>
    <!-- titletext为页面上方正中央的标题 -->
    <h1>{{ titletext }}</h1>

    <!-- 搜索框,用于搜索联系人,其中@keyup可以用于监听键盘事件,用户在搜索框中输入姓名后,页面立即回传对应的数据,与后端配合支持模糊查询 -->
    <el-input @keyup.native="searchPerson()" style="width: 50%" placeholder="输入姓名进行查找" v-model="search"></el-input>

    <el-table
      :data="Bookdata"
      style="width: 100%"
      :header-cell-style="{textAlign: 'center'}"
      :cell-style="{textAlign: 'center'}">

      <!-- 第一列显示联系人姓名 -->
      <el-table-column label="姓名" width="180">
        <template slot-scope="scope">
          <i class="el-icon-user"></i>
          <span style="margin-left: 10px">{{ scope.row.name }}</span>
        </template>
      </el-table-column>

      <!-- 第二列显示联系方式 -->
      <el-table-column label="联系方式" width="180">
        <template slot-scope="scope">
          <i class="el-icon-phone"></i>
          <span style="margin-left: 10px">{{ scope.row.phone_number }}</span>
        </template>
      </el-table-column>

      <!-- 第三列为操作区,涉及到“编辑”和“删除”两个操作 -->
      <el-table-column label="操作">
        <template slot-scope="scope">

          <!-- “编辑”按钮绑定了一个el-dialog对话框,也就是模态框,用于用户对于联系人信息的修改,editshow()会将本条目对应的信息显示在待修改框中 -->
          <el-button size="mini" @click="dialogFormEdit = true,editshow(scope.row.id,scope.row.name,scope.row.phone_number)">编辑</el-button>
          <el-dialog title="编辑联系人" :visible.sync="dialogFormEdit">
            <el-form :model="formLabelEdit" :rules="rules" ref="formLabelEdit" label-width="100px" label-position="right">
              <!-- 姓名label中添加了两个中文空格“ ”,用于和“联系方式”四个字的长度保持一致,提高系统美观度 -->
              <el-form-item label="姓  名:" prop="name">
                    <el-input v-model="formLabelEdit.name" autocomplete="off" clearable></el-input>
                </el-form-item>
                <el-form-item label="联系方式:" prop="phone_number">
                    <el-input v-model="formLabelEdit.phone_number" autocomplete="off" clearable></el-input>
                </el-form-item>
            </el-form>
            <div slot="footer" class="dialog-footer">
              <!-- 点击“取消”,对话框会被关闭 -->
              <el-button @click="dialogFormEdit = false">取 消</el-button>
              <!-- 点击“确定”,会执行更新函数editPerson() -->
              <el-button type="primary" @click="editPerson('formLabelEdit')">确 定</el-button>
            </div>
          </el-dialog>

          <!-- 删除按钮绑定了一个el-popover弹出框,用于重复提醒用户是否确实进行删除操作,防止误操作后造成数据丢失 -->
          <!-- ref="`popover-` + scope.row.id"将每一个弹出框绑定对应的数据的主键id,便于识别,防止在显示过程中由于数据的循环显示而显示错误 -->
          <el-popover placement="top" :ref="`popover-` + scope.row.id" width="160">
            <p>确定删除该联系人吗</p>
            <div style="text-align: right; margin: 0">
              <!-- 点击“取消”,执行Close_popover()函数,弹出框会被关闭 -->
              <el-button size="mini" type="text" @click=Close_popover(scope.row.id)>取消</el-button>
              <!-- 点击“确定”,执行delPerson()函数,删除对应数据,同时该函数也会再次调用Close_popover()函数,将弹出框关闭 -->
              <el-button type="primary" size="mini" @click=delPerson(scope.row.id)>确定</el-button>
            </div>
            <el-button slot="reference" size="mini" type="danger">删除</el-button>
          </el-popover>

        </template>
      </el-table-column>
    </el-table>

    <!-- 添加按钮同样绑定了一个el-dialog对话框,方便用户填写新数据,样式与更新数据的模态框保持完全一致,提高系统的操作统一性 -->
    <!-- 按下按钮后,打开dialogFormAdd模态框的同时,执行resetForm()函数,清空框内的数据 -->
    <el-button class="addbutton" size="small" @click="dialogFormAdd = true,resetForm()">添加联系人</el-button>
    <el-dialog title="添加联系人" :visible.sync="dialogFormAdd">
      <el-form :model="formLabelAdd" :rules="rules" ref="formLabelAdd" label-width="100px" label-position="right">
        <el-form-item label="姓  名:" prop="name">
          <el-input v-model="formLabelAdd.name" placeholder="请输入联系人姓名" autocomplete="off" clearable></el-input>
        </el-form-item>
        <el-form-item label="联系方式:" prop="phone_number">
          <el-input v-model="formLabelAdd.phone_number" placeholder="请输入联系方式" autocomplete="off" clearable></el-input>
        </el-form-item>
      </el-form>
      <div slot="footer" class="dialog-footer">
        <!-- 点击“取消”,对话框会被关闭 -->
        <el-button @click="dialogFormAdd = false">取 消</el-button>
        <!-- 点击“确定”,会执行添加函数addPerson() -->
        <el-button type="primary" @click="addPerson('formLabelAdd')">确 定</el-button>
      </div>
    </el-dialog>

    <p class="footer">Copyright © All Rights Reserved by 自邮之翼</p>
  </div>
</template>

<script>
import axios from 'axios'
export default {

  data () {
    return {
      titletext: '通讯录',//网页大标题
      search:'',//搜索框初始状态为空
      Bookdata:[],//table中显示的所有数据
      dialogFormEdit: false,//更新模态框,初始状态为关闭
      dialogFormAdd: false,//添加模态框,初始状态为关闭
      formLabelEdit:{
        id:'',
        name:'',
        phone_number:''
      },//更新模态框中显示以及提交的的数据
      formLabelAdd:{
        id:'',
        name:'',
        phone_number:''
      },//添加模态框中显示以及提交的的数据

      //rules中主要规定了姓名和联系方式均不能为空,以及利用正则校验限定了联系方式必须为中国大陆目前正在使用的电话号码,防止后端数据库中出现空数据和脏数据
      rules:{
        name:[{required: true, message: '姓名不能为空',trigger:'blur'}],
        phone_number:[{required: true, message: '联系方式不能为空',trigger:'blur'},{
          validator: function(rule, value, callback) {
            if (/^((13[0-9])|(14(0|[5-7]|9))|(15([0-3]|[5-9]))|(16(2|[5-7]))|(17[0-8])|(18[0-9])|(19([0-3]|[5-9])))\d{8}$/.test(value) == false) {
              callback(new Error("号码不符合中国大陆手机号段,请检查"));
            } else {
              //校验通过
              callback();
            }
          },
          trigger: "blur"
        }]
      }
    }
  },

  //钩子函数,在created()函数中调用axios获取页面初始化所需的数据,向后端请求了全部联系人数据,返回的数据送入Bookdata[]中
  created(){
    const _this = this
    axios.get('/select?Name=').then(function(resp){
      _this.Bookdata = resp.data
    })
  },

  methods:{
    //查询函数,主要向后端传输搜索框中输入的姓名,与后端协同支持模糊查询
    searchPerson(){
      const _this = this
        axios.get('/select?Name='+_this.search).then(function(resp){
          _this.Bookdata = resp.data
        }).catch(function(error){
          alert("查询失败,请检查远端数据库")
        })
    },
    //更新函数
    editPerson(formName){
      const _this = this
      //在执行更新之前,先检查模态框中用户输入的数据是否符合rules的规定
      this.$refs[formName].validate((valid) => {
        //如果符合规定,则向后端发出更新请求
        if (valid) {
          axios.post('/update?ID='+_this.formLabelEdit.id+'&Name='+_this.formLabelEdit.name+'&Phone_number='+_this.formLabelEdit.phone_number).then(function(resp){
            //更新请求成功后,向后端重新调取新的联系人信息
            axios.get('/select?Name='+_this.search).then(function(resp){
              _this.Bookdata = resp.data
            })
            //并关闭该模态框
            _this.dialogFormEdit = false
          }).catch(function(error){
            alert("请求失败,请检查远端数据库")
          })
        } else {
          console.log('error submit!!');
          return false;
        }
      });
    },
    //删除函数
    delPerson(id){
      const _this = this
      //确定删除后,先将popover弹出框关闭,执行Close_popover()函数
      this.Close_popover(id)
      axios.post('/del?ID='+id).then(function(resp){
        alert("已删除");
        axios.get('/select?Name='+_this.search).then(function(resp){
          _this.Bookdata = resp.data
        })
      }).catch(function(error){
        alert("请求失败,请检查远端数据库")
      })
    },
    //添加函数,与更新函数类似
    addPerson(formName){
      const _this = this
      //在执行添加之前,先检查模态框中用户输入的数据是否符合rules的规定
      this.$refs[formName].validate((valid) => {
        //如果符合规定,则向后端发出数据添加请求
        if (valid) {
          axios.post('/add?Name='+_this.formLabelAdd.name+'&Phone_number='+_this.formLabelAdd.phone_number).then(function(resp){
             //数据添加成功后,向后端重新调取新的联系人信息
            axios.get('/select?Name='+_this.search).then(function(resp){
              _this.Bookdata = resp.data
            })
            //并关闭该模态框
            _this.dialogFormAdd = false
          }).catch(function(error){
            alert("请求失败,请检查远端数据库")
          })
        } else {
          console.log('error submit!!');
          return false;
        }
      });
    },
    //弹出框关闭函数,找到对应绑定的id执行doClose()
    Close_popover(id){
      this.$refs[`popover-` + id].doClose()
    },
    //更新模态框的显示函数,用于将需要修改的原数据显示在模态框的form表格的input输入框中
    editshow (id,name,phone_number) {
      const _this =this
      _this.formLabelEdit.id = id
      _this.formLabelEdit.name = name
      _this.formLabelEdit.phone_number = phone_number
    },
    //添加模态框的重置数据函数,用于每次打开添加数据的模态框时,保证输入框是空的,方便用户输入新的数据
    resetForm(){
      const _this = this
      _this.formLabelAdd.name=''
      _this.formLabelAdd.phone_number='';
    }
  }
}
</script>

<!-- Add "scoped" attribute to limit CSS to this component only -->
<style scoped>
h1 {
  font-weight: normal;
}
.addbutton {
    margin-top: 20px;
}
.footer {
  position: absolute;
  left: 0;
  right: 0;
  bottom: 20px;
  color: rgb(183, 181, 181);
}

</style>
router/index.js
import Vue from 'vue'
import Router from 'vue-router'
import HelloWorld from '@/components/HelloWorld'

Vue.use(Router)

const router = new Router({
  mode:'history',
  routes: [
    {
      path: '/',
      meta:{
        title:"Vue通讯录"//网页title显示,需要配合下面router.beforeEach((to, form, next)的路由导航守卫实现
      },
      component: HelloWorld
    }
  ]
})
//挂载路由导航守卫,to是跳转后的目标路由对象、from是之前的路由对象、next是一个函数,决定路由是否跳转
router.beforeEach((to, form, next) => {
  //网页title
  if (to.meta.title) {
      document.title = to.meta.title
  }
  // 放行登录页面
  if (to.path ==='/'){
    return next()
  }
  //获取token
  const tokenStr = sessionStorage.getItem('token')
  if (!tokenStr) {
    return next()
  } else {
    next()
  }
})
export default router
App.vue
<template>
  <div id="app">

    <router-view/>
  </div>
</template>

<script>
export default {
  name: 'App'
}
</script>

<style>
#app {
  font-family: 'Avenir', Helvetica, Arial, sans-serif;
  -webkit-font-smoothing: antialiased;
  -moz-osx-font-smoothing: grayscale;
  text-align: center;
  color: #2c3e50;
  margin-top: 60px;
}
</style>
main.js
// The Vue build version to load with the `import` command
// (runtime-only or standalone) has been set in webpack.base.conf with an alias.
import Vue from 'vue'
import App from './App'
import router from './router'

// 导入 ElementUI
import ElementUI from 'element-ui';
import 'element-ui/lib/theme-chalk/index.css';

// 引入 axios
import axios from 'axios'
// 将 axios 挂载到 Vue 上
Vue.prototype.$axios = axios

Vue.config.productionTip = false

// 使用 ElementUI
Vue.use(ElementUI);

// 设置接口请求的前缀地址
axios.defaults.baseURL = '/api'

// 全局设置token
axios.interceptors.request.use(function (config) {
  let token = sessionStorage.getItem('token')
  if (token) {
    config.headers['token'] = token
  }
  return config
})

/* eslint-disable no-new */
new Vue({
  el: '#app',
  router,
  components: { App },
  template: '<App/>'
})
4.项目启动
保存上面的所有文件,关闭已经打开的终端,重新cd进入工程目录vuebook中,重新执行命令“npm run dev”。否则跨域代理将无法生效!!
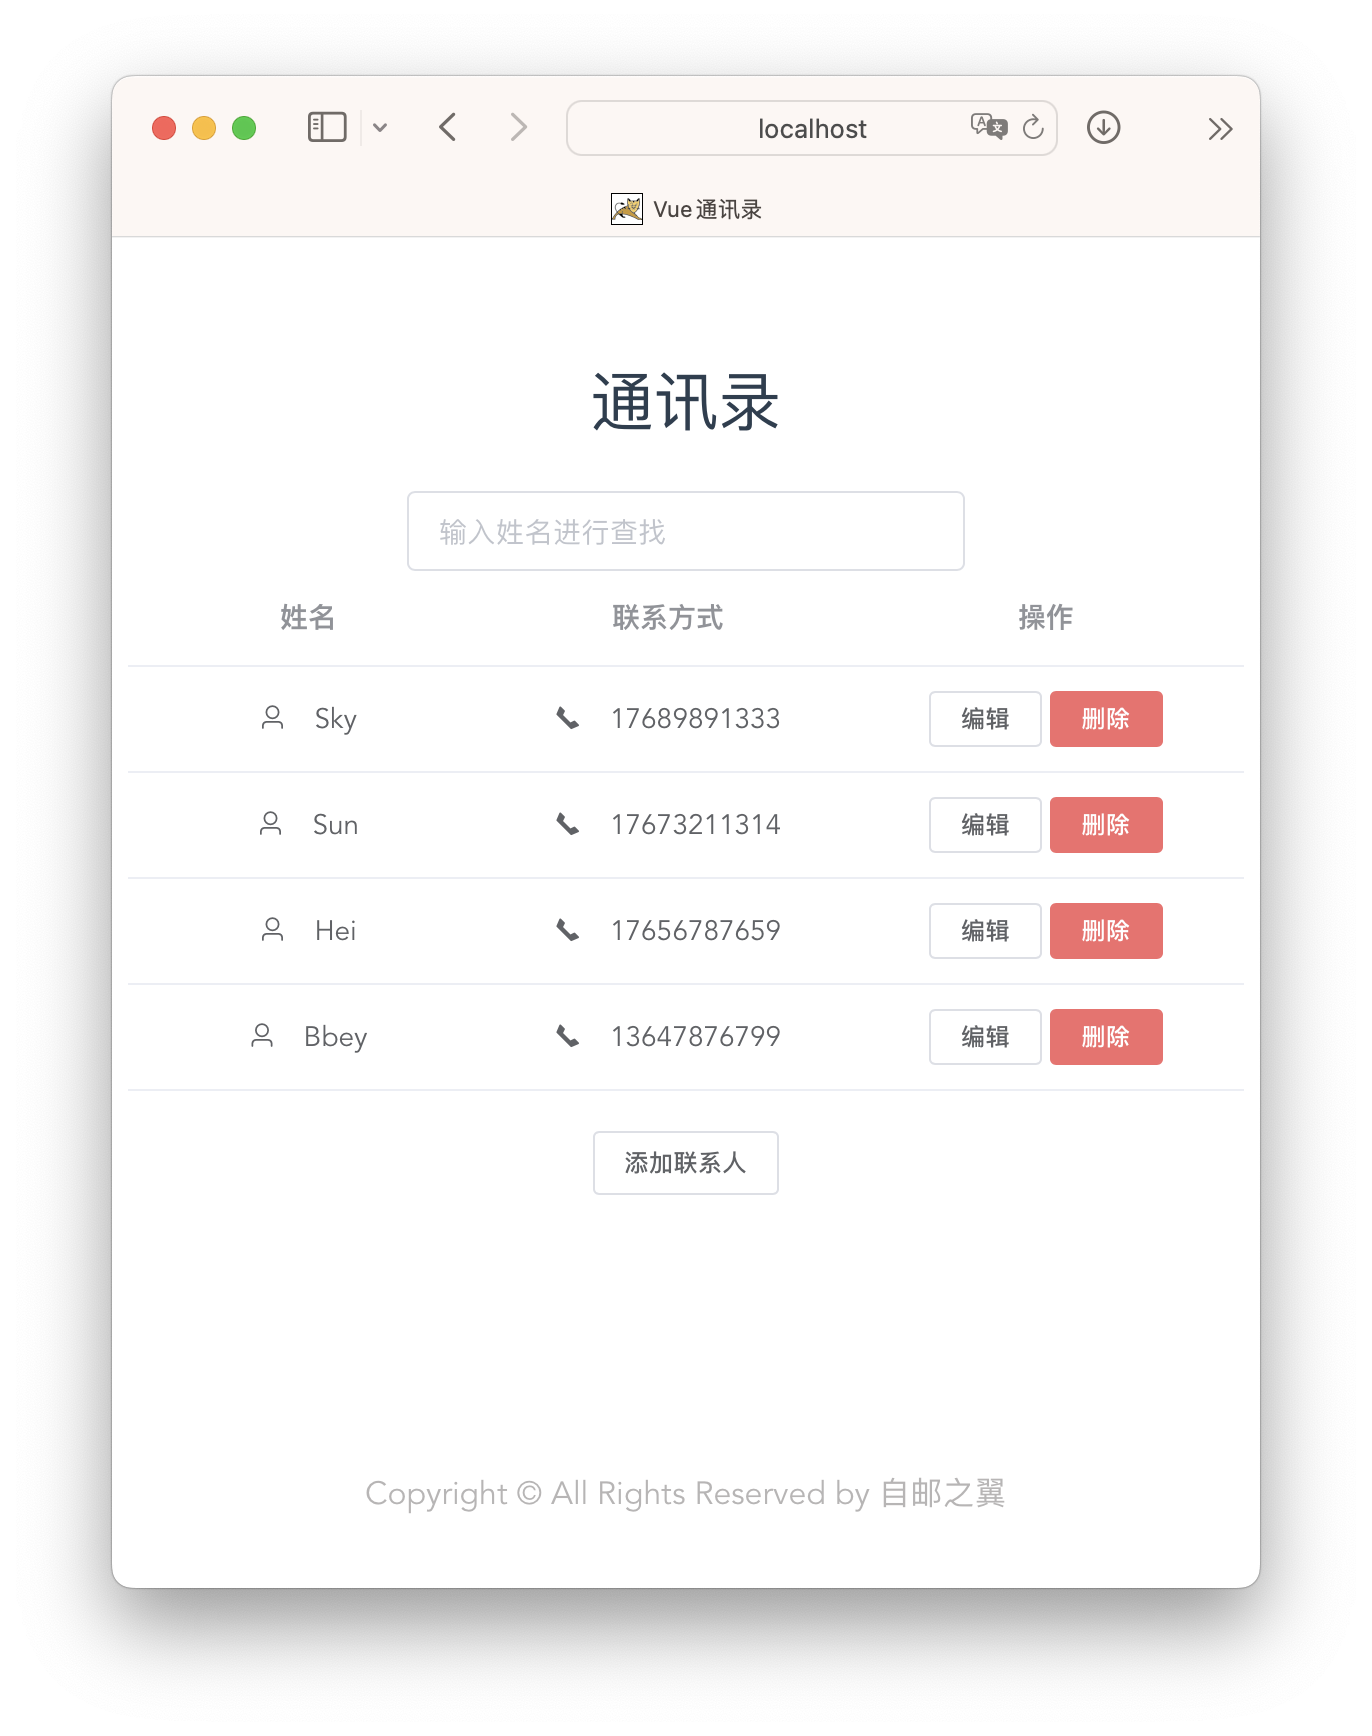
进入http://localhost:8080,发现通讯录已经能够从后端调取到联系人数据。
五、系统功能演示
1.增
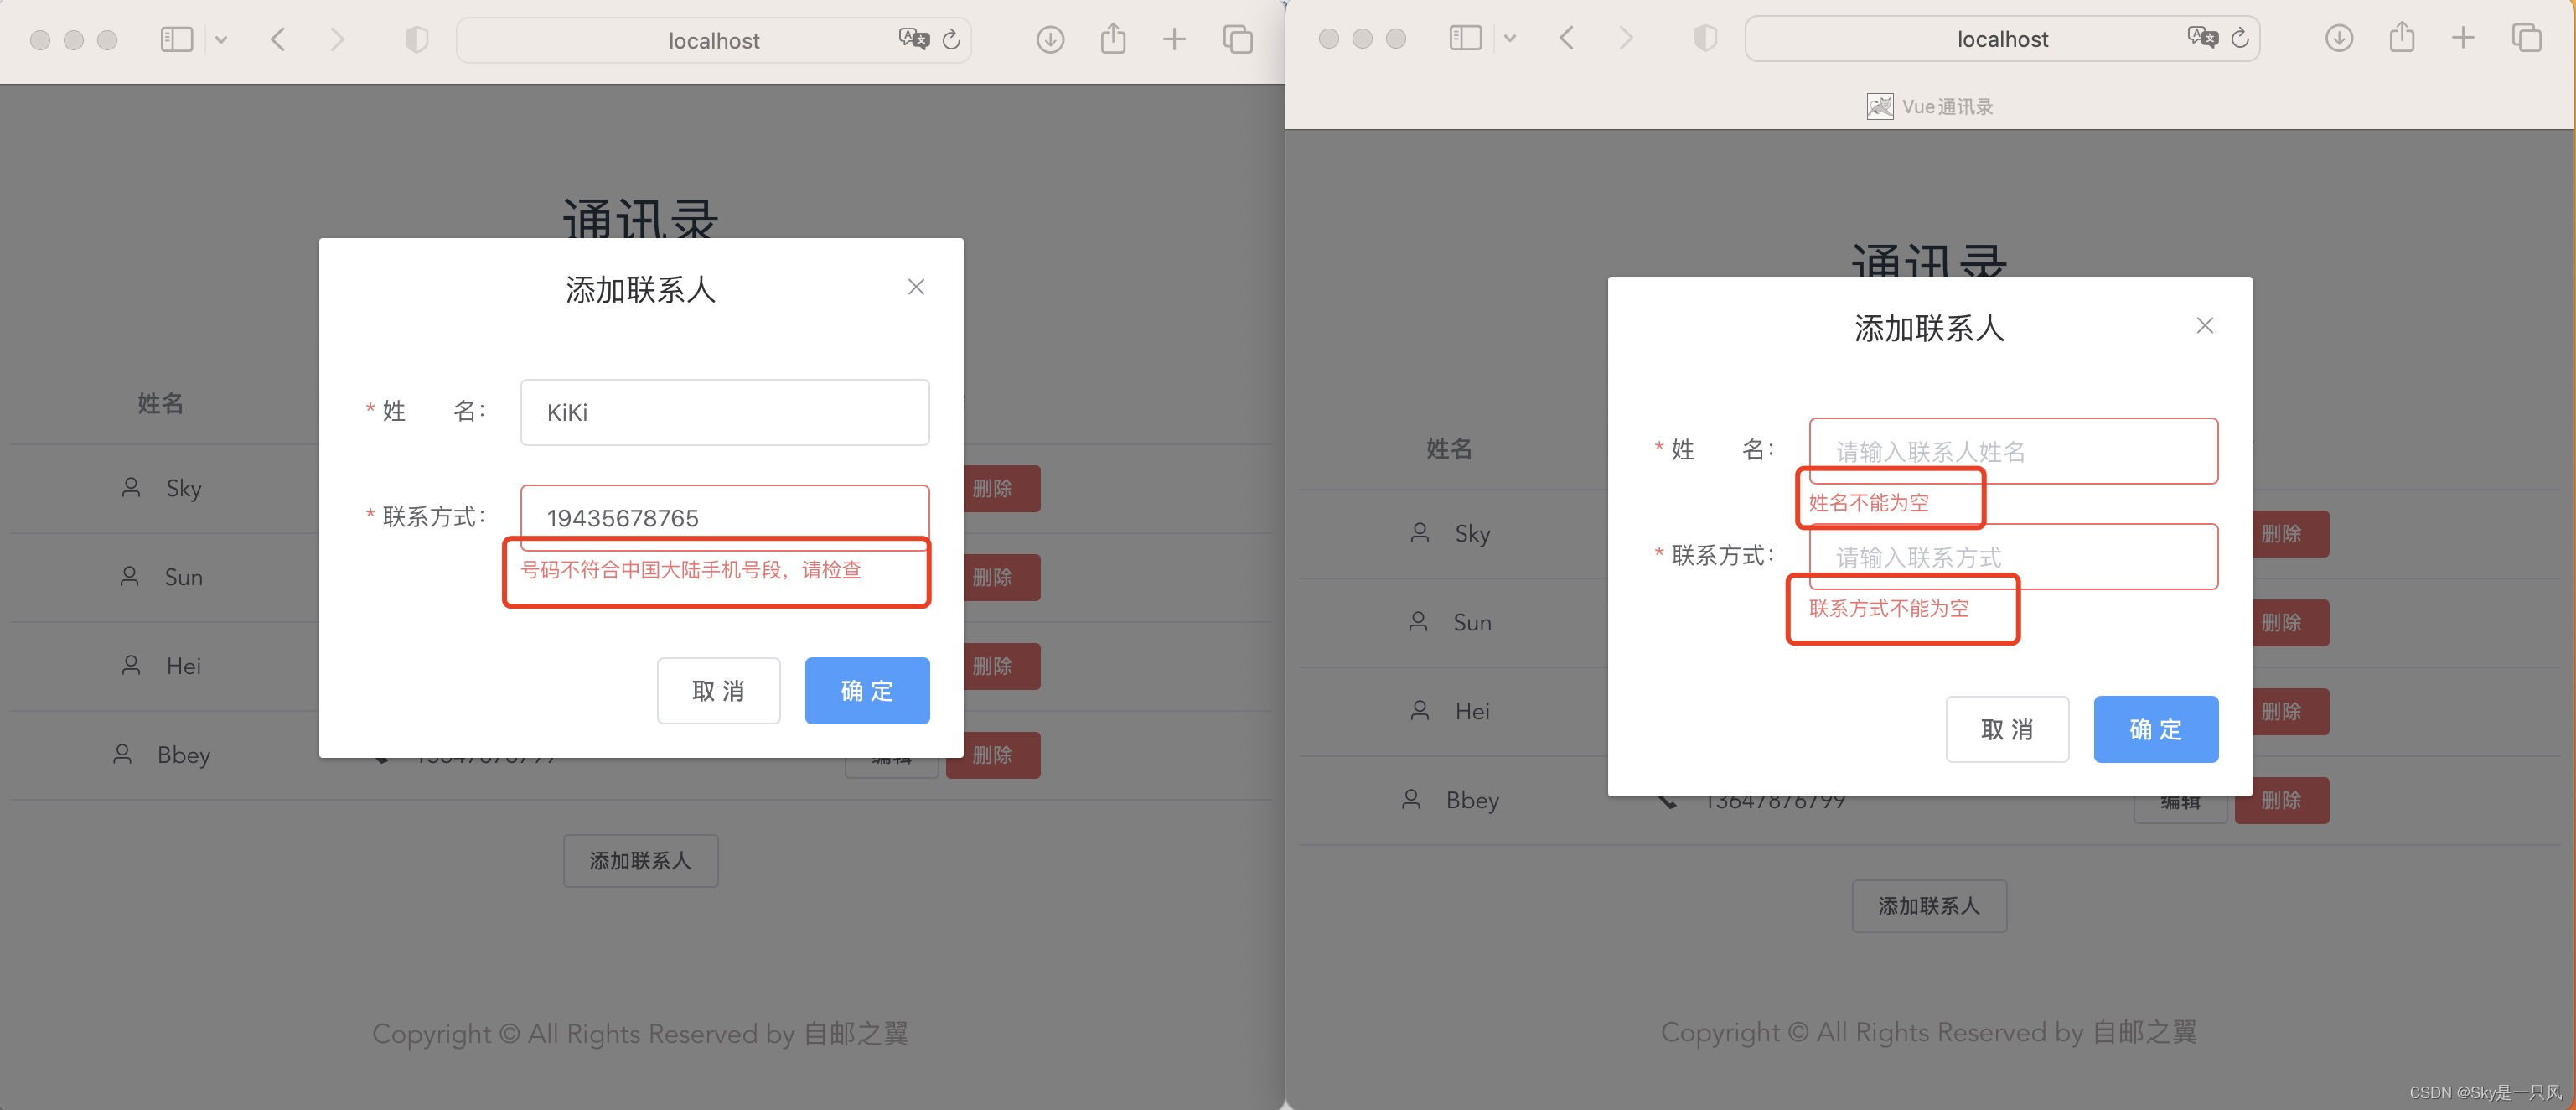
点击按钮添加联系人弹出模态框:
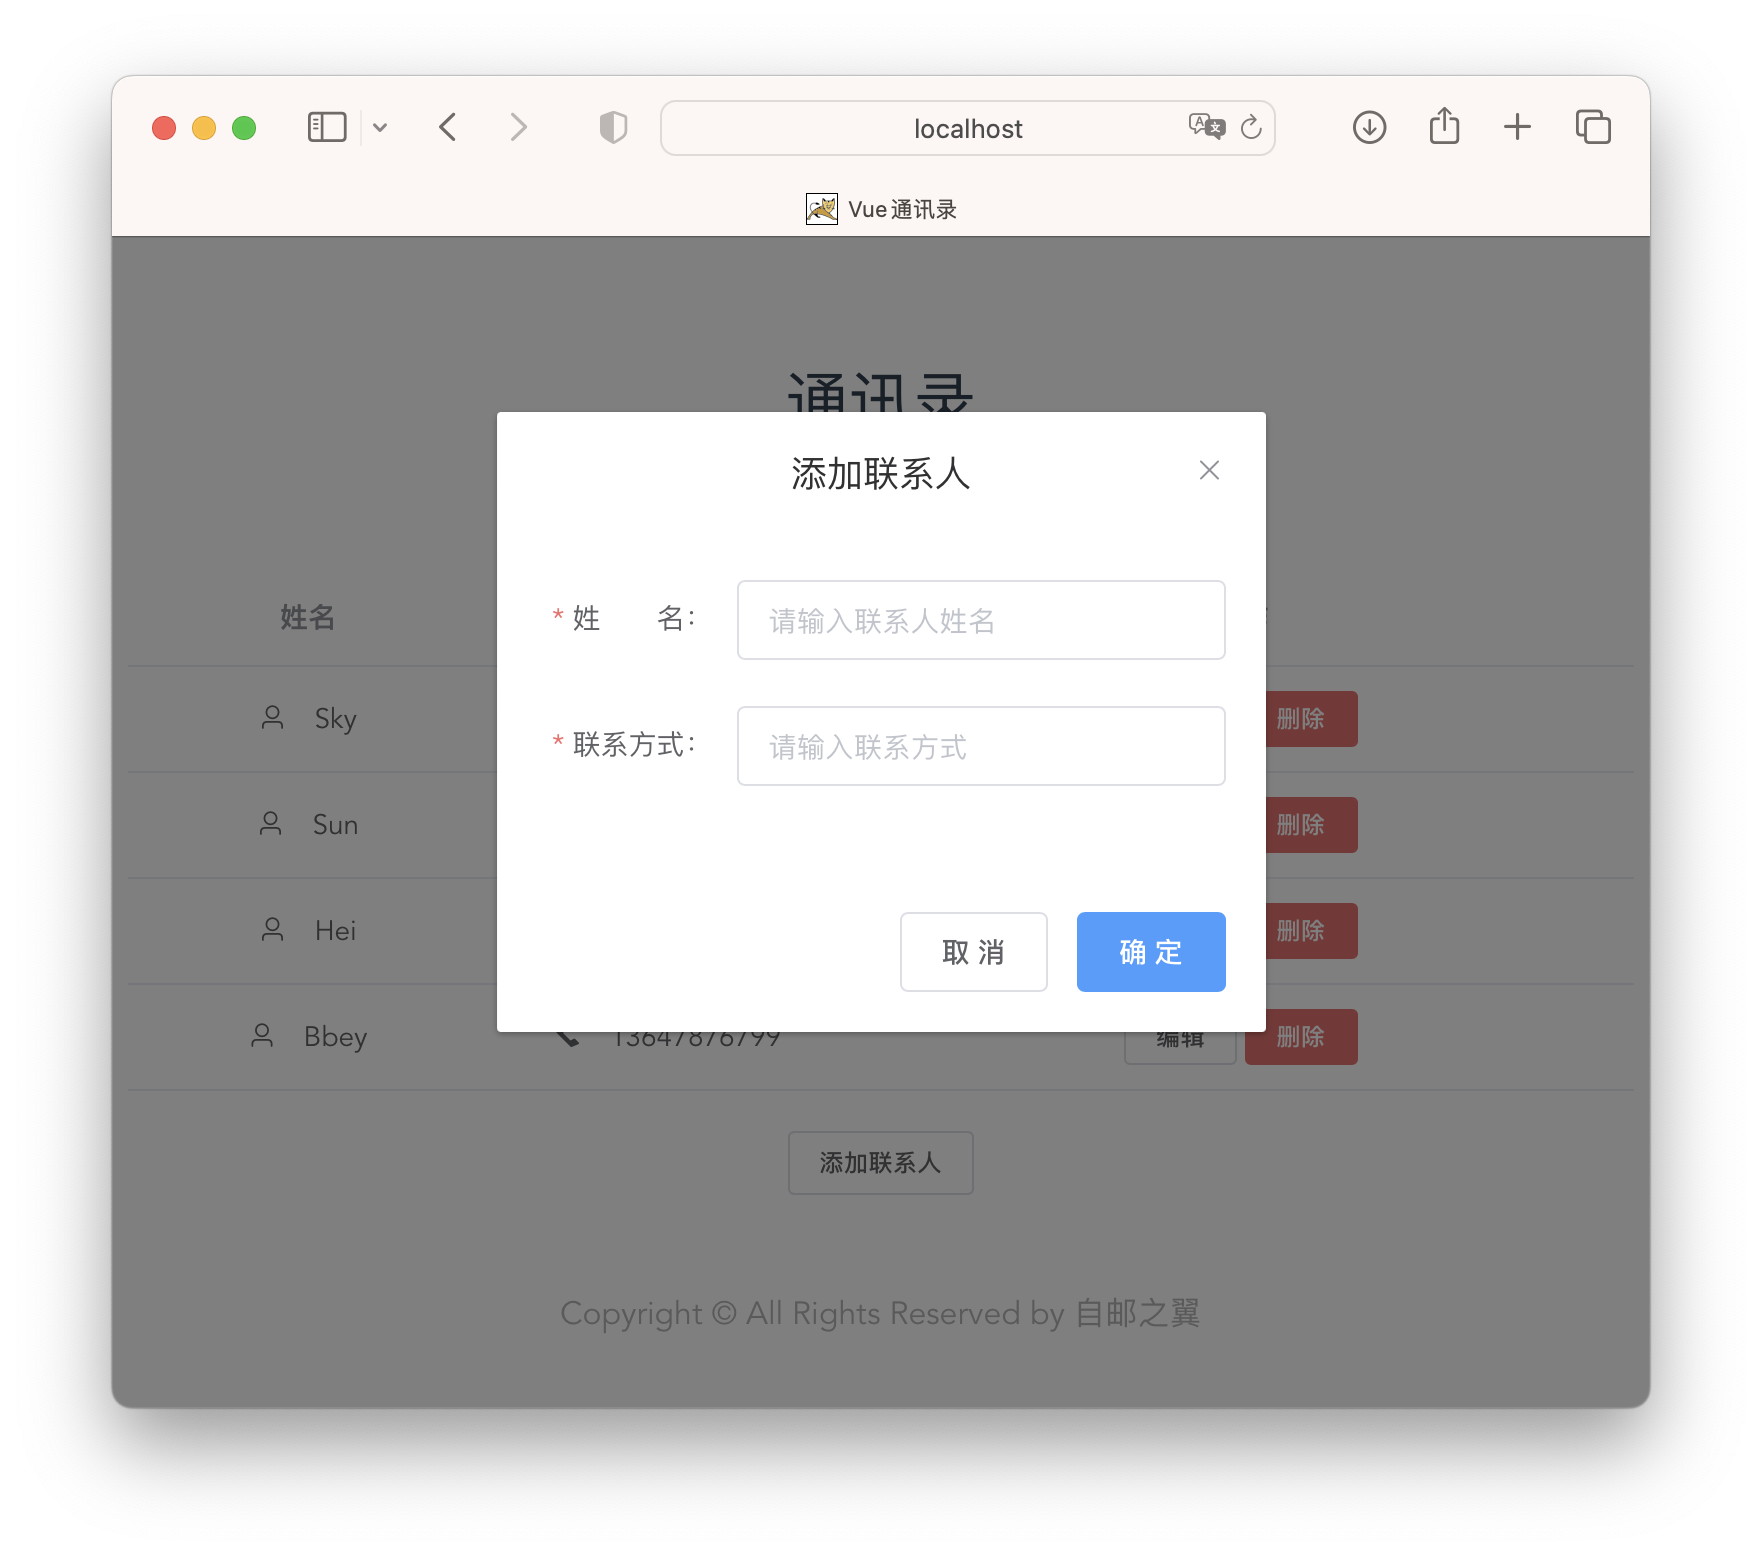
姓名和联系方式均为必填项,联系方式有中国大陆四大运营商号段的合规验证(相关正则表达式间链接🔗:JAVA正则表达式校验中国大陆手机号段【2022年2月】),防止数据库中出现空数据和脏数据,不合规将无法点击确定按钮提交数据。
2.删
针对删除这种可能会丢失数据的操作,根据数据无价原则,给予用户第二次确认机会。点击按钮删除弹出popover框,用户可以选择确定删除或者取消操作。

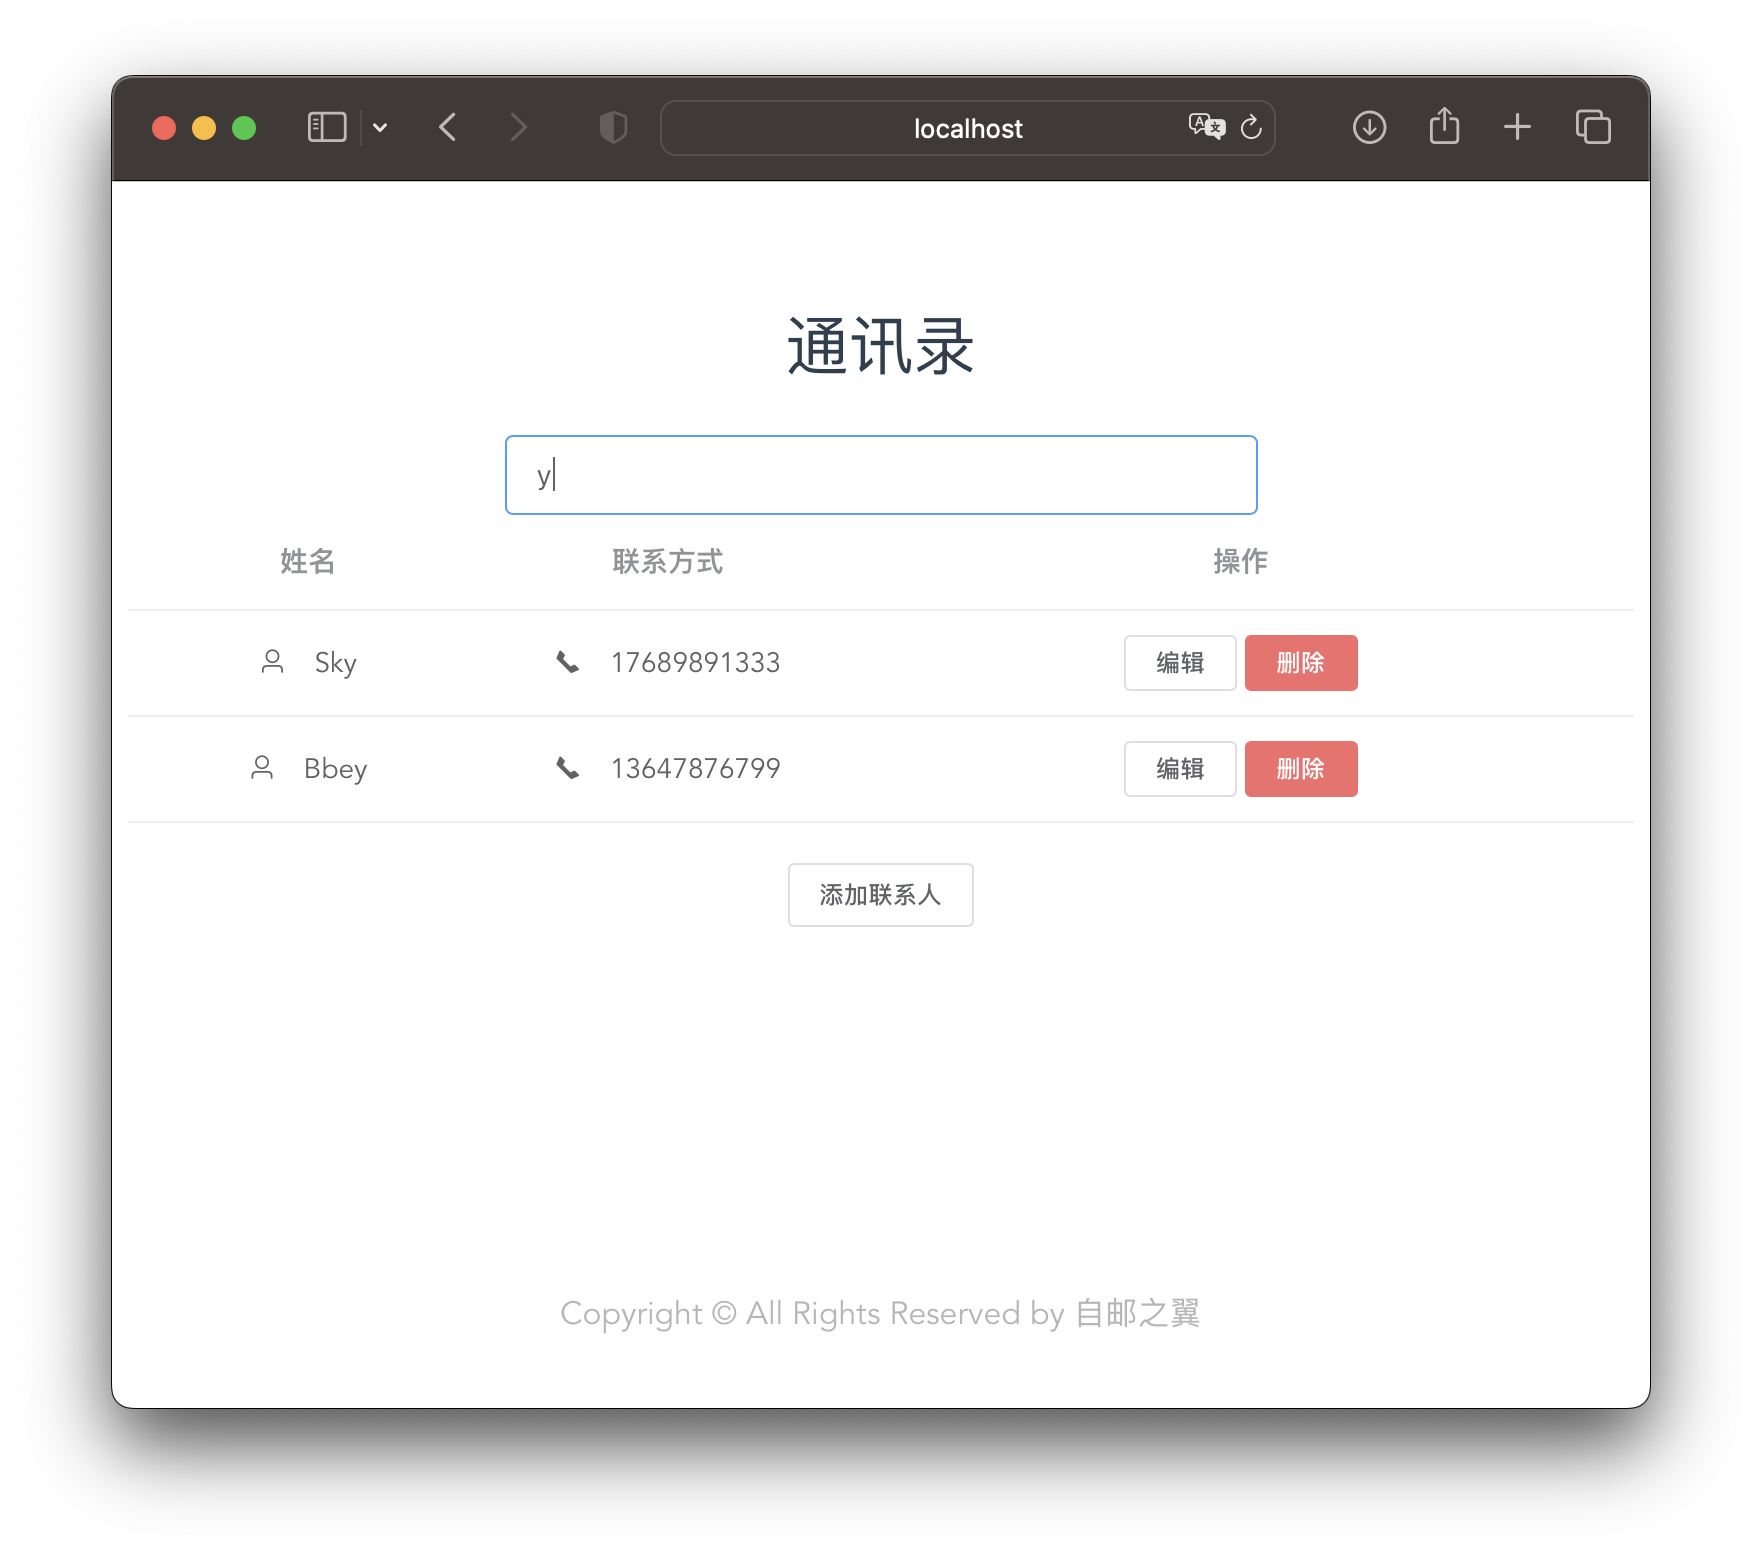
3.查
查询框实时监听键盘事件,用户在搜索时支持模糊查询,只要在搜索框中键入相关信息即可。
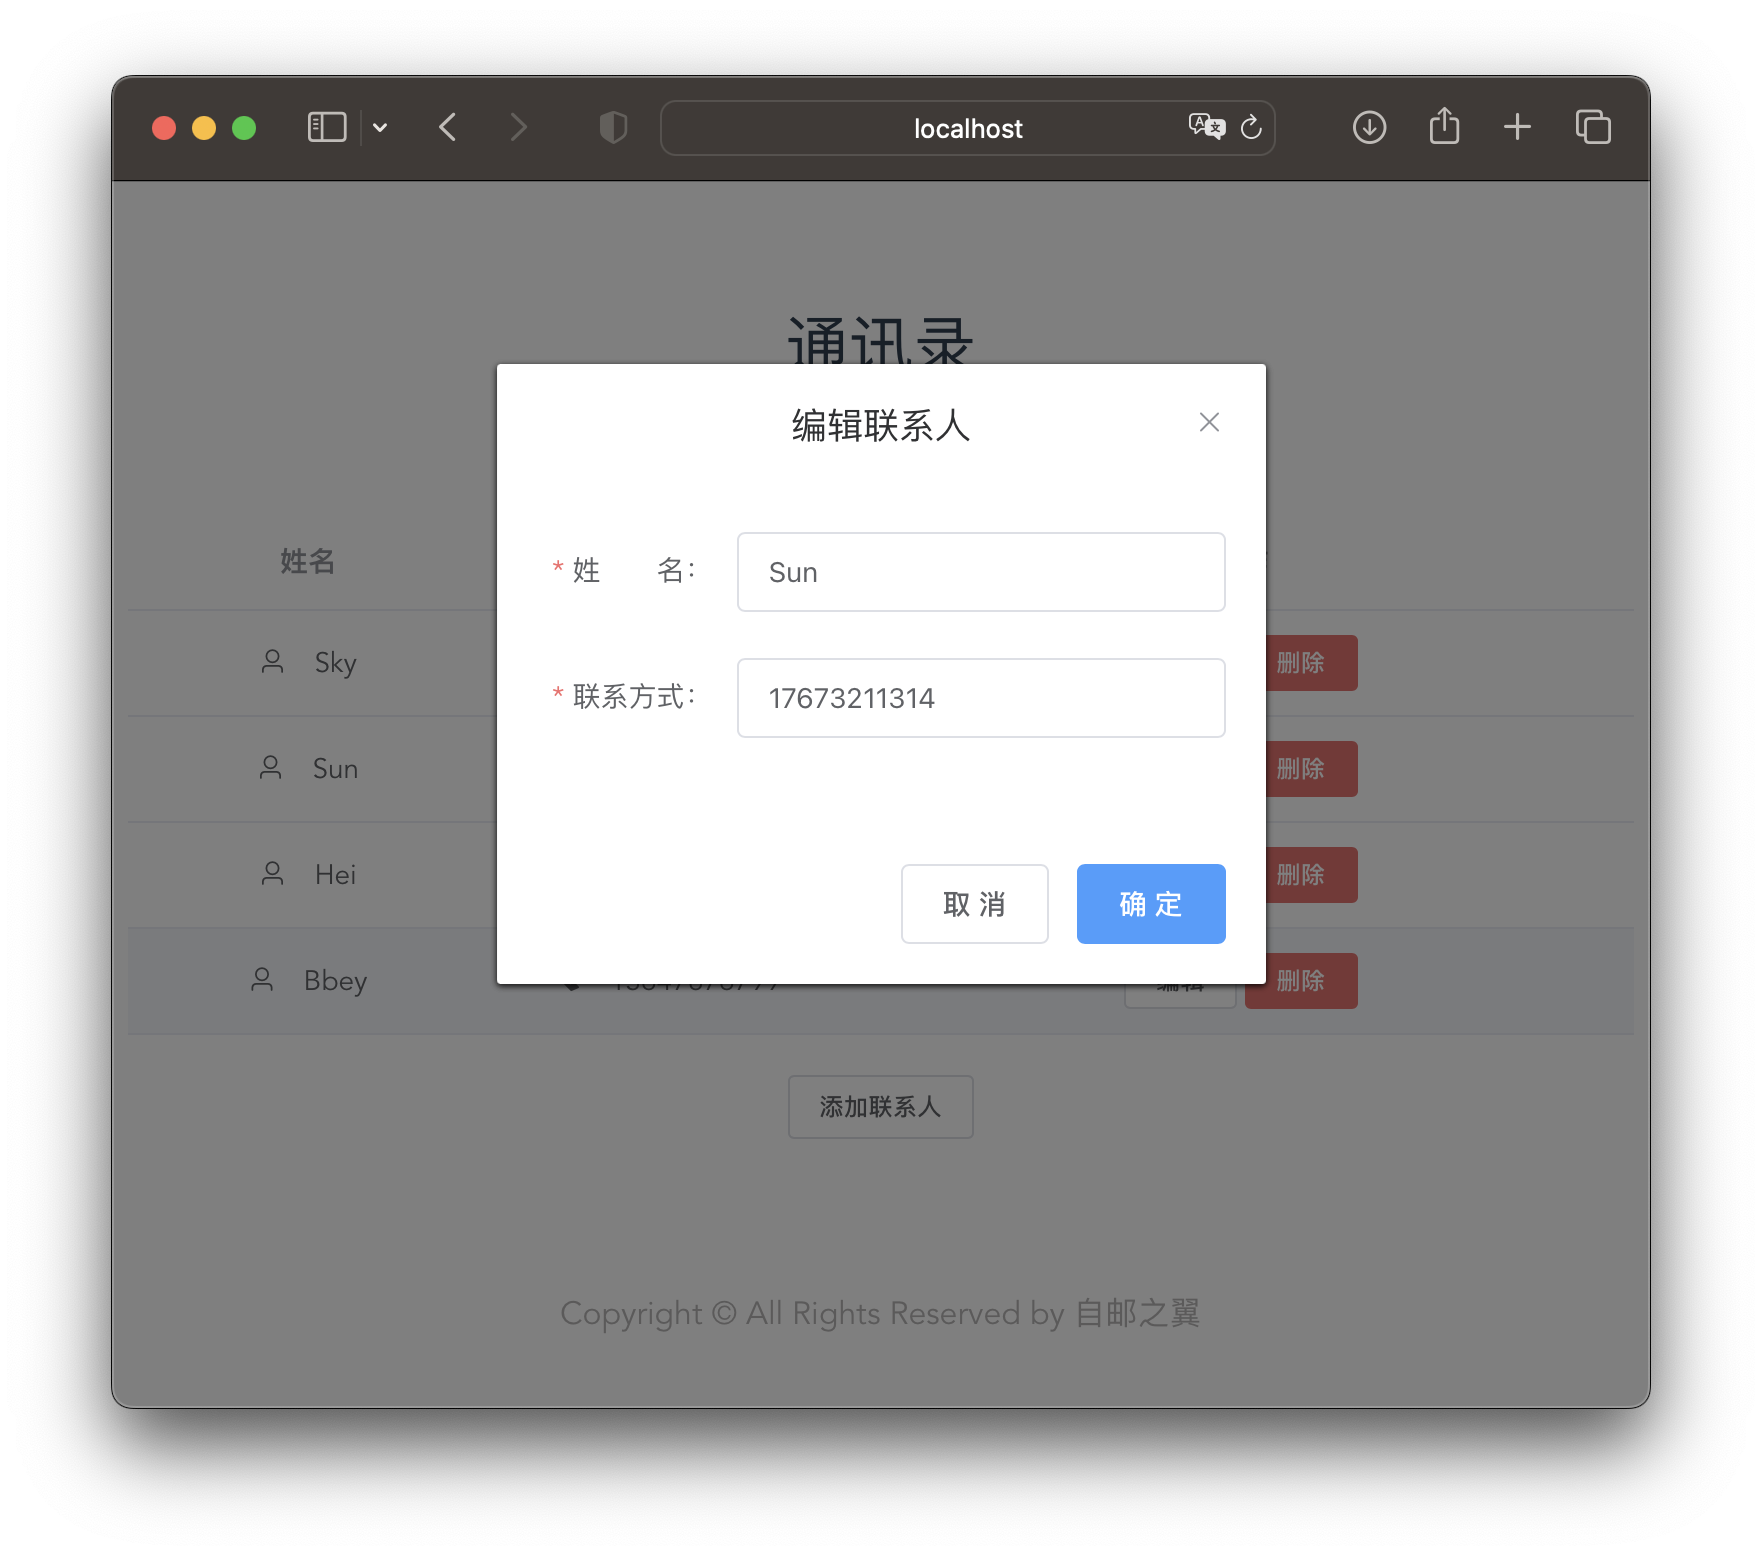
4.改
找到自己想要修改的联系人,点击按钮编辑会弹出对应模态框,框内存留有对应的原始数据。在修改提交时同添加数据一样,仍然需要对两种数据进行合规验证,验证成功方可提交修改的数据。
5.前后端断连
当后端数据库无法连接,或者axios出现问题无法访问后端数据端口时,以上四种操作将无法使用,对应的会在每次进行相应操作时弹出提示“请求失败,请检查远端数据库”。

六、一些参考
- Vue.js🔗:https://cn.vuejs.org
- Vue 2🔗:https://v2.cn.vuejs.org
- Element UI🔗:https://element.eleme.cn/#/zh-CN
- Axios🔗:https://www.axios-http.cn
- 来自CSDN程序员小明1024的博客🔗:168张图,万字长文,手把手教你开发vue后台管理系统
笔者对于Vue也是初学者,肝了一周多终于肝出了这篇博客,如果对你有帮助的话就点个赞吧~


 被折叠的 条评论
为什么被折叠?
被折叠的 条评论
为什么被折叠?
 到【灌水乐园】发言


