


 本文介绍了在一个Vue应用中,如何使用Pinia进行全局状态管理,以及如何通过axios进行API请求的封装,包括基础请求方法、错误处理和菜单权限获取。同时展示了路由守卫和菜单渲染的实现细节。
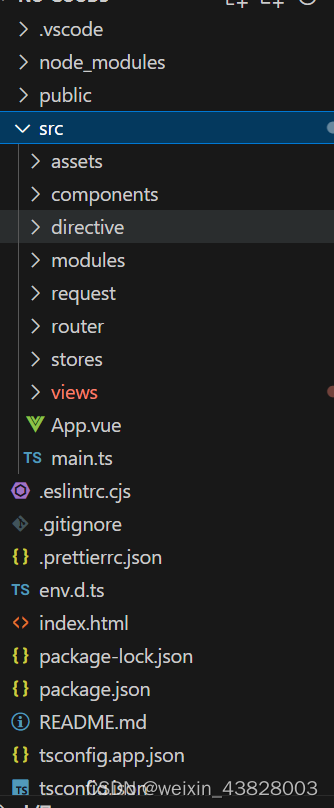
项目结构介绍
| 模块名 | 说明 |
| views | 页面 |
| stores | pinia全局状态管理 |
| router | 路由 |
| request | axios请求封装 |
| modules | 模块数据格式封装 |
| directive | 自定义指令 |
| components | 组件 |
请求封装
request工具类封装
//导入axios
import axios from "axios";
import type{ AxiosInstance, AxiosResponse, InternalAxiosRequestConfig, AxiosRequestConfig,AxiosError } from "axios"
//element-plus 弹窗
import { ElMessage } from 'element-plus'
//响应结果类型
import type{result} from '@/modules/base/Base.ts'
//导入路由对象
import router from '@/router/index'
//导入token状态管理
import {useUserInfoStore} from '@/stores/UserInfo'
//根路径
export const config={
  baseURL: 'http://localhost:9001',
  timeout: 10000,
  headers:{
      'Content-Type':'application/json'
  }
}

//请求类
export class HttpBase{
  // axios的实例
  private instance: AxiosInstance;
  // 初始化的作用
  constructor(configs: AxiosRequestConfig) {
    // 创建axios的实例
    this.instance = axios.create(configs)
    // 配置拦截器
    this.interceptors()
  }
  private interceptors() {
    // 拦截请求
    this.instance.interceptors.request.use((config: InternalAxiosRequestConfig) => {
        //获取token
        const token=useUserInfoStore().getToken
        if(token){
          config.headers.token=token
        }
        return config
    }), (error: any) => {
        error.data = {}
        error.data.message = '服务器异常请联系管理员'
        return error
    }
    // 拦截响应
    this.instance.interceptors.response.use((res: AxiosResponse) => {
        //获取token
        const token=res.headers.token;
        if(token){
          useUserInfoStore().setToken(token)
        }
        // 这里面可以做一些接口返回状态的判断
        //执行成功返回状态码以2开头,主要作用对于修改成功、新增成功等操作的消息提醒
        if ( /^2/.test(res.data.code)) {
          if(res.data.code!=200){
            ElMessage.success(res.data.message)
          }
            return Promise.resolve(res.data)
        } else {
          //执行异常的消息提醒
            ElMessage.error(res.data.message)
            return Promise.reject(res.data.message || '接口报错')
        }
    },(error: AxiosError) => {
        if(error.code==="ERR_NETWORK"){
            ElMessage.error('请检查您的网络')

        }else{
            const status=error.response.status;
            HttpBase.errorHandle(status)
        }

        return Promise.reject(error)
    })
  }
  // 下面是对几个请求方式的封装
  // post
  protected post<T = result>(url: string, data?: object): Promise<T> {
    return this.instance.post(url, data)
  }
  //put
  protected put<T = result>(url: string, data?: object): Promise<T> {
    return this.instance.put(url, data)
  }
  // get
  protected get<T = result>(url: string, params?: object): Promise<T> {
    return this.instance.get(url, { params })
  }
  // delete
  protected delete<T = result>(url: string): Promise<T> {
    return this.instance.delete(url)
  }
  // 图片上传
  protected upload<T = result>(url: string, params?: object): Promise<T> {
    return this.instance.post(url, params, {
        headers: {
            'Content-Type': 'multipart/form-data'
        }
    })
  }
  private static errorHandle(status:number) {
    // 状态码判断
    switch (status) {
      case 404:
        router.push('/404')
        break
      case 500:
        router.push('/500')
        break
      default:
    }
  }
}
菜单请求封装
import {HttpBase,config} from '@/request/base/index'
import type{ListMenu} from '@/modules/menu/MenuInfo'
// axios的配置项
const BaseUrl=config.baseURL+'/auth/menu'

class HttpMenu extends HttpBase{
  /**
   * 获取用户可访问权限
   * @returns
   */
  async getMenuByUser():Promise<Array<ListMenu>>{
    //获取用户可访问菜单
    const url=BaseUrl+'/getMenuByUserId'
    return (await super.get(url)).data
  }
}
export default new HttpMenu(config);
数据实体封装
import type{BaseModule} from '@/modules/base/Base'
interface ListMenu extends BaseModule{
  menuName:string,//菜单名称
  menuCode:string,//菜单编码
  parentId:number,//菜单父id
  routerPath:string,//路由地址
  componentPath:string,//组件所在位置
  menuType:number,//菜单类型
  authorityCode:string,//权限编码
  requestUrl:string,//请求路径
  children:Array<ListMenu>//子级
  icon:string//菜单图标

}


export type{ListMenu}
pinia全局状态管理封装
import { defineStore } from 'pinia'
import {computed, reactive, ref} from 'vue'
import type{ListMenu} from '@/modules/menu/MenuInfo'
import HttpMenu from '@/request/menu/Menu';
export const useMenuInfoStore = defineStore('menuInfo', () => {
  //获取标识符
    const menuFlag=ref<Boolean>(false)
    //获取菜单是否获取标识符
    const getMenuFlag=computed(()=>menuFlag.value)

    //响应式菜单集合数据
    const menuListInfo=reactive<Array<ListMenu>>([]);

    //获取菜单权限
    const getMenu=computed(async ()=>{
      //判断是否有权限
        if(!menuFlag.value){
          await getMenuByUser();
        }
        menuFlag.value=true;
        return menuListInfo;
    })
    //发送请求获取用户可访问菜单权限
    async function getMenuByUser(){
      try{
        const result=await HttpMenu.getMenuByUser()
        menuListInfo.push(...result)
     }catch(e){
        console.log(e)
     }
    }
    return {getMenu,getMenuFlag}
})
路由封装
import { createRouter, createWebHistory } from 'vue-router'
//登录页
import LoginView from '@/views/login/LoginView.vue'
//首页
import IndexView from '@/views/index/IndexView.vue'
//导入token 状态管理
import {useUserInfoStore} from '@/stores/UserInfo'
//导入获取权限状态管理
import { useMenuInfoStore } from '@/stores/MenuInfo'


const router = createRouter({
  history: createWebHistory(import.meta.env.BASE_URL),
  routes: [
    {
      path:'/',
      redirect:'/login'
    },
    {
      path:'/login',
      name:'login',
      component: LoginView
    },
    {
      path:'/index',
      name:'index',
      component: IndexView
    }
  ]
})
router.beforeEach( async (to,from,next)=>{

  const userStore=useUserInfoStore();
  const menuStore=useMenuInfoStore();
  //验证是否登录
  if(to.path!='/login'){
    //获取token
    const token=userStore.getToken
    if(!token){
      router.push('/login')
      return ;
    }
    const menuFlag=menuStore.getMenuFlag;
    //判断是否为首页并且没有获取过菜单权限
    if(!menuFlag ){
    const modules = import.meta.glob("@/views/*/*.vue");
    //获取菜单权限
    const menuList= await menuStore.getMenu
    //循环遍历菜单
    for(const menuInfo of menuList){

      const children=menuInfo.children

      if(children){

        for(const childrenInfo of children){
            const menu={
              path:childrenInfo.routerPath,
              name:childrenInfo.menuCode,
              // component :() => import(`..${childrenInfo.componentPath}.vue`)
              component :modules[`/src${childrenInfo.componentPath}.vue`]
            }
            router.addRoute('index',menu)
        }
      }
    }

    next({...to,replace:true})
    return
  }
}
  next()
})
export default router
菜单渲染
<template>
  <el-row class="tac">
    <el-col >
      <el-menu class="el-menu-vertical-demo" :router="true">
        <el-menu-item index="/index">
          <el-icon><House /></el-icon>
          <span>首页</span>
        </el-menu-item>
        <el-sub-menu v-for="menu in menuList" :key="menu.id" :index="menu.id">
          <template #title>
            <el-icon><component :is="menu.icon"></component></el-icon>
            <span>{{ menu.menuName }}</span>
          </template><el-menu-item-group>
            <template v-for="children in menu.children" :key="children.id">
              <el-menu-item :index="children.id" :route="children.routerPath">
                {{ children.menuName }}
              </el-menu-item>
            </template>
          </el-menu-item-group>
        </el-sub-menu>
      </el-menu>
    </el-col>
  </el-row>
</template>

<script lang="ts" setup>
import { useMenuInfoStore } from '@/stores/MenuInfo'
import { reactive } from 'vue'
import type { ListMenu } from '@/modules/menu/MenuInfo'
import { onMounted } from 'vue'
//菜单集合
let menuList = reactive<Array<ListMenu>>([])
  //菜单全局管理对象
const menuStore=useMenuInfoStore();
//获取菜单集合
const getMenu = async () => {
  const menuInfoList = await menuStore.getMenu
  menuList.push(...menuInfoList)
}
onMounted(() => {
  getMenu()
})
</script>
<style scoped>
.el-row {
  height: 100%;
}
.el-menu {
  height: 100%;
}

</style>


 197
197

 被折叠的 条评论
为什么被折叠?
被折叠的 条评论
为什么被折叠?
 到【灌水乐园】发言


