


安装插件
第一步
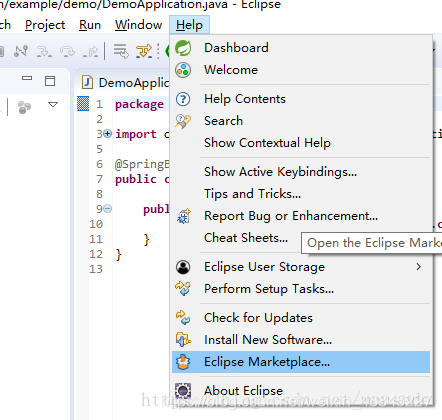
第二步搜索插件并下载
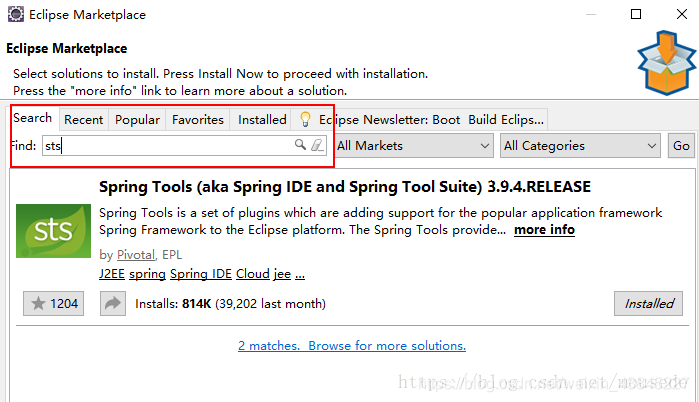
安装成功之后重启SpringBoot
快速创建Springboot项目
New->Project->
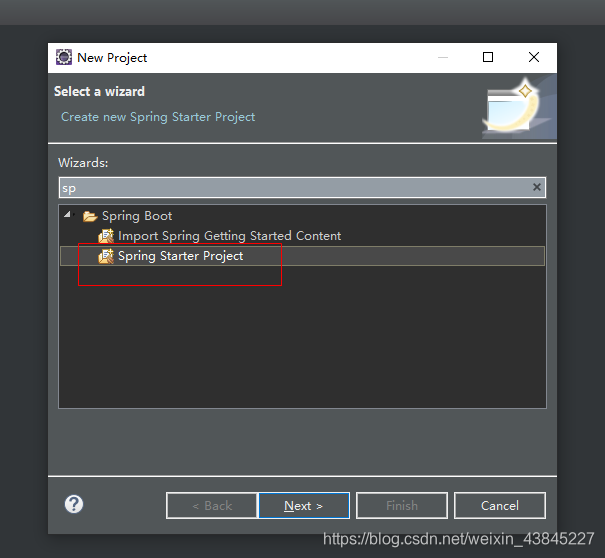
点击next
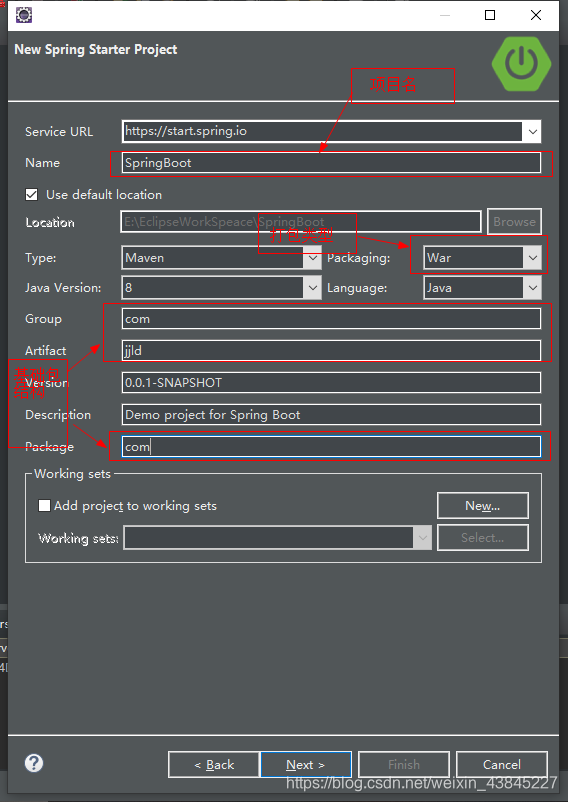
点击next

先不引入任何maven依赖。点击Finsh,项目构建完成
创建好的项目框架如图所示
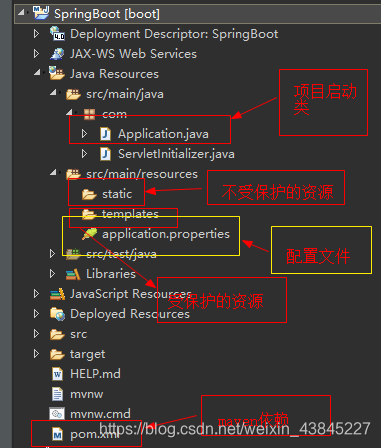
Spring Boott 2.0以下的版本
static里的文件不受保护,可以直接在浏览器进行访问
template里的文件受保护,必须通过后台方法才能进行反问
构建项目
添加目录结构
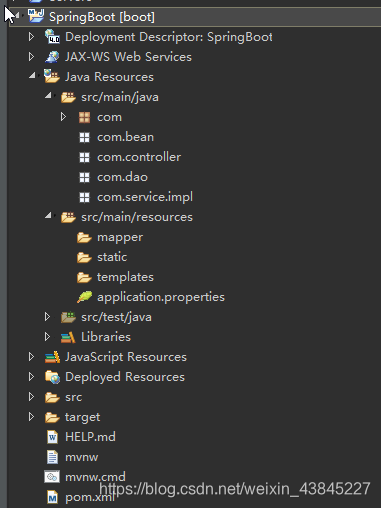
bean:实体类,与mysql表格对应
dao:mapper文件对应的接口
service:业务逻辑层接口
service.impl:业务逻辑层实现类
controller:控制层负责视图映射,返回数据等
引入jetbrick-template模板引擎
1、在pom.xml文件中引入依赖
          <!-- 引入jetbrick模板引擎 -->
          <dependency>
            <groupId>com.github.subchen</groupId>
             <artifactId>jetbrick-template-springmvc</artifactId>
            <version>2.1.6</version>
          </dependency>
        <dependency>
			<groupId>org.springframework.boot</groupId>
			<artifactId>spring-boot-starter-web</artifactId>
		</dependency>
2、在application.properties中进行配置
#jetbrick-template配置
#启用该视图处理器
spring.jetbrick.template.enabled=true
#是否启用页面缓存
spring.jetbrick.template.cache=false
#页面编码方式,默认utf-8
spring.jetbrick.template.charset=UTF-8
#该视图处理器的优先级,默认最低
spring.jetbrick.template.order=1
#视图类型
spring.jetbrick.template.content-type=text/html;  charset=utf-8
#视图映射的前缀
spring.jetbrick.template.prefix=templates/
#视图映射的后缀
spring.jetbrick.template.suffix=.html
3,构建Controller
package com.controller;


import org.springframework.stereotype.Controller;
import org.springframework.ui.ModelMap;
import org.springframework.web.bind.annotation.RequestMapping;


@Controller
@RequestMapping("/Test")
public class Test {
   @RequestMapping("/index")
   public String index(ModelMap map) {
      map.addAttribute("name", "gzf");
      return "test";
   }
}
4、test.html页面
<!DOCTYPE html>
<html>
<head>
<meta charset="UTF-8">
<title>Insert title here</title>
</head>
<body>
<h1>我是测试页面</h1>
<h1>${name}</h1>
</body>
</html>
获取静态资源
如果是springboot1.x版本,无需配置就可直接访问static文件下的内容
如果是Springboot2.x版本,所有的请求都会被SpringMVC接管,因此需要配置拦截器放行对静态资源的请求
1、创建Component文件夹,自定义拦截器
package com.component;
import javax.servlet.http.HttpServletRequest;
import javax.servlet.http.HttpServletResponse;
import org.springframework.stereotype.Component;
import  org.springframework.web.servlet.handler.HandlerInterceptorAdapter;
@Component
public class MyInterceptor extends  HandlerInterceptorAdapter {
     public boolean preHandle(HttpServletRequest request,  HttpServletResponse response, Object handler)
              throws Exception {
          // 拦截代码
          return true;
     }
}
2、注册拦截器,
创建config文件夹,构建WebMvcConfiguration类如下
package com.config;
import java.util.Arrays;
import  org.springframework.context.annotation.Configuration;
import  org.springframework.web.servlet.config.annotation.InterceptorRegistry;
import  org.springframework.web.servlet.config.annotation.WebMvcConfigurer;
import com.component.MyInterceptor;
@Configuration
public class WebMvcConfiguration implements  WebMvcConfigurer {
     @Override
     public void addInterceptors(InterceptorRegistry  registry) {
          registry.addInterceptor(new MyInterceptor())
                   .excludePathPatterns(Arrays.asList("/css/**",  "/images/**", "/js/**"));
     }
}
前端文件如下
<!DOCTYPE html>
<html>
<head>
<meta charset="UTF-8">
<link rel="stylesheet" type="text/css"  href="/css/test.css" />
<title>Insert title here</title>
</head>
<body>
<h1>我是测试页面</h1>
<h1>${name}</h1>
</body>
</html>
css文件所在位置如图

引入数据库
1、引入maven依赖
         <!-- mysql驱动 -->
          <dependency>
              <groupId>mysql</groupId>
                <artifactId>mysql-connector-java</artifactId>
         </dependency>
         <!--    https://mvnrepository.com/artifact/com.alibaba/druid 数据库连接池 数据源 -->
         <dependency>
              <groupId>com.alibaba</groupId>
              <artifactId>druid</artifactId>
              <version>1.1.10</version>
         </dependency>
         <!-- mybatis连接jar -->
           <dependency>
             <groupId>org.mybatis.spring.boot</groupId>
               <artifactId>mybatis-spring-boot-starter</artifactId>
             <version>1.3.2</version>
         </dependency>
2、配置application.properties文件
#数据库配置文件
spring.datasource.driver-class-name=com.mysql.jdbc.Driver
spring.datasource.url=jdbc:mysql://localhost:3306/test?useUnicode=true&characterEncoding=UTF-8&serverTimezone=UTC
spring.datasource.username=root
spring.datasource.password=root
#jdbc
spring.datasource.type=com.alibaba.druid.pool.DruidDataSource
#bean,配置实体类别名,别名即为实体类的名字
mybatis.type-aliases-package=com.gzf.bean
#mapper.xml文件所在位置,文件可以在resources下
mybatis.mapper-locations=classpath:mapper/*.xml
3、构建实体类,对应表结构如图

实体类
package com.bean;
public class UserBean extends BaseBean {
     private String name;
     private String password;
     private String salt;
     public String getName() {
          return name;
     }
     public void setName(String name) {
          this.name = name;
     }
     public String getPassword() {
          return password;
     }
     public void setPassword(String password) {
          this.password = password;
     }
     public String getSalt() {
          return salt;
     }
     public void setSalt(String salt) {
          this.salt = salt;
     }
}
构建dao层接口文件UserDao
package com.dao;
import java.util.ArrayList;
import com.bean.UserBean;
public interface UserDao {
     ArrayList<UserBean> query();
}
为主启动类配置注解,表明dao层所在目录结构
package com;
import org.mybatis.spring.annotation.MapperScan;
import org.springframework.boot.SpringApplication;
import  org.springframework.boot.autoconfigure.SpringBootApplication;
@SpringBootApplication
@MapperScan("com.dao")
public class Application {
     public static void main(String[] args) {
          SpringApplication.run(Application.class, args);
     }
}
在mapper文件夹下构建UserMapper.xml文件,注意namespace对应着其dao层接口的位置
<?xml version="1.0" encoding="UTF-8"?>
<!DOCTYPE mapper PUBLIC "-//mybatis.org//DTD Mapper   3.0//EN" "http://mybatis.org/dtd/mybatis-3-mapper.dtd"  >
<mapper namespace="com.dao.UserDao">
     <select id="query" resultType="UserBean">
         select * from t_user
     </select>
</mapper>
构建sevice层接口
package com.service;
public interface IUserService {
     Object query();
}
构建Service层实现类,注意@Service注解
package com.service.impl;
import  org.springframework.beans.factory.annotation.Autowired;
import org.springframework.stereotype.Service;
import com.dao.UserDao;
import com.service.IUserService;
@Service
public class UserServiceImpl implements IUserService {
     @Autowired
     private UserDao userDao;
     public Object query() {
          return userDao.query();
     }
}
添加Controller方法
package com.controller;
import  org.springframework.beans.factory.annotation.Autowired;
import org.springframework.stereotype.Controller;
import org.springframework.ui.ModelMap;
import  org.springframework.web.bind.annotation.RequestMapping;
import  org.springframework.web.bind.annotation.ResponseBody;
import com.service.IUserService;
@Controller
@RequestMapping("/Test")
public class Test {
     @Autowired
     private IUserService userservice;
     @RequestMapping("/index")
     public String index(ModelMap map) {
          map.addAttribute("name", "谷占方");
          return "test";
     }
     @ResponseBody//此注解表示返回json数据
     @RequestMapping("/query")
     public Object query() {
          return userservice.query();
     }
}
访问
http://localhost:8080/Test/query看到返回的数据列表即访问数据库成功,如下所示
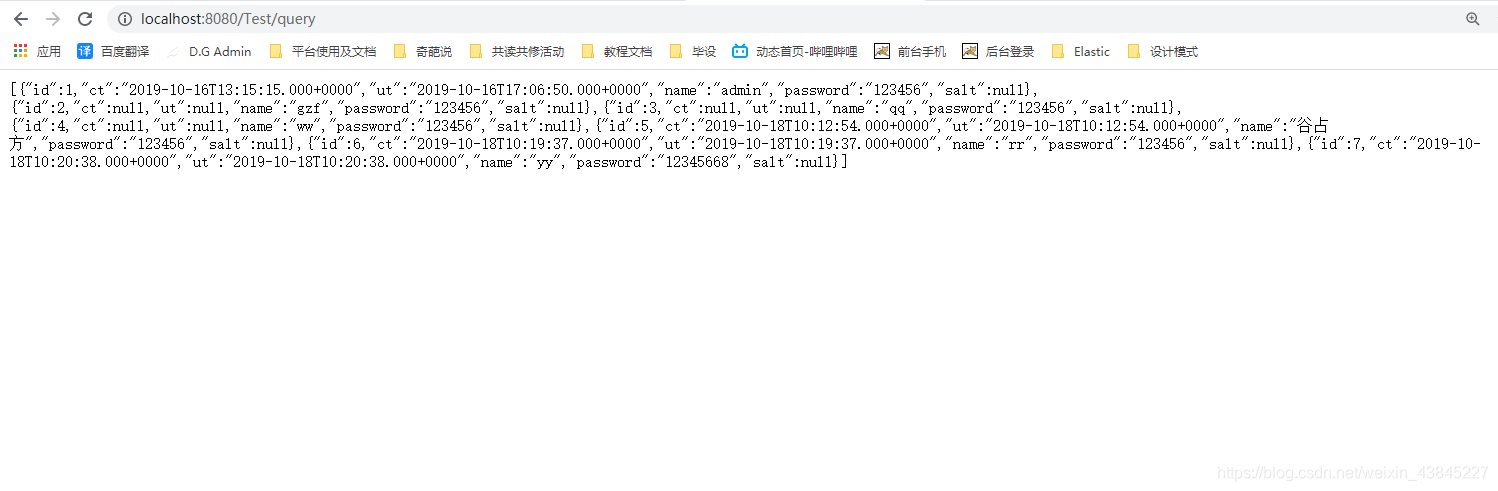
根据以上配置即可实现springboot整合模板引擎,完成视图映射、访问静态资源、连接数据库。


 3254
3254

 被折叠的 条评论
为什么被折叠?
被折叠的 条评论
为什么被折叠?
 到【灌水乐园】发言


