创建maven空白项目
- 这是一个很简单的例子,但是需要一些知识储备,希望对你有用,这只是我的个人笔记,个人的见解。。。
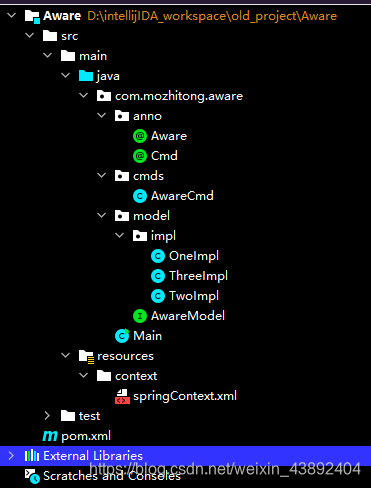
代码架构
pom.xml文件
- pom.xml
	<?xml version="1.0" encoding="UTF-8"?>
	<project xmlns="http://maven.apache.org/POM/4.0.0"
	         xmlns:xsi="http://www.w3.org/2001/XMLSchema-instance"
	         xsi:schemaLocation="http://maven.apache.org/POM/4.0.0 http://maven.apache.org/xsd/maven-4.0.0.xsd">
	    <modelVersion>4.0.0</modelVersion>

	    <groupId>com.mozhitong</groupId>
	    <artifactId>Aware</artifactId>
	    <version>1.0-SNAPSHOT</version>

	    <dependencies>
	        <dependency>
	            <groupId>org.springframework</groupId>
	            <artifactId>spring-context</artifactId>
	            <version>5.2.8.RELEASE</version>
	        </dependency>
	    </dependencies>
	</project>
配置文件
- springContext.xml
<?xml version="1.0" encoding="UTF-8"?>
<beans xmlns="http://www.springframework.org/schema/beans"
xmlns:xsi="http://www.w3.org/2001/XMLSchema-instance"
xmlns:context="http://www.springframework.org/schema/context"
xsi:schemaLocation="http://www.springframework.org/schema/beans http://www.springframework.org/schema/beans/spring-beans.xsd
http://www.springframework.org/schema/context http://www.springframework.org/schema/context/spring-context-4.2.xsd">
<bean id="awareCmd" class="com.mozhitong.aware.cmds.AwareCmd"/>
<context:component-scan base-package="com.mozhitong.aware.model.impl">
<context:include-filter type="annotation" expression="com.mozhitong.aware.anno.Aware" />
</context:component-scan>
</beans>
编写代码分模块
anno 注解
- 注解的作用就是为了,区分出哪一个类带有这个注解,如果有这个注解,将其列为需要getBean的对象,然后spring就认识他,把他作为一个对象注入,程序员需要使用这个类,直接可以getBean,这样就可以减去自己new对象的操作,慢慢会知道这样做的好处
- Aware.java
	@Target({ElementType.TYPE, ElementType.METHOD})
	@Retention(RetentionPolicy.RUNTIME)
	public @interface Aware
	{
	}
- Cmd.java(暂时没有使用)
	@Target({ElementType.TYPE, ElementType.METHOD})
	@Retention(RetentionPolicy.RUNTIME)
	public @interface Cmd
	{
	}
cmds
- 描述:这个类需要实现ApplicationContextAware接口,然后将扫描实现AwareModel.class接口的类找到,并进行区分一个接口多个实现,通过getModel找到对应的实现类
- AwareCmd.java
public class AwareCmd implements ApplicationContextAware
{
private final Map<String, AwareModel> awareModels = new HashMap<String, AwareModel>();
public void setApplicationContext(ApplicationContext applicationContext) throws BeansException
{
Map<String, AwareModel> awares = applicationContext.getBeansOfType(AwareModel.class);
for (AwareModel aware : awares.values())
{
this.awareModels.put(aware.getModel(), aware);
}
}
public void show()
{
AwareModel one = this.awareModels.get("One");
one.work("mo");
AwareModel two = this.awareModels.get("Two");
two.work("zhi");
AwareModel three = this.awareModels.get("Three");
three.work("tong");
}
}
model 接口
- 描述:这里根据业务需求,有可能需要同个接口给不同的类型实现不同的方法,例如商店系统,一开始,这个商店只能买水果,也能进行发货,但是后来需要扩展业务,加多一个卖蔬菜,肉类,所以这个接口被蔬菜和肉的类进行实现,返回对应的接口实现类,实现不同的发货和购买操作
- 接口model
public interface AwareModel
{
String getModel();
void work(String name);
}
- impl 各个实现类
	@Aware
	public class OneImpl implements AwareModel
	{
	    public String getModel()
	    {
	        return "One";
	    }

	    public void work(String name)
	    {
	        System.out.println(name + "在学习!");
	    }
	}

	@Aware
	public class TwoImpl implements AwareModel
	{
	    public String getModel()
	    {
	        return "Two";
	    }

	    public void work(String name)
	    {
	        System.out.println(name + "在工作!");
	    }
	}

	@Aware
	public class ThreeImpl implements AwareModel
	{
	    public String getModel()
	    {
	        return "Three";
	    }

	    public void work(String name)
	    {
	        System.out.println(name + "在偷懒!");
	    }
	}
测试、主类
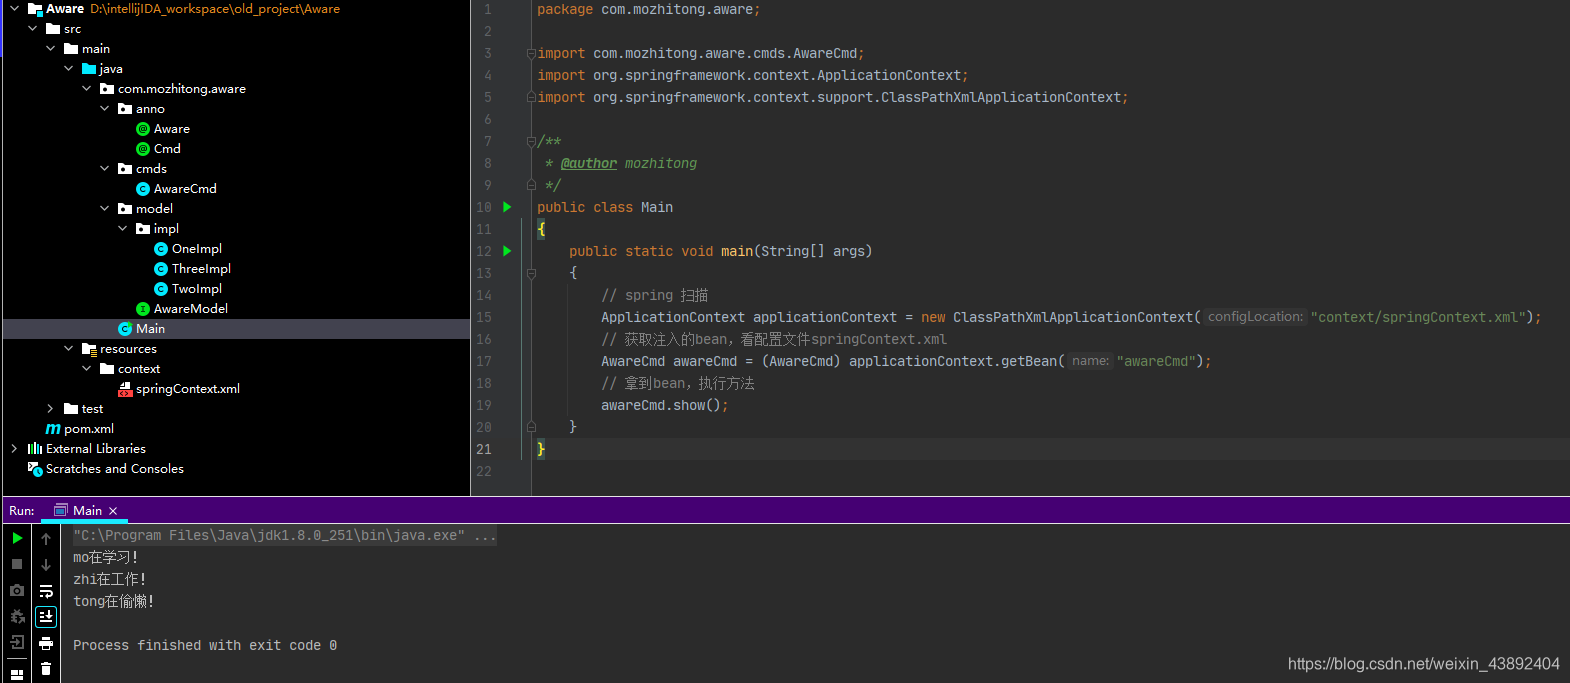
- Main.java
public class Main
{
public static void main(String[] args)
{
ApplicationContext applicationContext = new ClassPathXmlApplicationContext("context/springContext.xml");
AwareCmd awareCmd = (AwareCmd) applicationContext.getBean("awareCmd");
awareCmd.show();
}
}
测试结果


 7565
7565


 被折叠的 条评论
为什么被折叠?
被折叠的 条评论
为什么被折叠?
 到【灌水乐园】发言


