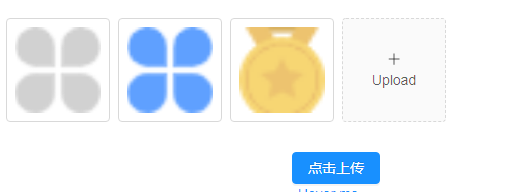
内容是根据网友的案例进行修改,代码直接可以用,给大家参考参考,有不足之处请大家指点。
代码:
<template>
<!-- 先预览,然后再自定义上传base64图片 -->
  <div class="clearfix">
    <a-upload
      listType="picture-card"
      :fileList="fileList"
      :beforeUpload="beforeUpload"
      :multiple="true"
      :remove="handleRemove"
      @preview="handlePreview"
    >
      <div v-if="fileList.length < 9">
        <a-icon type="plus" />
        <div class="ant-upload-text">Upload</div>
      </div>
    </a-upload>
    <!-- 放大预览窗口 -->
    <a-modal :visible="previewVisible" :footer="null" @cancel="handleCancel">
        <img alt="example" style="width: 100%" :src="previewImage" />
      </a-modal>
    <a-button type="primary"
    :loading="uploading"
    @click="handleUpload"
    style="margin-top: 16px">点击上传</a-button>

  </div>
</template>
<script>
import reqwest from 'reqwest';
export default {
  data () {
    return {
      fileList: [],
      previewVisible: false,
      previewImage: "",
      uploading: false,
    }
  },
  methods: {
    beforeUpload (file) {
      if (this.fileList.length > 9) {//判断上传的图片数量

        return false
      }
      this.exeBase(file)
      return false
    },
    async exeBase (file) {
      await this.getBase64(file, (imageUrl) => {
        if (this.fileList.length < 9 && this.preventRepeat(imageUrl)) {//判断图片数量及去重
          const file2 = file
          file2.url = imageUrl
          this.fileList = [...this.fileList, file]
          this.loading = false
        }
      }).then((result) => {
        console.log(result)
      })
    },
    handleRemove (file) {//删除图片
      const index = this.fileList.indexOf(file)
      const newFileList = this.fileList.slice()
      newFileList.splice(index, 1)
      this.fileList = newFileList
    },
    getBase64 (file, callback) {
      return new Promise((resolve) => {
        let reader = new FileReader()
        reader.readAsDataURL(file)
        reader.onload = () => {
          callback(reader.result)
          resolve('成功')
        }
      })
    },
    preventRepeat (url) {
      // 排除相同图片
      for (let i = 0, len = this.fileList.length; i < len; i++) {
        if (this.fileList[i].url === url) {
          return false
        }
      }
      return true
    },
    handleCancel() {//点击关闭图片预览
      this.previewVisible = false;
    },
    async handlePreview(file) {//点击查看大图
      if (!file.url && !file.preview) {
        file.preview = await  this.getBase64(file.originFileObj);
      }
      this.previewImage = file.url || file.preview;
      this.previewVisible = true;
    },
    handleUpload() {
      const { fileList } = this;
      const formData = new FormData();
      fileList.forEach(file => {
        formData.append('files[]', file);//后面再加上token
      });
      this.uploading = true;
      reqwest({
        url: 'https://www.mocky.io/v2/5cc8019d300000980a055e76',
        method: 'post',
        processData: false,
        data: formData,
        success: () => {
        //   this.fileList = [];图片上传后清空
          this.uploading = false;
          this.$message.success('upload successfully.');
        },
        error: () => {
          this.uploading = false;
          this.$message.error('upload failed.');
        },
      });
    },
  }
}
</script>
参考资源链接:https://blog.csdn.net/weixin_39651562/article/details/100010828


 1353
1353


 被折叠的 条评论
为什么被折叠?


