


Docker Desktop 安装Seata Server
seata 本质上是一个服务,用docker安装更方便,配置默认:file
docker run -d --name seata-server -p 8091:8091 -p 7091:7091 seataio/seata-server:2.0.0
与SpringBoot集成
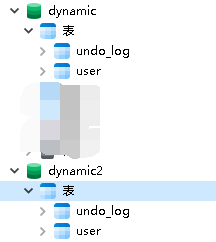
表结构
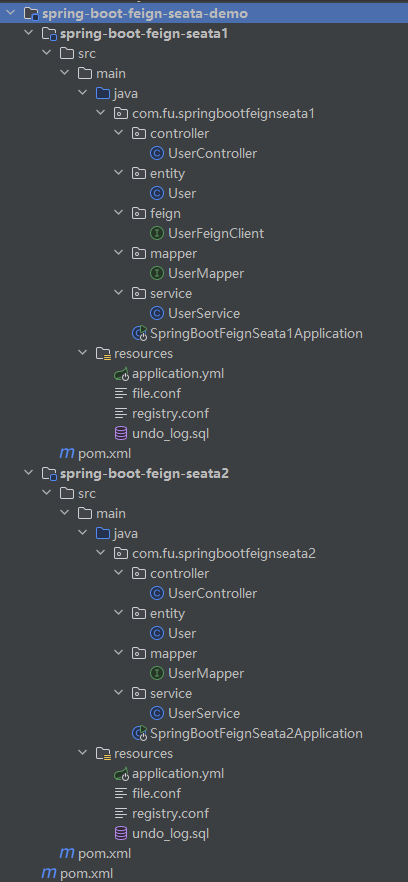
项目目录
dynamic和dynamic2新建user、undo_log表
每个数据库都必须包含undo_log表(user表不是必须的,这里只是演示)
CREATE TABLE `undo_log` (
  `branch_id` bigint NOT NULL COMMENT 'branch transaction id',
  `xid` varchar(128) NOT NULL COMMENT 'global transaction id',
  `context` varchar(128) NOT NULL COMMENT 'undo_log context,such as serialization',
  `rollback_info` longblob NOT NULL COMMENT 'rollback info',
  `log_status` int NOT NULL COMMENT '0:normal status,1:defense status',
  `log_created` datetime(6) NOT NULL COMMENT 'create datetime',
  `log_modified` datetime(6) NOT NULL COMMENT 'modify datetime',
  UNIQUE KEY `ux_undo_log` (`xid`,`branch_id`),
  KEY `ix_log_created` (`log_created`)
) ENGINE=InnoDB DEFAULT CHARSET=utf8mb4 COLLATE=utf8mb4_0900_ai_ci COMMENT='AT transaction mode undo table';
spring-boot-feign-seata1
pom.xml
		<!-- lombok 1.18.26 -->
        <dependency>
            <groupId>org.projectlombok</groupId>
            <artifactId>lombok</artifactId>
            <scope>provided</scope>
            <optional>true</optional>
        </dependency>
        <!-- jdbc -->
        <dependency>
            <groupId>org.springframework.boot</groupId>
            <artifactId>spring-boot-starter-jdbc</artifactId>
        </dependency>
        <!-- mysql 8.0.32 -->
        <dependency>
            <groupId>com.mysql</groupId>
            <artifactId>mysql-connector-j</artifactId>
            <version>${mysql.version}</version>
            <scope>runtime</scope>
        </dependency>
        <!-- jdbc -->
        <dependency>
            <groupId>org.springframework.boot</groupId>
            <artifactId>spring-boot-starter-jdbc</artifactId>
        </dependency>
        <!-- web 2.7.9 -->
        <dependency>
            <groupId>org.springframework.boot</groupId>
            <artifactId>spring-boot-starter-web</artifactId>
        </dependency>
        <!-- MyBatis-Plus 3.5.2 -->
        <dependency>
            <groupId>com.baomidou</groupId>
            <artifactId>mybatis-plus-boot-starter</artifactId>
        </dependency>
        <!-- seata 调用方用 openfeign 必须引入spring-cloud-starter-alibaba-seata,否则被调用方获取到的xid可能会为null -->
        <dependency>
            <groupId>io.seata</groupId>
            <artifactId>seata-spring-boot-starter</artifactId>
        </dependency>
        <!-- cloud seata 2.0.0 -->
        <dependency>
            <groupId>com.alibaba.cloud</groupId>
            <artifactId>spring-cloud-starter-alibaba-seata</artifactId>
            <exclusions>
                <exclusion>
                    <groupId>io.seata</groupId>
                    <artifactId>seata-spring-boot-starter</artifactId>
                </exclusion>
            </exclusions>
        </dependency>
        <!-- openfeign 3.1.9 -->
        <dependency>
            <groupId>org.springframework.cloud</groupId>
            <artifactId>spring-cloud-starter-openfeign</artifactId>
        </dependency>
application.yml
server:
  port: 8088

spring:
  application:
    name: spring-boot-feign-seata1
  datasource:
    driver-class-name: com.mysql.cj.jdbc.Driver
    # 数据库必须包含 undo_log 表,如果没有则用 resources 目录下的undo_log.sql 创建
    url: jdbc:mysql://127.0.0.1:3306/dynamic?useUnicode=true&characterEncoding=UTF-8&autoReconnect=true&useSSL=false&serverTimezone=Asia/Shanghai
    username: root
    password: 123456

seata:
  tx-service-group: my_test_tx_group
SpringBootFeignSeata1Application.java
@MapperScan
@EnableFeignClients
// seata 版本兼容性问题,如果启动报错就要排除 SeataRestTemplateAutoConfiguration 自动配置
@SpringBootApplication(exclude = SeataRestTemplateAutoConfiguration.class)
public class SpringBootFeignSeata1Application {

    public static void main(String[] args) {
        SpringApplication.run(SpringBootFeignSeata1Application.class, args);
    }

}
User.java
@Data
@TableName("user")
public class User {
    @TableId(type = IdType.AUTO)
    private Integer id;
    private String name;
}
UserMapper.java
public interface UserMapper extends BaseMapper<User> {

}
UserController.java
@RestController
@RequiredArgsConstructor
public class UserController {
    private final UserService userService;

    @GetMapping("user")
    public String user(@RequestParam(name = "rollback") boolean rollback) {
        User user = new User();
        user.setName("Meta");
        try {
            userService.insert(rollback, user);
        } catch (Exception e) {
            return "rollback";
        }
        return "success";
    }

}
UserFeignClient.java(openfeign调用spring-boot-feign-seata2)
@FeignClient(name = "spring-boot-feign-seata2", url = "127.0.0.1:8089")
public interface UserFeignClient {

    @GetMapping("user")
    void user();

}
UserService.java(主要的)
@Slf4j
@Service
@RequiredArgsConstructor
public class UserService {
    private final UserMapper userMapper;
    private final UserFeignClient userFeignClient;

    /**
     * 全局事务
     * 1、pom.xml引入seata-spring-boot-starter
     * 2、pom.xml引入spring-cloud-starter-alibaba-seata(排除:seata-spring-boot-starter,因为前面已经引入了。)
     * 3、使用 @GlobalTransactional 全局事务注解开启全局事务控制(默认:Seata AT 模式)
     * 4、被调用方业务层需要引入 @Transactional 本地事务注解
     */
    @GlobalTransactional(rollbackFor = Exception.class)
    public void insert(boolean rollback, User user) {
        log.info("seata1 xid = {}", RootContext.getXID());
        userMapper.insert(user);
        userFeignClient.user();
        if (rollback) {
            throw new RuntimeException("rollback");
        }
    }
}
spring-boot-feign-seata2
pom.xml和spring-boot-feign-seata是一样的
application.yml
server:
  port: 8089

spring:
  application:
    name: spring-boot-feign-seata2
  datasource:
    driver-class-name: com.mysql.cj.jdbc.Driver
    # 数据库必须包含 undo_log 表,如果没有则用 resources 目录下的undo_log.sql 创建
    url: jdbc:mysql://127.0.0.1:3306/dynamic2?useUnicode=true&characterEncoding=UTF-8&autoReconnect=true&useSSL=false&serverTimezone=Asia/Shanghai
    username: root
    password: 123456

seata:
  tx-service-group: my_test_tx_group
SpringBootFeignSeata2Application.java
@MapperScan
// 被调用端引用 seata 默认 AT 模式
@EnableAutoDataSourceProxy
// seata 版本兼容性问题,如果启动报错就要排除 SeataRestTemplateAutoConfiguration 自动配置
@SpringBootApplication(exclude = SeataRestTemplateAutoConfiguration.class)
public class SpringBootFeignSeata2Application {

    public static void main(String[] args) {
        SpringApplication.run(SpringBootFeignSeata2Application.class, args);
    }

}
UserController.java
@RestController
@RequiredArgsConstructor
public class UserController {
    private final UserService userService;

    @GetMapping("user")
    public void user() {
        User user = new User();
        user.setName("Meta2");
        userService.insert(user);
    }

}
UserService.java
@Slf4j
@Service
@RequiredArgsConstructor
public class UserService {
    private final UserMapper userMapper;

    /**
     * 调用方用 openfeign 必须引入spring-cloud-starter-alibaba-seata,否则被调用方获取到的xid可能会为null
     * PS:被调用方可以不用引入
     */
    @Transactional(rollbackFor = Exception.class)
    public void insert(User user) {
        log.info("seata2 xid = {}", RootContext.getXID());
        userMapper.insert(user);
    }

}
上面重复的文件就不说了
启动两个项目
访问localhost:8088/user?rollback=true
返回rollback,2个数据库都没有新增数据库,验证分布式(AT)事务回滚成功
访问localhost:8088/user?rollback=false
返回success,2个数据库都新增了数据,验证分布式(AT)事务成功


 878
878


 被折叠的 条评论
为什么被折叠?
被折叠的 条评论
为什么被折叠?
 到【灌水乐园】发言


