


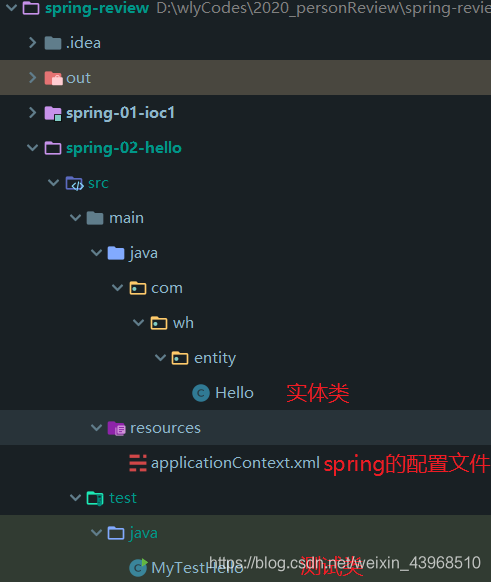
1.创建一个子项目
applicationContext.xml
<?xml version="1.0" encoding="UTF-8"?>
<beans xmlns="http://www.springframework.org/schema/beans"
       xmlns:xsi="http://www.w3.org/2001/XMLSchema-instance"
       xsi:schemaLocation="http://www.springframework.org/schema/beans
       http://www.springframework.org/schema/beans/spring-beans.xsd">
    <!-- 通过spring来创建对象,在spring称为bean
         id等价于原来new对象的句柄
     -->
    <bean id="hello" class="com.wh.entity.Hello">
        <!-- set方法 属性注入值 -->
        <property name="str" value="Spring你好!"></property>
    </bean>
</beans>
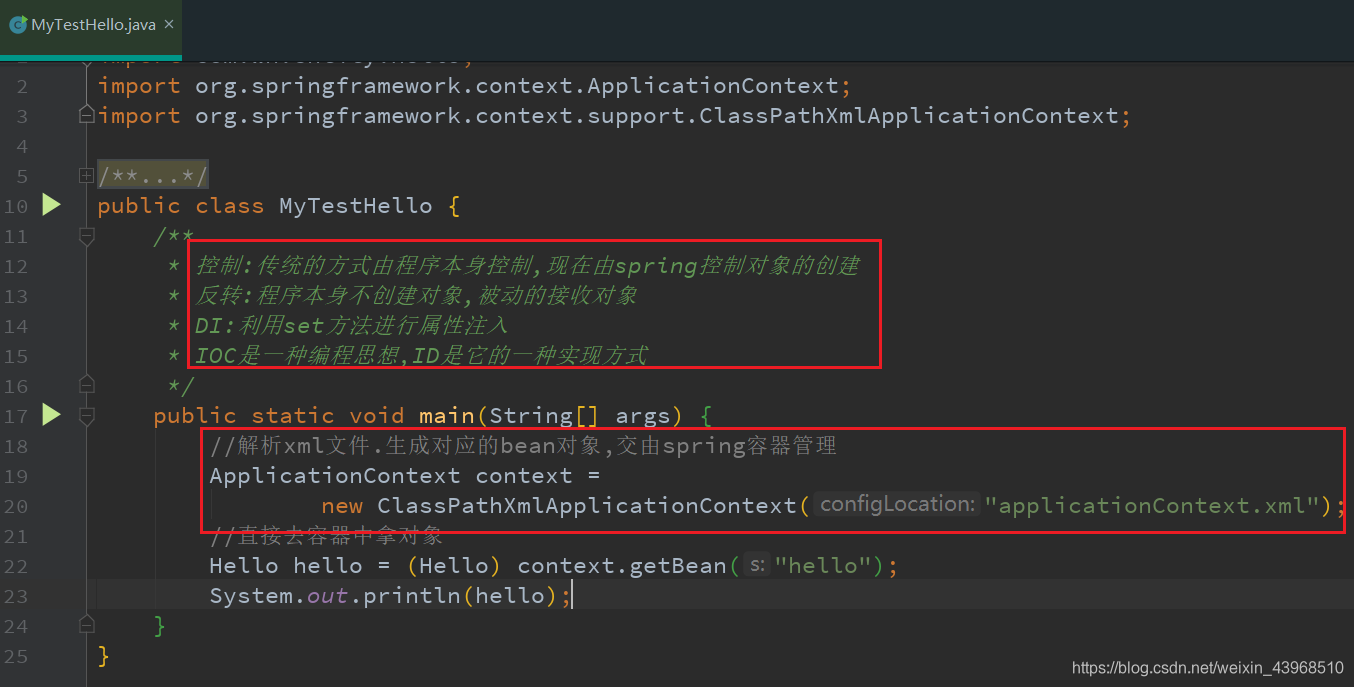
2.测试
3.ClassPathXmlApplicationContext源码分析
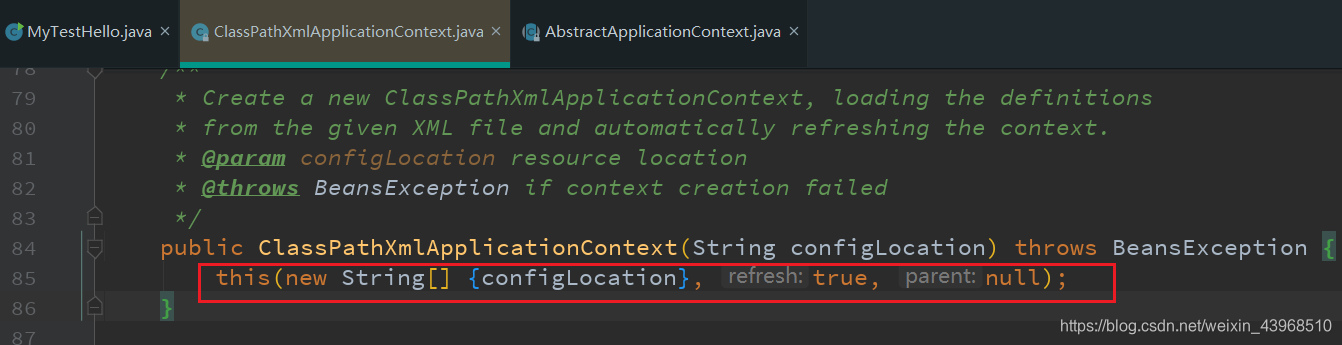
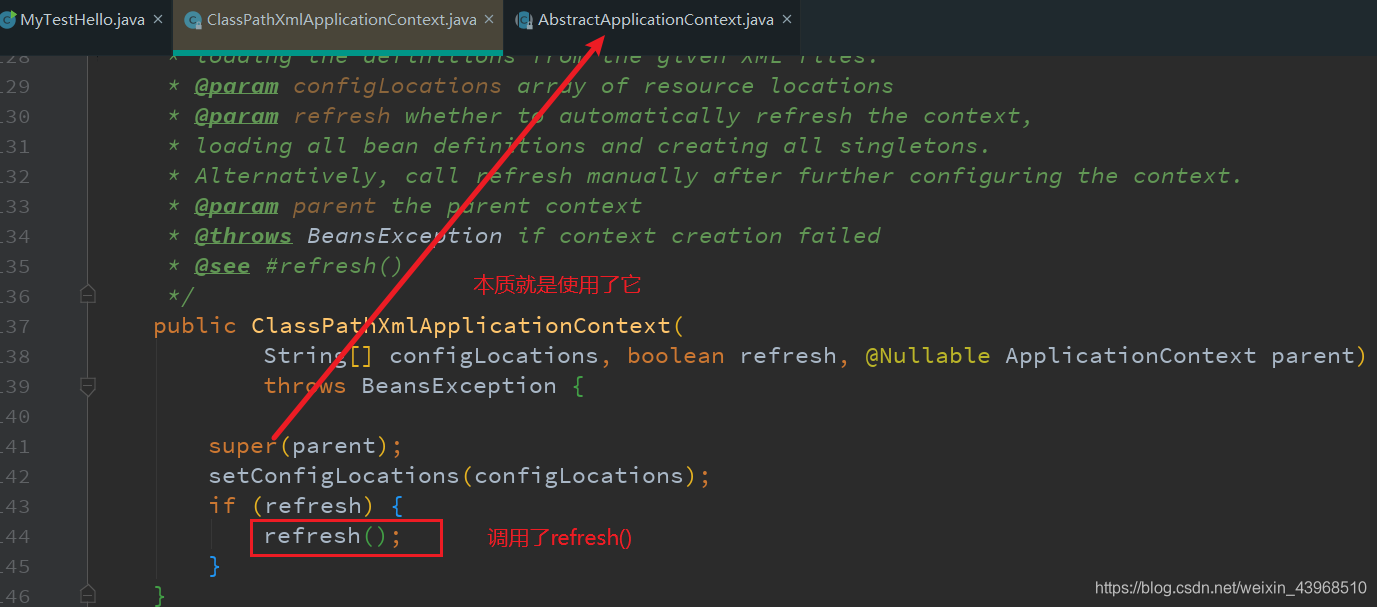
refresh()方法就是spring容器的入口,核心方法
下面的文章可以更深层次的理解该过程
https://blog.csdn.net/wang704987562/article/details/81273899
4.回到之前的ioc原型
案例1的ioc原型,现在我们通过spring容器管理测试
那么我们引入applicationContext.xml配置文件
<?xml version="1.0" encoding="UTF-8"?>
<beans xmlns="http://www.springframework.org/schema/beans"
       xmlns:xsi="http://www.w3.org/2001/XMLSchema-instance"
       xsi:schemaLocation="http://www.springframework.org/schema/beans
       http://www.springframework.org/schema/beans/spring-beans.xsd">
    <!-- 通过spring来创建对象,在spring称为bean
         id等价于原来new对象的句柄
     -->
    <!-- 注入dao层的实现类对象-->
    <bean id="daoMysql" class="com.wh.dao.impl.UserDaoMysqlImpl"/>
    <bean id="daoOracle" class="com.wh.dao.impl.UserDaoOracleImpl"/>

    <bean id="userService" class="com.wh.service.impl.UserServiceImpl">
        <!-- 引用spring容器创建好的对象,只需要修改这里即可 -->
        <property name="userDao" ref="daoMysql"/>
    </bean>

</beans>
重新测试下

想要修改dao层,只需要切换即可


 3105
3105


 被折叠的 条评论
为什么被折叠?
被折叠的 条评论
为什么被折叠?
 到【灌水乐园】发言


