


springboot maven打包之打入本地jar包并部署linux服务器运行无报错
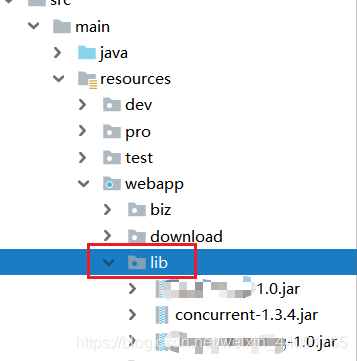
1、首先在项目中新建存放jar包的Directory,命名为lib(随意命名)。
2、在pom中自定义依赖。
		<dependency>
            <groupId>EDU.oswego.cs.dl.util.concurrent</groupId>
            <artifactId>concurrent</artifactId>
            <version>1.3.4</version> <!--自定义-->
            <scope>system</scope> <!--system,类似provided,需要显式提供依赖的jar以后,Maven就不会在Repository中查找它-->
            <systemPath>${project.basedir}/src/main/resources/webapp/lib/concurrent-1.3.4.jar</systemPath>
        </dependency>

图片“1”框中,名字自定义可随意写,建议根据jar包的路劲写。
图片“2”框中,名字自定义可随意写,建议根据jar包名称写。
图片“3”框中,版本号可随意写,建议根据jar包的版本写。
scope属性值必须填写为system。
systemPath属性值必须是要引入的lib包的路径,比如${project.basedir}/src/main/resources/webapp/lib/concurrent-1.3.4.jar。
3、最关键的一步,也是不同项目中差异性最多的一步。
(1)
          在<groupId>org.springframework.boot</groupId>
            <artifactId>spring-boot-maven-plugin</artifactId>
          所在的plugin标签中添加
			<includeSystemScope>true</includeSystemScope>
		  标签。
如图:
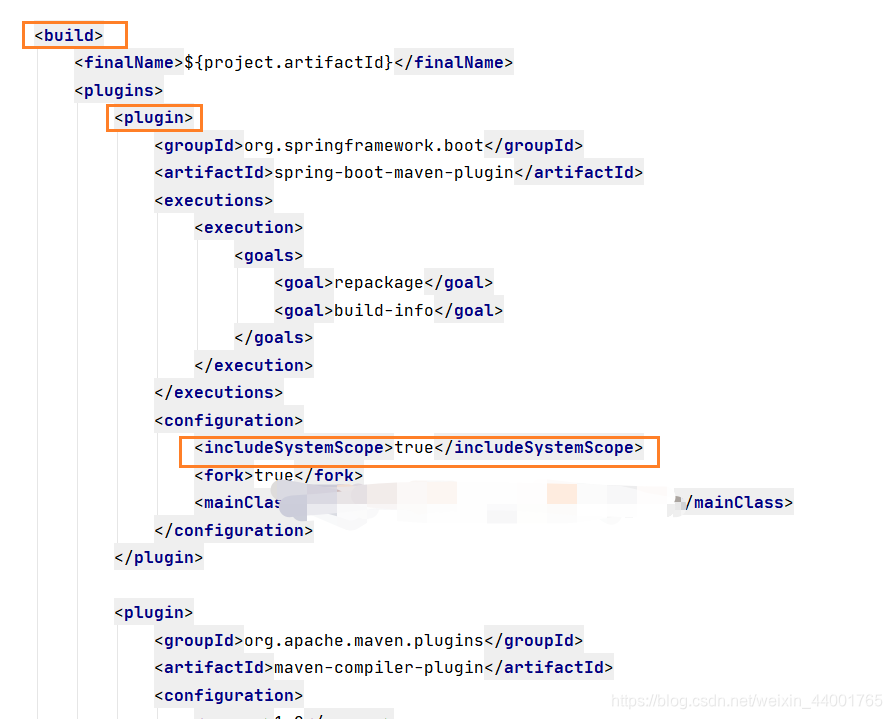
在build标签中的plugin标签中的configuration标签中加入,代表build时编译指定的系统文件。
<includeSystemScope>true</includeSystemScope>
(2)、因为pom中有两个plugin标签。本人测试下,在org.apache.maven.plugins此plugn标签加入< includeSystemScope> true </ includeSystemScope>,会报错!(文章最后说一下,另外一个项目同样是引入本地jar包,但是单个plugin的pom中是如何配置的,就不另开帖子了,方便比较。)
          在<groupId>org.apache.maven.plugins</groupId>
            <artifactId>maven-compiler-plugin</artifactId>
          所在的plugin标签中添加
			<includeSystemScope>true</includeSystemScope>
		  标签。
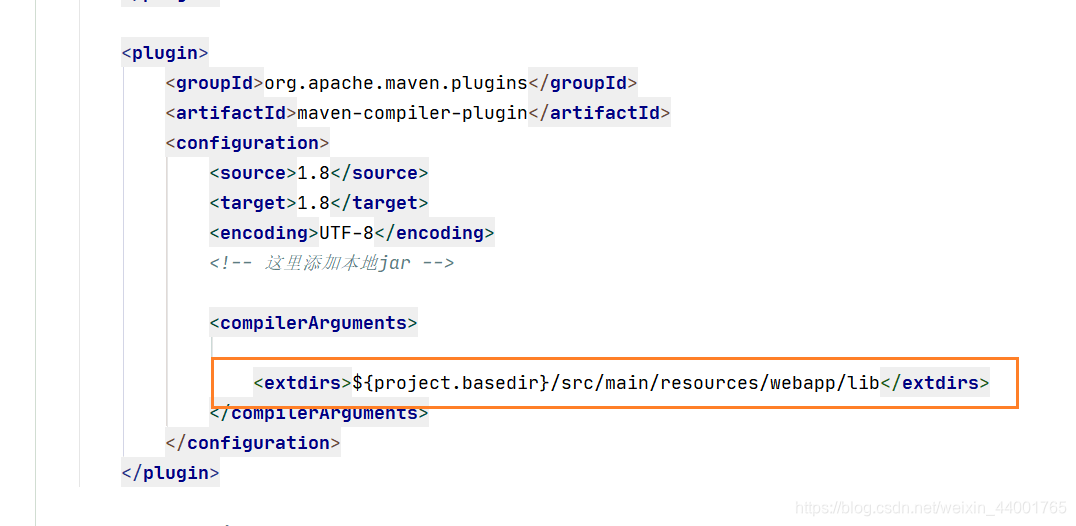
extdirs中填写要引入的lib包的路径。
点击clean 、rebuild project、install或者package。
至此本次打包如何配置结束。
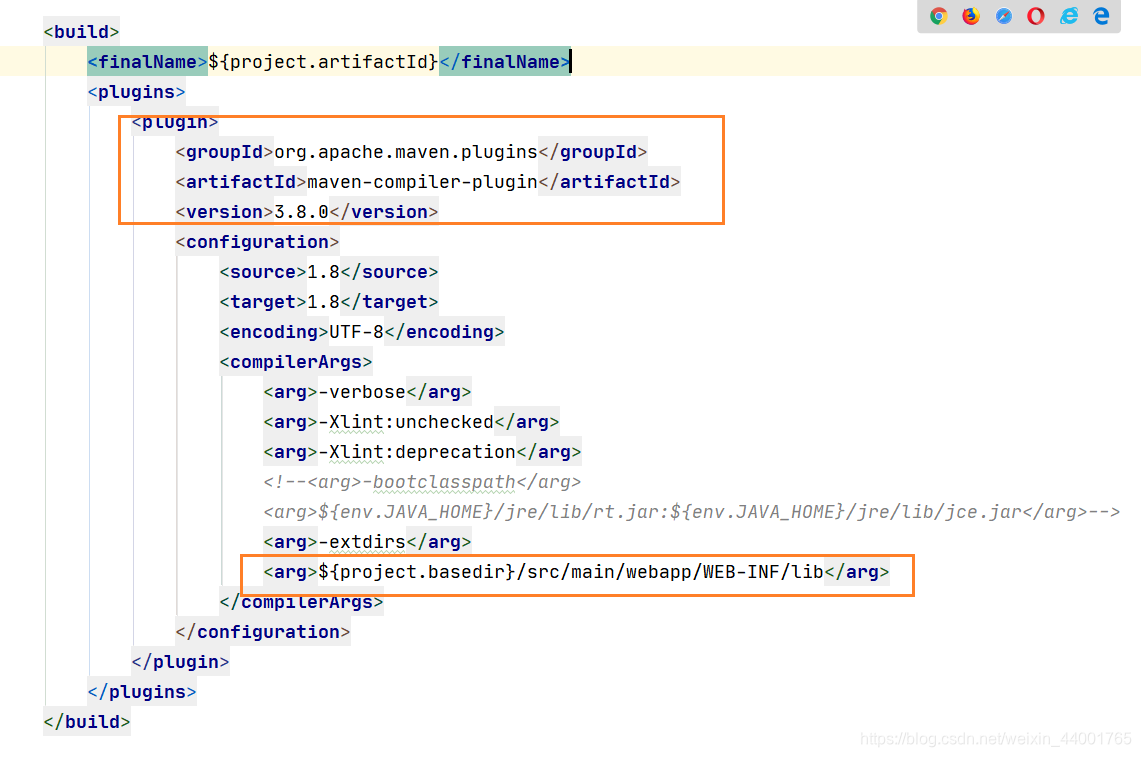
3、另外一个项目同样是引入本地jar包的pom中如何配置。
(1)bulid中只有单个plugin,并且不用在< dependencies>< /dependencies>中自定义jar包依赖,但是会在idea–>file–>Projuct Strccture中引入一下这些jar包,这种是idea工具帮你引入,上面是在pom中指定引入,个人觉得本质是一样的。然后就是 clean 、rebuild project、install或者package。


 1289
1289


 被折叠的 条评论
为什么被折叠?
被折叠的 条评论
为什么被折叠?
 到【灌水乐园】发言


