


一。项目情景
有时在我们项目当中需要存储一些固定值时,会使用一些配置文件来存储,例如最常见的.json文件。它可以用来存储相应的属性以及属性值,当你需要的时候进行提取,甚至还可以基于这个.json文件写一些条件查询的语句来获得自己需要的值。
本篇博客的示例项目就是将角色权限控制的信息存入到.json文件中,再使用Jackson2RepositoryPopulatorFactoryBean更换.json文件为数据源,在根据需求条件查询获取某个特定用户角色的权限控制关系。
二。项目搭建
说明:
该项目角色有三种,分别为student、teacher以及admin,我们可以控制对应角色的ui权限。简单来说就是控制各个角色能在页面上的操作,是只能看(READ),还是能看也能改(READ_WRITE)。
1)在pom.xml文件中引入springframework data依赖:
        <dependency>
            <groupId>org.springframework.data</groupId>
            <artifactId>spring-data-keyvalue</artifactId>
        </dependency>
2)角色权限控制rule_definitions.json内容如下:
[
  {
    "_class": "com.example.jsondemo.dto.RuleDefinition",
    "ruleId": 1,
    "roleId": "*",
    "resourceId": "studentNo",
    "resourceContext": "student-ui/update-form",
    "action": "READ"
  },
  {
    "_class": "com.example.jsondemo.dto.RuleDefinition",
    "ruleId": 2,
    "roleId": "teacher",
    "resourceId": "studentNo",
    "resourceContext": "student-ui/update-form",
    "action": "READ_WRITE"
  },
  {
    "_class": "com.example.jsondemo.dto.RuleDefinition",
    "ruleId": 3,
    "roleId": "admin",
    "resourceId": "studentNo",
    "resourceContext": "student-ui/update-form",
    "action": "READ_WRITE"
  },
  {
    "_class": "com.example.jsondemo.dto.RuleDefinition",
    "ruleId": 4,
    "roleId": "*",
    "resourceId": "studentName",
    "resourceContext": "student-ui/update-form",
    "action": "READ"
  },
  {
    "_class": "com.example.jsondemo.dto.RuleDefinition",
    "ruleId": 5,
    "roleId": "*",
    "resourceId": "studentAge",
    "resourceContext": "student-ui/update-form",
    "action": "READ"
  },
  {
    "_class": "com.example.jsondemo.dto.RuleDefinition",
    "ruleId": 6,
    "roleId": "*",
    "resourceId": "studentSex",
    "resourceContext": "student-ui/update-form",
    "action": "READ"
  },
  {
    "_class": "com.example.jsondemo.dto.RuleDefinition",
    "ruleId": 7,
    "roleId": "*",
    "resourceId": "studentPhone",
    "resourceContext": "student-ui/update-form",
    "action": "READ"
  }
]
各个属性解析:
_class:实体类所在的包位置,类似于连接数据库时对应实体的包位置。ruleId:计数标志roleId:用户角色Id,就是项目角色。“*”是通配符,在本项目中,代表匹配student、teacher以及admin三种项目角色。resourceId:资源Id,相当于前端UI界面的一个button的名称。resourceContext:资源上下文,相当于某个UI界面的名称。action:操作名称,代表该角色Id下有哪种操作权限。
3)RuleDefinition实体代码如下:
package com.example.jsondemo.dto;

import lombok.AllArgsConstructor;
import lombok.Builder;
import lombok.Data;
import lombok.NoArgsConstructor;
import org.springframework.data.annotation.Id;

import java.io.Serializable;

/**
 * @author Keson
 * @version 1.0
 * @description: TODO 权限控制实体
 * @date 2021/9/15 11:12
 */
@Data
@Builder
@NoArgsConstructor
@AllArgsConstructor
public class RuleDefinition implements Serializable {

    @Id
    private Integer ruleId;
    private String roleId;
    private String resourceId;
    private String resourceContext;
    private String action;
}
4)config配置类代码如下(更换配置源为上述自定义的json文件):
package com.example.jsondemo.config;

import org.springframework.beans.factory.annotation.Value;
import org.springframework.context.annotation.Bean;
import org.springframework.context.annotation.Configuration;
import org.springframework.core.io.ClassPathResource;
import org.springframework.core.io.Resource;
import org.springframework.data.repository.init.Jackson2RepositoryPopulatorFactoryBean;

/**
 * @author Keson
 * @version 1.0
 * @description: TODO 更换数据源配置
 * @date 2021/9/15 11:46
 */
@Configuration
public class RepositoryConfig {

    @Value("${rules.datasource}")
    private String ruleDefinitionFilePath;

    @Bean
    public Jackson2RepositoryPopulatorFactoryBean getRepository(){
        Jackson2RepositoryPopulatorFactoryBean factoryBean = new Jackson2RepositoryPopulatorFactoryBean();
        factoryBean.setResources( new Resource [] { new ClassPathResource(ruleDefinitionFilePath) } );
        return factoryBean;
    }
}
5)repository层代码如下:
package com.example.jsondemo.repository;

import com.example.jsondemo.dto.RuleDefinition;
import org.springframework.data.repository.CrudRepository;
import org.springframework.stereotype.Repository;

import java.util.List;

@Repository
public interface RuleDefinitionRepository extends CrudRepository<RuleDefinition, Integer> {

    List<RuleDefinition> findByResourceContextEqualsAndRoleIdEqualsOrResourceContextEqualsAndRoleIdIn
            (String wildcardResourceContext, String roleId, String resourceContext, List<String> roleIds);
}
6)service层代码如下:
package com.example.jsondemo.service;

import com.example.jsondemo.dto.RuleDefinition;

import java.util.List;

/**
 * @author Keson
 * @version 1.0
 * @description: TODO 权限控制service
 * @date 2021/9/15 11:31
 */
public interface RuleDefinitionService {

    List<RuleDefinition> getRules (String wildcardResourceContext, String roleId, String resourceContext, List<String> roleIds);
}
package com.example.jsondemo.service.impl;

import com.example.jsondemo.dto.RuleDefinition;
import com.example.jsondemo.repository.RuleDefinitionRepository;
import com.example.jsondemo.service.RuleDefinitionService;
import org.springframework.beans.factory.annotation.Autowired;
import org.springframework.stereotype.Service;

import java.util.List;

/**
 * @author Keson
 * @version 1.0
 * @description: TODO 权限控制service的实现
 * @date 2021/9/15 11:32
 */
@Service
public class RuleDefinitionServiceImpl implements RuleDefinitionService {

    @Autowired
    private RuleDefinitionRepository ruleDefinitionRepository;

    @Override
    public List<RuleDefinition> getRules(String wildcardResourceContext, String roleId, String resourceContext, List<String> roleIds) {
        return ruleDefinitionRepository.findByResourceContextEqualsAndRoleIdEqualsOrResourceContextEqualsAndRoleIdIn
                (wildcardResourceContext, roleId, resourceContext, roleIds);
    }
}
7)控制层代码如下:
package com.example.jsondemo.api;

import com.example.jsondemo.dto.RuleDefinition;
import com.example.jsondemo.service.RuleDefinitionService;
import io.swagger.annotations.ApiOperation;
import org.springframework.beans.factory.annotation.Autowired;
import org.springframework.web.bind.annotation.GetMapping;
import org.springframework.web.bind.annotation.RequestMapping;
import org.springframework.web.bind.annotation.RequestParam;
import org.springframework.web.bind.annotation.RestController;

import java.util.List;

/**
 * @author Keson
 * @version 1.0  权限控制API
 * @description: TODO
 * @date 2021/9/15 11:34
 */
@RestController
@RequestMapping("/v1")
public class RuleDefinitionApi {

    @Autowired
    private RuleDefinitionService RuleDefinitionService;

    @GetMapping("/getRules")
    List<RuleDefinition> getRules(@RequestParam("resourceContext")String resourceContext,
                                  @RequestParam("roleId")String roleId,
                                  @RequestParam("roleIds")List<String> roleIds){
        return RuleDefinitionService.getRules(resourceContext, roleId, resourceContext , roleIds);
    }
}
8)配置文件application.yml内容如下:
server:
  port: 8080 #端口号
  servlet:
    context-path: /${spring.application.name}

spring:
  application:
    name: json-demo #服务名称

# 配置json数据源所在位置
rules:
  datasource: "rules/rule_definitions.json"
9)启动类代码如下:
package com.example.jsondemo;

import org.springframework.boot.SpringApplication;
import org.springframework.boot.autoconfigure.SpringBootApplication;
import org.springframework.data.map.repository.config.EnableMapRepositories;

@EnableMapRepositories
@SpringBootApplication
public class JsonDemoApplication {

    public static void main(String[] args) {
        SpringApplication.run(JsonDemoApplication.class, args);
    }

}
注意:
@EnableMapRepositories注解一定不要忘记添加,负责项目会启动失败!!!
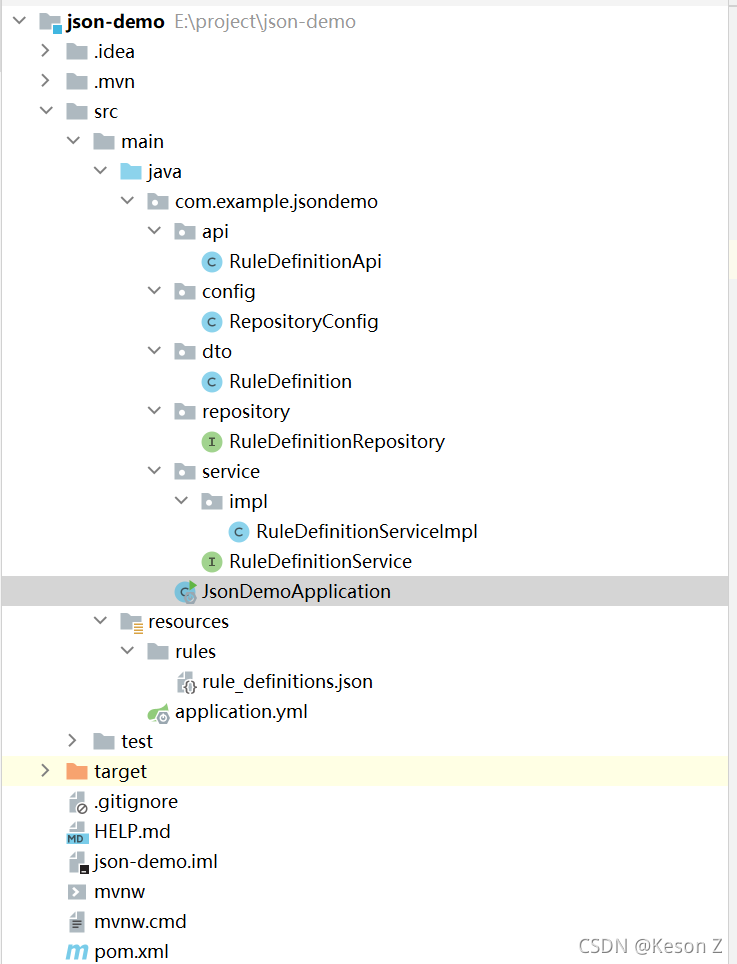
10)项目创建完成后杰哥如下:
三。测试
1)使用postman访问接口,先使用角色Id为student的进行传入:
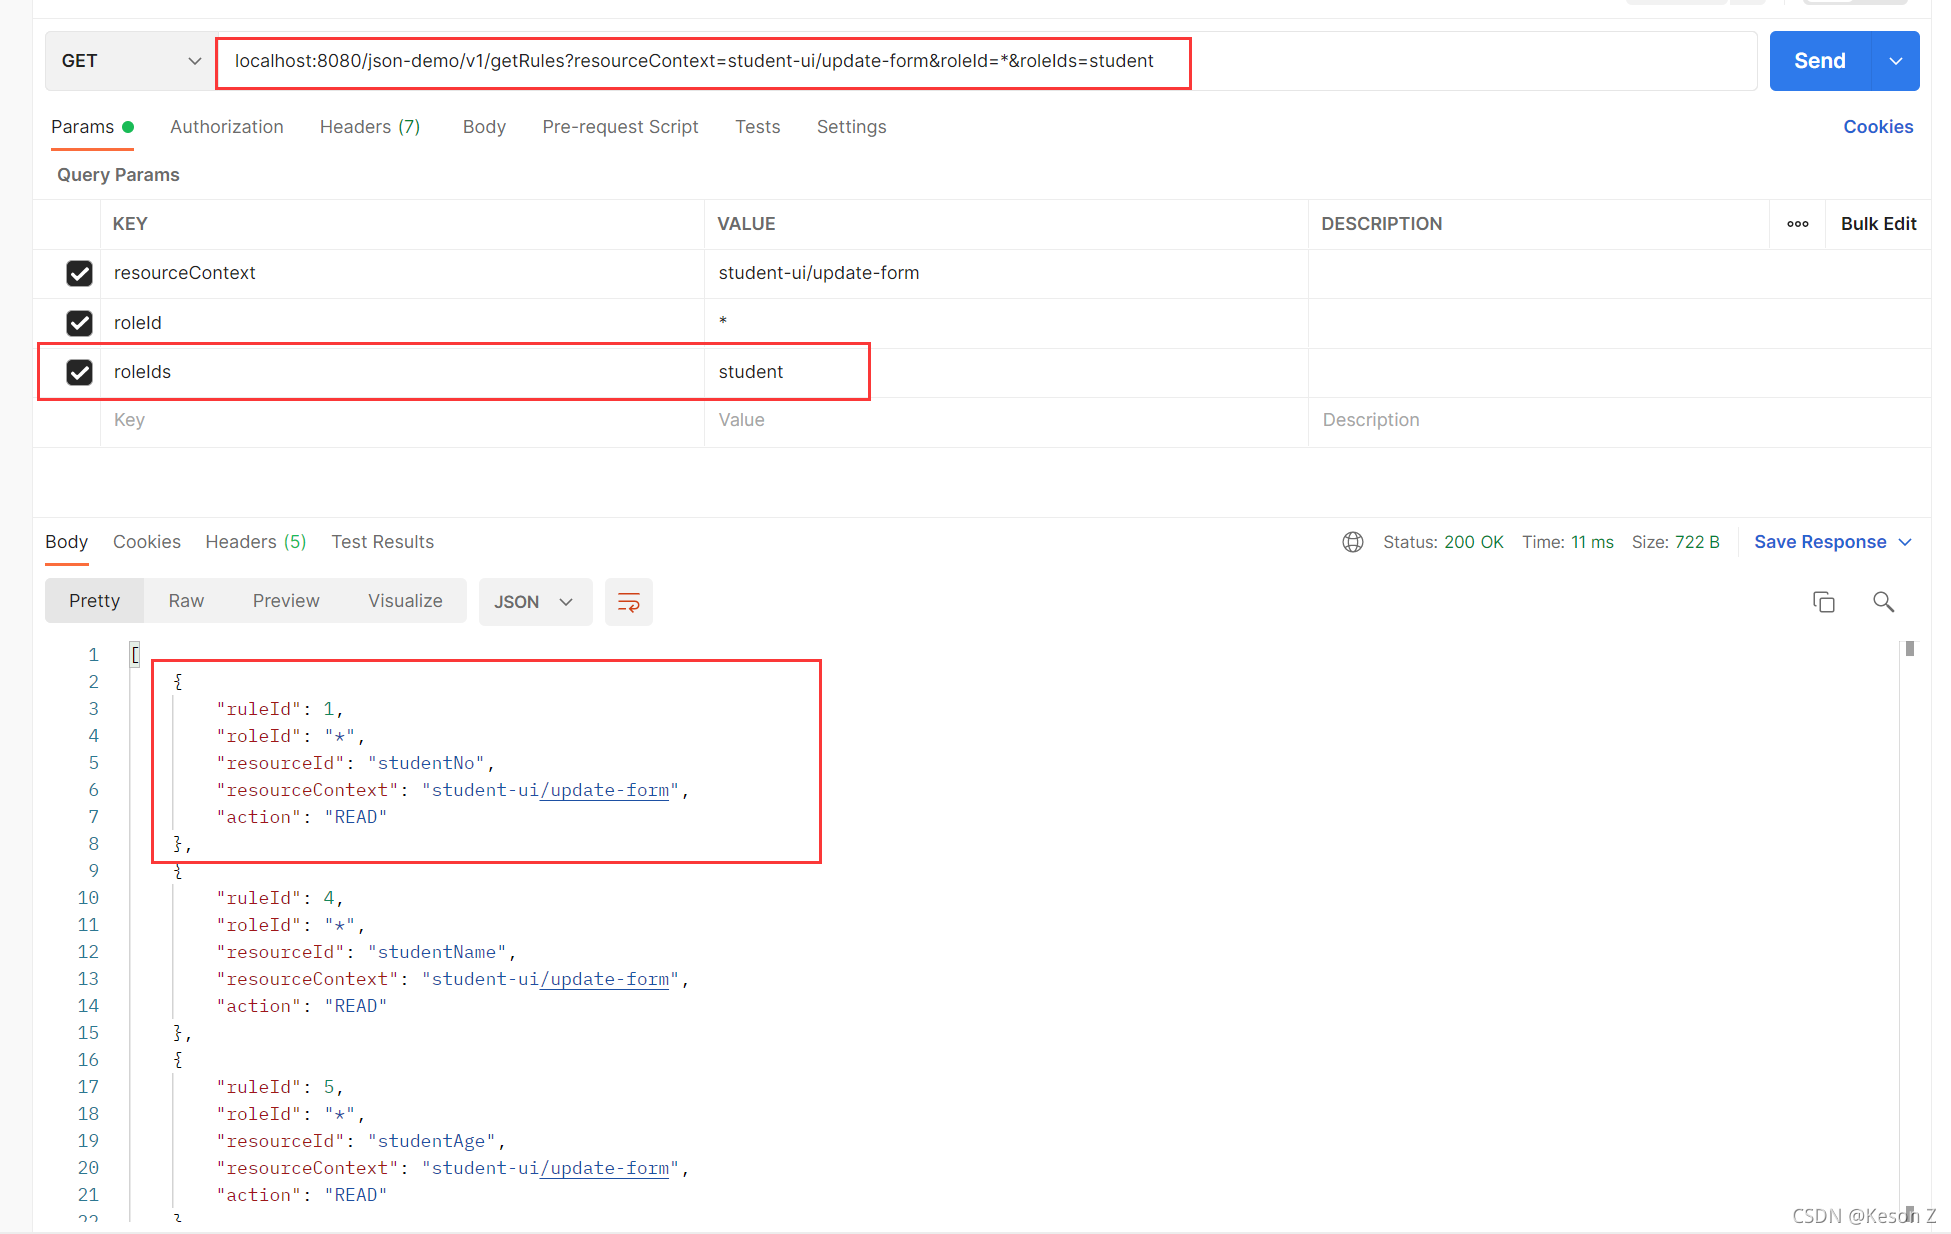
发现student角色对studentNo只有READ(读)权限。
2)更换为teacher再访问:
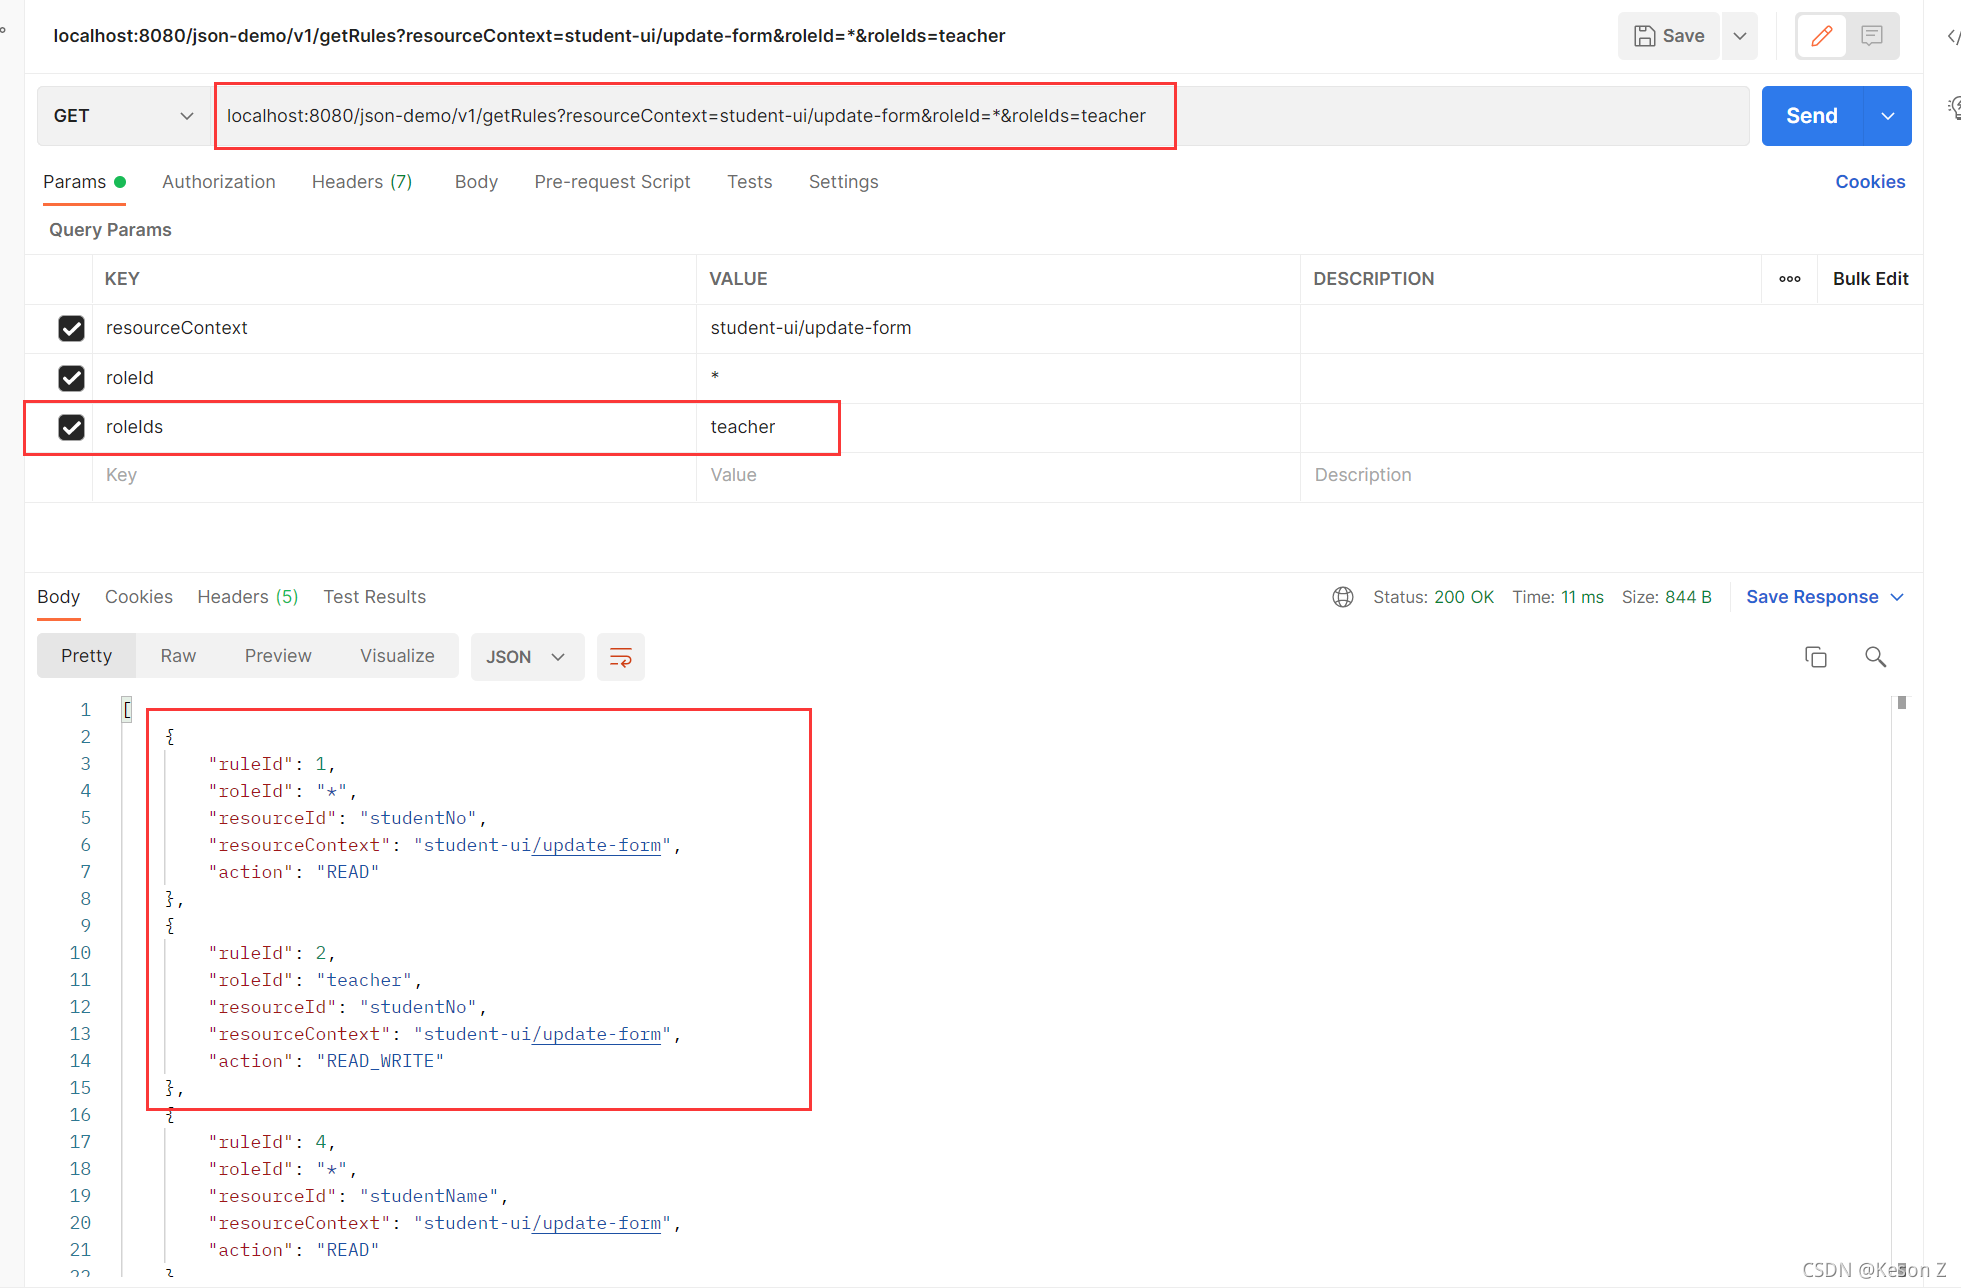
发现teacher角色对studentNo有READ_WRITE(读写)权限。
3)至此,我们使用json文件为数据源实现了角色权限控制的功能。
四。项目下载
本博客示例项目已经上传至gitee,需要的下伙伴可以自行下载:
https://gitee.com/hair_gel_king/json-demo/tree/master


 6万+
6万+


 被折叠的 条评论
为什么被折叠?
被折叠的 条评论
为什么被折叠?
 到【灌水乐园】发言


