SpringBoot POM配置文件 配置不同环境配置文件

POM配置文件

<profiles>
   <!-- 开发 -->
    <profile>
        <id>dev</id>
        <activation>
            <!--默认激活配置-->
            <activeByDefault>true</activeByDefault>
        </activation>
        <properties>
            <!--当前环境-->
            <profile.name>dev</profile.name>
        </properties>
    </profile>
    <!-- 测试 -->
    <profile>
        <id>stage</id>
        <properties>
            <!--当前环境-->
            <profile.name>stage</profile.name>
        </properties>
    </profile>
</profiles>

application.yml 配置文件

spring:
	profiles:
   		active: @profile.name@

配置完刷新一下pom文件,IDEA右侧就会有配置信息可选项

在这里插入图片描述

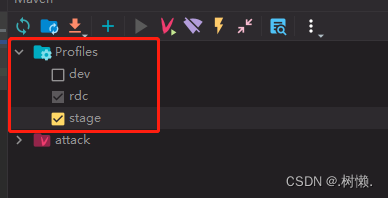
右键POM文件 maven -> reloadProject ,重新刷新一下配置信息,启动项目,就可以实现切换不同环境的配置文件了

  • 0
    点赞
  • 2
    收藏
    觉得还不错? 一键收藏
  • 0
    评论
使用Spring Boot Maven插件可以很方便地根据不同环境使用不同配置文件来打包WAR文件。 首先,在项目的资源目录下创建多个不同环境的配置文件,如application-dev.properties、application-prod.properties、application-test.properties等。 然后,在pom.xml文件中,为每个环境配置一个profile,指定相应的配置文件。 ``` <profiles> <profile> <id>dev</id> <activation> <activeByDefault>true</activeByDefault> </activation> <build> <resources> <resource> <directory>src/main/resources</directory> <includes> <include>application-dev.properties</include> </includes> </resource> </resources> </build> </profile> <profile> <id>prod</id> <build> <resources> <resource> <directory>src/main/resources</directory> <includes> <include>application-prod.properties</include> </includes> </resource> </resources> </build> </profile> <profile> <id>test</id> <build> <resources> <resource> <directory>src/main/resources</directory> <includes> <include>application-test.properties</include> </includes> </resource> </resources> </build> </profile> </profiles> ``` 接下来,在插件配置中,使用resource元素来指定每个环境的配置文件。 ``` <build> <plugins> <plugin> <groupId>org.springframework.boot</groupId> <artifactId>spring-boot-maven-plugin</artifactId> <configuration> <executable>true</executable> </configuration> </plugin> <plugin> <groupId>org.apache.maven.plugins</groupId> <artifactId>maven-assembly-plugin</artifactId> <executions> <execution> <id>make-assembly</id> <phase>package</phase> <goals> <goal>single</goal> </goals> <configuration> <finalName>my-project-${env}</finalName> <appendAssemblyId>false</appendAssemblyId> <descriptors> <descriptor>src/main/assembly/assembly.xml</descriptor> </descriptors> </configuration> </execution> </executions> </plugin> </plugins> </build> ``` 在上面的配置中,使用了一个单独的assembly.xml文件来定义如何打包WAR文件。在assembly.xml中,可以根据不同环境配置不同配置文件。 ``` <assembly xmlns:xsi="http://www.w3.org/2001/XMLSchema-instance" xmlns="http://maven.apache.org/ASSEMBLY/2.0.0" xsi:schemaLocation="http://maven.apache.org/ASSEMBLY/2.0.0 http://maven.apache.org/xsd/assembly-2.0.0.xsd"> <id>war</id> <formats> <format>war</format> </formats> <fileSets> <fileSet> <directory>${project.basedir}/src/main/resources</directory> <outputDirectory>/</outputDirectory> <includes> <include>application*.properties</include> </includes> </fileSet> </fileSets> </assembly> ``` 最后,使用命令mvn -P dev package可以选择不同profile进行打包,生成的WAR文件会根据不同的环境使用相应的配置文件。例如,使用mvn -P dev package会使用application-dev.properties配置文件进行打包,生成的WAR文件名为my-project-dev.war。

“相关推荐”对你有帮助么?

  • 非常没帮助
  • 没帮助
  • 一般
  • 有帮助
  • 非常有帮助
提交
评论
添加红包

请填写红包祝福语或标题

红包个数最小为10个

红包金额最低5元

当前余额3.43前往充值 >
需支付:10.00
成就一亿技术人!
领取后你会自动成为博主和红包主的粉丝 规则
hope_wisdom
发出的红包
实付
使用余额支付
点击重新获取
扫码支付
钱包余额 0

抵扣说明:

1.余额是钱包充值的虚拟货币,按照1:1的比例进行支付金额的抵扣。
2.余额无法直接购买下载,可以购买VIP、付费专栏及课程。

余额充值