


 本文详细介绍了如何在Apache服务器上配置HTTPS,包括HTTP与HTTPS的概念对比,SSL证书的安装与配置,以及如何将HTTP请求重定向到HTTPS,确保网站安全和数据加密。
最近公司项目考虑到安全性要使用
https,于是领导就把这个任务交给了我,今天就一次性搞懂https如何配置。

文章目录
一、HTTP和HTTPS概念
超文本传输协议HTTP协议被用于在Web浏览器和网站服务器之间传递信息,HTTP协议以明文方式发送内容,不提供任何方式的数据加密,如果攻击者截取了Web浏览器和网站服务器之间的传输报文,就可以直接读懂其中的信息,因此,HTTP协议不适合传输一些敏感信息,比如:信用卡号、密码等支付信息。
为了解决HTTP协议的这一缺陷,需要使用另一种协议:安全套接字层超文本传输协议HTTPS,为了数据传输的安全,HTTPS在HTTP的基础上加入了SSL/TLS协议,SSL/TLS依靠证书来验证服务器的身份,并为浏览器和服务器之间的通信加密。
也就是说https在进行数据加密传输、身份认证等网络协议中要比http安全的多。
二、HTTP和HTTPS区别
- https协议是需要到CA申请证书的,一般免费证书较少,因而需要一定费用,在后面的配置中,证书是公司已经申请好的;
- http是超文本传输协议,信息是明文传输,https则是具有安全性的ssl/tls加密传输协议;
- http和https的连接方式是不同的,用的端口也不一样,前者是80,后者是443;
- http的连接很简单,是无状态的;HTTPS协议是由SSL/TLS+HTTP协议构建的可进行加密传输、身份认证的网络协议,比http协议安全。
三、Apache安装
因为公司使用的是Apache服务,所以我就用它来演示,考虑到一些小伙伴可能没有使用过Apache服务,这里我带领大家一起来安装一下。
1. 通过ssh连接到我们的服务器
ssh iyongbao@10.xx.xx.xx
password:
iyongbao是我们服务器的主机名,@后面是服务器ip
2. 使用yum安装apache
-
通过
yum来下载安装apache[root@iyongbao ~]# yum install httpd -y # 启动apache [root@iyongbao ~]# systemctl start httpd # 设置开机自启动 [root@iyongbao ~]# systemctl enable httpd # 查看服务是否启动 [root@iyongbao ~]# netstat -lntp |grep http tcp6 0 0 :::443 :::* LISTEN 1368511/httpd tcp6 0 0 :::80 :::* LISTEN 1368511/httpd因为我这里是配置好https服务了,所以端口有一个443在运行。
-
访问网站
通过
域名或ip就可以访问到apache的默认页,apache的默认端口是80,后面我们会让80强制跳转到443。
-
apache项目路径
上边显示的内容是apache的默认页,我们可以找到它的路径。
# 配置web页面(apache默认web路径)
[root@iyongbao ~]# cat /var/www/html/index.html
- apache配置文件
# 通过配置这个文件可以改变我们的端口和项目路径
[root@iyongbao ~]# cat /etc/httpd/conf/httpd.conf

# DocumentRoot: The directory out of which you will serve your
DocumentRoot "/var/www/html"
注意:当你修改了配置文件之后记得要重启
[root@iyongbao ~]# systemctl restart httpd
四、配置证书
证书如果是工作中,一般公司都会去申请,这里我也是直接使用申请下来的。
1. 安装ssl证书模块
# 安装mod_ssl模块
[root@iyongbao ~]# yum install mod_ssl -y

#查看安装的mod_ssl
[root@iyongbao ~]# rpm -qa mod_ssl
mod_ssl-2.4.57-5.el9.x86_64

# 创建证书的存放目录
[root@iyongbao ~]# mkdir /etc/httpd/ssl
[root@iyongbao ~]# ll /etc/httpd/
2. 配置https
当我们安装好mod_ssl模块后,在我们的/etc/httpd/conf.d目录下会生成一个ssl.conf,下面我们来配置一下这个文件。
# ssl.conf
[root@iyongbao ~]# egrep '^[^#]' /etc/httpd/conf.d/ssl.conf
Listen 443 https
SSLPassPhraseDialog exec:/usr/libexec/httpd-ssl-pass-dialog
SSLSessionCache shmcb:/run/httpd/sslcache(512000)
SSLSessionCacheTimeout 300
SSLRandomSeed startup file:/dev/urandom 256
SSLRandomSeed connect builtin
<VirtualHost _default_:443>
ServerName utouch-vn-qms-api.ces.myfiinet.com
ErrorLog logs/ssl_error_log
TransferLog logs/ssl_access_log
LogLevel warn
SSLEngine on #启用SSL功能
SSLProtocol all -SSLv2 -SSLv3 -TLSv1 -TLSv1.1
SSLCipherSuite HIGH:!aNULL:!MD5:!SEED:!IDEA
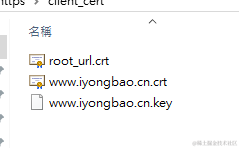
# 配置证书
SSLCertificateFile /etc/httpd/www.iyognbao.cn.crt
SSLCertificateKeyFile /etc/httpd/www.iyongbao.cn.key
SSLCertificateChainFile /etc/httpd/ssl/root_url.crt
# 配置项目的路径
<Directory /var/www/my-project>
Options Indexes FollowSymLinks
AllowOverride All
Order deny,allow
Allow from all
</Directory>
</VirtualHost>
#重启apache服务
[root@iyongbao ~]# systemctl restart httpd
3. https访问网站
配置好就可以使用https去访问我们的网站了。
https://www.xxxxxx.cn/
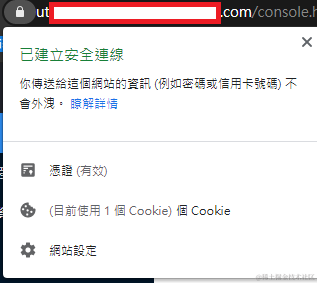
可以看到我们的网站已经成功上锁了,到此https配置成功。
五、Apache 80跳转443
当我们不以
https://开头时,默认是去访问apache的80(http)端口,但是为了安全我们要http去跳转到https上,已达到安全的目的。
修改ssl.conf文件
# /etc/httpd/conf.d/ssl.conf
<VirtualHost *:80>
    ServerName www.iyongbao.cn
    RewriteEngine on
    RewriteCond %{SERVER_PORT} !^443$
    RewriteRule ^/?(.*)$ https://%{SERVER_NAME}/$1 [L,R]
</VirtualHost>

#重启apache服务
[root@iyongbao ~]# systemctl restart httpd
六、总结
这篇文章意在让大家了解https是如何配置的,对于技术其实也是一种增长,虽然我们不需要经常配置它,但是掌握了肯定没有坏事。


 3904
3904

 被折叠的 条评论
为什么被折叠?
被折叠的 条评论
为什么被折叠?
 到【灌水乐园】发言


