


前言
在基础篇,主要实现的是谷粒商场的基本业务。基础阶段完成的业务部分以及所涉及的技术栈包含以下部分。
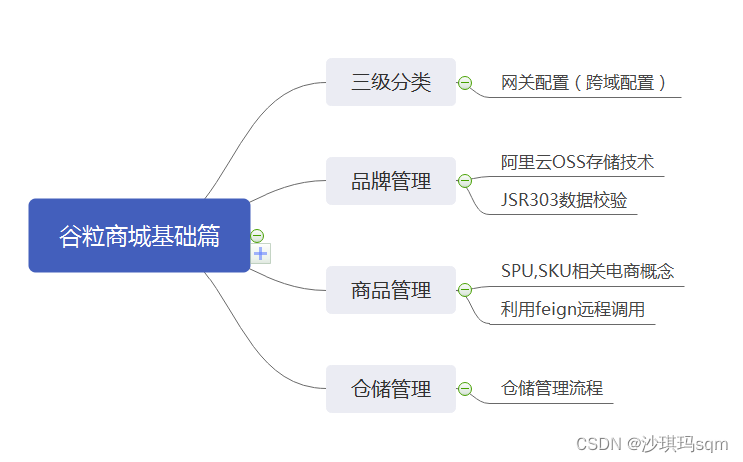
(一)三级菜单
1.1配置网关
为什么要配置网关:不同微服务所在的端口是不同的,使用网关来动态路由到任何一个微服务
1.2网关路径重写
在登陆时,如果不进行路径重写,会发生验证码失效
不配置路径重写时前端发出的请求:http://localhost:88/api/captcha.jpg?uuid=69c79f02-d15b-478a-8465-a07fd09001e6
然而验证码的正确访问请求时:http://localhost:8001/renren-fast/captcha.jpg?uuid=69c79f02-d15b-478a-8465-a07fd09001e6
spring:
  cloud:
    gateway:
      routes:
        - id: admin_route
          uri: lb://renren-fast
          predicates:
            - Path=/api/**
          filters:
            - RewritePath=/api/?(?<segment>.*), /renren-fast/$\{segment}
此后每一个微服务我们都要对其进行相应的配置,来让网关进行动态路由
1.2三级菜单的实现
三级菜单前端实现,前端发出请求http://localhost:88/api/product/category/list/tree
 getMenus() {
      this.$http({
        url: this.$http.adornUrl("/product/category/list/tree"),
        method: "get"
      }).then(({ data }) => {
        console.log("成功获取到菜单数据...", data.data);
        this.menus = data.data;
      });
    },
三级菜单后台业务
在controller层接受请求,调用service执行相应的方法,实现类代码如下所示
    @Override
    public List<CategoryEntity> listWithTree() {
        //1、查出所有分类
        List<CategoryEntity> entities = baseMapper.selectList(null);
        //2、组成父子结构
        //2.1找到所有的一级分类
        List<CategoryEntity> level1Menus = entities.stream().filter((categoryEntity) -> {
            return categoryEntity.getParentCid() == 0;
        }).map((menu)->{
            menu.setChildren(getChildrens(menu,entities));
            return menu;
        }).sorted((menu1,menu2)->{
            return (menu1.getSort() ==null?0:menu1.getSort())- (menu2.getSort()==null?0:menu2.getSort());
        }).collect(Collectors.toList());//把流中的元素以list形式收集起来

        return entities;
    }**
(二)品牌管理
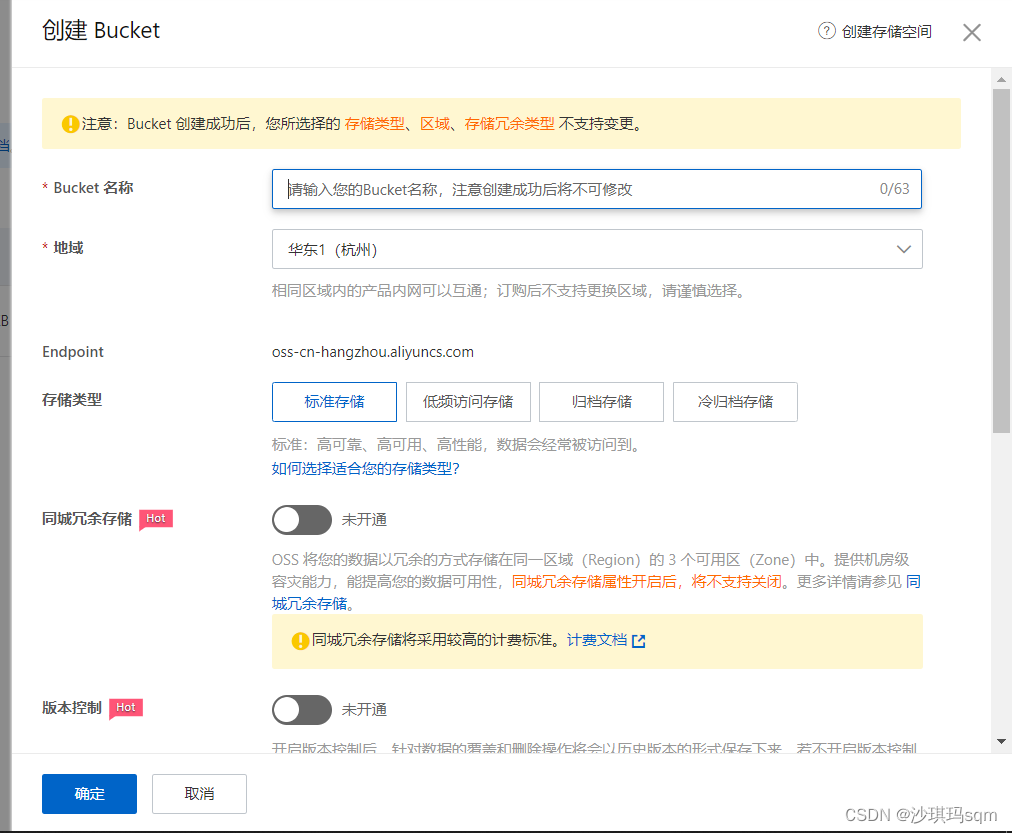
2.1云存储服务开通以及使用
商城中使用的图像等数据采用阿里云服务进行存储

创建一个bucket来进行数据存储
2.2oss整合
2.2.1创建第三方微服务

2.2.2依赖注入
依赖注入
springboot版本:2.6.7
springcloud版本:2021.0.2
springcloudalibaba版本:2021.0.1.0
采用下面方式可以正常导入
   <dependency>
            <groupId>com.alibaba.cloud</groupId>
            <artifactId>aliyun-oss-spring-boot-starter</artifactId>
            <version>1.0.0</version>
            <exclusions>
                <exclusion>
                    <groupId>com.aliyun</groupId>
                    <artifactId>aliyun-java-sdk-oss</artifactId>
                </exclusion>
            </exclusions>
        </dependency>
        <dependency>
            <groupId>com.aliyun</groupId>
            <artifactId>aliyun-java-sdk-core</artifactId>
            <version>4.5.7</version>
        </dependency>
2.2.3配置文件
要进行文件上传下载功能,所以需要配置相关的云服务签名
#application.xml
spring:
  cloud:
    nacos:
      discovery:
        server-addr: 127.0.0.1:8848
  application:
    name: gulimall-third-party

server:
  port: 30000

alibaba:
  cloud:
    access-key: LTAI5tGQCDBq9KvQofBe6
    secret-key: 97lusyunOAfjpo9BgSpqtA4FmR
    oss:
      endpoint: oss-cn-beijing.aliyuncs.com
      bucket: gulimall-sgyj
#bootstrap.properties
spring.application.name=gulimall-third-party
spring.cloud.nacos.config.server-addr=127.0.0.1:8848
spring.cloud.nacos.config.namespace=f56be649-7ce0-4497-91b5-0d578626678f
spring.cloud.nacos.config.extension-configs[0].data-id=oss.yml
spring.cloud.nacos.config.extension-configs[0].group=DEFAULT_GROUP
spring.cloud.nacos.config.extension-configs[0].refresh=true
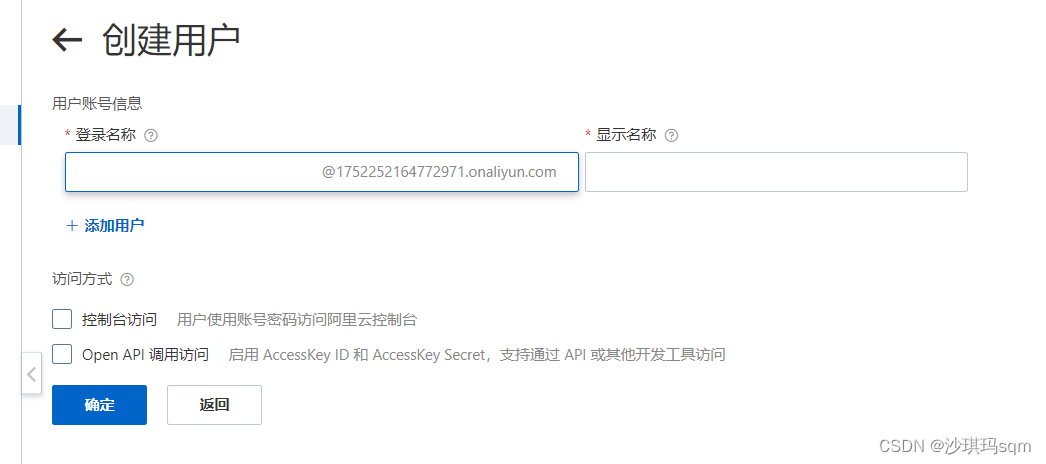
获取云服务签名的方式
点击AccessKey管理
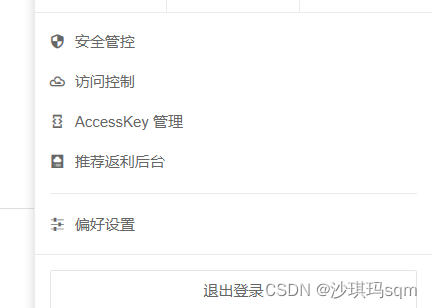
点击使用子用户
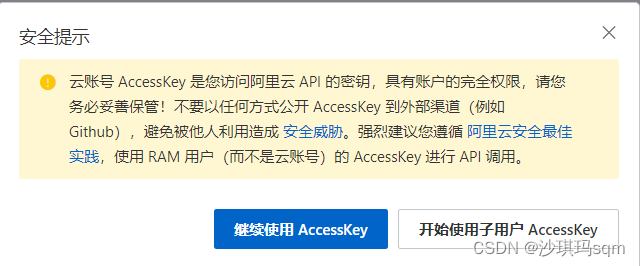
创建用户,选择openAPI,之后会生成AccessKey
2.2.4数据上传功能
数据上传可以选择两种方式
- 可以由客户端向服务器上传数据,服务器再向云存储中存入数据
- 客户端只向服务器中获取云服务的数字签名,再由客户端直接上传到云存储中
第一种方式会给服务器带来较大的带宽耗费,所以使用第二种方式
(1)具体实现
获取云服务的数字签名
package com.sgyj.gulimall.thirdparty.controller;


import com.aliyun.oss.OSSClient;
import com.aliyun.oss.common.utils.BinaryUtil;
import com.aliyun.oss.model.MatchMode;
import com.aliyun.oss.model.PolicyConditions;
import com.sgyj.common.utils.R;
import org.springframework.beans.factory.annotation.Value;
import org.springframework.web.bind.annotation.RequestMapping;
import org.springframework.web.bind.annotation.RestController;

import javax.annotation.Resource;
import java.text.SimpleDateFormat;
import java.util.Date;
import java.util.LinkedHashMap;
import java.util.Map;
@RestController
public class OssController {

    @Resource
    OSSClient ossClient;

    @Value("${alibaba.cloud.oss.endpoint}")
    private String endpoint;

    @Value("${alibaba.cloud.oss.bucket}")
    private String bucket;

    @Value("${alibaba.cloud.access-key}")
    private String accessId;

    /**
     * 用户上传有两种方式
     * (一)先提交给服务器  服务器再上传到云中  具体测试代码见src\test\java\com\sgyj\gulimall\thirdparty\GulimallThirdPartyApplicationTests.java
     * 1、引入oss-starter
     * 2、配置key,endpoint相关信息即可
     * 3、使用OSSClient 进行相关操作
     * 这种方式会对服务器造成巨大的带宽占用所以使用二
     * (二)用户向服务器要到阿里云数字签名  然后由客户端直接向云中上传数据
     */

    //向服务器要到阿里云数字签名  然后由客户端直接向云中上传数据
    //这里的policy是向服务器要到阿里云数字签名的方法
    @RequestMapping("/oss/policy")
    public R policy() {

//        access-key: LTAI5tGQCDXRFBq9KvQofBe6
//        secret-key: 97lusyunOAwaogfjpo9BgSpqtA4FmR
//        oss:
//        endpoint: oss-cn-beijing.aliyuncs.com
//        bucket: gulimall-sgyj

        //https://gulimall-hello.oss-cn-beijing.aliyuncs.com/hahaha.jpg

//        String bucket="gulimall-sgyj";
//        String endpoint="oss-cn-beijing.aliyuncs.com";
//        String accessId="LTAI5tGQCDXRFBq9KvQofBe6";
        String host = "https://" + bucket + "." + endpoint; // host的格式为 bucketname.endpoint
        //System.out.println(bucket);
        //System.out.println(endpoint);
        // callbackUrl为 上传回调服务器的URL,请将下面的IP和Port配置为您自己的真实信息。
//        String callbackUrl = "http://88.88.88.88:8888";
        String format = new SimpleDateFormat("yyyy-MM-dd").format(new Date());
        String dir = format + "/"; // 用户上传文件时指定的前缀。 当天上传的放在当天日期的文件夹下

        Map<String, String> respMap = null;
        try {
            long expireTime = 30;
            long expireEndTime = System.currentTimeMillis() + expireTime * 1000;
            Date expiration = new Date(expireEndTime);
            PolicyConditions policyConds = new PolicyConditions();
            policyConds.addConditionItem(PolicyConditions.COND_CONTENT_LENGTH_RANGE, 0, 1048576000);
            policyConds.addConditionItem(MatchMode.StartWith, PolicyConditions.COND_KEY, dir);

            String postPolicy = ossClient.generatePostPolicy(expiration, policyConds);
            byte[] binaryData = postPolicy.getBytes("utf-8");
            String encodedPolicy = BinaryUtil.toBase64String(binaryData);
            String postSignature = ossClient.calculatePostSignature(postPolicy);

            respMap = new LinkedHashMap<String, String>();
            respMap.put("accessid", accessId);
            respMap.put("policy", encodedPolicy);
            respMap.put("signature", postSignature);
            respMap.put("dir", dir);
            respMap.put("host", host);
            respMap.put("expire", String.valueOf(expireEndTime / 1000));
            // respMap.put("expire", formatISO8601Date(expiration));


        } catch (Exception e) {
            // Assert.fail(e.getMessage());
            System.out.println(e.getMessage());
        }

        return R.ok().put("data",respMap);
    }
//    @RequestMapping("/oss/aa")
//    public int a(){
//        int b=10;
//        System.out.println("nihaoi");
//        return b;
//    }
}
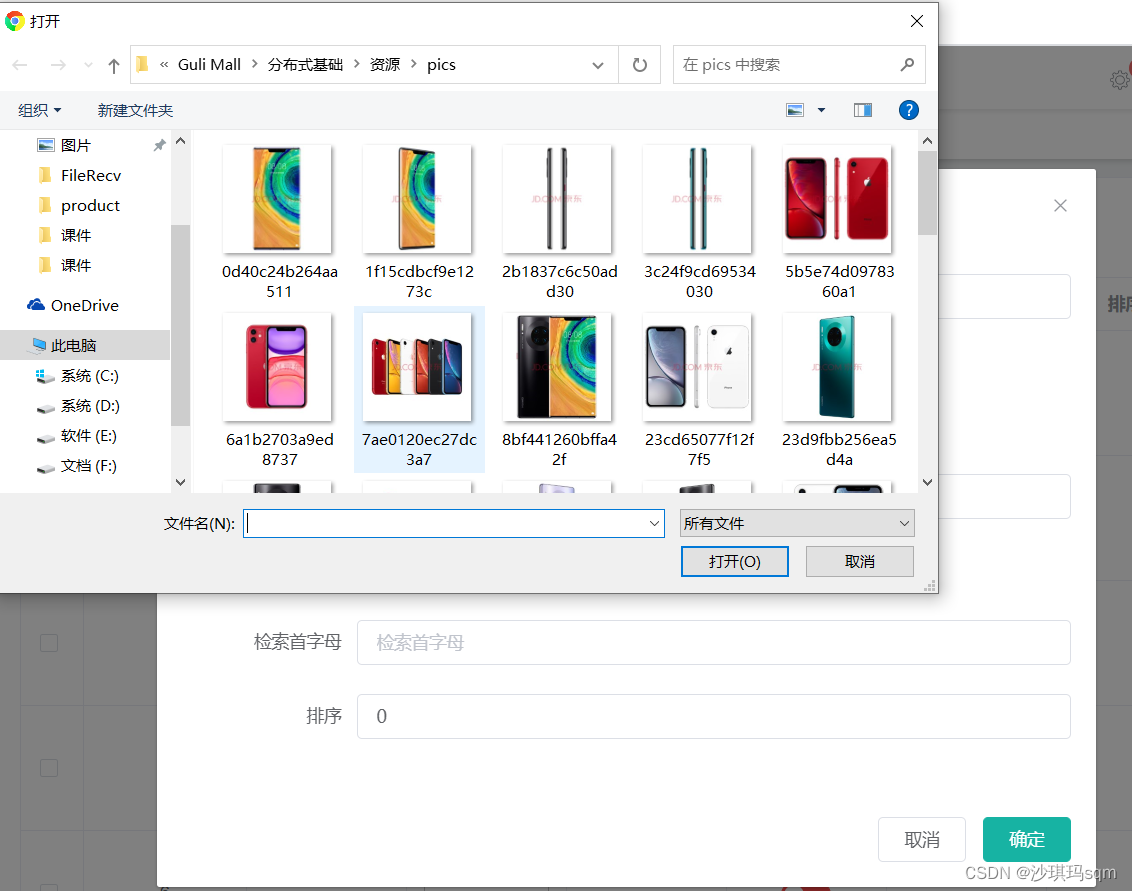
客户端上传使用前端上传组件
<template>
  <div>
    <el-upload
      action="http://gulimall-sgyj.oss-cn-beijing.aliyuncs.com"
      :data="dataObj"
      list-type="picture"
      :multiple="false" :show-file-list="showFileList"
      :file-list="fileList"
      :before-upload="beforeUpload"
      :on-remove="handleRemove"
      :on-success="handleUploadSuccess"
      :on-preview="handlePreview">
      <el-button size="small" type="primary">点击上传</el-button>
      <div slot="tip" class="el-upload__tip">只能上传jpg/png文件,且不超过10MB</div>
    </el-upload>
    <el-dialog :visible.sync="dialogVisible">
      <img width="100%" :src="fileList[0].url" alt="">
    </el-dialog>
  </div>
</template>
<script>
   import {policy} from './policy'
   import { getUUID } from '@/utils'

  export default {
    name: 'singleUpload',
    props: {
      value: String
    },
    computed: {
      imageUrl() {
        return this.value;
      },
      imageName() {
        if (this.value != null && this.value !== '') {
          return this.value.substr(this.value.lastIndexOf("/") + 1);
        } else {
          return null;
        }
      },
      fileList() {
        return [{
          name: this.imageName,
          url: this.imageUrl
        }]
      },
      showFileList: {
        get: function () {
          return this.value !== null && this.value !== ''&& this.value!==undefined;
        },
        set: function (newValue) {
        }
      }
    },
    data() {
      return {
        dataObj: {
          policy: '',
          signature: '',
          key: '',
          ossaccessKeyId: '',
          dir: '',
          host: '',
          // callback:'',
        },
        dialogVisible: false
      };
    },
    methods: {
      emitInput(val) {
        this.$emit('input', val)
      },
      handleRemove(file, fileList) {
        this.emitInput('');
      },
      handlePreview(file) {
        this.dialogVisible = true;
      },
      beforeUpload(file) {
        let _self = this;
        return new Promise((resolve, reject) => {
          policy().then(response => {
            console.log("响应的数据",response);
            _self.dataObj.policy = response.data.policy;
            _self.dataObj.signature = response.data.signature;
            _self.dataObj.ossaccessKeyId = response.data.accessid;
            _self.dataObj.key = response.data.dir +getUUID()+'_${filename}';
            _self.dataObj.dir = response.data.dir;
            _self.dataObj.host = response.data.host;
            console.log("响应的数据222。。。",_self.dataObj);
            resolve(true)
          }).catch(err => {
            reject(false)
          })
        })
      },
      handleUploadSuccess(res, file) {
        console.log("上传成功...")
        this.showFileList = true;
        this.fileList.pop();
        this.fileList.push({name: file.name, url: this.dataObj.host + '/' + this.dataObj.key.replace("${filename}",file.name) });
        this.emitInput(this.fileList[0].url);
      }
    }
  }
</script>
<style>

</style>
(2)测试
2.3数据验证
在新增或者更新的过程中,需要对数据进行验证,比如有些字段不能为空,有些字段需要有固定的格式,所以需要对更新的数据进行验证
2.3.1前端验证
前端验证主要就是对一些表单进行验证
 dataRule: {
        name: [{ required: true, message: "品牌名不能为空", trigger: "blur" }],
        logo: [
          { required: true, message: "品牌logo地址不能为空", trigger: "blur" }
        ],
        descript: [
          { required: true, message: "介绍不能为空", trigger: "blur" }
        ],
        showStatus: [
          {
            required: true,
            message: "显示状态[0-不显示;1-显示]不能为空",
            trigger: "blur"
          }
        ],
        firstLetter: [
          {
            validator: (rule, value, callback) => {
              if (value == "") {
                callback(new Error("首字母必须填写"));
              } else if (!/^[a-zA-Z]$/.test(value)) {
                callback(new Error("首字母必须a-z或者A-Z之间"));
              } else {
                callback();
              }
            },
            trigger: "blur"
          }
        ],
        sort: [
          {
            validator: (rule, value, callback) => {
              if (value == "") {
                callback(new Error("排序字段必须填写"));
              } else if (!Number.isInteger(value) || value<0) {
                callback(new Error("排序必须是一个大于等于0的整数"));
              } else {
                callback();
              }
            },
            trigger: "blur"
          }
        ]
      }
    };
  },
2.3.2后端验证
只进行前端数据验证不安全,用户可以绕开前端对后台添加一些非法数字,所以要进行后台的验证
这里采用JSR303进行后端的验证
2.3.2.1给所有的bean增加注解
package com.sgyj.gulimall.product.entity;

import com.baomidou.mybatisplus.annotation.TableId;
import com.baomidou.mybatisplus.annotation.TableName;
import com.sgyj.common.valid.AddGroup;
import com.sgyj.common.valid.ListValue;
import com.sgyj.common.valid.UpdateGroup;
import com.sgyj.common.valid.UpdateStatusGroup;
import lombok.Data;
import org.hibernate.validator.constraints.URL;

import javax.validation.constraints.*;
import java.io.Serializable;

/**
 * 品牌
 *
 * @author sgyj
 * @email 609473861@qq.com
 * @date 2022-04-29 14:46:15
 */
@Data
@TableName("pms_brand")
public class BrandEntity implements Serializable {
	private static final long serialVersionUID = 1L;

	/**
	 * 品牌id
	 * 分组校验的含义是: 当进行修改时,id必须不能为空 要填写  当进行新增时,id可以为空
	 */
	@NotNull(message = "修改必须指定品牌id",groups = {UpdateGroup.class})
	@Null(message = "新增不能指定id",groups = {AddGroup.class})
	@TableId
	private Long brandId;
	/**
	 * 品牌名
	 */
	@NotBlank(message = "品牌名必须提交",groups = {AddGroup.class,UpdateGroup.class})
	private String name;
	/**
	 * 品牌logo地址
	 */
	@NotBlank(groups = {AddGroup.class})
	@URL(message = "logo必须是一个合法的url地址",groups={AddGroup.class,UpdateGroup.class})
	private String logo;
	/**
	 * 介绍
	 */
	private String descript;
	/**
	 * 显示状态[0-不显示;1-显示]
	 */
	@NotNull(groups = {AddGroup.class, UpdateStatusGroup.class})
	@ListValue(vals={0,1},groups = {AddGroup.class, UpdateStatusGroup.class})
	private Integer showStatus;
	/**
	 * 检索首字母
	 */
	@NotEmpty(groups={AddGroup.class})
	@Pattern(regexp="^[a-zA-Z]$",message = "检索首字母必须是一个字母",groups={AddGroup.class, UpdateGroup.class})
	private String firstLetter;
	/**
	 * 排序
	 */
	@NotNull(groups={AddGroup.class})
	@Min(value = 0,message = "排序必须大于等于0",groups={AddGroup.class,UpdateGroup.class})
	private Integer sort;

}
在保存方法中添加相应的注解
@RequestMapping("/save")
    //@RequiresPermissions("product:brand:save")
    public R save(@Validated({AddGroup.class}) @RequestBody BrandEntity brand/*,BindingResult result*/){
//        if(result.hasErrors()){
//            Map<String,String> map = new HashMap<>();
//            //1、获取校验的错误结果
//            result.getFieldErrors().forEach((item)->{
//                //FieldError 获取到错误提示
//                String message = item.getDefaultMessage();
//                //获取错误的属性的名字
//                String field = item.getField();
//                map.put(field,message);
//            });
//
//            return R.error(400,"提交的数据不合法").put("data",map);
//        }else {
//
//        }

        brandService.save(brand);


        return R.ok();
    }
集中处理所有的异常
package com.sgyj.gulimall.product.exception;

import com.sgyj.common.exception.BizCodeEnume;
import com.sgyj.common.utils.R;
import lombok.extern.slf4j.Slf4j;
import org.springframework.validation.BindingResult;
import org.springframework.web.bind.MethodArgumentNotValidException;
import org.springframework.web.bind.annotation.ExceptionHandler;
import org.springframework.web.bind.annotation.RestControllerAdvice;

import java.util.HashMap;
import java.util.Map;

/*
集中处理所有异常
 */
@Slf4j
//@ResponseBody
//@ControllerAdvice(basePackages = "com.atguigu.gulimall.product.controller")
@RestControllerAdvice(basePackages = "com.sgyj.gulimall.product.controller")
public class GulimallExceptionControllerAdvice {


    @ExceptionHandler(value= MethodArgumentNotValidException.class)
    public R handleVaildException(MethodArgumentNotValidException e){
        log.error("数据校验出现问题{},异常类型:{}",e.getMessage(),e.getClass());
        BindingResult bindingResult = e.getBindingResult();

        Map<String,String> errorMap = new HashMap<>();
        bindingResult.getFieldErrors().forEach((fieldError)->{
            errorMap.put(fieldError.getField(),fieldError.getDefaultMessage());
        });
        return R.error(BizCodeEnume.VAILD_EXCEPTION.getCode(),BizCodeEnume.VAILD_EXCEPTION.getMsg()).put("data",errorMap);
    }

    @ExceptionHandler(value = Throwable.class)
    public R handleException(Throwable throwable){

        log.error("错误:",throwable);
        return R.error(BizCodeEnume.UNKNOW_EXCEPTION.getCode(),BizCodeEnume.UNKNOW_EXCEPTION.getMsg());
    }


}
2.3.3总结
总结
JSR303
1、给Bean添加校验注解:javax.validation.constraints,并定义自己的message提示
2、开启校验功能@Valid
效果:校验错误以后会有默认的响应;
3、给校验的bean后紧跟一个BindingResult,就可以获取到校验的结果
4、分组校验(多场景的复杂校验)
1)、 @NotBlank(message = “品牌名必须提交”,groups = {AddGroup.class,UpdateGroup.class})
给校验注解标注什么情况需要进行校验
2)、@Validated({AddGroup.class})
3)、默认没有指定分组的校验注解@NotBlank,在分组校验情况@Validated({AddGroup.class})下不生效,只会在@Validated生效;
5、自定义校验
1)、编写一个自定义的校验注解
2)、编写一个自定义的校验器 ConstraintValidator
3)、关联自定义的校验器和自定义的校验注解
@Documented
@Constraint(validatedBy = { ListValueConstraintValidator.class【可以指定多个不同的校验器,适配不同类型的校验】 })
@Target({ METHOD, FIELD, ANNOTATION_TYPE, CONSTRUCTOR, PARAMETER, TYPE_USE })
@Retention(RUNTIME)
public @interface ListValue {
(四)平台属性
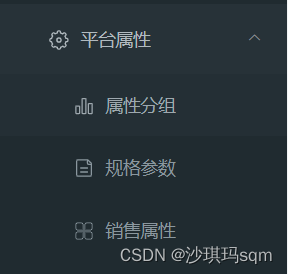
平台属性实现以上功能,没有涉及新的技术栈,只是复杂的增删改查业务
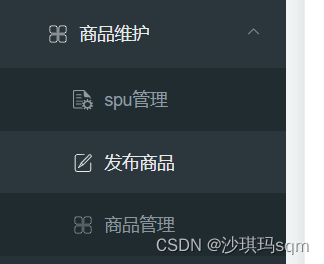
(五)商品维护
商品维护主要实现以下功能
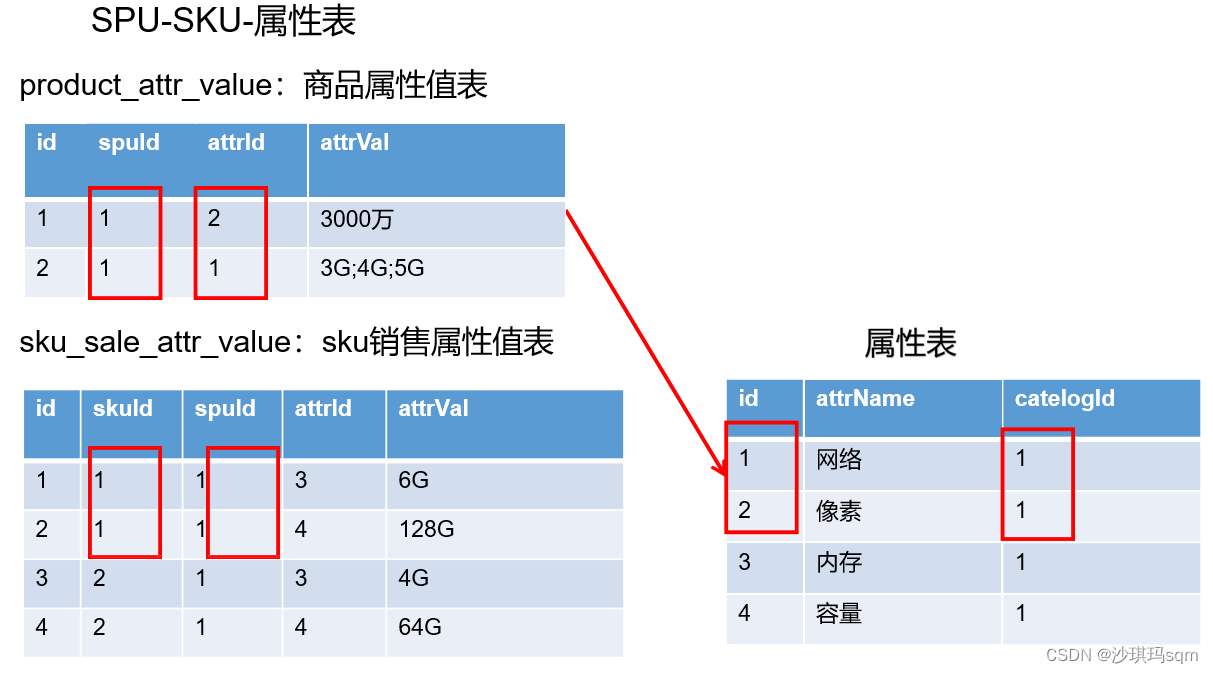
5.1SPU SKU相关概念
简单一句话概括,SPU是一个具体商品的大集合, SKU是这个商品不同的版本。例如华为Mate40是一个SPU,而8+128的星河银、8+256的星河银、8+128的胡杨黄、8+256的胡杨黄就是一个个的SKU。
表设计
5.2远程调用
当进行发布商品时,最后会设置每个商品的优惠情况,而优惠服务(gulimall-coupon)是另一个微服务,我们需要向这个服务中设置相应的优惠,就需要使用feign进行远程调用。
远程调用的过程
1、需要调用哪个服务,在哪个服务中加入依赖
        <dependency>
            <groupId>org.springframework.cloud</groupId>
            <artifactId>spring-cloud-starter-openfeign</artifactId>
        </dependency>
2、创建CouponFeignService接口
@FeignClient("gulimall-coupon")
@Component
public interface CouponFeignService {


    /**
     * 1、CouponFeignService.saveSpuBounds(spuBoundTo);
     *      1)、@RequestBody将这个对象转为json。
     *      2)、找到gulimall-coupon服务,给/coupon/spubounds/save发送请求。
     *          将上一步转的json放在请求体位置,发送请求;
     *      3)、对方服务收到请求。请求体里有json数据。
     *          (@RequestBody SpuBoundsEntity spuBounds);将请求体的json转为SpuBoundsEntity;
     * 只要json数据模型是兼容的。双方服务无需使用同一个to
     * @param spuBoundTo
     * @return
     */
    @PostMapping("/coupon/spubounds/save")
    R saveSpuBounds(@RequestBody SpuBoundTo spuBoundTo);


    @PostMapping("/coupon/skufullreduction/saveinfo")
    R saveSkuReduction(@RequestBody SkuReductionTo skuReductionTo);
}
使用FeignClient注解标记要调用的微服务,在接口内声明要调用的请求参数
3、在主启动类中加入@EnableFeignClients注解。
@EnableFeignClients(basePackages = "com.sgyj.gulimall.product.feign")
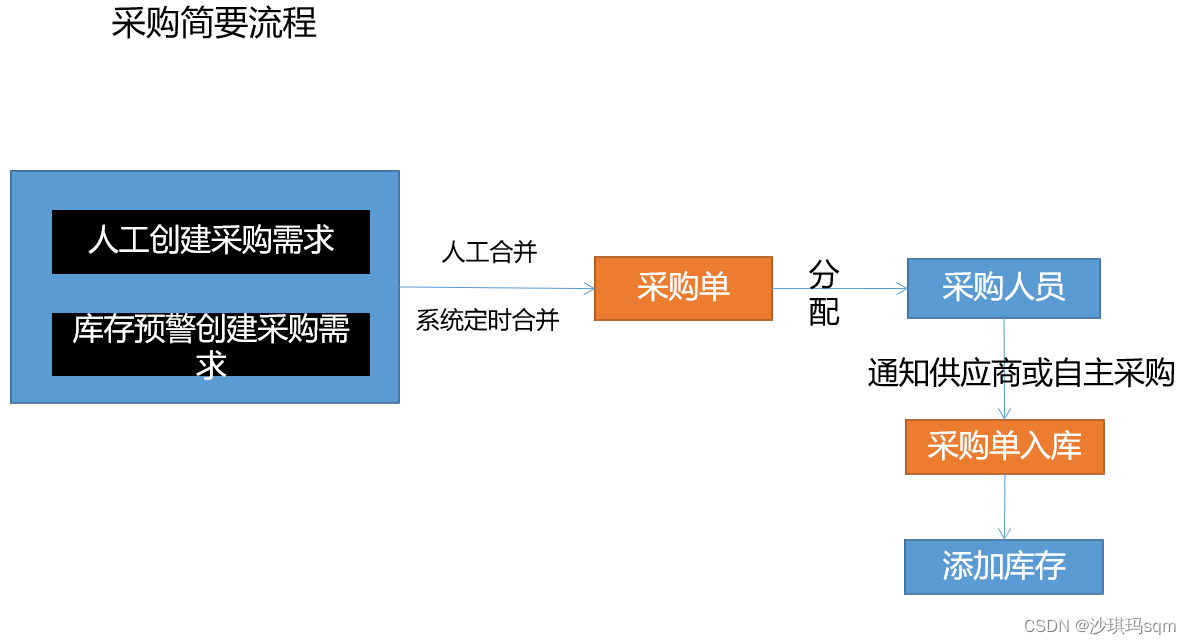
(六)库存系统
采购流程


 716
716


 被折叠的 条评论
为什么被折叠?
被折叠的 条评论
为什么被折叠?
 到【灌水乐园】发言


