


SpringMVC的实现方式2
不使用idea的骨架创建一个SpringMVC的入门项目,具体步骤如下:
1、创建一个新的maven工程

不选骨架,直接next


创建完成如图所示,默认是一个JavaSE工程,而我们需要的是一个web工程,所以还需要进行一些配置:
2、web工程配置
(1)、在pom文件中声明打包方式为war包,也就是说项目最终要打包为war包。

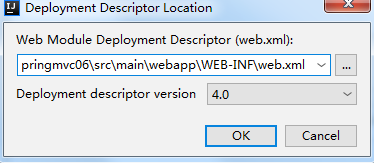
(2)、创建webapp目录


剪切\WEB-INF\web.xml至webapp目录下

基本搭建完成

3、添加依赖

4、创建配置文件

注意:一定要先加依赖,再添加配置文件,否则没有Spring Config这个选项

spring容器一般来扫描controller之外的目录,Spring容器和SpringMVC容器是两个容器,SpringMVC是Spring的子容器,子容器可以访问父容器里的东西,所以SpringMVC可以访问到Spring中的东西,Spring不可以访问到SpringMVC中的东西,所以一般来说我们在Spring中扫描controller之外的目录,SpringMVC中扫描controller就可以了。
配置spring的applicationContext.xml如下:
<?xml version="1.0" encoding="UTF-8"?>
<beans xmlns="http://www.springframework.org/schema/beans"
       xmlns:xsi="http://www.w3.org/2001/XMLSchema-instance"
       xmlns:context="http://www.springframework.org/schema/context"
       xsi:schemaLocation="http://www.springframework.org/schema/beans http://www.springframework.org/schema/beans/spring-beans.xsd http://www.springframework.org/schema/context http://www.springframework.org/schema/context/spring-context.xsd">

    <!--spring配置中的use-default-filters用来指示是否自动扫描带有@Component、@Repository、@Service和@Controller的类。默认为true,即默认扫描。-->
    <context:component-scan base-package="com.yunzhong" use-default-filters="true">
   <!--不包含controller-->
        <context:exclude-filter type="annotation" expression="org.springframework.stereotype.Controller"/>
    </context:component-scan>
</beans>
配置springmvc的springmvc.xml如下:
?xml version="1.0" encoding="UTF-8"?>
<beans xmlns="http://www.springframework.org/schema/beans"
       xmlns:xsi="http://www.w3.org/2001/XMLSchema-instance"
       xmlns:context="http://www.springframework.org/schema/context"
       xmlns:mvc="http://www.springframework.org/schema/mvc"
       xsi:schemaLocation="http://www.springframework.org/schema/beans http://www.springframework.org/schema/beans/spring-beans.xsd http://www.springframework.org/schema/context http://www.springframework.org/schema/context/spring-context.xsd http://www.springframework.org/schema/cache http://www.springframework.org/schema/cache/spring-cache.xsd http://www.springframework.org/schema/mvc http://www.springframework.org/schema/mvc/spring-mvc.xsd">

    <!--都不扫描,但扫描controller-->
    <context:component-scan base-package="com.yunzhong" use-default-filters="false">
        <context:include-filter type="annotation" expression="org.springframework.stereotype.Controller"/>
    </context:component-scan>
   <!--作用:将reques 请求上面的数据绑定到controller 上-->
    <mvc:annotation-driven/>

</beans>
在web.xml中加载这两个配置:
<?xml version="1.0" encoding="UTF-8"?>
<web-app xmlns="http://xmlns.jcp.org/xml/ns/javaee"
         xmlns:xsi="http://www.w3.org/2001/XMLSchema-instance"
         xsi:schemaLocation="http://xmlns.jcp.org/xml/ns/javaee http://xmlns.jcp.org/xml/ns/javaee/web-app_4_0.xsd"
         version="4.0">
    <!--spring的配置-->
    <context-param>
        <param-name>contextConfigLocation</param-name>
        <param-value>classpath:applicationContext.xml</param-value>
    </context-param>
    <listener>
        <listener-class>org.springframework.web.context.ContextLoaderListener</listener-class>
    </listener>

    <!--SpringMVC的配置-->
    <servlet>
        <servlet-name>springmvc</servlet-name>
        <servlet-class>org.springframework.web.servlet.DispatcherServlet</servlet-class>
        <init-param>
            <param-name>contextConfigLocation</param-name>
            <param-value>classpath:springmvc.xml</param-value>
        </init-param>
    </servlet>
    <servlet-mapping>
        <servlet-name>springmvc</servlet-name>
        <url-pattern>/</url-pattern>
    </servlet-mapping>
</web-app>
创建一个controller:
@RestController
public class HelloController {
    @Autowired
    private HelloService helloService;

    @GetMapping("/hello")
    public String hello() {
        return helloService.hello();
    }
}
创建一个service:
@Service
public class HelloService {
    public String hello() {
        return "hello world yunzhongmanbu";
    }
}
配置tomcat并加载项目:


启动tomcat,并访问http://localhost:8080/hello


 476
476


 被折叠的 条评论
为什么被折叠?
被折叠的 条评论
为什么被折叠?
 到【灌水乐园】发言


