


 本文详细指导了在CentOS环境下安装OpenStackVictoria版本的步骤,包括环境配置、网络设置、软件包安装、NTP同步、YUM源配置、packstack工具使用以及服务验证。
OpenStack的安装
1. 环境准备
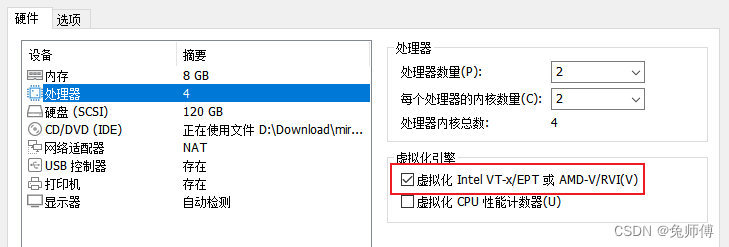
这里控制节点和计算节点分开 所以需要准备两台虚拟机 规格均为4u8g ,可以根据自己机器配置灵活改动 但最少不少于2u2g,磁盘规格统一为120G
1.1 网络地址规划
| / | 控制节点 | 计算节点 |
| 地址 | 192.168.100.100/24 | 192.168.100.101/24 |
| 网关 | 192.168.100.254 | 192.168.100.254 |
| DNS | 192.168.100.254 | 192.168.100.254 |
准备好两台安装好操作系统的虚拟机
这里准备的Centos镜像为 CentOS-Stream-8-20240304.0-x86_64-dvd1.iso
镜像可以在国内任意镜像站下载
这里我们在阿里云下载 阿里云镜像站直达
Centos虚拟机必须开启CPU虚拟化
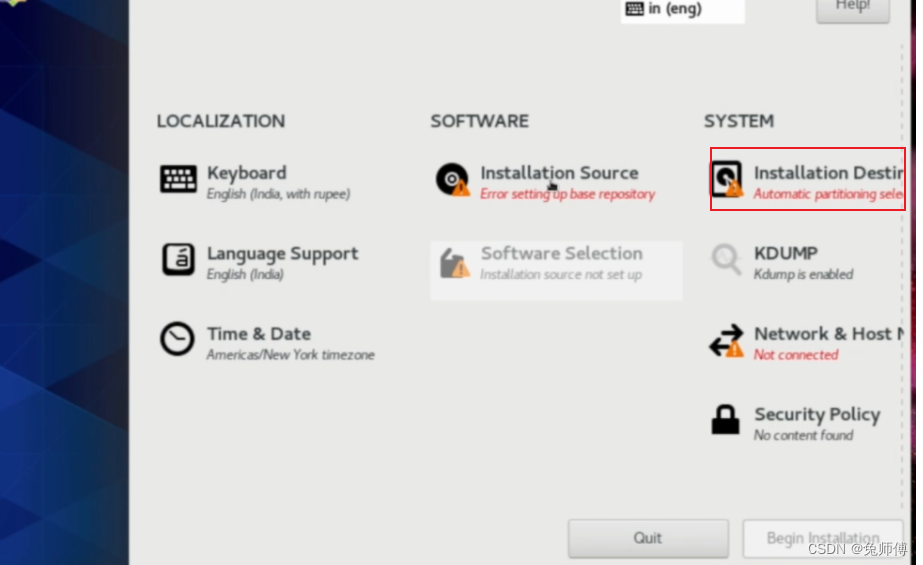
系统的安装可以参考以下博客
系统安装
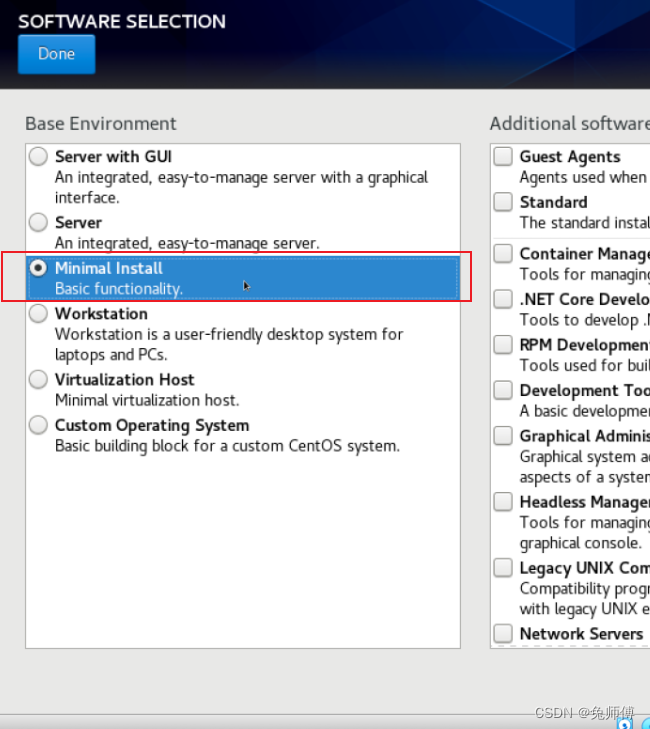
注:在选择安装时,选择最小化安装即可
1.1.2开启两台虚拟机 修改主机名分别为Controller和Computer,
1.在Controller节点执行
[root@localhost ~]hostnamectl set-hostname Controller #修改主机名为Controller
bash 								#刷新
2.在Cpmputer节点执行
[root@localhost ~]hostnamectl set-hostname Computer 	#修改主机名为Computer
bash 								#刷新

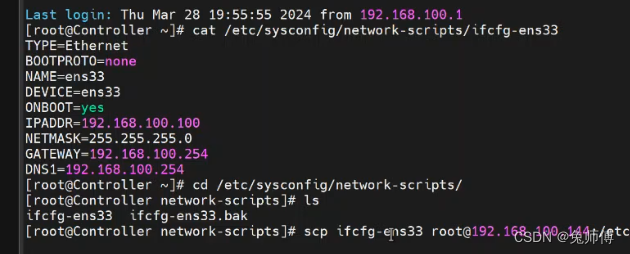
配置网卡文件
修改两台虚拟机的网卡文件为规划地址
vi /etc/sysconfig/network-scripts/ifcfg-ens33
1.1.3 关闭防火墙 (两台节点都执行)
[root@Coputer ~] systemctl stop firewalld     #停止防火墙服务
[root@Coputer ~] systemctl disable firewalld  #关闭开机启动
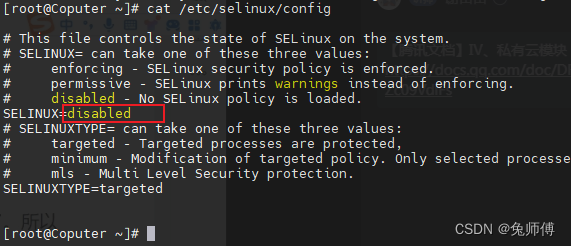
1.1.4 关闭selinux
永久关闭:输入命令
vi /etc/selinux/config
按i进入编辑模式 将SELINUX=enforcing改为SELINUX=disabled,然后按ESC,输入:wq保存退出。
1.1.5 关闭selinux关闭网络服务(与OpenStack 网络服务可能会冲突 关机会掉网卡)
执行命令
systemctl stop NetworkManager && systemctl disable NetworkManager
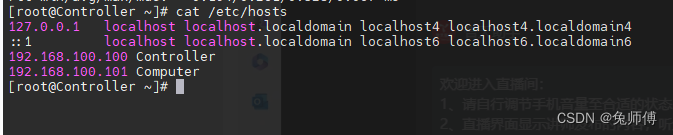
1.1.6 配置host文件
在两个节点都输入如下命令
echo "192.168.100.100 Controller" >> /etc/hosts
echo "192.168.100.101 Computer" >> /etc/hosts
2. 安装基础软件
本次使用的是 openstack-victoria版本
yum install -y vim net-tools bash-completion chrony.x86_64
yum install -y centos-release-openstack-victoria.noarch
2.1 配置NTP时间同步
直接复制即可
修改部分为
server ntp.aliyun.com iburst
allow 192.168.100.0/24
# Use public servers from the pool.ntp.org project.
# Please consider joining the pool (http://www.pool.ntp.org/join.html).
#pool 2.centos.pool.ntp.org iburst
server ntp.aliyun.com iburst
# Record the rate at which the system clock gains/losses time.
driftfile /var/lib/chrony/drift

# Allow the system clock to be stepped in the first three updates
# if its offset is larger than 1 second.
makestep 1.0 3

# Enable kernel synchronization of the real-time clock (RTC).
rtcsync

# Enable hardware timestamping on all interfaces that support it.
#hwtimestamp *

# Increase the minimum number of selectable sources required to adjust
# the system clock.
#minsources 2

# Allow NTP client access from local network.
#allow 192.168.0.0/16
allow 192.168.100.0/24
# Serve time even if not synchronized to a time source.
#local stratum 10

# Specify file containing keys for NTP authentication.
keyfile /etc/chrony.keys

# Get TAI-UTC offset and leap seconds from the system tz database.
leapsectz right/UTC

# Specify directory for log files.
logdir /var/log/chrony

# Select which information is logged.
#log measurements statistics tracking
计算节点同理,但无需再添加allow 192.168.100.0/24
修改后两台虚拟机均 重启NTP服务
systemctl start chronyd.service 		#启动ntp服务
systemctl enable chronyd.service		#ntp服务开机启动
2.2 配置YUM源
yum源文件如下
OpenStack安装所需yum文件
可直接复制
[highavailability]
name=CentOS Stream 8 - HighAvailability
baseurl=https://mirrors.aliyun.com/centos/8-stream/HighAvailability/x86_64/os/
gpgkey=file:///etc/pki/rpm-gpg/RPM-GPG-KEY-centosofficial
gpgcheck=1
repo_gpgcheck=0
metadata_expire=6h
countme=1
enabled=1

[nfv]
name=CentOS Stream 8 - NFV
baseurl=https://mirrors.aliyun.com/centos/8-stream/NFV/x86_64/os/
gpgkey=file:///etc/pki/rpm-gpg/RPM-GPG-KEY-centosofficial
gpgcheck=1
repo_gpgcheck=0
metadata_expire=6h
countme=1
enabled=1

[rt]
name=CentOS Stream 8 - RT
baseurl=https://mirrors.aliyun.com/centos/8-stream/RT/x86_64/os/
gpgkey=file:///etc/pki/rpm-gpg/RPM-GPG-KEY-centosofficial
gpgcheck=1
repo_gpgcheck=0
metadata_expire=6h
countme=1
enabled=1

[resilientstorage]
name=CentOS Stream 8 - ResilientStorage
baseurl=https://mirrors.aliyun.com/centos/8-stream/ResilientStorage/x86_64/os/
gpgkey=file:///etc/pki/rpm-gpg/RPM-GPG-KEY-centosofficial
gpgcheck=1
repo_gpgcheck=0
metadata_expire=6h
countme=1
enabled=1

[extras-common]
name=CentOS Stream 8 - Extras packages
baseurl=https://mirrors.aliyun.com/centos/8-stream/extras/x86_64/extras-common/
gpgkey=file:///etc/pki/rpm-gpg/RPM-GPG-KEY-CentOS-SIG-Extras-SHA512
gpgcheck=1
repo_gpgcheck=0
metadata_expire=6h
countme=1
enabled=1

[extras]
name=CentOS Stream $releasever - Extras
mirrorlist=http://mirrorlist.centos.org/?release=$stream&arch=$basearch&repo=extras&infra=$infra
#baseurl=http://mirror.centos.org/$contentdir/$stream/extras/$basearch/os/
baseurl=https://mirrors.aliyun.com/centos/8-stream/extras/x86_64/os/
gpgcheck=1
enabled=1
gpgkey=file:///etc/pki/rpm-gpg/RPM-GPG-KEY-centosofficial

[centos-ceph-pacific]
name=CentOS - Ceph Pacific
baseurl=https://mirrors.aliyun.com/centos/8-stream/storage/x86_64/ceph-pacific/
gpgcheck=0
enabled=1
gpgkey=file:///etc/pki/rpm-gpg/RPM-GPG-KEY-CentOS-SIG-Storage

[centos-rabbitmq-38]
name=CentOS-8 - RabbitMQ 38
baseurl=https://mirrors.aliyun.com/centos/8-stream/messaging/x86_64/rabbitmq-38/
gpgcheck=1
enabled=1
gpgkey=file:///etc/pki/rpm-gpg/RPM-GPG-KEY-CentOS-SIG-Messaging

[centos-nfv-openvswitch]
name=CentOS Stream 8 - NFV OpenvSwitch
baseurl=https://mirrors.aliyun.com/centos/8-stream/nfv/x86_64/openvswitch-2/
gpgcheck=1
enabled=1
gpgkey=file:///etc/pki/rpm-gpg/RPM-GPG-KEY-CentOS-SIG-NFV
module_hotfixes=1

[baseos]
name=CentOS Stream 8 - BaseOS
baseurl=https://mirrors.aliyun.com/centos/8-stream/BaseOS/x86_64/os/
gpgkey=file:///etc/pki/rpm-gpg/RPM-GPG-KEY-centosofficial
gpgcheck=1
repo_gpgcheck=0
metadata_expire=6h
countme=1
enabled=1

[appstream]
name=CentOS Stream 8 - AppStream
baseurl=https://mirrors.aliyun.com/centos/8-stream/AppStream/x86_64/os/
gpgkey=file:///etc/pki/rpm-gpg/RPM-GPG-KEY-centosofficial
gpgcheck=1
repo_gpgcheck=0
metadata_expire=6h
countme=1
enabled=1

[centos-openstack-victoria]
name=CentOS 8 - OpenStack victoria
baseurl=https://mirrors.aliyun.com/centos/8-stream/cloud/x86_64/openstack-victoria/
#baseurl=https://repo.huaweicloud.com/centos/8-stream/cloud/x86_64/openstack-yoga/
gpgcheck=1
enabled=1
gpgkey=file:///etc/pki/rpm-gpg/RPM-GPG-KEY-CentOS-SIG-Cloud
module_hotfixes=1

[powertools]
name=CentOS Stream 8 - PowerTools
#mirrorlist=http://mirrorlist.centos.org/?release=$stream&arch=$basearch&repo=PowerTools&infra=$infra
baseurl=https://mirrors.aliyun.com/centos/8-stream/PowerTools/x86_64/os/
gpgcheck=1
enabled=1
gpgkey=file:///etc/pki/rpm-gpg/RPM-GPG-KEY-centosofficial
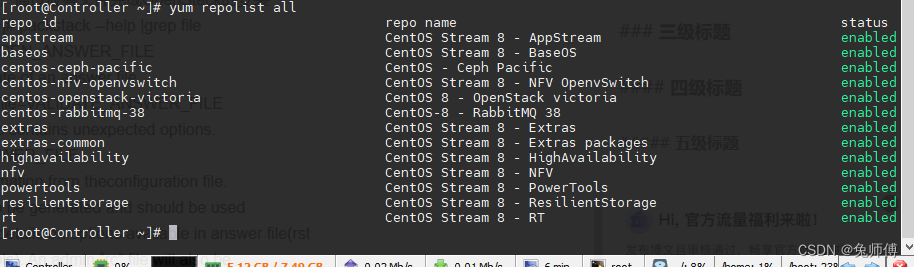
同步以上配置到 计算节点
检查yum源是否生效
yum repolist all
yum list all
2.3安装packstack(工具部署OpenStack)
!!!注:只在控制节点安装
yum install -y openstack-packstack
生成一个应答文件,这里通过应答文件完成OpenStack的安装
packstack --help |grep file
packstack --gen-answer-file=openstack.txt  #生成应答文件命名为openstack
2.3.1编辑应答文件
注意设置参数 CONFIG_NEUTRON_OVN_BRIDGE_IFACES ,OVN 会⾃动创建 br-ex 虚拟交换机并
使 ens33 桥接到 br-ex 虚拟交换机上,未来云主机通过 br-ex 可以连通外部⽹络。
打开应答文件
vi openstack.txt
#修改以下参数内容
 CONFIG_COMPUTE_HOSTS=192.168.100.100,192.168.100.101 #添加101控制节点地址
 CONFIG_KEYSTONE_ADMIN_PW=openstart					#OpenStack登录密码设置为openstart
 CONFIG_PROVISION_DEMO=n
 CONFIG_HEAT_INSTALL=y
 CONFIG_NEUTRON_OVN_BRIDGE_IFACES=br-ex:ens33    #ens33为本机网卡名称,根据实际修改
2.4 执⾏应答⽂件进⾏安装
packstack --answer-file=cloudcs.txt
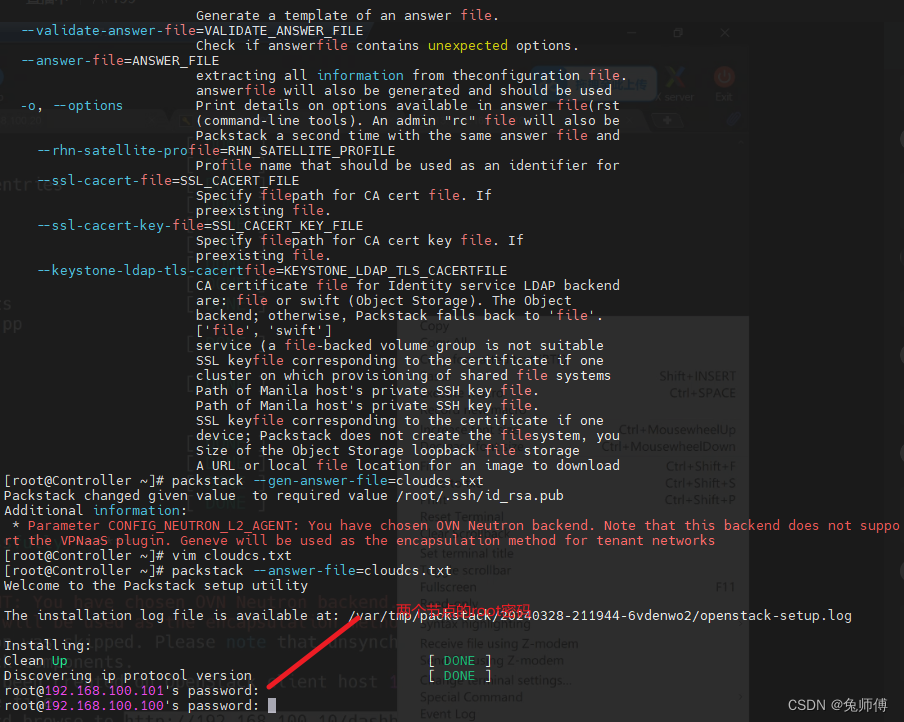
输入控制节点和计算节点的root密码
等待安装至如下界面即为安装成功
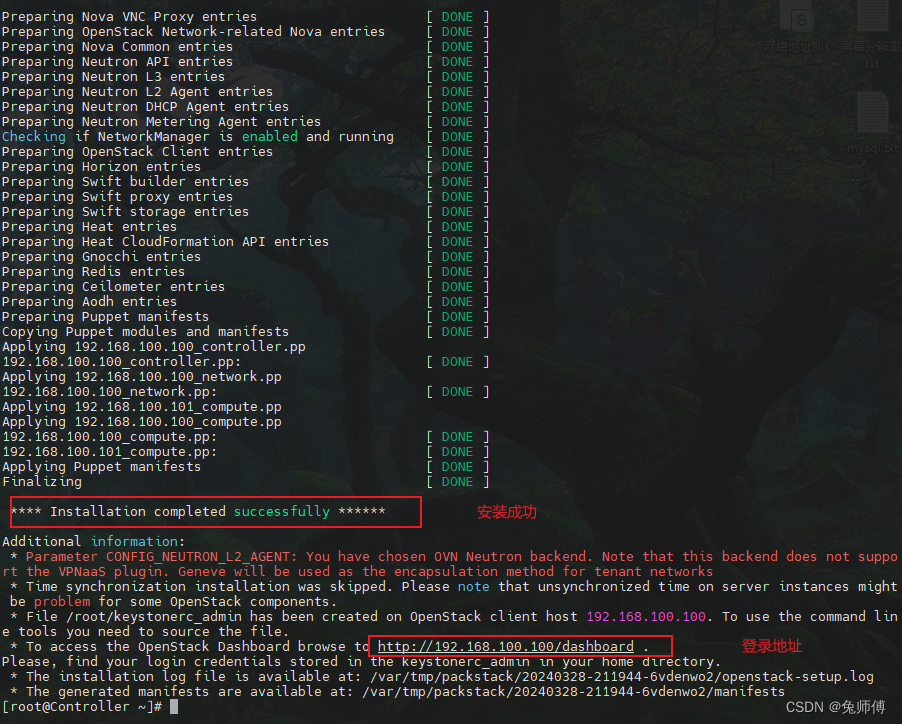
http://xxx.xxx.xxx.xxx/dashboard 即为登录地址
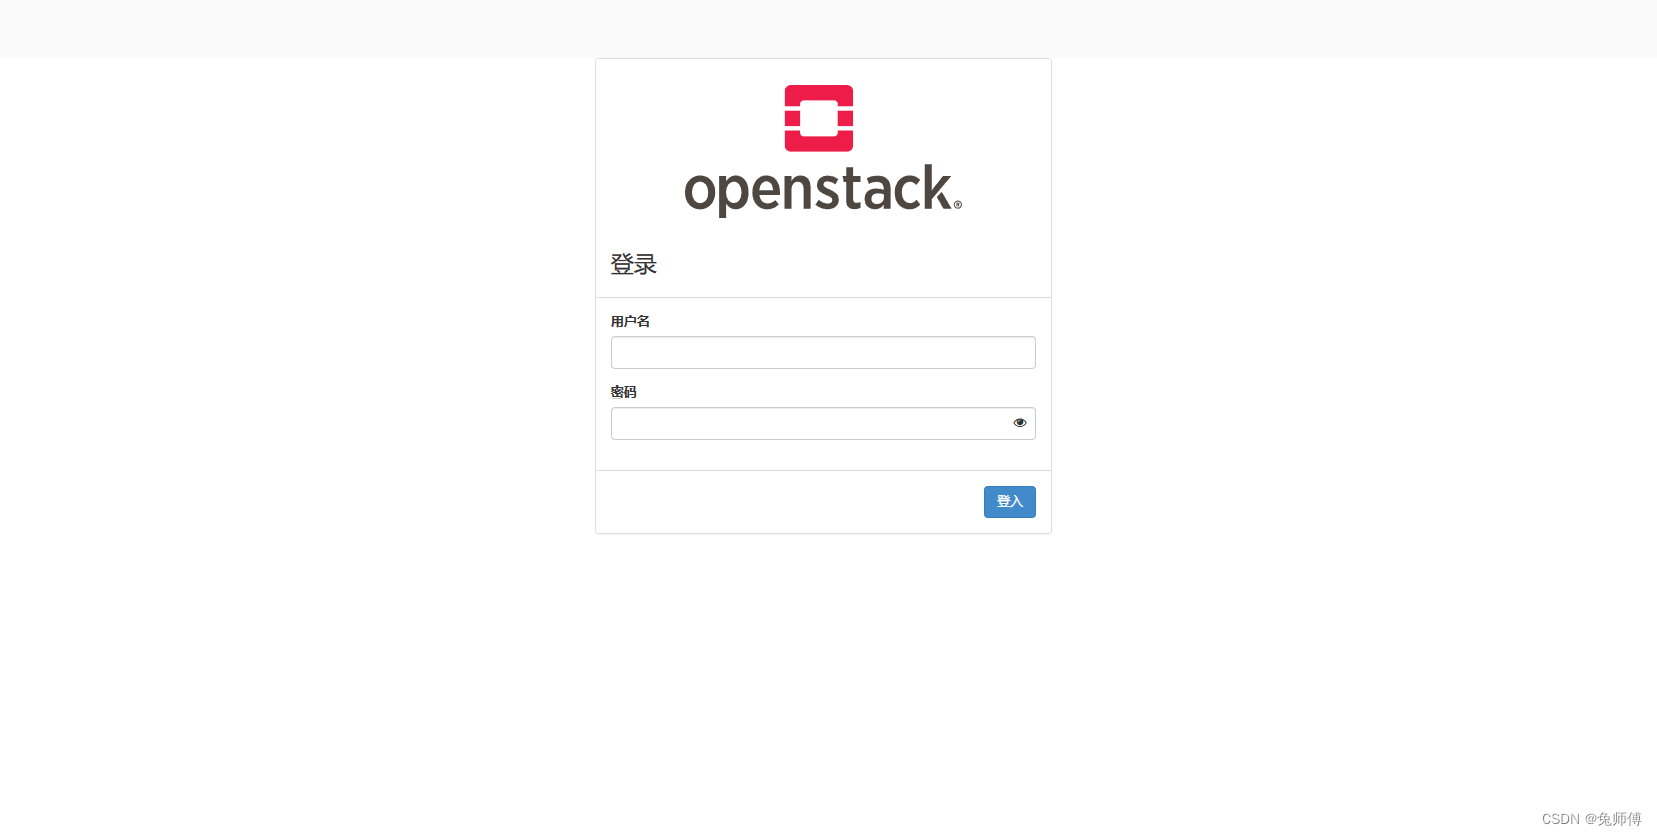
3.安装完成
验证是否正常启动
登录账户 admin
登录账户 openstack
密码为应答文件openstack.txt中CONFIG_KEYSTONE_ADMIN_PW=openstack字段设置的密码
如果服务异常,请查看rabiitmq的状态
systemctl status rabbitmq-server.service
重新启用network服务
systemctl enable network

systemctl start  network


 1886
1886


 被折叠的 条评论
为什么被折叠?
被折叠的 条评论
为什么被折叠?
 到【灌水乐园】发言


