


BC-Linux上安装re2c
提示:一旦涉及编译源码安装,你需要安装的基本的依赖项有:git、autoconf、automake、libtool、make、cmake。
我在安装 ninja 软件包时遇到一个问题,如下所示:
warning: A compatible version of re2c (>= 0.15.3) was not found; changes to src/*.in.cc will not affect your build.
这里提示 re2c 没有找到,查阅了一下,re2c是一个将正则表达式转化成基于C语言标识的预处理器。于是想着从github上安装一下这个软件包。过程中碰到一些问题,所以想记录一下分享出来。
从GitHub上下载 re2c 项目源码
- 在 GitHub 上搜索 re2c
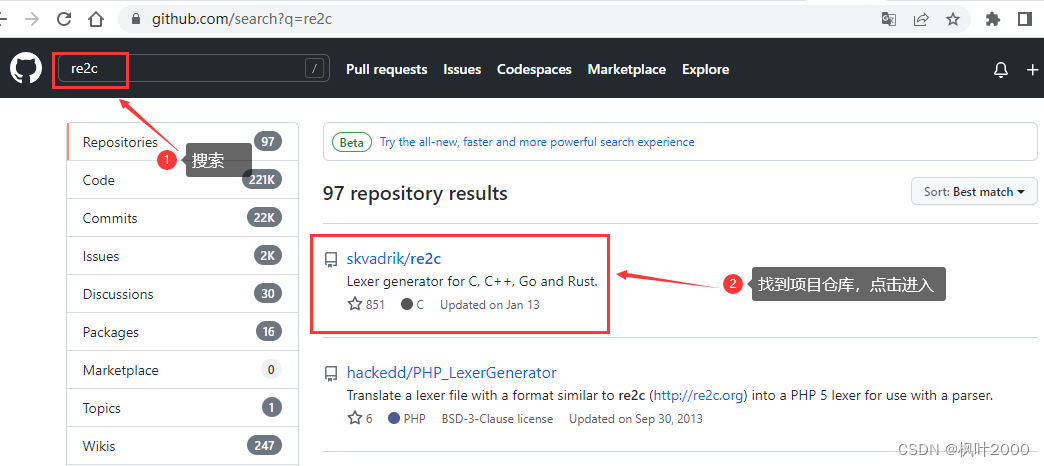
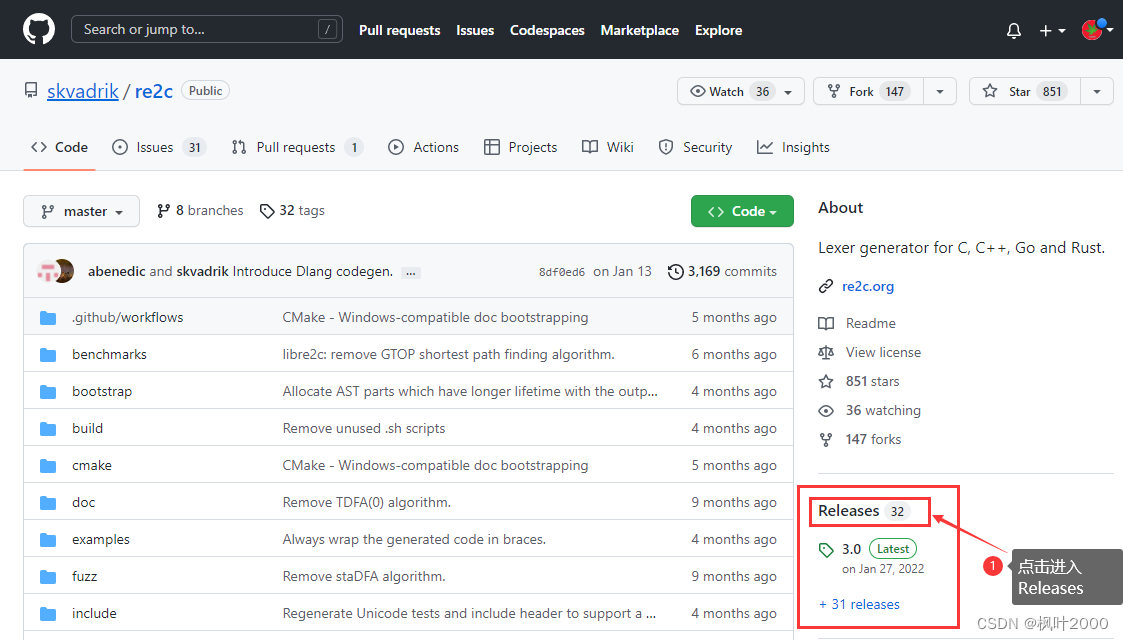
- 找到最新版releases版本源码
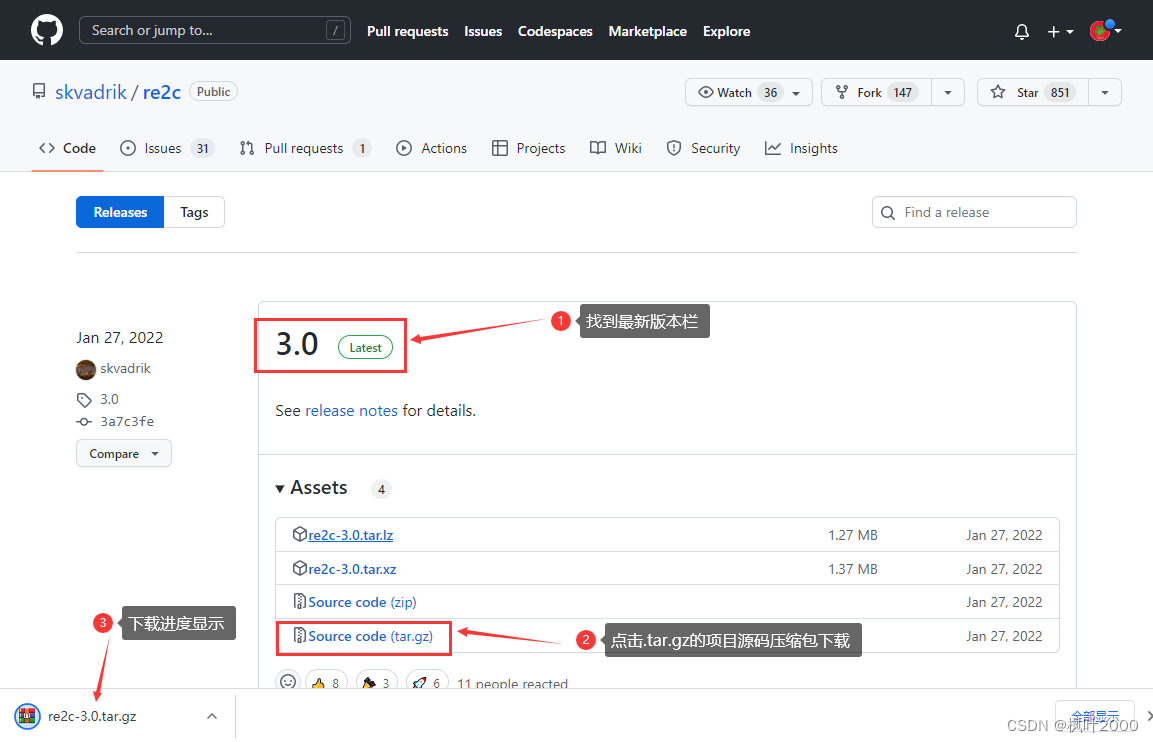
- 下载项目源码
编译和安装
- 将下载好的压缩包放到 Linux 服务器上,我这里放到了 /home/share/ 目录下,然后解压
解压命令:tar -xvzf re2c-3.0.tar.gz
[root@localhost share]# ls -d re2c*
re2c-3.0  re2c-3.0.tar.gz
[root@localhost share]#
可以看到已经将文件解压到了 re2c-3.0 文件夹中了。
- 进入 re2c-3.0 目录查看
[root@localhost share]# cd re2c-3.0/
[root@localhost re2c-3.0]# ls
add-release.txt  build      CMakeLists.txt     doc       lib          Makefile.am      release.sh       test
autogen.sh       BUILD.md   CMakePresets.json  examples  libre2c_old  Makefile.lib.am  run_tests.py.in
benchmarks       CHANGELOG  configure.ac       fuzz      LICENSE      NO_WARRANTY      sf-cheatsheet
bootstrap        cmake      CONTRIBUTING.md    include   m4           README.md        src
[root@localhost re2c-3.0]#
查看后发现没有 configure 配置文件,此时我们运行 autogen.sh 脚本来生成 configure文件。
- 运行 autogen.sh
[root@localhost re2c-3.0]# ./autogen.sh
fatal: Not a git repository (or any of the parent directories): .git
./autogen.sh: line 5: autoreconf: command not found
[root@localhost re2c-3.0]#
这里有一个 fatal 的错误提示说:当前的目录不是一个git仓库。这个错误其实不影响编译。为了不显示这个错误,保证安装的顺利,我们可以在本地创建一个git仓库,然后将解压的re2c-3.0解压文件夹拷贝到git仓库目录下,再执行 autogen.sh 脚本文件。
[root@localhost share]# git init github_re2c
Initialized empty Git repository in /home/share/github_re2c/.git/
[root@localhost share]# cd github_re2c/
[root@localhost github_re2c]# cp ../re2c-3.0.tar.gz ./
[root@localhost github_re2c]# ls
re2c-3.0.tar.gz
[root@localhost github_re2c]# tar -xvzf re2c-3.0.tar.gz
>>>>>>>>>>>>>> 中间的解压过程省略 <<<<<<<<<<<<<<
[root@localhost github_re2c]#
[root@localhost github_re2c]# ls
re2c-3.0  re2c-3.0.tar.gz
[root@localhost github_re2c]# cd re2c-3.0/
[root@localhost re2c-3.0]# ls
add-release.txt  build      CMakeLists.txt     doc       lib          Makefile.lib.am  run_tests.py.in
autogen.sh       BUILD.md   CMakePresets.json  examples  libre2c_old  NO_WARRANTY      sf-cheatsheet
benchmarks       CHANGELOG  configure.ac       fuzz      LICENSE      README.md        src
bootstrap        cmake      CONTRIBUTING.md    include   Makefile.am  release.sh       test
[root@localhost re2c-3.0]#
[root@localhost re2c-3.0]# ./autogen.sh
./autogen.sh: line 5: autoreconf: command not found
[root@localhost re2c-3.0]#
这样就不会报上面的错误了。此时提示 autoreconf: command not found,这是由于没有安装 autoconf 软件包导致的。
- 安装 autoconf
[root@localhost re2c-3.0]# yum install autoconf
Configuration file /etc/yum/pluginconf.d/license-manager.conf not found
Unable to find configuration file for plugin license-manager
Loaded plugins: fastestmirror
Loading mirror speeds from cached hostfile
Resolving Dependencies
--> Running transaction check
---> Package autoconf.noarch 0:2.69-11.el7 will be installed

>>>>>>>>>>>>>> 中间的安装过程省略 <<<<<<<<<<<<<<
Installed:
  autoconf.noarch 0:2.69-11.el7

Dependency Installed:
  m4.x86_64 0:1.4.16-10.el7                        perl-Data-Dumper.x86_64 0:2.145-3.el7

Complete!
[root@localhost re2c-3.0]#
- 再次运行 autogen.sh
[root@localhost re2c-3.0]# ./autogen.sh
Can't exec "aclocal": No such file or directory at /usr/share/autoconf/Autom4te/FileUtils.pm line 326.
autoreconf: failed to run aclocal: No such file or directory
[root@localhost re2c-3.0]#
此时又提示 Can’t exec “aclocal”: No such file or directory at /usr/share/autoconf/Autom4te/FileUtils.pm line 326.,这是由于没有安装 automake 软件包导致的
- 安装 automake
[root@localhost re2c-3.0]# yum install automake
Configuration file /etc/yum/pluginconf.d/license-manager.conf not found
Unable to find configuration file for plugin license-manager
Loaded plugins: fastestmirror
Loading mirror speeds from cached hostfile
Resolving Dependencies
--> Running transaction check
---> Package automake.noarch 0:1.13.4-3.el7 will be installed

>>>>>>>>>>>>>> 中间的安装过程省略 <<<<<<<<<<<<<<
Installed:
  automake.noarch 0:1.13.4-3.el7

Dependency Installed:
  perl-Test-Harness.noarch 0:3.28-3.el7

Complete!
[root@localhost re2c-3.0]#
- 三次运行 autogen.sh
[root@localhost re2c-3.0]# ./autogen.sh
configure.ac:3: installing 'build-aux/install-sh'
configure.ac:3: installing 'build-aux/missing'
Makefile.am:515: error: Libtool library used but 'LIBTOOL' is undefined
Makefile.am:515:   The usual way to define 'LIBTOOL' is to add 'LT_INIT'
Makefile.am:515:   to 'configure.ac' and run 'aclocal' and 'autoconf' again.
Makefile.am:515:   If 'LT_INIT' is in 'configure.ac', make sure
Makefile.am:515:   its definition is in aclocal's search path.
Makefile.am: installing 'build-aux/depcomp'
parallel-tests: installing 'build-aux/test-driver'
autoreconf: automake failed with exit status: 1
[root@localhost re2c-3.0]#
又出现一个错误:Makefile.am:515: error: Libtool library used but ‘LIBTOOL’ is undefined,这是由于没有安装 libtool 导致的。
- 安装 libtool
[root@localhost re2c-3.0]# yum install libtool
Configuration file /etc/yum/pluginconf.d/license-manager.conf not found
Unable to find configuration file for plugin license-manager
Loaded plugins: fastestmirror
Loading mirror speeds from cached hostfile
Resolving Dependencies
--> Running transaction check
---> Package libtool.x86_64 0:2.4.2-22.el7_3 will be installed

>>>>>>>>>>>>>> 中间的安装过程省略 <<<<<<<<<<<<<<
Installed:
  libtool.x86_64 0:2.4.2-22.el7_3

Complete!
[root@localhost re2c-3.0]#
- 四次运行 autogen.sh
[root@localhost re2c-3.0]# ./autogen.sh
Removing aclocal.m4
Removing config.h.in
Removing configure
libtoolize: putting auxiliary files in AC_CONFIG_AUX_DIR, `build-aux'.
libtoolize: copying file `build-aux/ltmain.sh'
libtoolize: putting macros in `m4'.
libtoolize: copying file `m4/libtool.m4'
libtoolize: copying file `m4/ltoptions.m4'
libtoolize: copying file `m4/ltsugar.m4'
libtoolize: copying file `m4/ltversion.m4'
libtoolize: copying file `m4/lt~obsolete.m4'
libtoolize: Consider adding `AC_CONFIG_MACRO_DIR([m4])' to configure.ac and
libtoolize: rerunning libtoolize, to keep the correct libtool macros in-tree.
configure.ac:191: installing 'build-aux/config.guess'
configure.ac:191: installing 'build-aux/config.sub'
[root@localhost re2c-3.0]#
到这里终于运行成功了,查看目录下生成了 configure 文件。
[root@localhost re2c-3.0]# ls
aclocal.m4       bootstrap  cmake              configure.ac     include      Makefile.am      release.sh
add-release.txt  build      CMakeLists.txt     CONTRIBUTING.md  lib          Makefile.in      run_tests.py.in
autogen.sh       build-aux  CMakePresets.json  doc              libre2c_old  Makefile.lib.am  sf-cheatsheet
autom4te.cache   BUILD.md   config.h.in        examples         LICENSE      NO_WARRANTY      src
benchmarks       CHANGELOG  configure          fuzz             m4           README.md        test
[root@localhost re2c-3.0]#
- 运行 configure 配置文件
[root@localhost re2c-3.0]# ./configure
checking for a BSD-compatible install... /usr/bin/install -c
checking whether build environment is sane... yes
checking for a thread-safe mkdir -p... /usr/bin/mkdir -p
checking for gawk... gawk
checking whether make sets $(MAKE)... yes
>>>>>>>>>>>>>> 中间的安装过程省略 <<<<<<<<<<<<<<
config.status: creating config.h
config.status: executing depfiles commands
config.status: executing libtool commands
[root@localhost re2c-3.0]#
执行完之后,查看目录,已经生成了 Makefile 文件
[root@localhost re2c-3.0]# ls
aclocal.m4       build-aux          config.h.in      examples     m4               release.sh
add-release.txt  BUILD.md           config.log       fuzz         Makefile         run_tests.py
autogen.sh       CHANGELOG          config.status    include      Makefile.am      run_tests.py.in
autom4te.cache   cmake              configure        lib          Makefile.in      sf-cheatsheet
benchmarks       CMakeLists.txt     configure.ac     libre2c_old  Makefile.lib.am  src
bootstrap        CMakePresets.json  CONTRIBUTING.md  libtool      NO_WARRANTY      stamp-h1
build            config.h           doc              LICENSE      README.md        test
[root@localhost re2c-3.0]#
-
执行 make 和 make install 命令进行编译和安装
此处编译和安装日志较多,所以不在累赘写出。 -
查看安装版本
[root@localhost re2c-3.0]# re2c -version
re2c 3.0
[root@localhost re2c-3.0]#
安装好之后查看版本,显示安装的是 re2c 3.0 版本,说明安装已经成功。
从 EPEL 中安装 re2c
安装 re2c 还有另外一种方式,那就是从 EPEL 中直接安装,最为方便快捷,一般都能满足要求,但不是最新的版本。
安装步骤分两步:
- 安装软件扩展包 EPEL
- 安装 re2c
1. 安装 EPEL
EPEL 的安装请参考文章《Linux上安装EPEL扩展包》,这里不再讲述。
2. 安装 re2c
命令:yum install re2c
[root@localhost ~]# yum install re2c
Extra Packages for Enterprise Linux 7 - x86_64                      14 kB/s |  17 MB     20:50
Last metadata expiration check: 0:10:35 ago on Sun 05 Mar 2023 06:49:56 PM EST.
Dependencies resolved.
===================================================================================================
 Package             Architecture          Version                       Repository           Size
===================================================================================================
Installing:
 re2c                x86_64                0.14.3-2.el7                  epel                230 k

>>>>>>>>>>>>>> 中间的安装过程省略 <<<<<<<<<<<<<<
Installed:
  re2c-0.14.3-2.el7.x86_64

Complete!
[root@localhost ~]#
查看安装版本
[root@localhost code]# re2c -version
re2c 0.14.3
[root@localhost code]#
4. 总结
编译和安装的依赖项
- 依赖项:git、autoconf、automake、libtool。git本地仓库的新建,所有的操作在本地仓库目录下进行。
- 安装epel, 然后从 epel中安装re2c
提示:一旦涉及编译源码安装,你需要安装的基本的依赖项有:git、autoconf、automake、libtool、make、cmake。


 1万+
1万+


 被折叠的 条评论
为什么被折叠?
被折叠的 条评论
为什么被折叠?
 到【灌水乐园】发言


