


小白一个,文章中可能说的不严谨或者错的地方,请指出我立马改,我超快的,嘿嘿。
整合MyBatis
基础环境搭建
MySQL+Navicat for MySQL
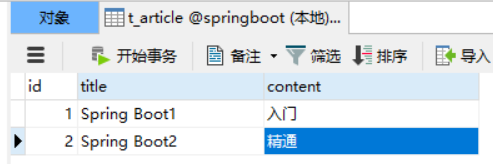
在此基础上创建数据库和数据表:
创建了 springboot 数据库及 t_article 数据表
用注解的方式整合MyBatis
创建Article实体类
实体类中的属性要与数据表中的属性一 一对应
若数据表中存在驼峰式命名,要在配置文件中添加 开启驼峰式命名匹配
#驼峰式命名
mybatis.configuration.map-underscore-to-camel-case=true
添加构造方法,便于增加和更新操作
Article类源码:
package com.zknu.demo.model;

public class Article {
    private int id;
    private String title;
    private String content;


    public Article(int id, String title, String content) {
        this.id = id;
        this.title = title;
        this.content = content;
    }

    public int getId() {
        return id;
    }

    public void setId(int id) {
        this.id = id;
    }

    public String getTitle() {
        return title;
    }

    public void setTitle(String title) {
        this.title = title;
    }

    public String getContent() {
        return content;
    }

    public void setContent(String content) {
        this.content = content;
    }

    @Override
    public String toString() {
        return "Article{" +
                "id=" + id +
                ", title='" + title + '\'' +
                ", content='" + content + '\'' +
                '}';
    }
}
编写配置文件和依赖
这里选择使用阿里巴巴的Druid数据源
添加Druid依赖
 <dependency>
            <groupId>com.alibaba</groupId>
            <artifactId>druid-spring-boot-starter</artifactId>
            <version>1.1.10</version>
 </dependency>
除此之外,还要增加 Mapper 依赖,Mapper 会使 MyBaits 的增删改查的操作变得更简单
<dependency>
            <groupId>tk.mybatis</groupId>
            <artifactId>mapper-spring-boot-starter</artifactId>
            <version>2.0.2</version>
</dependency>
因为要连接数据库,所以要添加mysql依赖
<dependency>
            <groupId>mysql</groupId>
            <artifactId>mysql-connector-java</artifactId>
            <scope>runtime</scope>
</dependency>
配置文件编写
在全局配置文件中编写数据库配置
# 数据库链接
spring.datasource.url=jdbc:mysql://localhost:3306/springboot?serverTimezone=UTC
#3306为默认端口号,springboot是要连接的数据库名,其他的不变为固定格式
spring.datasource.username=root
#数据库用户名
spring.datasource.password=root
#数据库密码

#添加第三方数据
spring.datasource.type=com.alibaba.druid.pool.DruidDataSource
spring.datasource.initialSize=20
#数据库最初的连接数量
spring.datasource.minIdle=10
#最小连接数
spring.datasource.maxActive=100
#最大的活跃连接数
编写自定义配置类,将所有配置的属性注入到Druid数据源中
创建config包,在包中创建自定义配置类 DataSourceConfig.java
package com.zknu.demo.config;

import com.alibaba.druid.pool.DruidDataSource;
import org.springframework.boot.context.properties.ConfigurationProperties;
import org.springframework.context.annotation.Bean;
import org.springframework.context.annotation.Configuration;

import javax.sql.DataSource;

@Configuration
public class DataSourceConfig {
    @Bean
    @ConfigurationProperties(prefix = "spring.datasource")

    public DataSource getDruid(){
        return new DruidDataSource();
    }
}
创建接口文件
创建mapper包,在其中创建ArticleMapper接口文件
package com.zknu.demo.mapper;

import com.zknu.demo.model.Article;
import org.apache.ibatis.annotations.*;

import java.util.List;

@Mapper
public interface ArticleMapper {

    @Select(" select * from t_article")
    public List<Article> findAll();

    @Select("select * from t_article where id = #{id}")
    public Article findId(int id);

    @Insert("insert into t_article(id,title,content) values ( #{id} , #{title} , #{content})")
    public int insertArticle(Article article);

    @Update(" update t_article set title = #{title} where id = #{id} ")
    public int updateArticle(Article article);

    @Delete(" delete from t_article where id = #{id} ")
    public int deleteArticle(int id);
}
使用@Select等语句进行对数据表的操作
#{属性名} 是读取属性值的一种方式
如果Mapper注解过多需要重复添加时,可在项目启动类中
@MapperScan(“需要扫描的具体包名”)
eg. @MapperScan(“com.zknu.demo.mapper”)
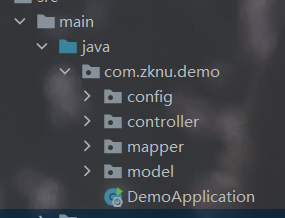
所以为了使用方便,要对所有的文件进行归类放置
一般都会把 接口文件放于 mapper包中
所有的实体类文件放于 modle包中
自定义配置类放于 config 包中
控制层文件放于 controller 包中
增删改查
    @Autowired
    private ArticleMapper articleMapper;
    @Test
    public void selectArticle(){
        System.out.println(articleMapper.findAll());
    }
    //  查找所有数据行
    @Test
    public void selectIdArticle(){
        System.out.println(articleMapper.findId(1));
    }
    // 查找指定id的数据行
    @Test
    public void insertArticle(){
        Article article = new Article(20,"java","好难我不会");
        int a = articleMapper.insertArticle(article);
        if (a == 1)
            System.out.println("插入成功");
        else
            System.out.println("插入失败");

    }
    @Test
    public void updateArticle(){
        Article article = new Article(20,"spring","好难我不会");
        int flag = articleMapper.updateArticle(article);
        if( flag == 1 )
            System.out.println("更新成功");
        else
            System.out.println("更新失败");
    }
    @Test
    public void deleteArticle(){
        System.out.println(articleMapper.deleteArticle(20));
        System.out.println(articleMapper.findAll());
    }
原数据表
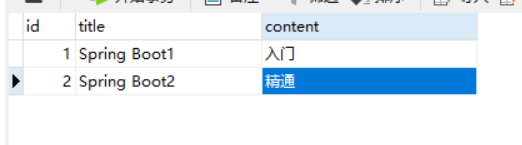
运行结果:
1、查找所有数据行

2、查找指定id数据行

3、插入语句

4、更新语句

5、删除语句


 8519
8519


 被折叠的 条评论
为什么被折叠?
被折叠的 条评论
为什么被折叠?
 到【灌水乐园】发言


