


一、环境配置
配置yum源
1. 将saltstack包放在真机的默认发布目录下
/var/www/html/saltstack/rhel7/2018
2.虚拟机上编写yum源
[root@server1 ~]# vim /etc/yum.repos.d/salt.repo
[salt]
name=salt
baseurl=http://172.25.36.250/saltstack/rhel7/2018/
gpgcheck=0
[root@server1 ~]# scp /etc/yum.repos.d/salt.repo root@172.25.36.2:/etc/yum.repos.d/salt.repo
[root@server1 ~]# scp /etc/yum.repos.d/salt.repo root@172.25.36.3:/etc/yum.repos.d/salt.repo

2.安装salt
[root@server1 ~]# yum install -y salt-master.noarch salt-minion.noarch

[root@server2 ~]# yum install -y salt-minion.noarch
[root@server2 ~]# vim /etc/salt/minion
16  master: 172.25.36.1
server3配置与server2配置相同
3.salt秘钥认证设置
[root@server1 ~]# salt-key -L
[root@server1 ~]# salt-key -A
Proceed? [n/Y] Y
[root@server1 ~]# salt-key -L
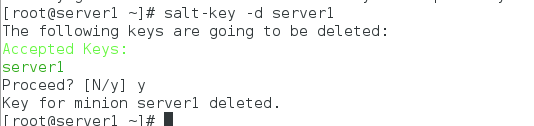
如果想删除某个节点:salt-key -d server1
[root@server1 ~]# netstat -atnlp
4505:发布订阅
4506:接受信息
4.测试:
[root@server1 ~]# salt '*' test.ping  #'*':调用所有主机
server3:
    True
server2:
    True
- 调用模块:cmd.run 'df -h'
- 所有文件定位 都必须方在/srv/salt
httpd: #既是声明,又是软件包的名在,在同一文件中时唯一的
模块.方法apache.install(base=/srv/salt,调用install文件)
[root@server1 ~]# yum install -y lsof.x86_64
[root@server1 ~]# lsof -i :4505
[root@server1 ~]# yum install -y python-setproctitle.x86_64
[root@server1 ~]# systemctl restart salt-master.service
测试:
[root@server1 ~]# salt '*' cmd.run 'df -h'
[root@server1 ~]# salt '*' cmd.run 'hostname'

二、自动化部署httpd服务
1.更改配置文件
[root@server1 ~]# cd /etc/salt/
[root@server1 salt]# vim minion
568 file_roots:
569   base:
570     - /srv/salt
[root@server1 salt]# systemctl restart salt-master.service
2.建立base目录,编辑安装文件
[root@server1 ~]# mkdir /srv/salt
[root@server1 ~]# cd /srv/salt/
[root@server1 salt]# mkdir apache
[root@server1 salt]# cd apache/
[root@server1 apache]# vim install.sls
httpd:
  pkg.installed
3.安装
[root@server1 apache]# salt server2 state.sls apache.install #state.sls--状态.调用

多个安装:
[root@server1 apache]# vim install.sls

httpd-install:
  pkg.installed:
    - pkgs:
      - httpd
      - php
      - httpd-tools
[root@server1 apache]# salt server2 state.sls apache.install


4.添加重启服务
[root@server1 apache]# vim install.sls
httpd-install:
  pkg.installed:
    - pkgs:
      - httpd
      - php
      - httpd-tools
  service.running:
    - name: httpd
    - enable: true
    - reload: True
[root@server1 apache]# salt server2 state.sls apache.install

5.添加监控文件
[root@server1 apache]# vim install.sls
httpd-install:
  pkg.installed:
    - pkgs:
      - httpd
      - php
      - httpd-tools

  service.running:
    - name: httpd
    - enable: true
    - reload: True
    - watch:
      - file: /etc/httpd/conf/httpd.conf

/etc/httpd/conf/httpd.conf:
  file.managed:
    - source: salt://apache/files/httpd.conf
    - user: root
    - group: root
- mode: 644 
pkg.installed: #安装服务
service.running: #启动模块
- name: httpd #服务名
- enable: True #开机自起
- reload: True #如果不加这个参数默认会restart,加了这个参数,watch 监控一个文件,文件发生改变,就会重载服务
- watch:
- file /etc/httpd/conf/http.conf
将httpd的主配置文件放在files目录下:
[root@server1 apache]# mkdir files
[root@server1 apache]# cd files/
[root@server1 files]# scp server2:/etc/httpd/conf/httpd.conf .
[root@server1 apache]# salt server2 state.sls apache.install
#server2:
[root@server2 minion]# yum install tree -y
[root@server2 minion]# cd /var/cache/salt/minion/
[root@server2 minion]# ls
[root@server2 minion]# tree .
.
|-- accumulator
|-- extmods
|-- files
|   `-- base
|       `-- apache
|           |-- files
|           |   `-- httpd.conf
|           `-- install.sls
|-- highstate.cache.p
|-- pkg_refresh
|-- proc
`-- sls.p

7 directories, 5 files

三、安装和服务的启动分开部署:
1.编辑install.sls文件
[root@server1 apache]# vim install.sls
httpd-install:
  pkg.installed:
    - pkgs:
      - httpd
      - php
      - httpd-tools

  file.managed:
    - name: /etc/httpd/conf/httpd.conf
    - source: salt://apache/files/httpd.conf
    - user: root
    - group: root
    - mode: 644
2.编辑service服务启动文件:service.sls
[root@server1 apache]# vim service.sls
include:
  - apache.install

httpd-service:
  service.running:
    - name: httpd
    - enable: true
    - reload: True
    - watch:
      - file: httpd-install
#测试:
关闭server2上的httpd服务
[root@server2 minion]# systemctl stop httpd执行开启服务的文件:
[root@server1 apache]# salt server2 state.sls apache.service
查看server2上的httpd的状态:
[root@server2 minion]# systemctl status httpd四、Salt部署源码nginx
(一)
1.建立nginx目录
[root@server1 salt]# mkdir nginx
[root@server1 salt]# cd nginx/
[root@server1 nginx]# mkdir files
[root@server1 nginx]# cd files/
[root@server1 files]# ls
nginx-1.15.8.tar.gz
2.编辑安装文件
[root@server1 nginx]# vim install.sls
nginx-install:
  pkg.installed:
    - pkgs:
      - gcc
      - make
      - pcre-devel
      - zlib-devel
  file.managed:
    - name: /mnt/nginx-1.15.8.tar.gz
    - source: salt://nginx/files/nginx-1.15.8.tar.gz

  cmd.run:
    - name: cd /mnt && tar zxf nginx-1.15.8.tar.gz && cd nginx-1.15.8 && sed -i 's/CFLAGS="$CFLAGS -g"/#CFLAGS="$CFLAGS -g"/g' auto/cc/gcc &&./configure --prefix=/usr/local/nginx &> /dev/null && make &> /dev/null && make install &> /dev/null
    - creates: /usr/local/nginx
3.执行:server3上安装nginx
[root@server1 nginx]# salt server3 state.sls nginx.install
4.查看
[root@server3 ~]# cd /mnt/nginx-1.15.8/
[root@server3 nginx-1.15.8]# du -sh /usr/local/nginx/
872K    /usr/local/nginx/  #说明注释了debug
(二)启动脚本设置
1.将启动脚本放在master的/srv/salt/nginx/files目录下
[root@foundation36 Desktop]# scp nginx.service root@172.25.36.1:/srv/salt/nginx/files

[root@server1 nginx]# cat files/nginx.service
[Unit]
Description=The NGINX HTTP and reverse proxy server
After=syslog.target network.target remote-fs.target nss-lookup.target

[Service]
Type=forking
PIDFile=/usr/local/nginx/logs/nginx.pid
ExecStartPre=/usr/local/nginx/sbin/nginx -t
ExecStart=/usr/local/nginx/sbin/nginx
ExecReload=/usr/local/nginx/sbin/nginx -s reload
ExecStop=/bin/kill -s QUIT $MAINPID
PrivateTmp=true

[Install]
WantedBy=multi-user.target
2.编辑nginx的服务service.sls文件
[root@server1 nginx]# vim service.sls
include:
  - nginx.install

/usr/local/nginx/conf/nginx.conf:
  file.managed:
    - source: salt://nginx/files/nginx.conf

nginx-service:
  file.managed:
    - name: /etc/systemd/system/nginx.service
    - source: salt://nginx/files/nginx.service

  service.running:
    - name: nginx
    - enable: true
    - reload: true
    - watch:
      - file: /usr/local/nginx/conf/nginx.conf
3.执行nginx服务脚本
[root@server1 nginx]# salt server3 state.sls nginx.service
4.server3上查看nginx的状态
[root@server3 nginx-1.15.8]# systemctl status nginx
[root@server3 ~]# curl localhost

5更改worker进程数
[root@server3 nginx-1.15.8]# scp /usr/local/nginx/conf/nginx.conf server1:/srv/salt/nginx/files
[root@server1 nginx]# cd files/
[root@server1 files]# vim nginx.conf
  3 worker_processes  2;

[root@server3 ~]# ps ax
14980 ?        S      0:00 nginx: worker process
14981 ?        S      0:00 nginx: worker process
不同的主机执行不同脚本文件
[root@server1 nginx]# cd
[root@server1 ~]# cd /srv/salt/
[root@server1 salt]# ls
apache  nginx
[root@server1 salt]# vim top.sls
base:
  'server2':
    - apache.service
  'server3':
    - nginx.service

[root@server1 salt]# salt '*' state.highstate


 333
333

 被折叠的 条评论
为什么被折叠?
被折叠的 条评论
为什么被折叠?
 到【灌水乐园】发言


