


React+Redux 数据存储持久化
1、安装相关依赖
yarn add @reduxjs/toolkit redux react-redux redux-persist
2、userSlice:用户状态数据切片封装
import { createSlice, PayloadAction } from '@reduxjs/toolkit'

interface IUserInfo {
  userName: string
  avatar?: string
  brief?: string
}

// 使用该类型定义初始 state
const initialState = {
  userInfo: <IUserInfo>{
    userName: 'zh',
    brief: '无心'
  }
}

const userSlice = createSlice({
  name: 'user',
  initialState,
  reducers: {
    // action: {
    //   payload: { uerName: 'zhw' },
    //   type: 'user/updateUserName'    name + 方法名
    // }
    // 使用: dispatch(updateUserName({ uerName: 'zhw' }))
    // // 使用 PayloadAction 类型声明 `action.payload` 的内容
    updateUserInfo: (state, action: PayloadAction<IUserInfo>) => {
      // Redux Toolkit 允许在 reducers 中编写 "mutating" 逻辑。
      // 它实际上并没有改变 state,因为使用的是 Immer 库,检测到“草稿 state”的变化并产生一个全新的
      // 基于这些更改的不可变的 state。

      state.userInfo = action.payload
    }
  }
})

// 导出修改state  dispatch时的actions
export const { updateUserInfo } = userSlice.actions
export default userSlice.reducer
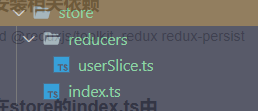
3、在store的index.ts中
默认已经模块化了reducers,如下图所示
// configureStore: store配置项
import { configureStore } from '@reduxjs/toolkit'
// combineReducers: 组合reducers目录下的所有reducer模块
import { combineReducers } from 'redux'
// 数据持久化
import { persistStore, persistReducer } from 'redux-persist'
// defaults to localStorage for web
import storageLocation from 'redux-persist/lib/storage'
// import storageSession from 'redux-persist/lib/storage/session'

// 导入自己封装好的reducers
import userReducer from './reducers/userSlice'
// 持久化存储配置对象
const persistConfig = {
  key: 'root',
  version: 1,
  storage: storageLocation
}
// 持久化处理后的reducers
const persistedReducer = persistReducer(
  persistConfig,
  combineReducers({
    // 数据切片
    userReducer
  })
)
// 将初九话插件和store通过middleware关联起来
const store = configureStore({
  // userReducer 模块名
  reducer: persistedReducer,
  middleware: (getDefaultMiddleware) =>
    getDefaultMiddleware({
      serializableCheck: false
    })
})

// 可以订阅 store
// store.subscribe(() => console.log(store.getState(), 'userSlice'))

// 持久化的store
const persistor = persistStore(store)

export { store, persistor }
4、将store和App组件关联起来
import React from 'react'
import ReactDOM from 'react-dom/client'
// UI css
// antd v5 自带的重置样式
import 'antd/dist/reset.css'
// 自定义css
import '@/assets/style/global.scss'

// 导入路由模式
import { BrowserRouter } from 'react-router-dom'
// 导入redux仓库
import { Provider } from 'react-redux'
import { store, persistor } from '@/store'
// store持久化
import { PersistGate } from 'redux-persist/integration/react'

import App from './App.tsx'

ReactDOM.createRoot(document.getElementById('root')!).render(
  <Provider store={store}>
    <PersistGate loading={null} persistor={persistor}>
      <React.StrictMode>
        <BrowserRouter>
          <App />
        </BrowserRouter>
      </React.StrictMode>
    </PersistGate>
  </Provider
5、在组件中使用store
import { useSelector, useDispatch } from 'react-redux'
import { updateUserInfo } from '@/store/reducers/userSlice'
const Home = () => {
  const {
    userInfo: { userName, brief }
  } = useSelector((state: RootState) => state.userReducer)

  const dispatch = useDispatch()
  const test = () => {
    dispatch(updateUserInfo({ userName: 'zhw', brief: '那就这样吧' }))
  }
  return (
    <>
      <div>home page</div>
      <p>{userName}</p>
      <p>{brief}</p>
      <button onClick={test}>测试</button>
    </>
  )
}
export default Home
数据持续化存储github redux-persist
redux工具redux RTK
redux官网 redux


 769
769


 被折叠的 条评论
为什么被折叠?
被折叠的 条评论
为什么被折叠?
 到【灌水乐园】发言


