


看视频学习的一个过程下来,虽然错误排除了,程序也能跑起来,但是里面的逻辑到现在还是明白不了,只知道怎么去使用,不知道里面实现的原理,迫于课程设计以及初次学习的复杂性,只能硬着头皮向下学,记住相关实现步骤,希望之后的学习能够让我有更加深刻的理解。在此处记录好实现步骤。
步骤①导入
依赖坐标步骤②
数据表bean以及实现接口步骤③配置
数据源以及mybatis步骤④
service层的装入步骤⑤
实现部分
步骤①导入
依赖坐标
下面是本次需要使用的依赖坐标:
<?xml version="1.0" encoding="UTF-8"?>

<project xmlns="http://maven.apache.org/POM/4.0.0" xmlns:xsi="http://www.w3.org/2001/XMLSchema-instance"
  xsi:schemaLocation="http://maven.apache.org/POM/4.0.0 http://maven.apache.org/xsd/maven-4.0.0.xsd">
  <modelVersion>4.0.0</modelVersion>

  <groupId>com.itheima</groupId>
  <artifactId>spring_06_spring_mybatis</artifactId>
  <version>1.0-SNAPSHOT</version>

  <dependencies>
    <dependency>
      <groupId>org.springframework</groupId>
      <artifactId>spring-context</artifactId>
      <version>5.0.0.RELEASE</version>
    </dependency>
    <dependency>
      <groupId>com.alibaba</groupId>
      <artifactId>druid</artifactId>
      <version>1.1.16</version>
    </dependency>

    <dependency>
      <groupId>org.mybatis</groupId>
      <artifactId>mybatis</artifactId>
      <version>3.5.6</version>
    </dependency>

     <dependency>
            <groupId>mysql</groupId>
            <artifactId>mysql-connector-java</artifactId>
            <version>8.0.25</version>
        </dependency>

    <dependency>
      <groupId>org.springframework</groupId>
      <artifactId>spring-jdbc</artifactId>
      <version>5.2.10.RELEASE</version>
    </dependency>

    <dependency>
      <groupId>org.mybatis</groupId>
      <artifactId>mybatis-spring</artifactId>
      <version>1.3.0</version>
    </dependency>

  </dependencies>
</project>
步骤②
数据表bean以及实现接口
处在目录的位置:
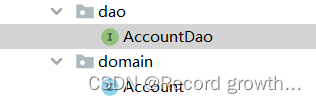
- 数据表的实现类javabean
黑老师提供的是一个Account表,以前在JavaWeb中学习的叫做
pojo的文件,现在叫什么,叫domain。反正这里放的是一个数据表的实现类。在这里实现了一个这个接口,还是头一回见。
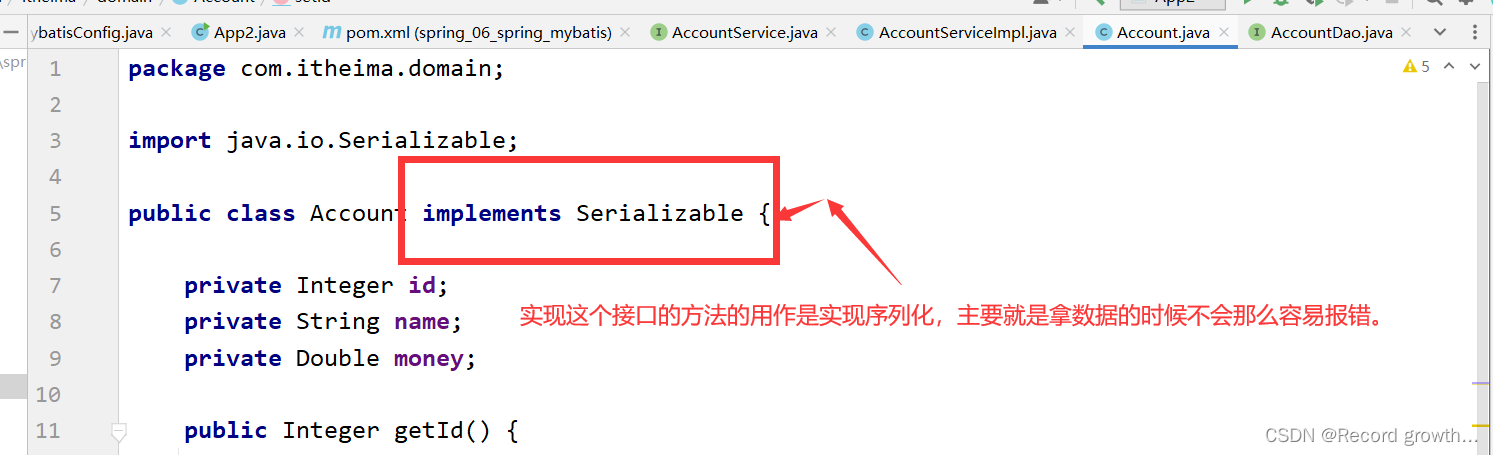
代码:
package com.itheima.domain;

import java.io.Serializable;

public class Account implements Serializable {

    private Integer id;
    private String name;
    private Double money;

    public Integer getId() {
        return id;
    }

    public void setId(Integer id) {
        this.id = id;
    }

    public String getName() {
        return name;
    }

    public void setName(String name) {
        this.name = name;
    }

    public Double getMoney() {
        return money;
    }

    public void setMoney(Double money) {
        this.money = money;
    }

    @Override
    public String toString() {
        return "Account{" +
                "id=" + id +
                ", name='" + name + '\'' +
                ", money=" + money +
                '}';
    }
}
- 实现的sql的代码,以前是mapper中的内容。这里全部采用了注解开发,那如果复杂一点的SQL语句该怎么办?
package com.itheima.dao;

import com.itheima.domain.Account;
import org.apache.ibatis.annotations.Delete;
import org.apache.ibatis.annotations.Insert;
import org.apache.ibatis.annotations.Select;
import org.apache.ibatis.annotations.Update;

import java.util.List;

public interface AccountDao {

    @Insert("insert into tbl_account(name,money)values(#{name},#{money})")
    void save(Account account);

    @Delete("delete from tbl_account where id = #{id} ")
    void delete(Integer id);

    @Update("update tbl_account set name = #{name} , money = #{money} where id = #{id} ")
    void update(Account account);

    @Select("select * from tbl_account")
    List<Account> findAll();

    @Select("select * from tbl_account where id = #{id} ")
    Account findById(Integer id);
}
步骤③配置
数据源以及mybatis
- 配置数据源
数据源使用的是druid的连接池,再加上配置文件的方式。实现步骤在之前的学习记录中存在,主要过程也不再赘述,主要就是需要注意导入
@Import({MybatisConfig.class,JdbcConfig.class}).。在之前的错误中就是因为没有导入才爆红。
下面是jdbcConfig:
package com.itheima.config;

import com.alibaba.druid.pool.DruidDataSource;
import org.springframework.beans.factory.annotation.Value;
import org.springframework.context.annotation.Bean;
import org.springframework.context.annotation.Configuration;

import javax.sql.DataSource;


public class JdbcConfig {
    @Value("${jdbc.driver}")
    private String driver;
    @Value("${jdbc.url}")
    private String url;
    @Value("${jdbc.username}")
    private String userName;
    @Value("${jdbc.password}")
    private String password;

    @Bean
    public DataSource dataSource(){
        DruidDataSource ds = new DruidDataSource();
        ds.setDriverClassName(driver);
        ds.setUrl(url);
        ds.setUsername(userName);
        ds.setPassword(password);
        return ds;
    }
}
- 关键不理解部分mybatis配置类部分
下面有两个类,一个可以说对应的domain表,一个对应dao层的接口,后面的还好理解,mapper对应的就是接口这一块的,sql却对应bean,这个还是不是很理解, 但是按照以往的惯例,这个里面的代码以后也是以复制为主。
MybatisConfig
package com.itheima.config;

import org.mybatis.spring.SqlSessionFactoryBean;
import org.mybatis.spring.mapper.MapperScannerConfigurer;
import org.springframework.context.annotation.Bean;

import javax.sql.DataSource;

public class MybatisConfig {

    @Bean
    public SqlSessionFactoryBean sqlSessionFactory(DataSource dataSource){
        SqlSessionFactoryBean bean = new SqlSessionFactoryBean();
        bean.setTypeAliasesPackage("com.itheima.domain");
        bean.setDataSource(dataSource);
        return bean;
    }

    @Bean
    public MapperScannerConfigurer mapperScannerConfigurer(){
        MapperScannerConfigurer msc = new MapperScannerConfigurer();
        msc.setBasePackage("com.itheima.dao");
        return msc;
    }
}
- SpringConfig部分
这一部分其实还是很容易落下一些东西的,告诉自己
首先最基础的是该配置类本身应有的两个注解@Configuration以及@ComponentScan({"com.itheima"})。这就已经两个了,
然后就是去看它隔壁有没有配置类,如果有的话是需要导进来的,明显,这里有两个
@Import({MybatisConfig.class,JdbcConfig.class})。这就已经四个了。这里也有一个小细节,这两处,后面是没有冒号的,直接写字节码文件,联想到后面的拿容器,确实不需要。
最后就是看是不是存在配置文件,将用户名密码集中放的这种。这个的写法也不一样。
@PropertySource("classpath:jdbc.properties")
下面是代码用于留存:
package com.itheima.config;

import org.springframework.context.annotation.ComponentScan;
import org.springframework.context.annotation.Configuration;
import org.springframework.context.annotation.Import;
import org.springframework.context.annotation.PropertySource;

@Configuration
@ComponentScan({"com.itheima"})
@Import({MybatisConfig.class,JdbcConfig.class})
//@PropertySource:加载类路径jdbc.properties文件
@PropertySource("classpath:jdbc.properties")
public class SpringConfig {
}
步骤④
service层的装入
相应目录:
- 接口
这个接口和之前学JavaWeb的大体相同,内容主要就是从dao层复制来的一个一个接口方法。
package com.itheima.service;

import com.itheima.domain.Account;

import java.util.List;

public interface AccountService {

    void save(Account account);

    void delete(Integer id);

    void update(Account account);

    List<Account> findAll();

    Account findById(Integer id);

}
- 实现类。在这里面实现一个一个的接口。突然想起来,这个操作不需要再获取session已经个体Maper了,只需要,只需要写实现方法。sqlsession关闭也不存在。
代码:
package com.itheima.service.impl;

import com.itheima.dao.AccountDao;
import com.itheima.domain.Account;
import com.itheima.service.AccountService;
import org.springframework.beans.factory.annotation.Autowired;
import org.springframework.stereotype.Service;

import java.util.List;
@Service
public class AccountServiceImpl implements AccountService {

    @Autowired
    private AccountDao accountDao;

    public void save(Account account) {
        accountDao.save(account);
    }

    public void update(Account account){
        accountDao.update(account);
    }

    public void delete(Integer id) {
        accountDao.delete(id);
    }

    public Account findById(Integer id) {
        return accountDao.findById(id);
    }

    public List<Account> findAll() {
        return accountDao.findAll();
    }
}
步骤⑤
实现部分
对于实现过程还是比较简单,拿到容器之后直接调方法就可以了。拿容器这一块还是挺需要注意,接口和实现类并不一样。
import com.itheima.config.SpringConfig;
import com.itheima.domain.Account;
import com.itheima.service.AccountService;
import org.springframework.context.ApplicationContext;
import org.springframework.context.annotation.AnnotationConfigApplicationContext;

public class App2 {
    public static void main(String[] args) {
        ApplicationContext acac = new AnnotationConfigApplicationContext(SpringConfig.class);
        AccountService bean = acac.getBean(AccountService.class);

        Account account = bean.findById(1);
        System.out.println(account.getId());
    }
}
小结。
拿以前的写法来比较,名称稍稍有变化,主要还是service层这一块,装入之后直接调用方法,推测是mybatis的配置文件把工作做了,或者是容器?应该是ioc容器,一下子没明白是只装入了一个接口,没有装入实现类。还是得继续学习,争取在之后的学习中理解得更加深刻。


 201
201


 被折叠的 条评论
为什么被折叠?
被折叠的 条评论
为什么被折叠?
 到【灌水乐园】发言


