


 本文详细介绍了如何在AmazonAWS上使用免费服务器创建Windows10OpenVPN环境,包括设置实例、配置入站规则、安装和配置OpenVPN,以及生成和分发客户端证书。
使用环境
服务器使用的amazon的1年免费服务器。
客户端使用win10的openvpn连接。
服务器内网ip:172.31.2.77
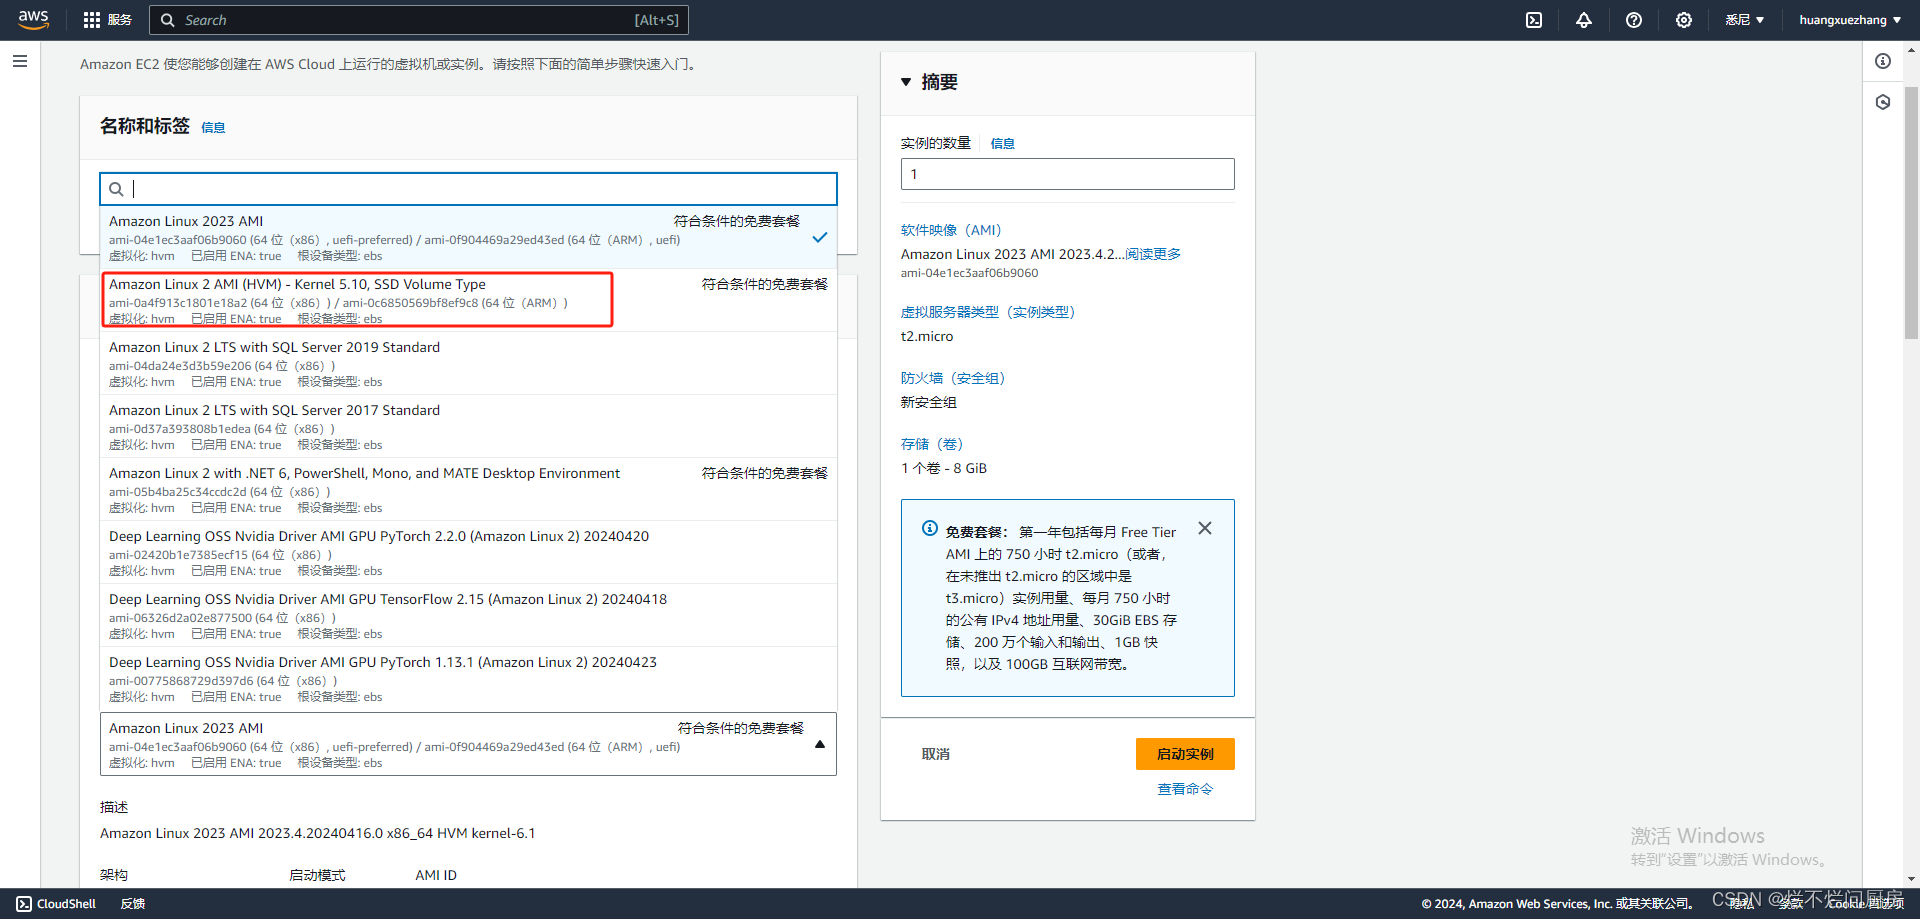
第一步先创建实例并连接
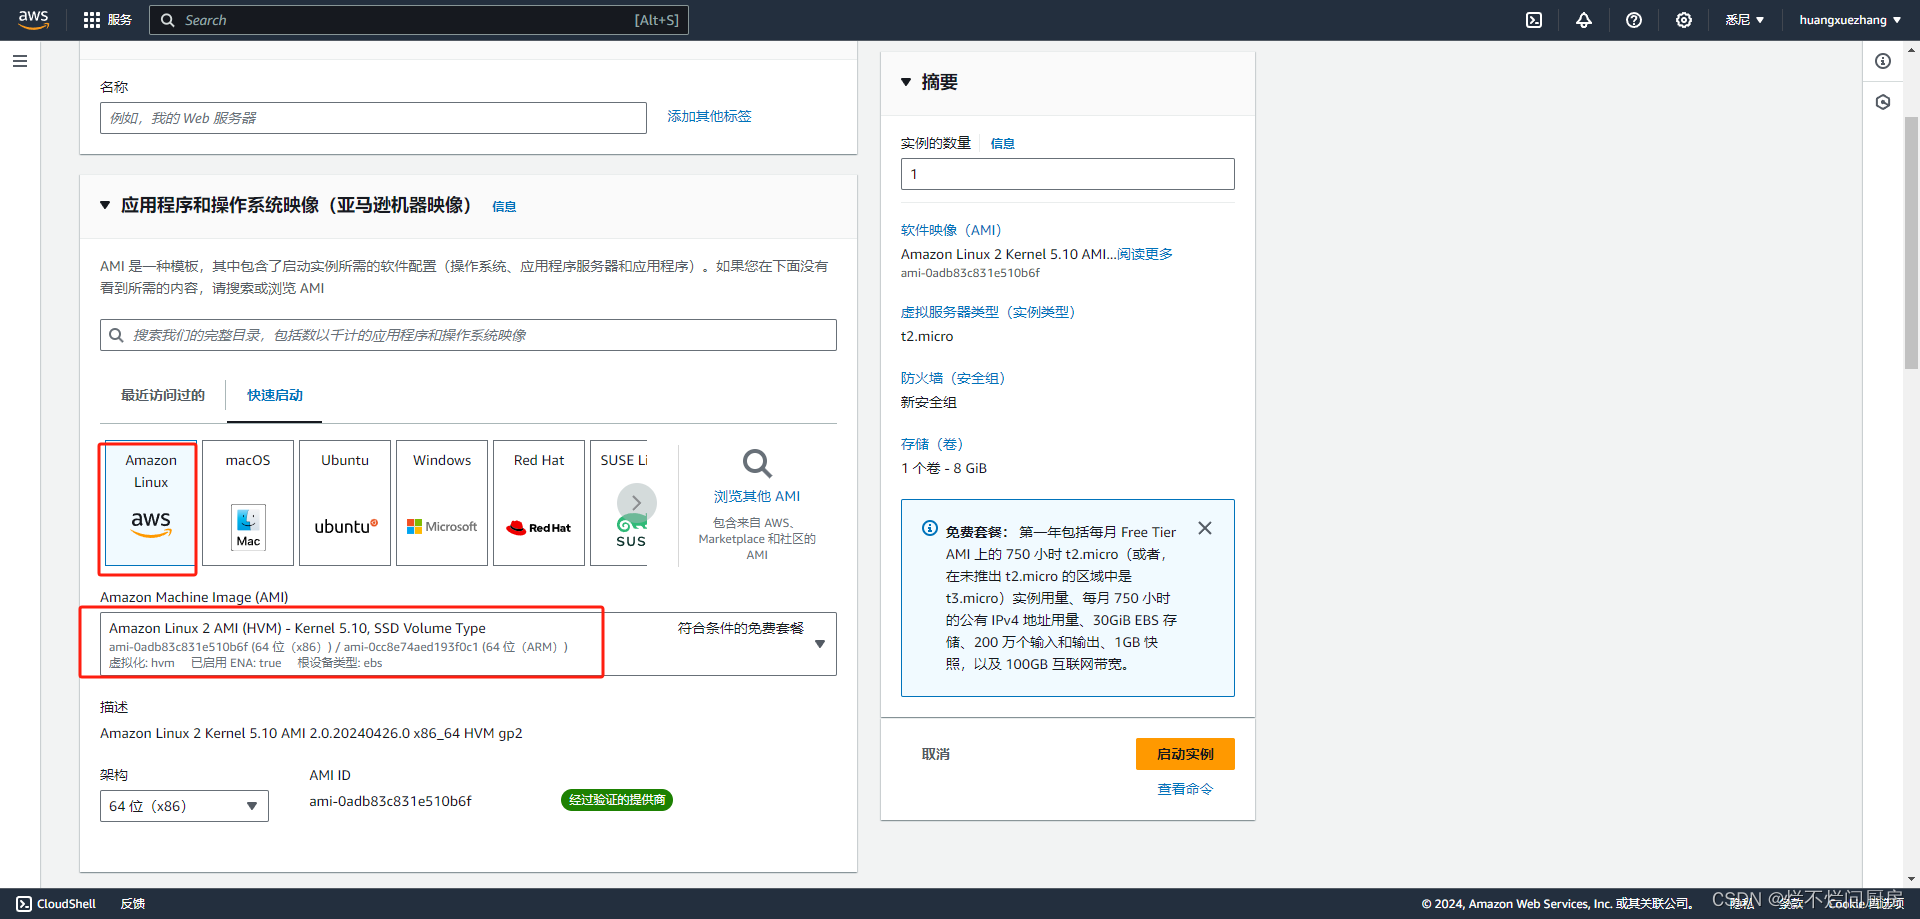
注意创建实例时勾选的AMI,选择第二个(下面红框这一个)AMI,使用默认AMI(第一个)安装epel会报错。
等待实例创建完成后使用XShell连接实例,下载XShell。
XShell内使用服务器公网IP,用户名输入:ec2-user,密码用创建实例时的密钥文件。
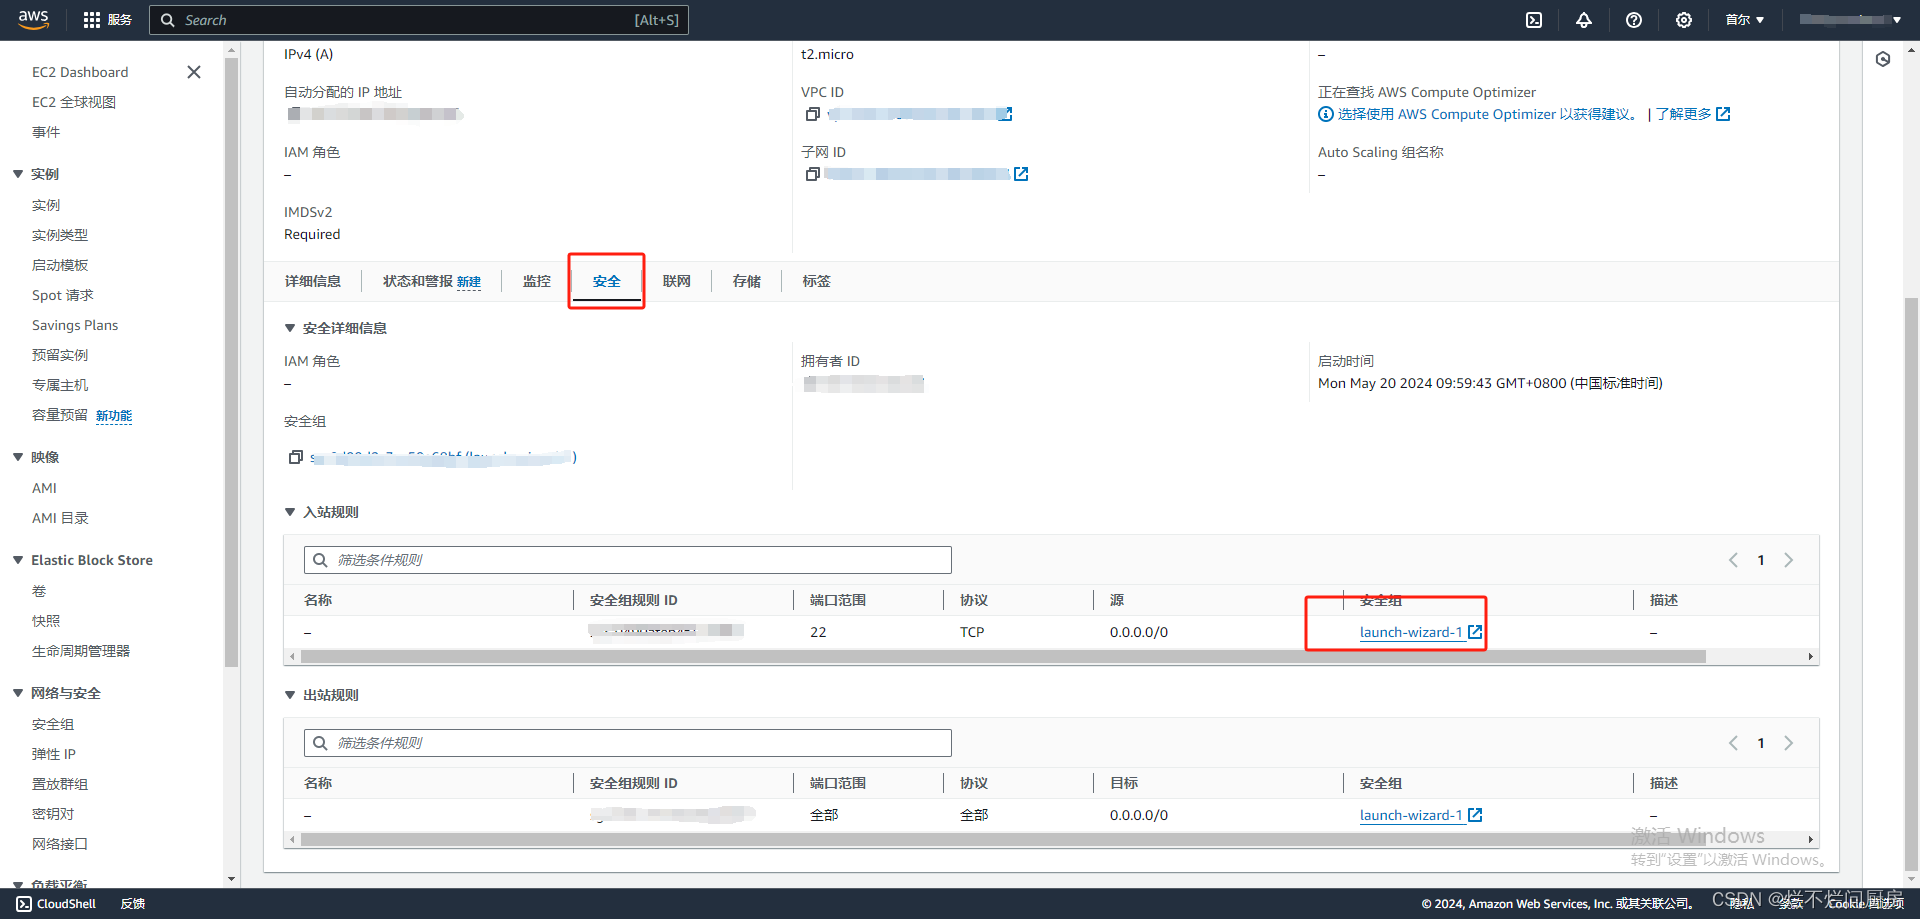
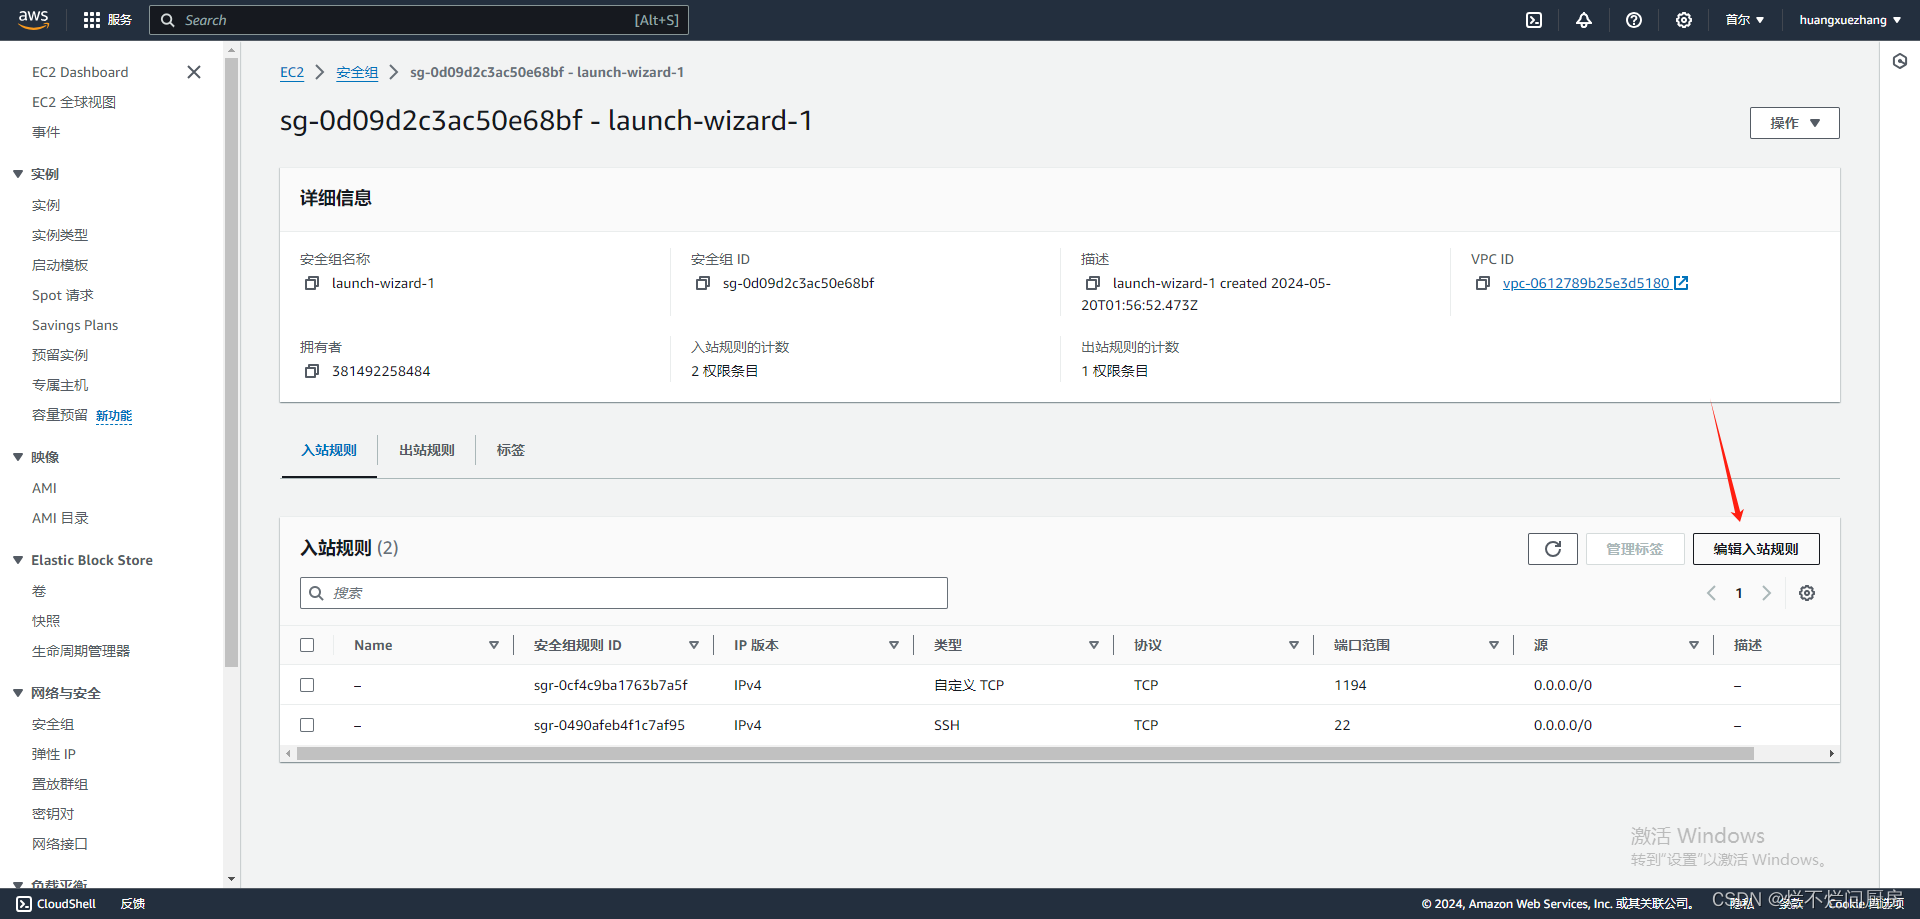
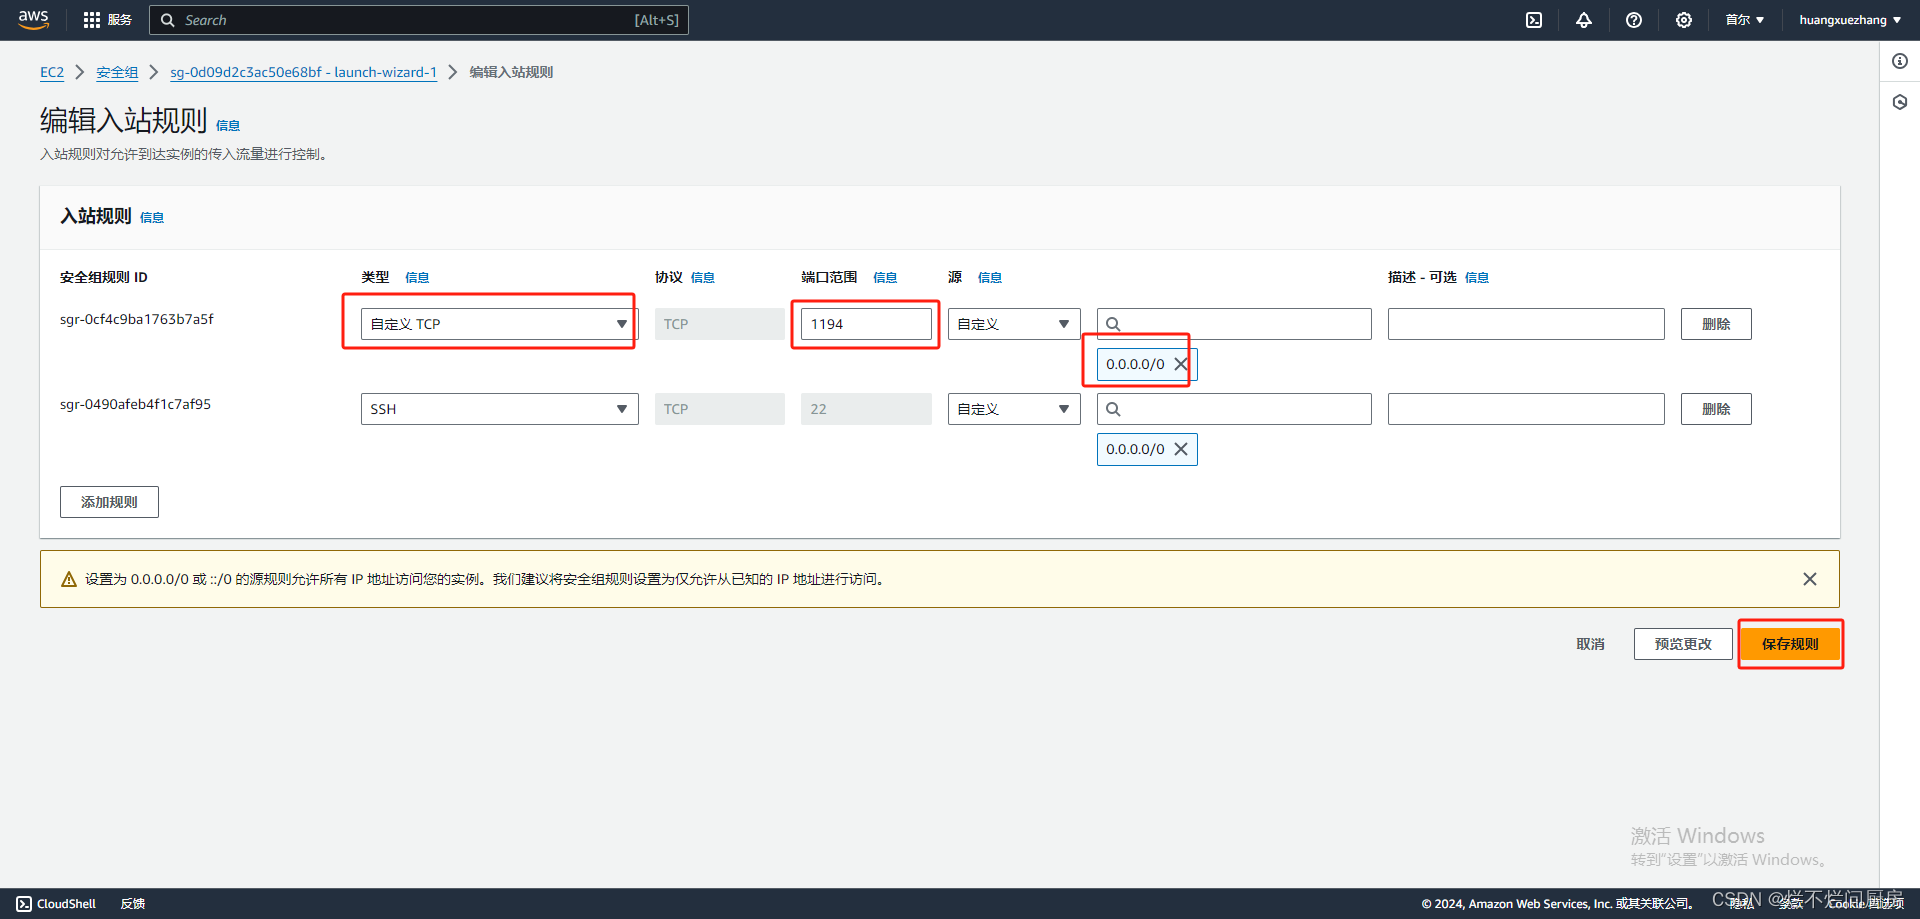
二、配置入站规则
在亚马逊控制台选择实例 =》 安全 =》 入站规则像我下面添加规则。
三、服务器配置
下面有三处需要根据自己情况修改的地方,openvpn版本、openvpn客户端端配置文件的外网ip(一般只改这一个)。
可一次性复制多条指令,下面已用空行隔开每块指令。
# 设置密码
sudo passwd

# 切换成root
su

# 首先准备好epel源,可以从阿里源下载,我的就是从阿里源下来的epel源
wget -O /etc/yum.repos.d/epel.repo https://mirrors.aliyun.com/repo/epel-7.repo
#重新制作yum缓存
yum clean all
yum makecache
#安装openvpn和制作证书工具
yum -y install openvpn
yum -y install easy-rsa

# 复制服务端配置文件,这里可能需要根据自己的openvpen的版本号修改路径,因为yum源不同的话可能版本不同,可用命令openvpn --version查看版本号,我安装的是2.4.12
cp /usr/share/doc/openvpn-2.4.12/sample/sample-config-files/server.conf /etc/openvpn/ # 可能需要修改版本
# 复制证书签发的相关文件
cp -r /usr/share/easy-rsa/ /etc/openvpn/easy-rsa-server
# 准备服务端签发证书相关变量的配置文件
cp /usr/share/doc/easy-rsa-3.0.8/vars.example /etc/openvpn/easy-rsa-server/3/vars
# 初始化服务端PKI生成PKI相关目录和文件
cd /etc/openvpn/easy-rsa-server/3
./easyrsa init-pki

# 创建CA证书,直接回车
./easyrsa build-ca nopass

# 生成服务端证书,直接回车
./easyrsa gen-req server nopass

# 签发服务端证书,输入yes
./easyrsa sign server server

# 创建 Diffie-Hellman 密钥(Diffie-Hellman是一种密钥交换协议,用于在公开信道上安全地共享密钥)
./easyrsa gen-dh
#编写服务端的配置文件
cat > /etc/openvpn/server.conf <<EOF
port 1194
proto tcp
dev tun
ca  /etc/openvpn/certs/ca.crt
cert  /etc/openvpn/certs/server.crt
key  /etc/openvpn/certs/server.key  # This file should be kept secret
dh  /etc/openvpn/certs/dh.pem
server 10.8.0.0 255.255.255.0
ifconfig-pool-persist ipp.txt # 保存客户端IP地址的文件
duplicate-cn # 多用户允许使用相同的密钥和证书连接服务器
push "redirect-gateway def1 bypass-dhcp"
push "dhcp-option DNS 8.8.8.8" # 固定写法
push "dhcp-option DNS 8.8.4.4" # 固定写法
keepalive 10 120
cipher AES-256-CBC
compress lz4-v2
push "compress lz4-v2"
max-clients 2048
user openvpn
group openvpn
status  /var/log/openvpn/openvpn-status.log
log-append   /var/log/openvpn/openvpn.log
verb 3
mute 20
EOF
# 配置防火墙转发规则
echo net.ipv4.ip_forward = 1 >> /etc/sysctl.conf
sysctl -p
yum install iptables-services -y
# systemctl disable --now firewalld # 提示Failed to execute operation: No such file or directory,忽略不计
systemctl start iptables
iptables -F
# 每次重启实例会被清空,要重新使用这条命令
iptables -t nat -A POSTROUTING -s 10.8.0.0/24 -j MASQUERADE
iptables -vnL -t nat
# 创建日志存放目录
mkdir -p /var/log/openvpn
# 拷贝相关证书认证文件
mkdir -p /etc/openvpn/certs
cp /etc/openvpn/easy-rsa-server/3/pki/issued/server.crt /etc/openvpn/certs/
cp /etc/openvpn/easy-rsa-server/3/pki/private/server.key /etc/openvpn/certs/
cp /etc/openvpn/easy-rsa-server/3/pki/ca.crt /etc/openvpn/certs/
cp /etc/openvpn/easy-rsa-server/3/pki/dh.pem /etc/openvpn/certs/
# 启动openvpn
systemctl daemon-reload
systemctl enable --now openvpn@server
systemctl restart openvpn@server
# 查看openvpn 1194端口是否启动
netstat -pantl
#创建客户端证书环境
cp -r /usr/share/easy-rsa/ /etc/openvpn/easy-rsa-client
cp /usr/share/doc/easy-rsa-3.0.8/vars.example /etc/openvpn/easy-rsa-client/3/varsa
cd /etc/openvpn/easy-rsa-client/3
# 初始化pki证书目录
./easyrsa init-pki

# 生成客户端证书,直接回车
./easyrsa gen-req yiyezhiqiu nopass

# 然后将客户端证书同步到服务端
cd /etc/openvpn/easy-rsa-server/3
./easyrsa import-req /etc/openvpn/easy-rsa-client/3/pki/reqs/yiyezhiqiu.req yiyezhiqiu
# 查看客户端信息
ll pki/reqs/yiyezhiqiu.req /etc/openvpn/easy-rsa-client/3/pki/reqs/yiyezhiqiu.req
# 签发客户端证书,输入yes
./easyrsa sign client yiyezhiqiu

#创建客户端配置文件目录
mkdir -p /etc/openvpn/client/yiyezhiqiu
cd /etc/openvpn/client/yiyezhiqiu
# 创建客户端配置文件
cat > /etc/openvpn/client/yiyezhiqiu/yiyezhiqiu.ovpn <<EOF
client
dev tun
proto tcp
remote 192.168.121.159 1194 # 外网ip,根据服务器外网IP进行更改,就是连接XShell用的那个IP,在实例可查看公有 IP 。
resolv-retry infinite
nobind
ca ca.crt
cert yiyezhiqiu.crt
key yiyezhiqiu.key
remote-cert-tls server
cipher AES-256-CBC
verb 3
compress lz4-v2
# 使客户端中所有流量经过VPN,所有网络连接都使用vpn
redirect-gateway def1
# 添加路由信息,ip根据服务器的内网ip填写
# ;route 172.31.2.0 255.255.255.0 # 内网ip,根据服务器内网IP进行更改,由于设置了redirect-gateway def1,所以这一步不用设置
EOF
# 将认证文件拷贝到客户端目录下
cp /etc/openvpn/easy-rsa-client/3/pki/private/yiyezhiqiu.key .
cp /etc/openvpn/easy-rsa-server/3/pki/issued/yiyezhiqiu.crt .
cp /etc/openvpn/easy-rsa-server/3/pki/ca.crt .
#重启openvpn
systemctl daemon-reload
systemctl enable --now openvpn@server
systemctl restart openvpn@server
# 安装lrzsz传输文件到客户端
yum -y install lrzsz

# 传输文件
sz ca.crt

sz yiyezhiqiu.crt

sz yiyezhiqiu.key

sz yiyezhiqiu.ovpn
四、客户端设置
在openvpn安装目录的config目录创建一个文件夹client,然后把服务器传过来的文件放到里面。打开openGUI连接实例就可以了。
本文档只供学习使用,如有不对,欢迎指正。
补充:
使用amazon注意扣费,同时开启几个实例很容易超过750小时实例免费使用额度,可以在平台账单与成本看详细情况。
客户端openvpn软件百度自行下载;
手机端使用:
openvpn安卓客户端下载(需要魔法),安装时如果提示证书不一致把网络关了再安装,把相关证书文件以标签形式(不懂百度)放进.ovpn配置文件,然后把.ovpn文件传给手机用openvpn打开就行了。
遇到问题:
有时被不明ip连接时,不管连没连上,只要访问到openvpn就会有这个问题,然后会导致自己也连接不上,表现出来的效果就是服务器能监听到客户端进来的流量,但是在openvpn日志中没显示有连接的信息(证明没到达openvpn),客户端显示一直在tcp连接中。暂时不知道原因是什么
解决办法:在控制台设置白明单,禁止陌生ip连接
引用教程原文链接:https://blog.csdn.net/m0_58833554/article/details/136068707


 1260
1260


 被折叠的 条评论
为什么被折叠?
被折叠的 条评论
为什么被折叠?
 到【灌水乐园】发言


