


搭建Dokcer私有仓库(low版)
yum install httpd-tools -y
mkdir -p /data/docker.registry/etc/registry/auth/
htpasswd -Bbn admin Theshy554 >> /data/docker.registry/etc/registry/auth/passwd
vim /etc/docker/daemon.json
{
  "registry-mirrors": ["http://hub-mirror.c.163.com", "https://docker.mirrors.ustc.edu.cn"],
  "insecure-registries": ["192.168.10.212:5000"]
}
systemctl daemon-reload
systemctl restart docker.service
docker run -tid \
--name registry \
-h registry \
-p 5000:5000 \
--memory 512m \
--memory-swap -1 \
--restart always \
-v /data/docker.registry/var/lib/registry:/var/lib/registry \
-v /data/docker.registry/etc/registry/auth:/etc/registry/auth \
-e REGISTRY_AUTH=htpasswd \
-e "REGISTRY_AUTH_HTPASSWD_REALM=Registry Realm" \
-e REGISTRY_AUTH_HTPASSWD_PATH=/etc/registry/auth/passwd \
docker.io/registry
http://192.168.10.212:5000/v2/_catalog
docker tag redis:latest 192.168.10.212:5000/redis_v1
docker login -u admin -p Thehsy554 192.168.10.212:5000

# 退出
docker logout 192.168.10.212:5000
docker push 192.168.10.212:5000/redis_v1
http://192.168.10.212:5000/v2/_catalog
搭建Harbor私有仓库(推荐)
curl -o /etc/yum.repos.d/CentOS-Base.repo https://mirrors.aliyun.com/repo/Centos-7.repo
curl -o /etc/yum.repos.d/epel.repo http://mirrors.aliyun.com/repo/epel-7.repo

yum install -y yum-utils device-mapper-persistent-data lvm2
yum-config-manager --add-repo https://mirrors.aliyun.com/docker-ce/linux/centos/docker-ce.repo

yum clean all
yum makecache
yum install -y vim net-tools wget -y
# 安装最新版本的 Docker Engine 和容器
sudo yum install docker-ce docker-ce-cli containerd.io

# 启动 docker
sudo systemctl start docker
# 停止 docker
sudo systemctl stop docker
# 重启 docker
sudo systemctl restart docker
# 设置开机启动
sudo systemctl enable docker
# 查看 docker 状态
sudo systemctl status docker
# 查看 docker 内容器的运行状态
sudo docker stats
# 查看 docker 概要信息
sudo docker info
# 查看 docker 帮助文档
sudo docker --help

# 安装校验
docker -v

# 编辑文件 daemon.json
vi /etc/docker/daemon.json
{
  "registry-mirrors": ["http://hub-mirror.c.163.com", "https://docker.mirrors.ustc.edu.cn"]
}
# 重新加载某个服务的配置文件
sudo systemctl daemon-reload
# 重新启动 docker
sudo systemctl restart docker

# 安装docker-compose 如有需要,修改上面 1.24.1 为指定版本号即可
sudo curl -L "https://get.daocloud.io/docker/compose/releases/download/1.24.1/docker-compose-$(uname -s)-$(uname -m)" -o /usr/local/bin/docker-compose
# 安装完后执行
sudo chmod +x /usr/local/bin/docker-compose
# 安装校验
docker-compose -v
yum install openssl openssl-devel -y
https://github.com/goharbor/harbor/releases
tar -xf harbor-offline-installer-v2.3.3.tgz -C /usr/local/
cd /usr/local/harbor/
docker load < harbor.v2.3.3.tar.gz
[root@localhost harbor]# mkdir /opt/ssl
[root@localhost harbor]# cd /opt/ssl
[root@localhost ssl]# pwd
/opt/ssl

[root@localhost ssl]# openssl genrsa -out ca.key 4096

[root@localhost ssl]# openssl req -x509 -new -nodes -sha512 -days 3650 \
-subj "/C=CN/ST=ShangHai/L=ShangHai/O=Oldboy/OU=Linux/CN=192.168.15.201" \
-key ca.key \
-out ca.crt
[root@localhost ssl]# openssl genrsa -out 192.168.15.201.key 4096
[root@localhost ssl]# openssl req -sha512 -new \
-subj "/C=CN/ST=ShangHai/L=ShangHai/O=Oldboy/OU=Linux/CN=192.168.15.201" \
-key 192.168.15.201.key \
-out 192.168.15.201.csr
[root@localhost ssl]# cat > v3.ext <<-EOF
authorityKeyIdentifier=keyid,issuer
basicConstraints=CA:FALSE
keyUsage = digitalSignature, nonRepudiation, keyEncipherment, dataEncipherment
extendedKeyUsage = serverAuth
subjectAltName = IP:192.168.15.201
EOF
# 将192.168.15.201 CRS 和 CRT 文件名中的 替换为 Harbor 主机名
openssl x509 -req -sha512 -days 3650 \
-extfile v3.ext \
-CA ca.crt -CAkey ca.key -CAcreateserial \
-in 192.168.15.201.csr \
-out 192.168.15.201.crt
openssl x509 -inform PEM -in 192.168.15.201.crt -out 192.168.15.201.cert
[root@localhost ssl]# mkdir -p /etc/docker/certs.d/192.168.15.201

[root@localhost ssl]# cp 192.168.15.201.key /etc/docker/certs.d/192.168.15.201/
[root@localhost ssl]# cp 192.168.15.201.cert /etc/docker/certs.d/192.168.15.201/
[root@localhost ssl]# cp ca.crt /etc/docker/certs.d/192.168.15.201/

[root@localhost ssl]# ll /etc/docker/certs.d/192.168.15.201/
total 12
-rw-r--r-- 1 root root 2053 Jul  6 20:32 192.168.15.201.cert
-rw-r--r-- 1 root root 3243 Jul  6 20:32 192.168.15.201.key
-rw-r--r-- 1 root root 2029 Jul  6 20:32 ca.crt

[root@localhost ssl]# systemctl restart docker
[root@localhost harbor]# pwd
/usr/local/harbor

[root@localhost harbor]# cp harbor.yml.tmpl harbor.yml
[root@localhost harbor]# vim harbor.yml
hostname: 192.168.15.201
port: 80

https:
  # https port for harbor, default is 443
  port: 443
  certificate: /opt/ssl/192.168.15.201.crt
  private_key: /opt/ssl/192.168.15.201.key
[root@localhost harbor]# ./prepare
vim /etc/docker/daemon.json
{
  "registry-mirrors": ["http://hub-mirror.c.163.com", "https://docker.mirrors.ustc.edu.cn"],
  "insecure-registries": ["192.168.10.231"]
}

# 重新加载某个服务的配置文件
sudo systemctl daemon-reload
# 重新启动 docker
sudo systemctl restart docker
[root@localhost harbor]# ./install.sh
https://192.168.15.201/

用户名:admin
密码: Harbor12345


1、打tag
[root@localhost harbor]# docker pull nginx
[root@localhost harbor]# docker tag nginx:latest 192.168.10.231/keylion/nginx:20221117
[root@localhost harbor]# docker images
2、登录harbor
[root@localhost harbor]# docker login 192.168.15.201
Username: admin
Password:
WARNING! Your password will be stored unencrypted in /root/.docker/config.json.
Configure a credential helper to remove this warning. See
https://docs.docker.com/engine/reference/commandline/login/#credentials-store
Login Succeeded
docker push 192.168.10.231/keylion/nginx:20221117

[root@keylion harbor]# cd /home/harbor/
[root@keylion harbor]# ./install.sh
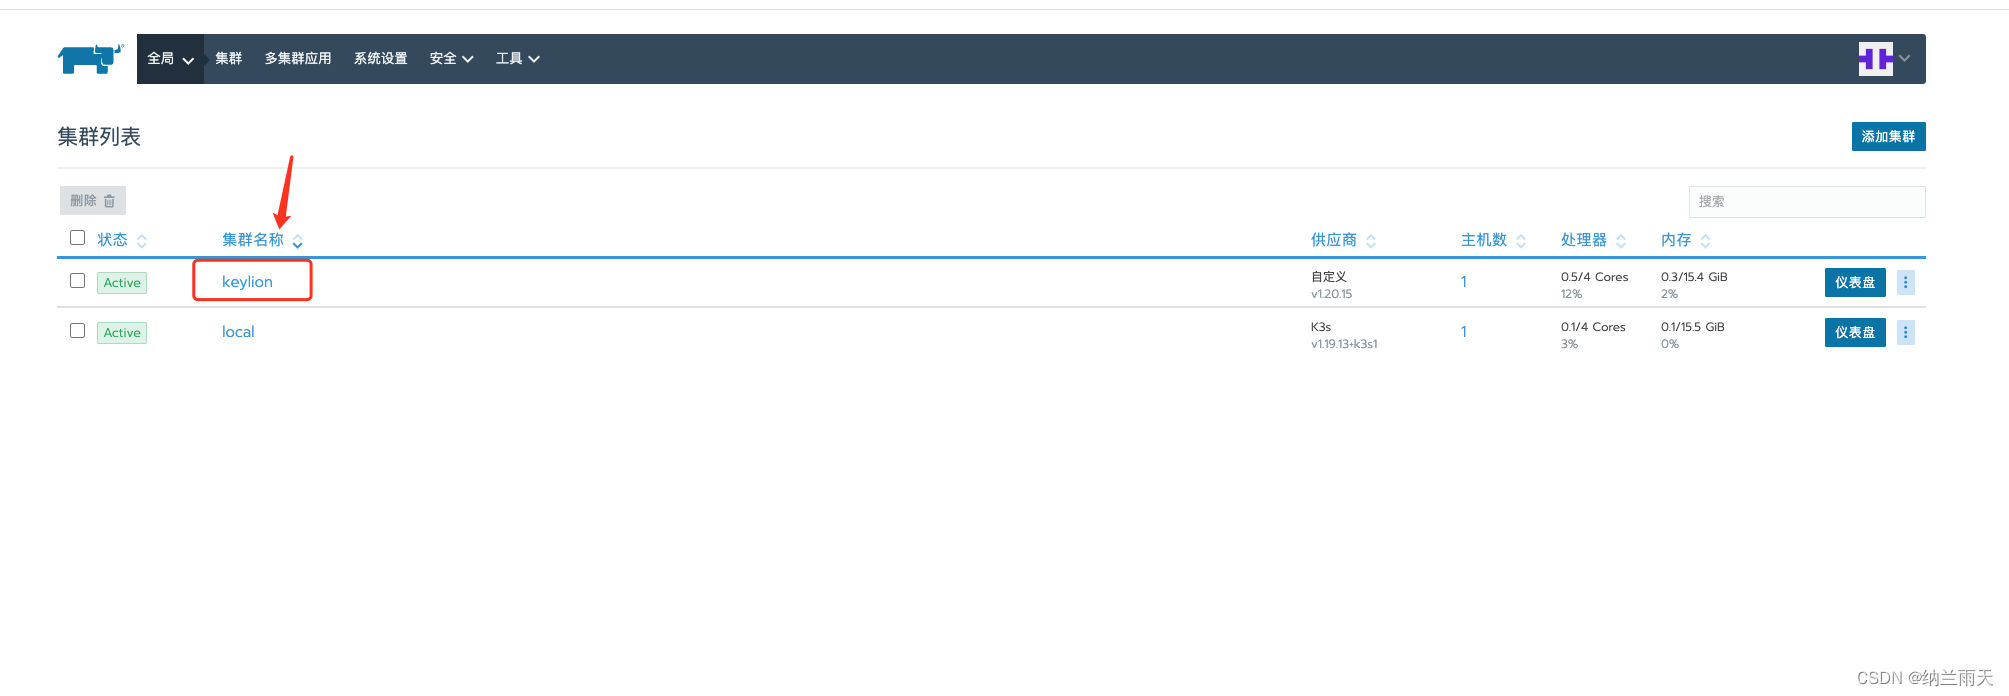
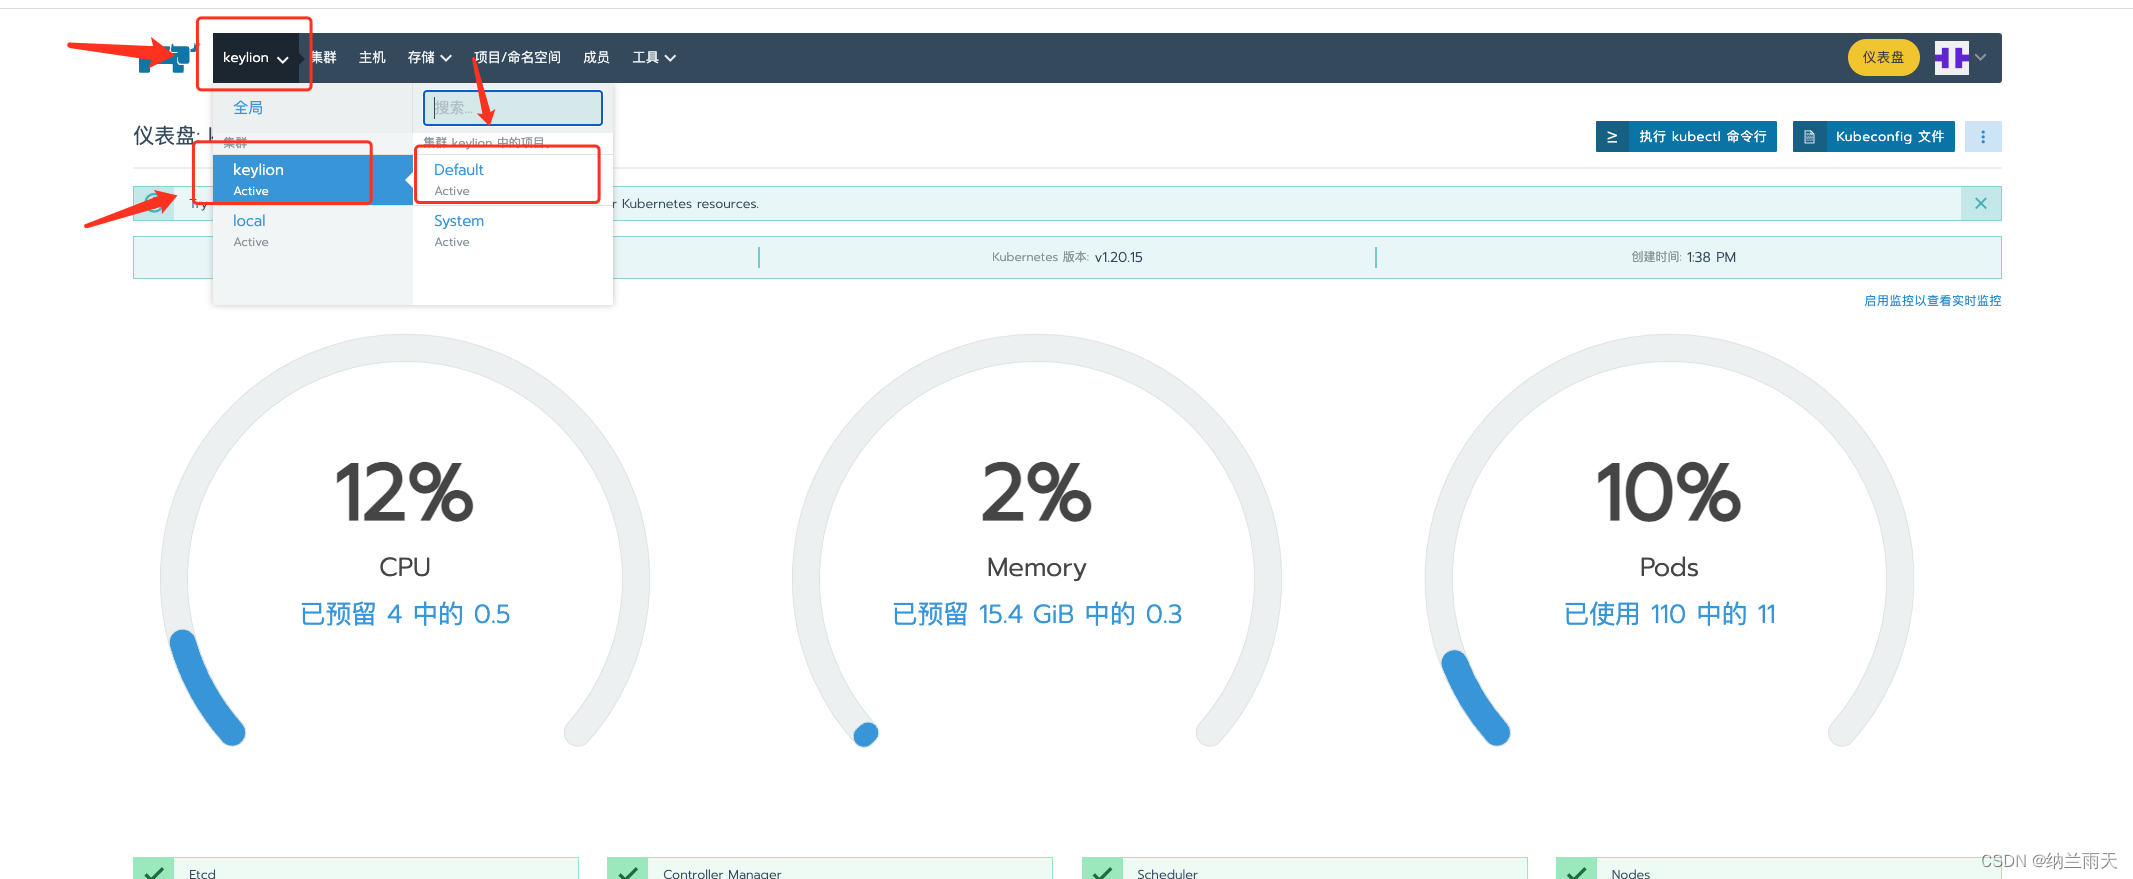
搭建Rancher
rm -rf /etc/cni \
       /etc/kubernetes \
       /opt/cni \
       /opt/rke \
       /run/secrets/kubernetes.io \
       /run/calico \
       /run/flannel \
       /var/lib/calico \
       /var/lib/etcd \
       /var/lib/cni \
       /var/lib/kubelet \
       /var/lib/rancher/rke/log \
       /var/log/containers \
       /var/log/pods \
       /var/run/calico

rm -f /var/lib/containerd/io.containerd.metadata.v1.bolt/meta.db
sudo systemctl restart containerd
sudo systemctl restart docker
docker pull rancher/rancher:v2.5.16
docker run --privileged -d \
  --restart=unless-stopped \
  --restart=always \
  --name=rancher \
  -v /home/rancher/data:/var/lib/rancher \
  -p 8080:80 -p 8443:443  rancher/rancher:v2.5.16


-
直接下一步
-
1、角色选择全选
2、高级选项里面的内网配置-输入与rancher同网段可达地址
	eg:rancher服务192.168.10.212,rancher-agent(内网地址) 192.168.10.230 (230必须是可以ping通的)
3、copy 最下面的命令道上面填写的内网服务器里执行即可
-


-
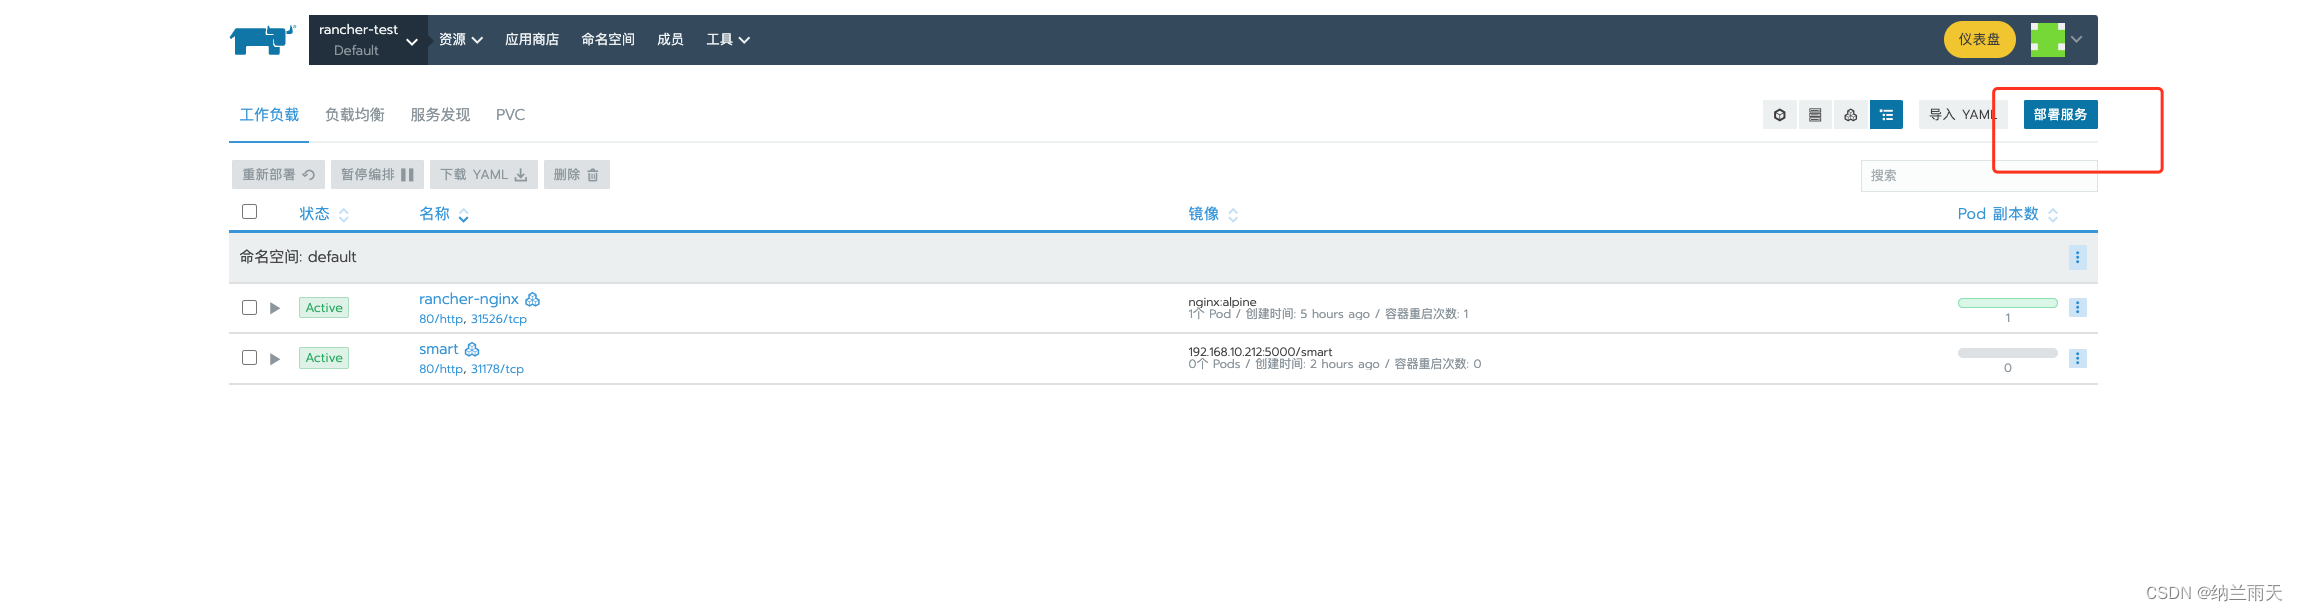
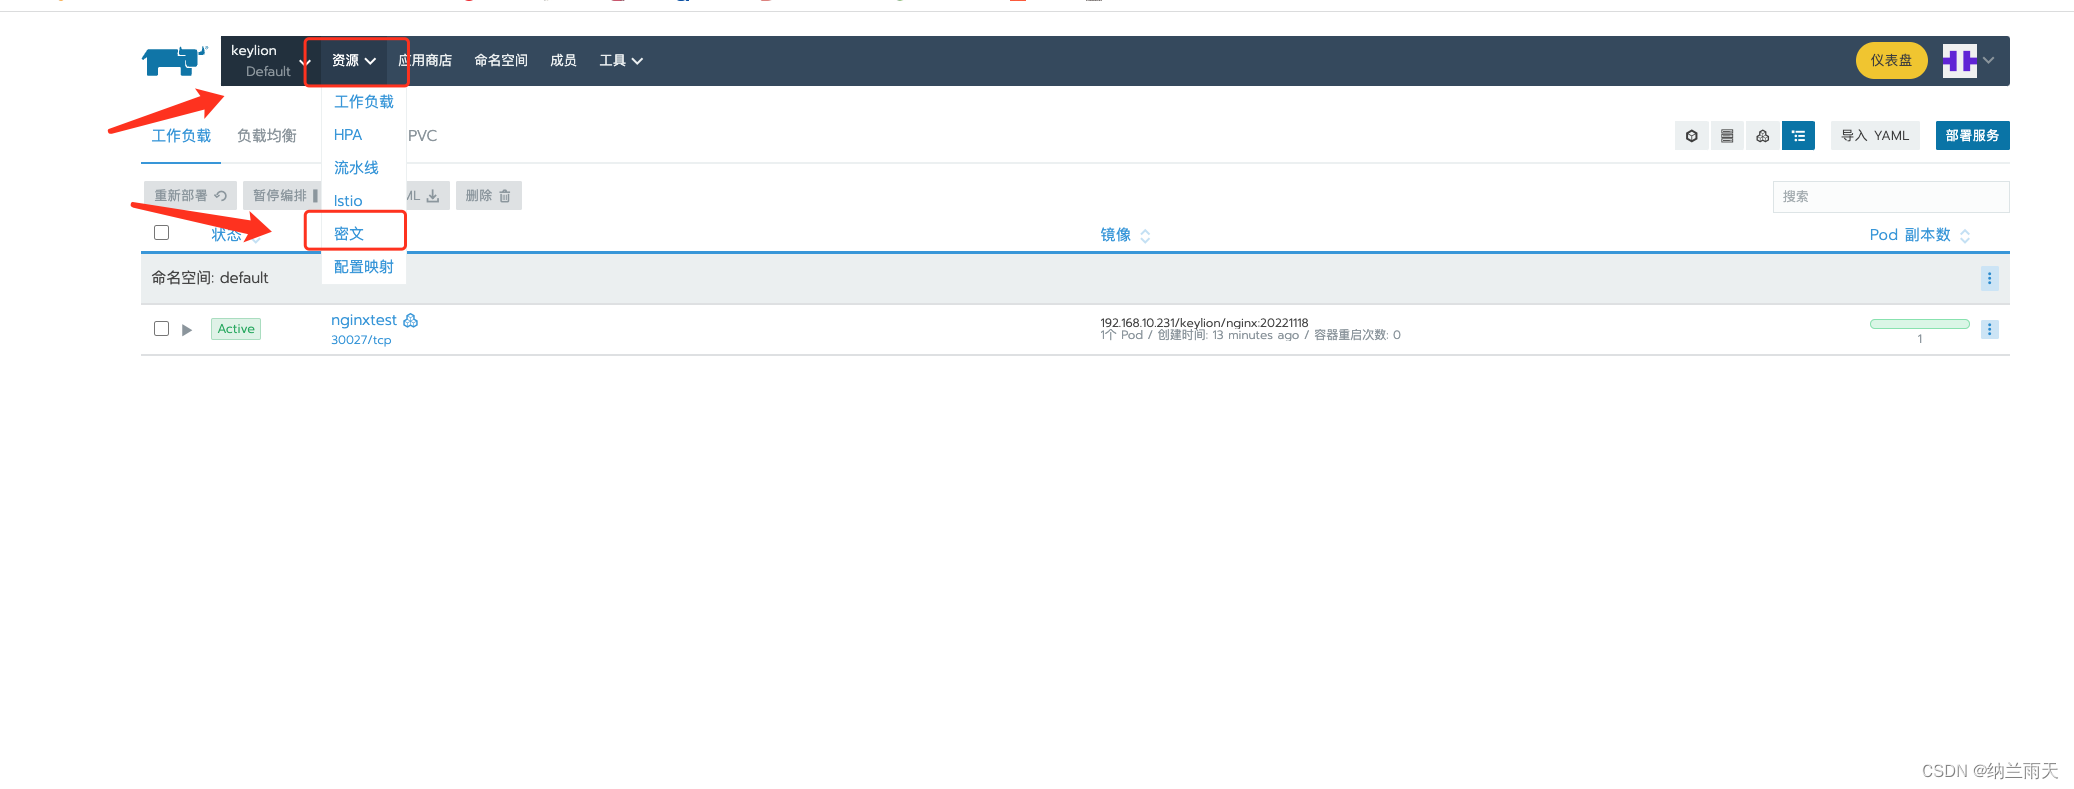
配置私有镜像仓库
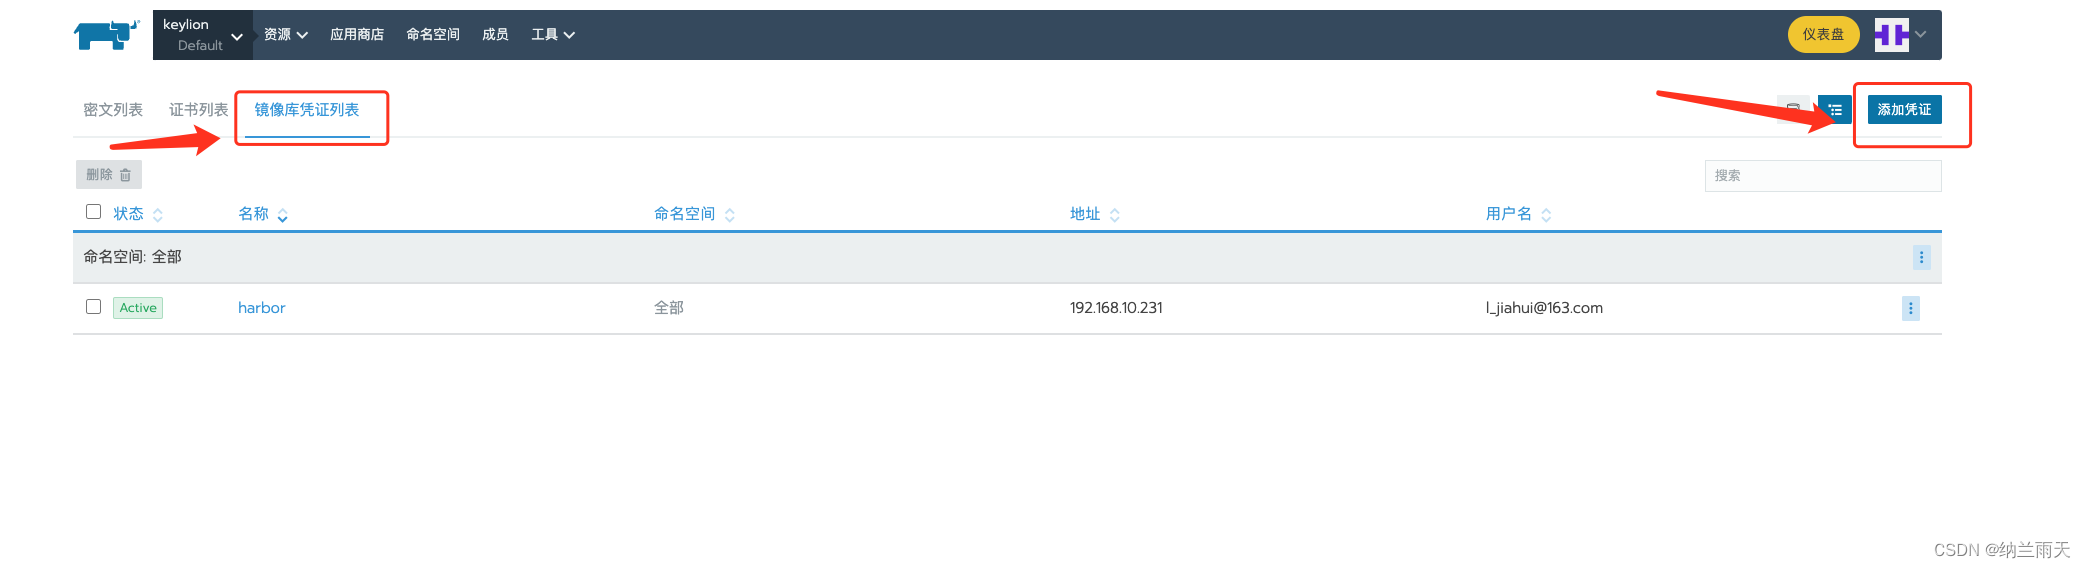
-
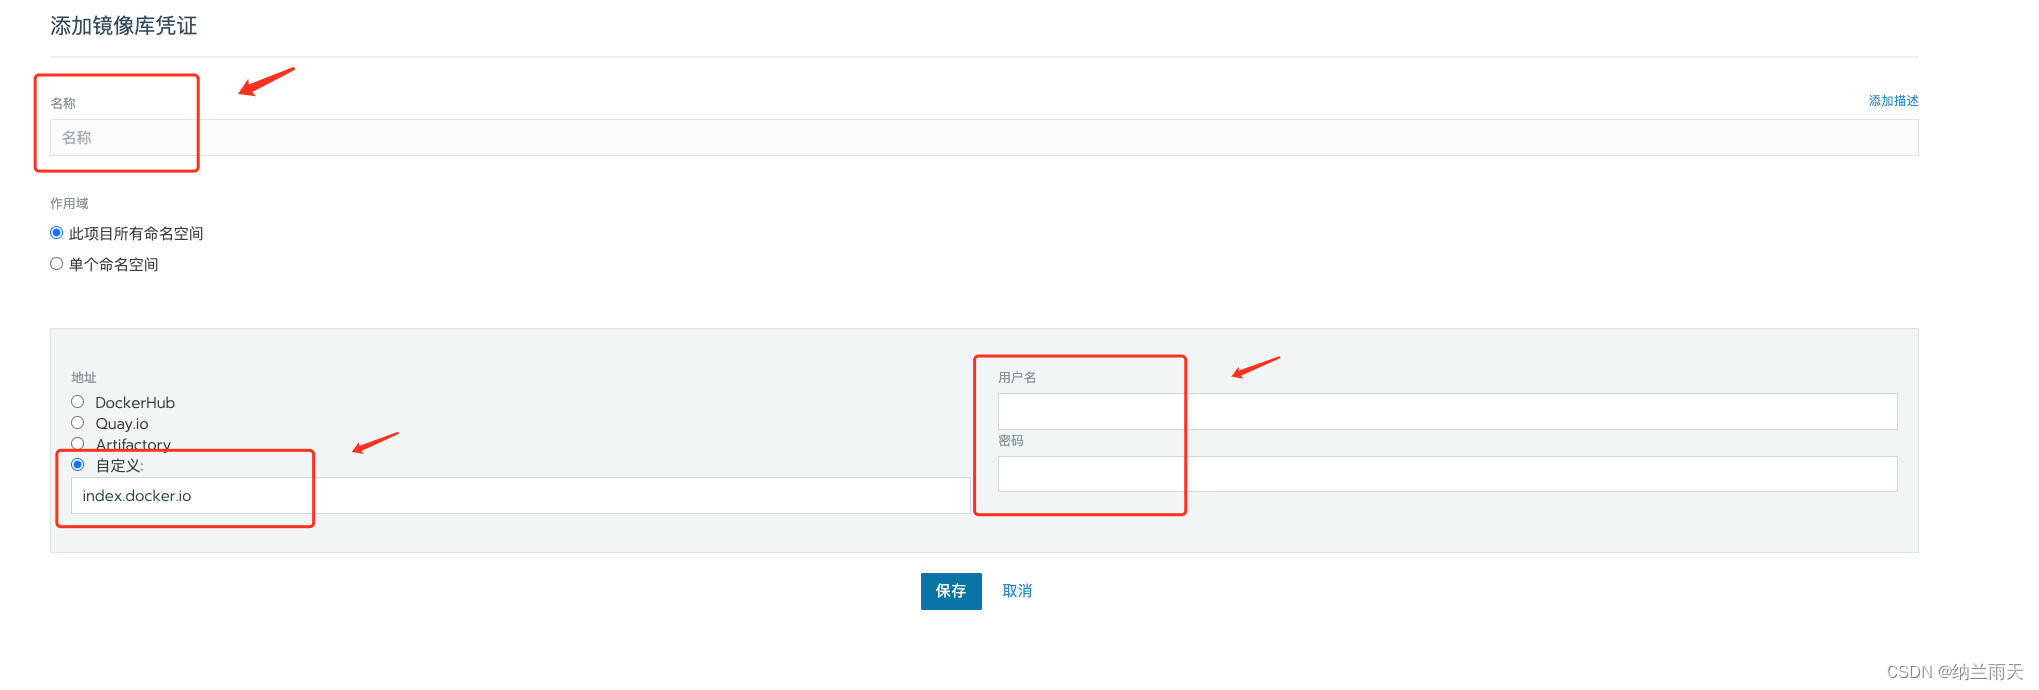
参数填写
-
1、Dokcer镜像可以填写公有镜像,或者自己项目的私有镜像(私有镜像在前面push到镜像仓库) 地址为:ip/镜像名/tag
2、命名空间可自定义后这里进行分类选择
3、端口映射 填写容器端口即可
4、启动
-
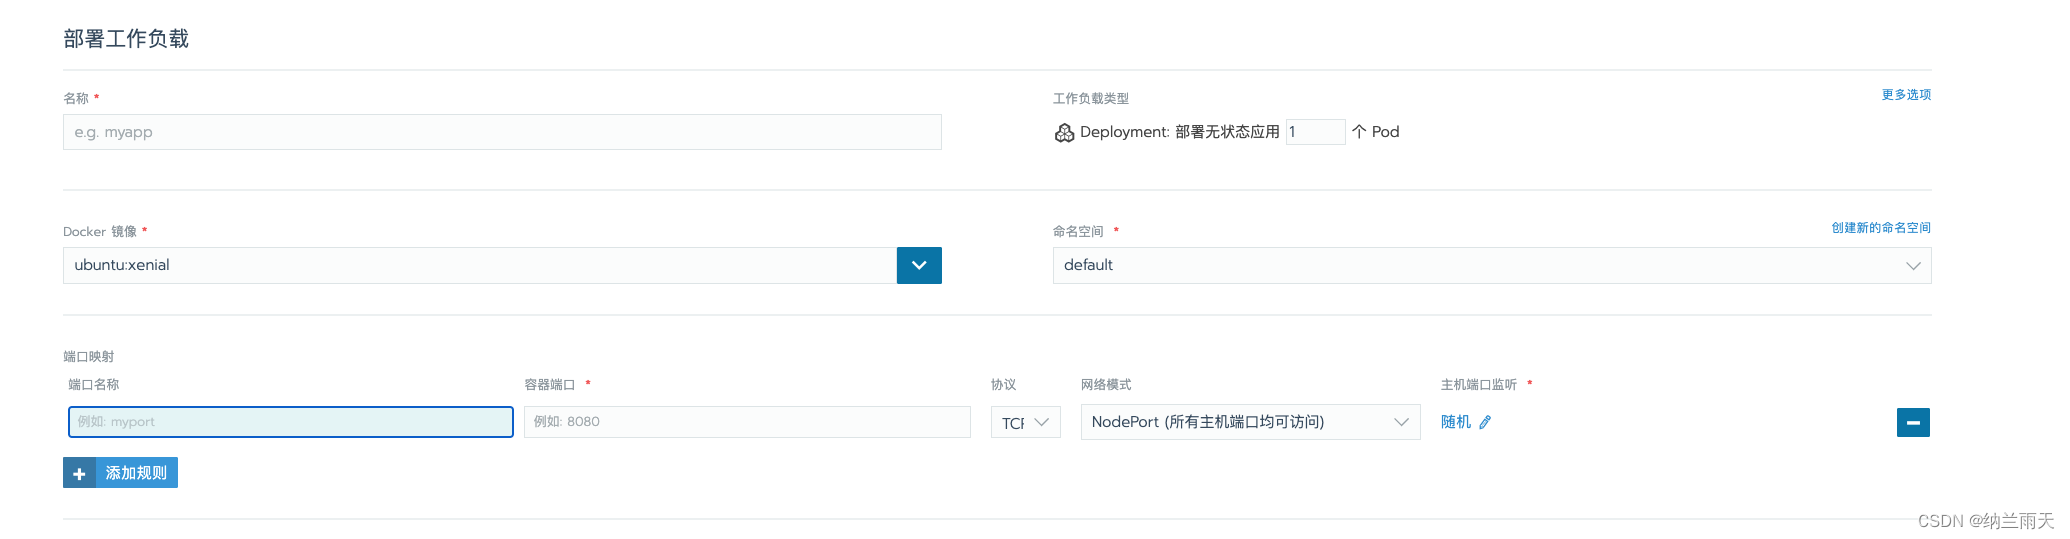
[外链图片转存失败,源站可能有防盗链机制,建议将图片保存下来直接上传(img-BAwAnZea-1677575572045)(/Users/l-jiahui/Library/Application Support/typora-user-images/image-20221111152801236.png)]
1、集群k8s执行
kubectl edit daemonset nginx-ingress-controller -n ingress-nginx
2、增加参数
    containers:
      - args:
        - /nginx-ingress-controller
        - --default-backend-service=$(POD_NAMESPACE)/default-http-backend
        - --configmap=$(POD_NAMESPACE)/nginx-configuration
        - --tcp-services-configmap=$(POD_NAMESPACE)/tcp-services
        - --udp-services-configmap=$(POD_NAMESPACE)/udp-services
        - --annotations-prefix=nginx.ingress.kubernetes.io
        # 增加以下两个参数参数(一个是http端口,一个是https端口)
        - --http-port=11080
        - --https-port=11443
3、然后使用删除原来的 nginx-ingress-controller 这个 pod,删除后 k8s 会自动使用新的配置创建 pod,这样就可以了
-
负载均衡
Internal error occurred: failed calling webhook “validate.nginx.ingress.kubernetes.io进入kubectl控制台 1.查看webhook kubectl get validatingwebhookconfigurations ingress-nginx-admission 2.删除ingress-nginx-admission kubectl delete -A ValidatingWebhookConfiguration ingress-nginx-admission- 创建负载均衡(引用链接)
https://blog.csdn.net/fengyuyeguirenenen/article/details/124740648


 2221
2221


 被折叠的 条评论
为什么被折叠?
被折叠的 条评论
为什么被折叠?
 到【灌水乐园】发言


