


一、Lnmp的概念
LNMP是指一组通常一起使用来运行动态网站或者服务器的自由软件名称首字母缩写。L指Linux ,N指Nginx,M一般指MySQL,也可以指MariaDB,P一般指PHP,也可以指Perl或Python。
LNMP代表的就是:Linux系统下Nginx+MySQL+PHP这种网站服务器架构。
- Linux是一类Unix计算机操作系统的统称,是目前最流行的免费操作系统。代表版本有:debian、centos、ubuntu、fedora、gentoo等。
- Nginx是一个高性能的HTTP和反向代理服务器,也是一个IMAP/POP3/SMTP代理服务器。
- Mysql是一个小型关系型数据库管理系统。
- PHP是一种在服务器端执行的嵌入HTML文档的脚本语言。
这四种软件均为免费开源软件,组合到一起,成为一个免费、高效、扩展性强的网站服务系统。
二、Lnmp的工作原理
首先,浏览器发送http request请求到服务器(Nginx),服务器响应并处理web请求,将一些静态资源(CSS,图片,视频等)保存服务器上,然后将php脚本通过接口传输协议(网关协议)PHP-FCGI(fast-cgi)传输给PHP-FPM(进程管理程序),PHP-FPM不做处理,然后PHP-FPM调用PHP解析器进程,PHP解析器解析php脚本信息。PHP解析器进程可以启动多个,进行并发执行。然后将解析后的脚本返回到PHP-FPM,PHP-FPM再通过fast-cgi的形式将脚本信息传送给Nginx.服务器再通过Http response的形式传送给浏览器。浏览器再进行解析与渲染然后进行呈现。
三、Lnmp架构的优点
- 作为 Web 服务器:相比 Apache,Nginx 使用更少的资源,支持更多的并发连接,体现更高的效率。
- 作为负载均衡服务器:Nginx 既可以在内部直接支持Rails和PHP,也可以支持作为 HTTP代理服务器对外进行服务。Nginx
用C编写,不论是系统资源开销还是CPU使用效率都比Perlbal要好的多。 - 作为邮件代理服务器:Nginx同时也是一个非常优秀的邮件代理服务器(最早开发这个产品的目的之一也是作为邮件代理服务器),Last/fm
描述了成功并且美妙的使用经验。 - Nginx安装非常的简单,配置文件非常简洁(还能够支持perl语法)。Nginx支持平滑加载新的配置,还能够在不间断服务的情况下进行软件版本的升级。
四、Mysql源码安装
部署环境:
最好是双核,硬盘大与20G。
1、在官网下载Mysql的源码包
https://dev.mysql.com/downloads/mysql/5.7.html#downloads
2、创建lnmp架构的部署目录,解压缩软件包。
mkdir /usr/local/lnmp/
tar zxf mysql-boost-5.7.17.tar.gz
3、下载编译时需要的软件包
yum install gcc gcc-c++ ncurses-devel bison -y
yum install cmake-2.8.12.2-4.el6.x86_64.rpm  -y
4、编译
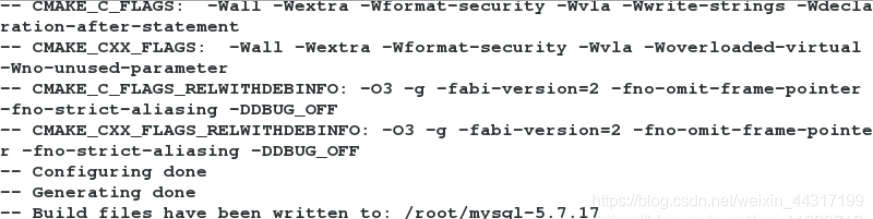
cd mysql-5.7.17/

cmake -DCMAKE_INSTALL_PREFIX=/usr/local/lnmp/mysql -DMYSQL_DATADIR=/usr/local/lnmp/mysql/data -DMYSQL_UNIX_ADDR=/usr/local/lnmp/mysql/data/mysql.sock -DWITH_MYISAM_STORAGE_ENGINE=1 -DWITH_INNOBASE_STORAGE_ENGINE=1 -DDEFAULT_CHARSET=utf8 -DDEFAULT_COLLATION=utf8_general_ci -DEXTRA_CHARSETS=all -DWITH_BOOST=boost/boost_1_59_0/
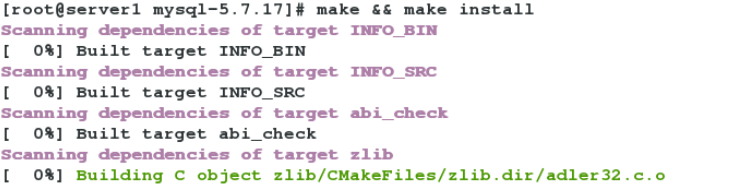
5、安装
make && make install
6、添加mysql用户及用户组
groupadd -g 27 mysql
useradd -u 27 -g 27 mysql -s /sbin/nologin
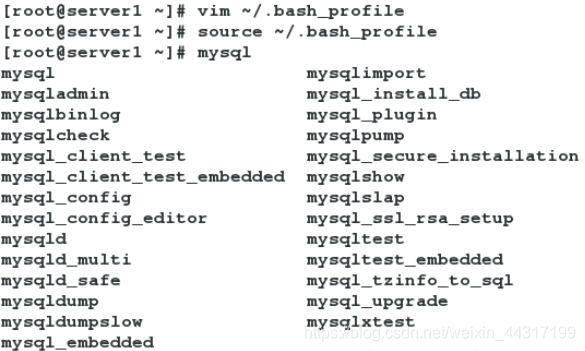
7、配置mysql环境变量
 vim ~/.bash_profile
# User specific environment and startup programs

PATH=$PATH:$HOME/bin
PATH=$PATH:$HOME/bin:/usr/local/lnmp/mysql/bin

source ~/.bash_profile
8、配置mysql配置文件
cd support-files/
cp my-default.cnf /etc/my.cnf
vim /etc/my.cnf

basedir = /usr/local/lnmp/mysql
datadir = /usr/local/lnmp/mysql/data
# port = .....
# server_id = .....
socket = /usr/local/lnmp/mysql/data/mysql.sock

chown root.mysql /usr/local/lnmp/mysql -R


9、制作mysql服务的启动脚本
[root@server1 support-files]# cd /usr/local/lnmp/mysql/support-files/
[root@server1 support-files]# cp mysql.server /etc/init.d/mysqld
[root@server1 support-files]# chown root.root /etc/init.d/mysqld
[root@server1 support-files]# ll /etc/init.d/mysqld
-rwxr-xr-x 1 root root 10916 Apr 24 18:13 /etc/init.d/mysqld
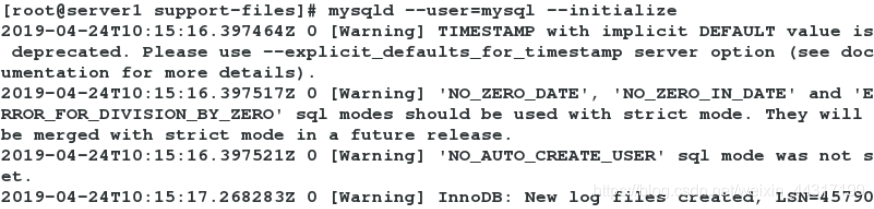
10、初始化
mysqld --user=mysql --initialize		#初始化后最后会给出初始的root密码
chown mysql.mysql /usr/local/lnmp/mysql/data/ -R
/etc/init.d/mysqld start

11、mysql安全初始化
[root@server1 support-files]# mysql_secure_installation

Securing the MySQL server deployment.

Enter password for user root: 			# 这里输入初始化给的初始密码

The existing password for the user account root has expired. Please set a new password.

New password:

Re-enter new password:

VALIDATE PASSWORD PLUGIN can be used to test passwords
and improve security. It checks the strength of password
and allows the users to set only those passwords which are
secure enough. Would you like to setup VALIDATE PASSWORD plugin?

Press y|Y for Yes, any other key for No: No
Using existing password for root.
Change the password for root ? ((Press y|Y for Yes, any other key for No) :

 ... skipping.
By default, a MySQL installation has an anonymous user,
allowing anyone to log into MySQL without having to have
a user account created for them. This is intended only for
testing, and to make the installation go a bit smoother.
You should remove them before moving into a production
environment.

Remove anonymous users? (Press y|Y for Yes, any other key for No) :

 ... skipping.


Normally, root should only be allowed to connect from
'localhost'. This ensures that someone cannot guess at
the root password from the network.

Disallow root login remotely? (Press y|Y for Yes, any other key for No) :

 ... skipping.
By default, MySQL comes with a database named 'test' that
anyone can access. This is also intended only for testing,
and should be removed before moving into a production
environment.


Remove test database and access to it? (Press y|Y for Yes, any other key for No) :

 ... skipping.
Reloading the privilege tables will ensure that all changes
made so far will take effect immediately.

Reload privilege tables now? (Press y|Y for Yes, any other key for No) :

 ... skipping.
All done!
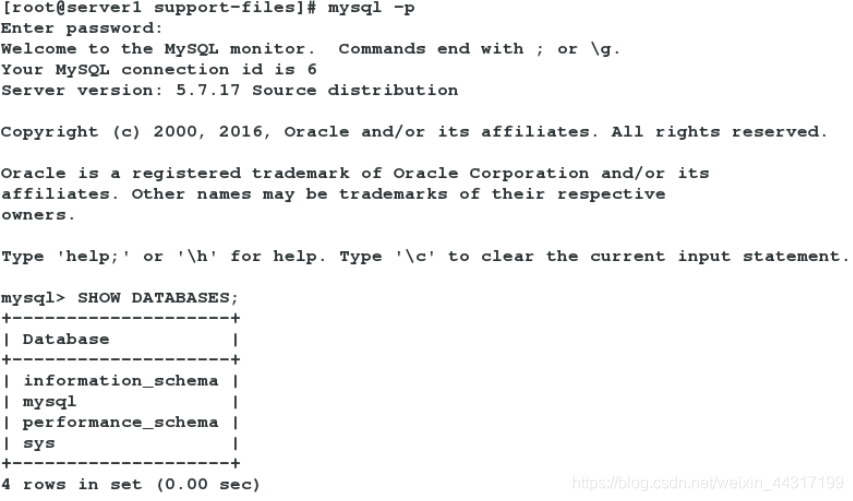
12、测试
mysql -p
五、PHP源码安装
1、获得PHP源码包
2、下载安装PHP源码包的依赖性
需要解决的依赖:
gmp-devel-4.3.1-7.el6_2.2.x86_64
gmp-devel-4.3.1-7.el6_2.2.x86_64
libmcrypt-
gmp-devel-4.3.1-7.el6_2.2.x86_64
freetype-devel
libpng-devel-1.2.49-1.el6_2.x86_64
libjpeg-turbo-devel-1.2.1-1.el6.x86_64
libcurl-devel
openssl-devel
libxml2-devel
yum安装:
yum install -y net-snmp-devel libmcrypt-* gmp-devel-4.3.1-7.el6_2.2.x86_64 freetype-devel 2:libpng-devel-1.2.49-1.el6_2.x86_64 libjpeg-turbo-devel-1.2.1-1.el6.x86_64 libcurl-devel openssl-devel libxml2-devel
3、解压缩安装包
tar jxf php-5.6.35.tar.bz2

3、编译
cd cd php-5.6.35
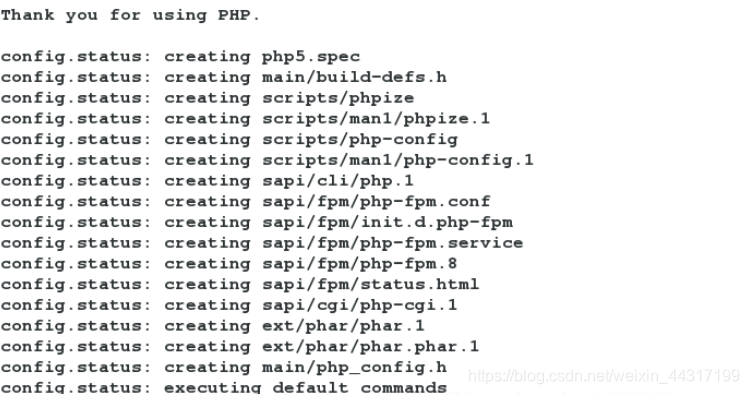
./configure --prefix=/usr/local/lnmp/php --with-config-file-path=/usr/local/lnmp/php/etc --with-openssl --with-snmp --with-gd --with-zlib --with-curl --with-libxml-dir --with-png-dir --with-jpeg-dir --with-freetype-dir --with-gmp --with-gettext --with-pear --enable-mysqlnd --enable-inline-optimization --enable-soap --enable-ftp --enable-sockets --enable-mbstring --enable-fpm --with-fpm-user=nginx --with-fpm-group=nginx --with-mcrypt --with-mhash

4、安装
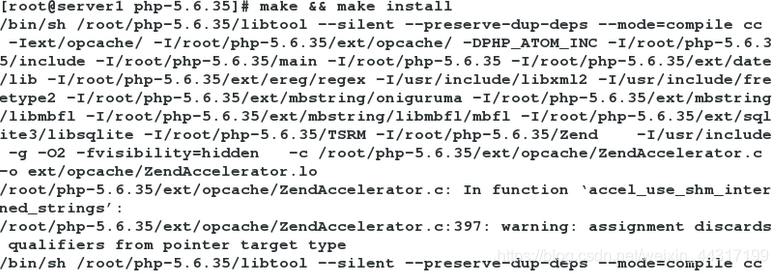
make && make install
5、复制并配置php配置文件,添加nginx用户
[root@server1 php]# cd /usr/local/lnmp/php/etc/
[root@server1 etc]# ls
pear.conf  php-fpm.conf.default
useradd nginx


[root@server1 php]# cd /usr/local/lnmp/php/etc/
[root@server1 etc]# ls
pear.conf  php-fpm.conf.default
[root@server1 etc]# cp php-fpm.conf.default php-fpm.conf
[root@server1 etc]# vim php-fpm.conf
 25 pid = run/php-fpm.pid
删除pid前面的分号
6、复制文件,修改时区
 [root@server1 fpm]# cp ~/php-5.6.35/php.ini-production /usr/local/lnmp/php/etc/php.ini
[root@server1 fpm]# vim /usr/local/lnmp/php/etc/php.ini
7、配置php服务启动脚本
[root@server1 php-5.6.35]# cd ~/php-5.6.35/sapi/fpm/
[root@server1 fpm]# cp init.d.php-fpm /etc/init.d/php-fpm
[root@server1 fpm]# chmod +x /etc/init.d/php-fpm
8、测试启动php服务
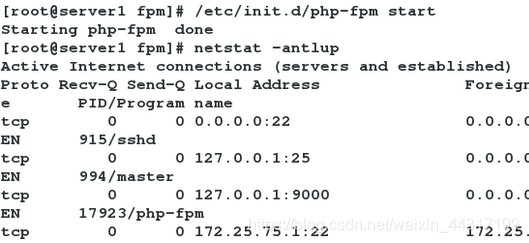
/etc/init.d/php-fpm start


 669
669


 被折叠的 条评论
为什么被折叠?
被折叠的 条评论
为什么被折叠?
 到【灌水乐园】发言


