


笔记1 +笔记2之后,如果想要开始Vue的页面练习
对应一个项目来说,v-loading 页面都是需要的 (就是查询、获取数据的等待期间的加载中提示页面)
Element网站快速成型工具

如图,就是蓝色那个类似圈圈的玩意,也可以自定文本 v-loading=“loading”,element-loading-text=“拼命加载中” 等等 ,建立一个独立的Vue组件,假设名字叫做 wrapper.vue
<template>
  <div v-loading="isLoading" tabindex="0" class="wrapper-container" @keydown.ctrl.121="onkeydown">
    <slot />  // 默认插槽
  </div>
</template>
建立好上面那个vue之后,再建立一个布局用的vue,将画面划分3个部分(上、中、下),统一管理布局页面
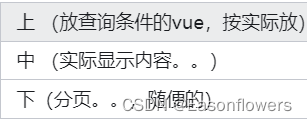
假设这个vue,起名字叫什么 分割布局 verticaSplit.vue
<slot name = "toptest"></slot>

<slot name = "middletest"></slot>

<slot name = "bottomtest"></slot>
<template>
 <wrapper ref="wrapperRef">  // 就是上面那个v-loading 的第1个vue
 <div class="box-container">
 <div class="vertica-sticky-container">
 <slot name="vertica-sticky-container" />
 </div>
 <div class="vertica-head-container">
 <slot name="vertica-head-container" />
 </div>
 <div class="vertica-detail-container">
 <slot name="vertica-detail-container" />
 </div>
 </div>
 </wrapper>
</template>
结合以上2个通用vue,
第1个vue 就是一个v-loading转圈圈 + 一个默认插槽
第2个vue 就是一个分成3份的布局页面,分成3个有名字的插槽
以后所有的vue,都先引入 第2个vue,然后放入其中有名字插槽中,第二个vue又是整体,放入第一个vue的插槽
依据 插槽的作用,也就是所有项目的vue页面,都会被 v-laoding判断覆盖,在获取、查询数据的时候,等待期间那个 蓝色圈圈出现,有结果了就消失 — 所以必须 有个变量值 + 改变值的方法,增加一个js即可
import { ref } from '@vue/composition-api'

export default ({
 init = false
}) => {
 const variable = ref(init)  // 因为用了ref ,所以后期使用 要加.value --->  variable.value
 const change = (value) => { variable.value = value } // 定义个方法,将来要执行 change() ,要加个(),传什么值就是什么值
 return { variable, change }
}
作用就是 ,数据执行前,来个loading圈圈,有数据返回后,圈圈消失,通过这个js来传值判断(自己想象的,不一定正确,后期通过实例再来补充)
在入门阶段,我们需要掌握的是「是什么」、「怎么用」、「有什么注意」,基本就差不多了。
为了使用vue3 的组合式api,用ref 和 reactive ,就必须先安装 npm install @vue/composition-api
在 main.js
import VueCompositionAPI from ‘@vue/composition-api’
Vue.use(VueCompositionAPI)
官方文档:组合式 API 常见问答
<template>
  <div>{{ money }}</div>
  <button @click="changeMondy">改值</button>
</template>

<script>
import { ref } from 'vue'
export default {
  setup() {
    let money = ref(100)
    console.log(money.value)
    return {
      money
    }
  }
}
</script>
<template>

</template>

<script>
export default {
 setup(){
 console.log(this) //undefined
   }
return{
 text,
 btn
 }
}
</script>
- setup 的参数
props:值为对象,包含:组件外部传递过来,且组件内部声明接收了的属性。
context:上下文对象 - attrs: 值为对象,包含:组件外部传递过来,但没有在props配置中声明的属性, 相当于this.$attrs
- slots: 收到的插槽内容, 相当于 this.$slots
- emit: 分发自定义事件的函数, 相当于 this.$emit
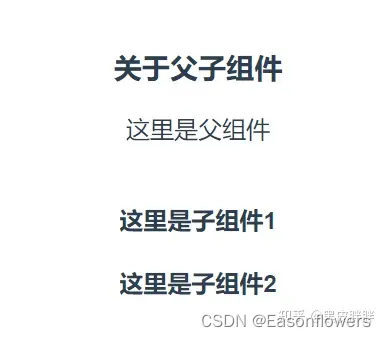
实际开发中,父子组件、父子孙组件等,是经常使用的
<template>
 <div>
 <h3>关于父子组件</h3>
 <div>这里是父组件</div><br/>
 <!-- 使用子组件 -->
 <Child1></Child1>
 <Child2>我想在子组件2内显示这句话</Child2>
 </div>
  </template>

<script>
import Child1 from '@/components/Child1.vue'
import Child2 from '@/components/Child2.vue'
export default {
 name: 'father',
 components: { Child1, Child2 },
 setup (props, ctx) {
 return {}
  }
}
</script>
<template>
 <h4>这里是子组件1</h4>
  </template>
<script>

export default {
 name: 'Child1',
 setup (props, ctx) {
 return {}
  }
}
</script>
<template>
 <h4>这里是子组件2</h4>
  </template>
<script>

export default {
 name: 'Child2',
 setup (props, ctx) {
 return {}
  }
}
</script>
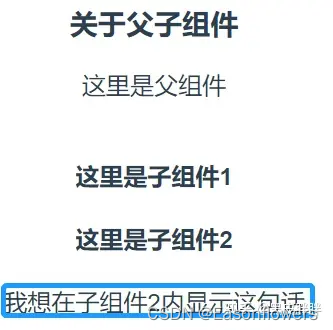
那么,在子组件2中 增加 默认插槽之后
<template>
 <div>
 <h4>这里是子组件2</h4>
 <slot />
 </div>
  </template>
<script>
那么接下来,增加第三3个子组件,那么父组件的代码如下
<template>
 <div>
 <h3>关于父子组件</h3>
 <div>这里是父组件</div><br/>
 <!-- 使用子组件 -->
 <Child1></Child1>
 <Child2>我想在子组件2内显示这句话</Child2>
<Child3>  // slot 有了名字
 <template slot="kaixin"> 我想在子组件3开心的时候</template>
</Child3>
<Child3> // slot 有了名字
 <template slot="bukaixin">我想在子组件3不开心的时候</template>
</Child3>

 </div>
  </template>

<script>
import Child1 from '@/components/Child1.vue'
import Child2 from '@/components/Child2.vue'
import Child3 from '@/components/Child3.vue'
export default {
 name: 'father',
 components: { Child1, Child2, Child3 },
 setup (props, ctx) {
 return {}
  }
}
</script>
<template>
<div>
 <slot name = "kaixin"></slot>
 <slot name = "bukaixin"></slot>
</div>
  </template>

<script>
export default {
 name: 'Child3',
 setup (props, ctx) {
 return {}
  }
}
</script>

发现一个问题: 父组件里面,import Child1 和 Child2 和 Child3 写了3条,有没有方便一些的写法?
比如写成这样 —> import {Child1, Child2, Child3} from ‘@/components’ --> 发现报错,原因在于
components 文件夹下面,必须先建立一个index.js (关于一个文件夹里面搜索规则参考笔记2)
export { default as Child1 } from '@/components/Child1'
export { default as Child2 } from '@/components/Child2'
export { default as Child3 } from '@/components/Child3'
这个时候,发现 import {Child1, Child2, Child3} from ‘@/components’ 可以用了
==================================================================
多组件的开发应用,
(1)那么 比如父组件是查询条件,那么子组件显示内容,子组件如何知道 查询条件?
(2)子组件有个按钮,是清空 父组件的查询条件,那么父组件是如何知道,子组件按了按钮?
那么,Vue组件之间的传值、方法、是如何运作的呢?
《接下来,就是父子组件传值》
Vue中父子组件通信有哪些方式?
1、Prop 常用
2、
e
m
i
t
组件封装用的较多
3
、
.
s
y
n
c
语法糖
(
较少
)
4
、
emit 组件封装用的较多 3、.sync 语法糖 (较少) 4、
emit组件封装用的较多3、.sync语法糖(较少)4、attrs和$listeners(组件封装用的较多)
5、provide和inject(高阶组件/组件库用的较多)
父传子,字传父 的 一个简单例子 https://blog.csdn.net/weixin_47013351/article/details/124335003
父传子,字传父 的 又一个简单例子 https://blog.csdn.net/glorydx/article/details/112247747
(1) 参数传递1:父传子 在父组件中,用 v-bind 或者 :动态绑定一个自定义属性,用于给子组件传递数据 子组件用 props,
父组件如果要用子组件的,在template 用 ref 绑定,setup中绑定多个的话,用 reactive
子传父 子组件通过事件的方式,利用 $emit 给父组件传值。
(2) 参数传递2:没有用 props的话, 也可以用 context 中的 attrs获取
(1) 方法调用1:父组件调用子组件的方法,用 ref 绑定,setup中绑定多个的话,用 reactive
(2) 方法调用2:子组件用箭头函数,可以被父组件获取
(3) 方法调用3:子组件用emit调用
https://blog.csdn.net/qq_51066068/article/details/125955967 Vue理解之路:组件通信:父子通信、兄弟通信
https://blog.csdn.net/qq_51066068/article/details/124972864 Vue中的动态路由、Router守卫、嵌套路由、路由跳转、路由重定向
https://blog.csdn.net/qq_51066068/article/details/125624882 学习Vue的历程
https://blog.csdn.net/qq_51066068/article/details/126018514 尚硅谷尚品项目汇笔记(一)
来个小例子试试
(一) 父组件 中使用其他组件vue 的三个步骤
(1) 使用组件 template 里面 或者 简写
(2) import 引入 import son1 from ‘…/Study学习用/son1.vue’ // 切记不要写成 { son1 } ,要写成 son1 sonVue = son-vue 大写字母 改为 -小写字母
(3) 组件注册 components: { son1 }
(二) 父组件 — 给 子组件传值 父组件给子组件传值方法 (v-bind) 或者 :, 子组件 使用props
我是父组件
const msg1 = ‘testmsg1’ // 传内容
function test1() { alert(‘1111’) } // 传方法
function test2() { alert(‘2222’) }
function test3() { alert(‘3333’) }
const TT = ‘不通过props’
— 子组件中----
我是子组件1
{{ value1 }} {{ $attrs.value2 }} // 主要接收没在 props 里定义// 传方法的方式 调用父组件的方法
function childfangfa1() {
if (props.change) { props.change() }
}
// 直接用 this.KaTeX parse error: Expected '}', got 'EOF' at end of input: …ngfa2() { this.parent.test2()
}
// 直接用 this.KaTeX parse error: Expected '}', got 'EOF' at end of input: …ngfa3() { this.emit(‘test33’) // 可以
ctx.emit(‘test33’) // 采用ctx
}
---- vue组件通信首先我们学习的便是常用的方式: props 和 emits , 这两个是 Vue 组件通讯的基础,而attrs主要接收没在 props 里定义,但父组件又传过来的属性
context.attrs 传递给我们组件的非 props 属性
context.slots 具有我们所有模板插槽渲染功能的对象
context.emit 我们的组件发出事件的方法
vue $attrs的使用(组件父传孙的方法)
https://www.cnblogs.com/panwudi/p/15990119.html
关于一些说明 https://www.jb51.net/article/268288.htm
1、父组件 在引用子组件时,通过属性绑定(v-bind:) 或者 简写 :的形式,把需要传递给子组件的数据,传递到子组件内部,供子组件使用
//父组件
<device-dialog
:personInfo=“info” //父组件通过赋值给info将表单数据传给子组件
:action=“action” //判断是新增还是编辑 add、edit
:dialogText=“dialogText” //对话框显示的标题
@toClose=“dialogConfirm(‘cancel’)” //关闭按钮对应的函数
@toComfirm=“requestApi(‘getUser’)” //确定按钮对应的函数
v-if=“this.dialogFormNew” //控制对话框的显示与隐藏
http://this.info = this.form_user; //父组件中相关的值赋值给info
this.dialogText = ‘编辑设备信息’;
this.dialogFormNew = true;
2、子组件如何接收父组件传过来的值并使用(props)
props: {
dataModel: { type: Object, default: null, require: true }, // require代表必传
doSubmit: { type: Function, default: null }
}
props: {
dataModel: { type: Object, default: () => {}, require: true },
inherit: { type: Object, default: () => {} },
doSubmit: { type: Function, default: null }
},
传入参数1: { type: Array, default: null, required: false },
传入参数2: { type: Array, default: () => [], required: false },
传入参数3: { type: Function, default: () => {} },
传入参数4: { type: [String,Number], default: null, required: false }
总结
1、父子组件之间的传参用的比较多的就是当父组件向子组件传递参数时,子组件用props接收参数,父组件绑定要传的参数。
2、子组件传递参数给父组件时试用$emit(父组件函数,要传的参数)来传递数向父组件传递参数
primary: { type: Object, default: () => ({ BINo: null }) }
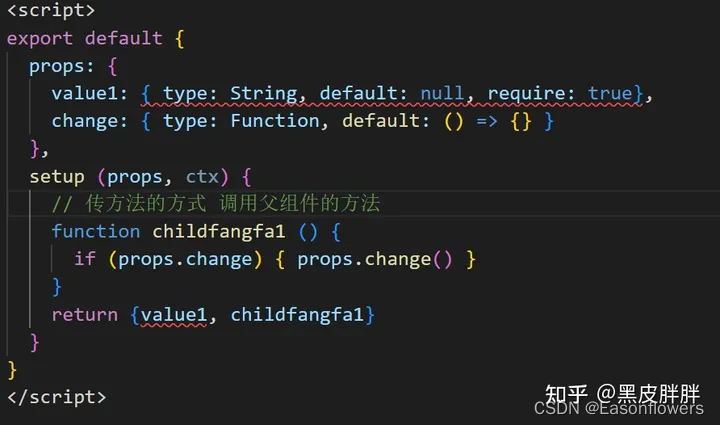
遇到一个坑
<template>
 <div>
 <h4>这里是子组件1</h4>
{{ value1 }}
 </div>
  </template>

<script>
export default {
 props: {
 value1: {type: String, default: null, require: true},
 change: { type: Function, default: () => {} }
  },
 setup (props, ctx) {
 const test1 = props.value1
 // 传方法的方式 调用父组件的方法
 function childfangfa1 () {
 if (props.change) { props.change() }
    }

 return {test1, childfangfa1}
  }
}
</script>

父组件
const test2 = () => alert(‘2222’)
子组件 — 那么 每次都写 props. 什么的
<el-button type=“primary” style=“width:100%;” @click=“change1” >执行父组件方法1
change1: { type: Function, default: () => {} }
const change1 = props.change1


 140
140


 被折叠的 条评论
为什么被折叠?
被折叠的 条评论
为什么被折叠?
 到【灌水乐园】发言


