


Set注入:
<?xml version="1.0" encoding="UTF-8"?>
<beans xmlns="http://www.springframework.org/schema/beans"
       xmlns:xsi="http://www.w3.org/2001/XMLSchema-instance"
       xsi:schemaLocation="http://www.springframework.org/schema/beans
        http://www.springframework.org/schema/beans/spring-beans.xsd">

    <bean id="address" class="com.feng.pojo.Address">
        <property name="address" value="福建"/>
    </bean>

    <bean id="student" class="com.feng.pojo.Student">
        <!--普通注入-->
        <property name="name" value="JackZhou"/>
        <!--Bean注入-->
        <property name="address" ref="address"/>
        <!--数组-->
        <property name="books">
            <array>
                <value>西游记</value>
                <value>水浒传</value>
                <value>红楼梦</value>
            </array>
        </property>
        <!--Map-->
        <property name="card">
            <map>
                <entry key="身份证" value="1111111112222222222"/>
                <entry key="银行卡" value="3333333333444444444"/>
            </map>
        </property>
        <!--Set-->
        <property name="games">
            <set>
                <value>DNF</value>
                <value>COC</value>
                <value>BOB</value>
            </set>
        </property>
        <!--List-->
        <property name="hobbys">
            <list>
                <value>听歌</value>
                <value>看书</value>
                <value>看电影</value>
            </list>
        </property>
        <!--特殊类型-->
        <property name="info">
            <props>
                <prop key="学号">180123456</prop>
                <prop key="姓名">小明</prop>
                <prop key="性别">男</prop>
                <prop key="年龄">20</prop>
            </props>
        </property>
        <!--Null-->
        <property name="wife">
            <null/>
        </property>
    </bean>
</beans>
构造器注入:
<bean id="person" class="com.oak.entity.Person"> <constructor-arg index="0" value="二狗"/> <constructor-arg index="1" value="18"/> </bean>
两者区别(转载):
1. 在Setter注入,可以将依赖项部分注入,构造方法注入不能部分注入,因为调用构造方法如果传入所有的参数就会报错。
2. 如果我们为同一属性提供Setter和构造方法注入,Setter注入将覆盖构造方法注入。但是构造方法注入不能覆盖setter注入值。显然,构造方法注入被称为创建实例的第一选项。
3. 使用setter注入你不能保证所有的依赖都被注入,这意味着你可以有一个对象依赖没有被注入。在另一方面构造方法注入直到你所有的依赖都注入后才开始创建实例
applicationContest.xml文件的拓展:
1. P命名空间(Set注入):
xmlns:p=“http://www.springframework.org/schema/p”
2. C命名空间(构造器注入):
xmlns:c=“http://www.springframework.org/schema/c” (注意:类中需要有"有参构造方法")


Bean的自动装配三种方式:
1. ByName:

2. ByType:

3. 注解:
1.官方XMl(复制过去就可以用)
<?xml version="1.0" encoding="UTF-8"?>
<beans xmlns="http://www.springframework.org/schema/beans"
    xmlns:xsi="http://www.w3.org/2001/XMLSchema-instance"
    xmlns:context="http://www.springframework.org/schema/context"
    xsi:schemaLocation="http://www.springframework.org/schema/beans
        https://www.springframework.org/schema/beans/spring-beans.xsd
        http://www.springframework.org/schema/context
        https://www.springframework.org/schema/context/spring-context.xsd">

    <context:annotation-config/>

</beans>
手动导入约束并且开启注解支持的便捷方法(避免以后频繁翻官网文档)

<context:component-scan base-package="com.feng.pojo"/> //开启包扫描,放在开启注解支持下
导入约束

自动装配(标注在类的属性上面):
@Autowire默认ByType其次ByName,如果都没有则需要通过@Qualifier(value=“XXX”)来指定一个对象
@Resourse 默认ByName其次ByName,如果都没有就会报错
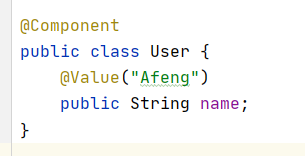
@Component 组件,放在类上,说明这个类被Spring管理了(我们可以不用手动注入到ApplicationContext.xml文件里面)
@Value("")属性值注入

补充:
以java配置文件的方式取代xml配置文档(常见于Springboot)
@Configuration
1.首先在类中使用@Configuration声明配置类
2.在配置类中定义一个方法,并且使用@Bean注解
3.在User类上使用@Conponent注解,并在配置类上声明@ComponentScan(“User类的路径”)

这种写法等同于
<bean id="getUser" class="com.feng.pojo.User"/>


 397
397


 被折叠的 条评论
为什么被折叠?
被折叠的 条评论
为什么被折叠?
 到【灌水乐园】发言


